10 Creative Painted Bricks Crafts for Unique Garden Decor
Bricks are everywhere — but most people never think twice about them. With a little paint and creativity, they become stunning decorative pieces.
These 10 painted bricks crafts ideas will show you just how versatile this humble material can be. Whether you’re a beginner or a seasoned crafter, there’s something here for every skill level.
1. Painted Brick Doorstop with Floral Design
A painted floral brick makes a charming, sturdy doorstop that adds a cottage-garden feel to any room. It’s one of the simplest painted bricks crafts you can start with.
Materials:
- 1 clean brick
- Acrylic paint (white base + assorted colors)
- Small detail brush
- Matte sealant spray
Steps:
- Clean the brick and let it dry completely.
- Apply 2 coats of white acrylic paint as a base. Let dry between coats.
- Paint simple flower shapes using round brushes — daisies and roses work great.
- Add leaves and stems with a fine detail brush.
- Seal with 2 coats of matte sealant when fully dry.
- Time: 30–45 minutes (plus drying time)
- Difficulty: Easy
Tip: Use chalk paint for a vintage matte finish that looks effortlessly rustic.
2. Garden Herb Marker Bricks
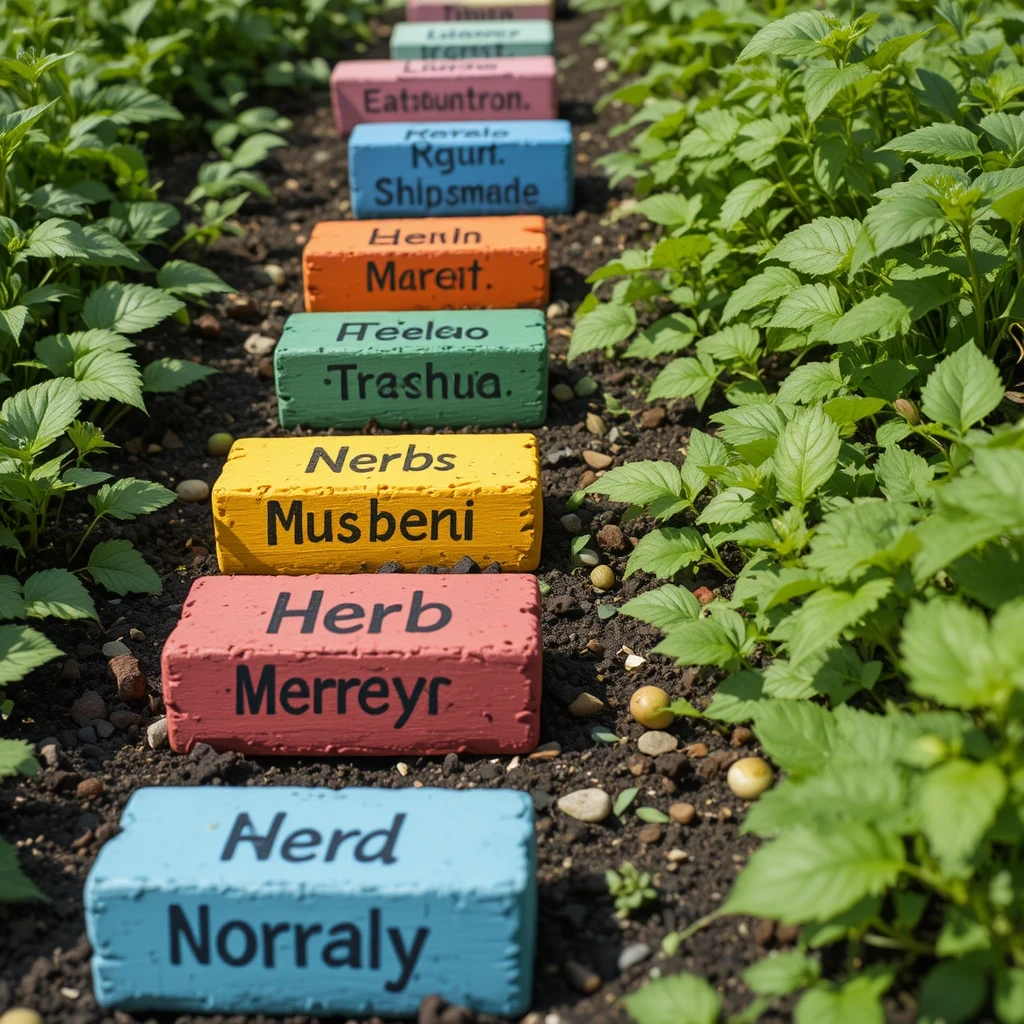
Label your garden beds with painted brick herb markers. They’re weather-resistant, won’t blow away, and look adorable nestled among your plants.
Materials:
- Small flat bricks (1 per herb)
- Outdoor acrylic paint
- Black permanent marker or paint pen
- Outdoor polyurethane sealant
Steps:
- Paint each brick a solid base color (sage green, terracotta, or mustard work well).
- Let dry fully — at least 1 hour.
- Write the herb name (Basil, Mint, Thyme, etc.) with a paint pen or fine brush.
- Add a small leaf or sprout illustration if desired.
- Seal with outdoor polyurethane for weather resistance.
- Time: 20–30 minutes per brick
- Difficulty: Easy
Tip: Use a white paint pen on dark-colored bricks for maximum readability outdoors.
3. Brick Bookend Set with Geometric Patterns
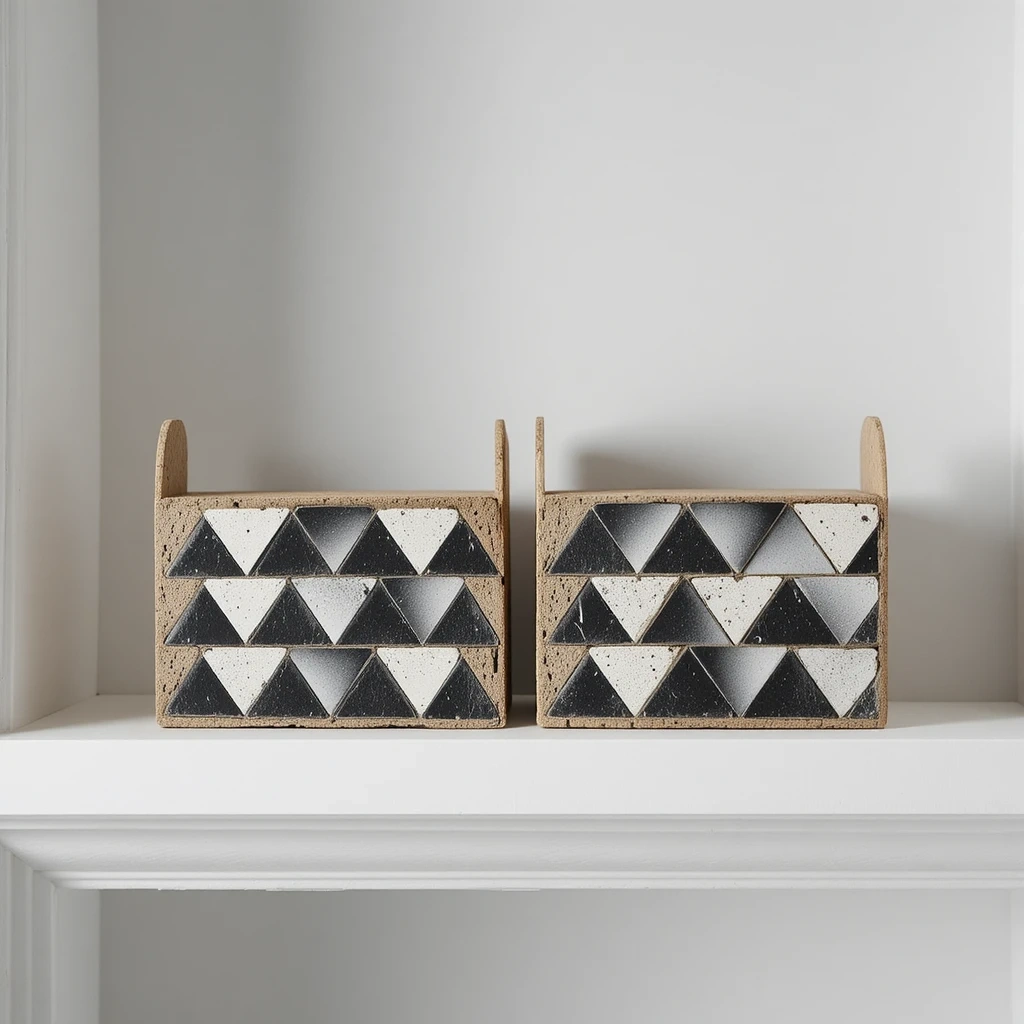
Bold geometric patterns turn plain bricks into striking bookends. This is a great project for anyone who loves a modern, graphic look.
Materials:
- 2 matching bricks
- Painter’s tape
- Acrylic paint (2–3 colors)
- Foam brush
- Gloss sealant
- Felt pads (for the bottom)
Steps:
- Apply painter’s tape to create geometric shapes — triangles, stripes, or chevrons.
- Paint inside the tape sections with your chosen colors.
- Remove tape carefully while paint is still slightly wet for clean edges.
- Let dry, then apply a second coat if needed.
- Seal with gloss sealant and attach felt pads to the bottom to protect shelves.
- Time: 45–60 minutes
- Difficulty: Medium
Tip: Stick to a two-tone color palette for a cleaner, more professional look.
4. Painted Bricks Crafts: Brick Photo Display Stand
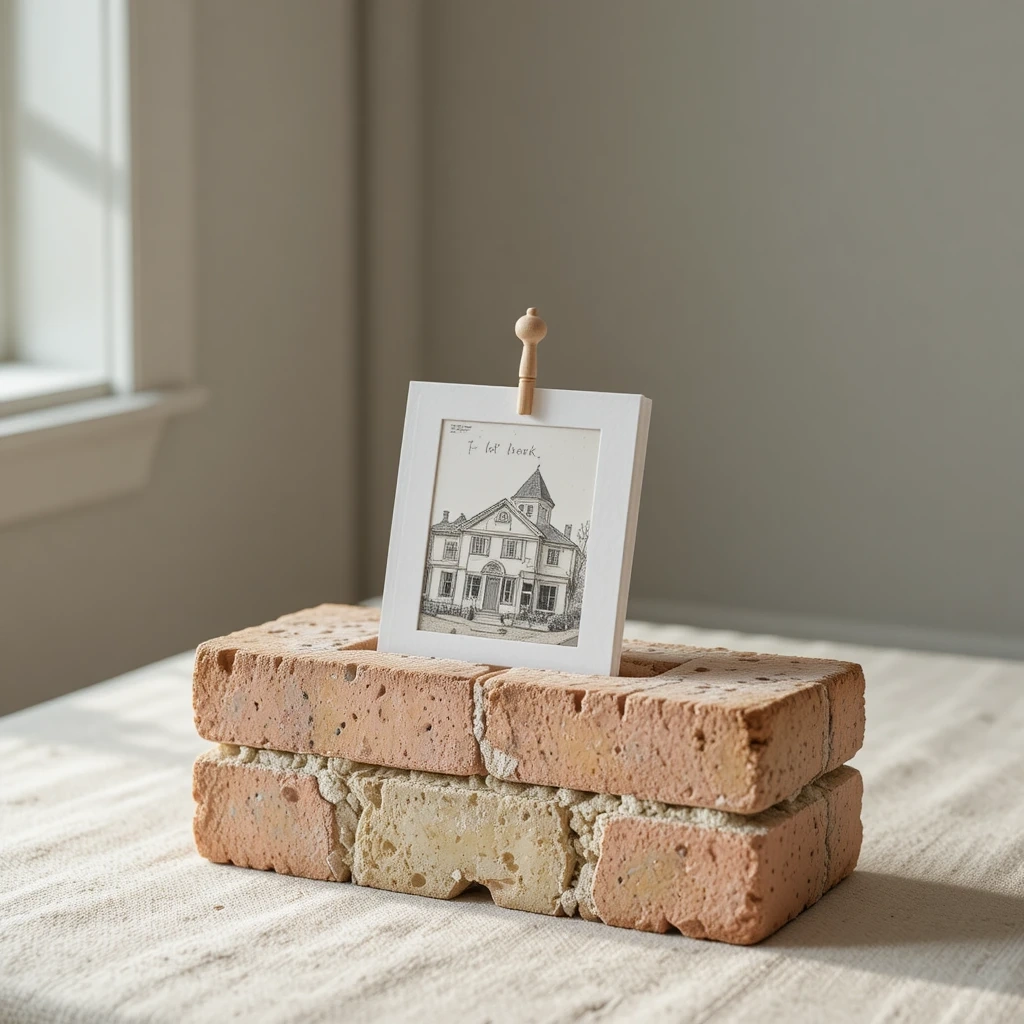
Turn a brick into a photo holder by adding a wire or wooden dowel slot. It’s functional, heavy enough to stay put, and completely unique.
Materials:
- 1 brick
- Acrylic paint + base coat
- Small drill with masonry bit
- Thin wooden dowel or wire
- Matte sealant
Steps:
- Paint the brick with a solid or patterned design of your choice.
- Seal and let dry completely.
- Carefully drill a shallow slot into the top center of the brick.
- Insert a thin wooden dowel or bent wire to act as a photo clip.
- Slide a printed photo or card into the slot to display.
- Time: 40–60 minutes
- Difficulty: Medium
Tip: Add a simple ombre gradient paint effect to make the display stand look extra polished.
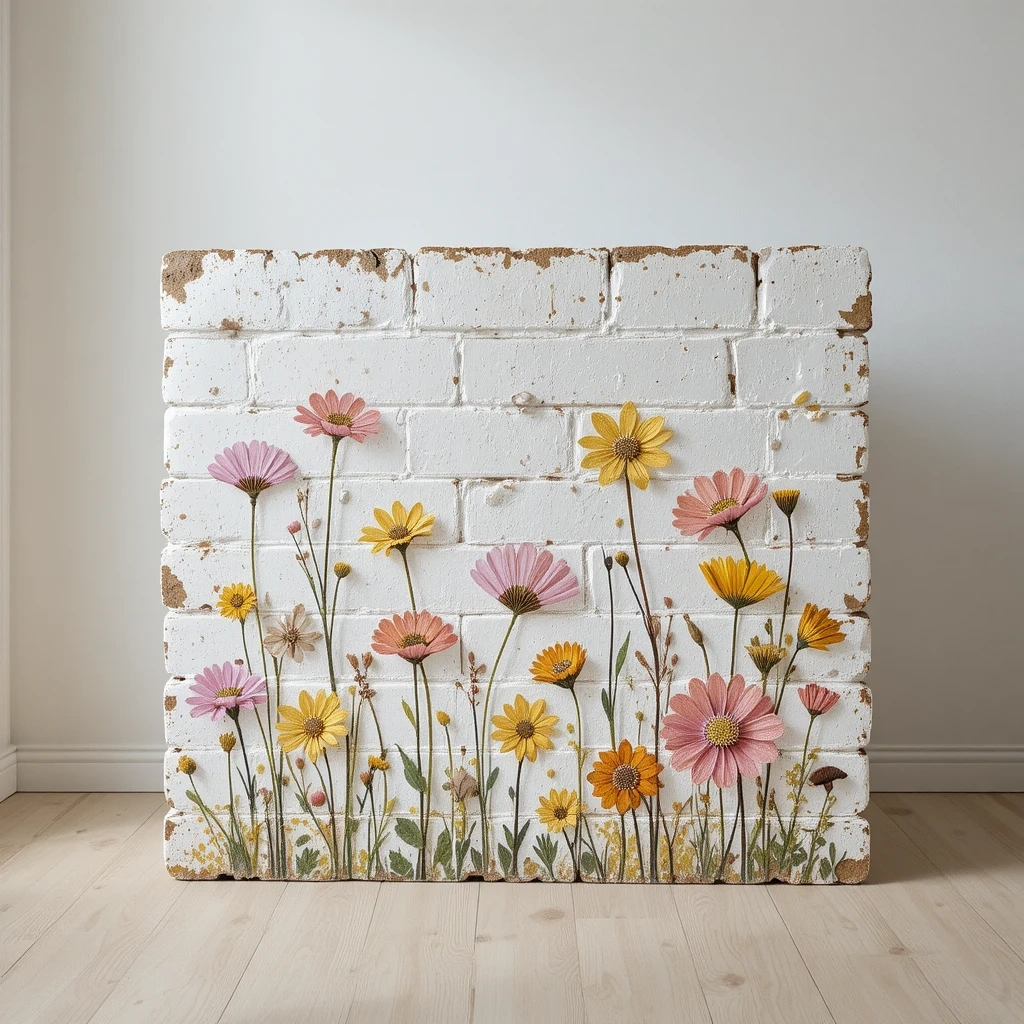
5. Painted Brick Planter Accent Stones

Stack or line painted bricks around potted plants to create a decorative border. Mix colors and patterns for a boho garden look.
Materials:
- 4–6 bricks
- Outdoor acrylic paint in multiple colors
- Assorted brushes
- Outdoor sealant
Steps:
- Arrange your bricks loosely to plan your pattern before painting.
- Paint each brick a different solid color or with a simple pattern.
- Add dots, stripes, or abstract doodles for extra detail.
- Let dry 2–3 hours, then seal for outdoor durability.
- Arrange around your planter or garden bed.
- Time: 1–2 hours (full set)
- Difficulty: Easy
Tip: Use terracotta, moss green, and dusty blue together for a cohesive earthy palette.
6. Inspirational Quote Brick Paperweight
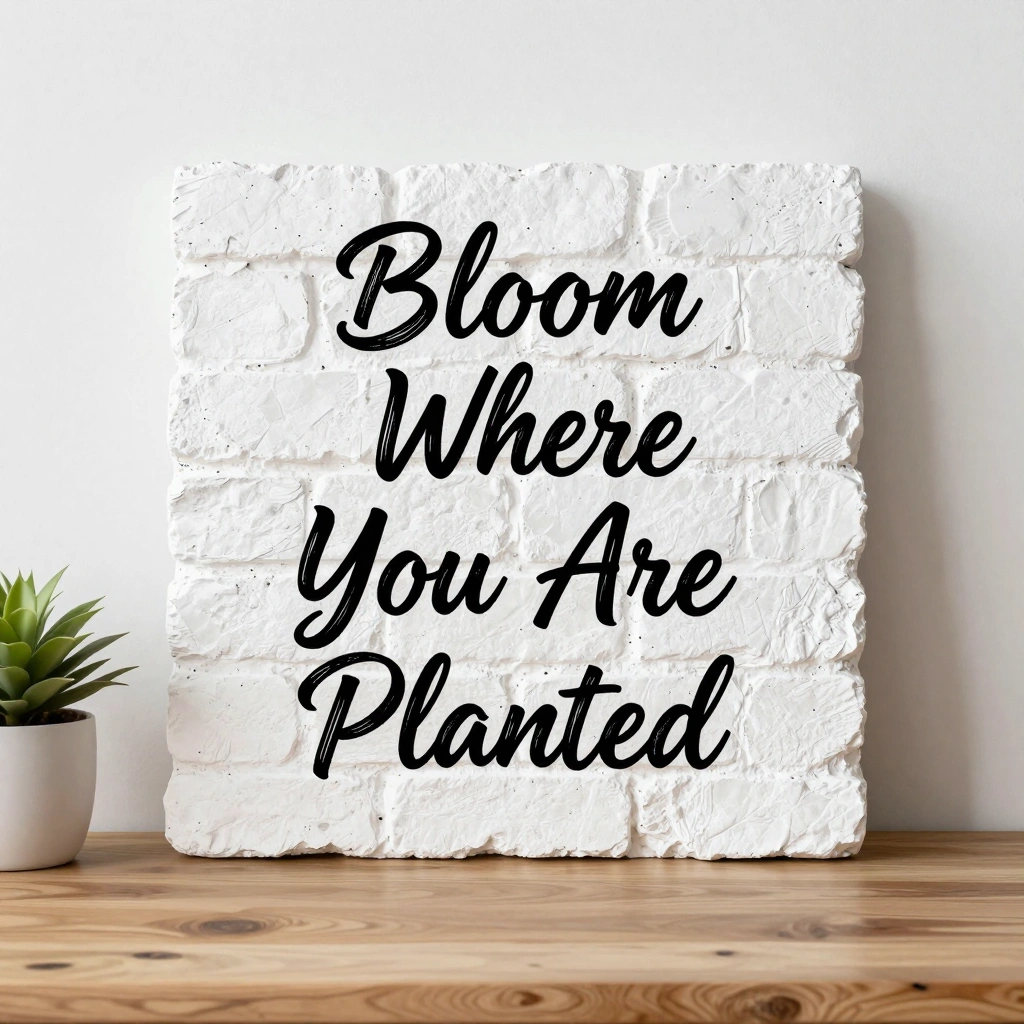
A painted brick with a handwritten quote makes a thoughtful, one-of-a-kind gift. Place it on a desk or shelf for daily motivation.
Materials:
- 1 smooth-faced brick
- White chalk paint (base)
- Black paint pen or fine brush
- Matte varnish
- Felt pad (for base)
Steps:
- Apply 2 coats of white chalk paint to the brick face. Let dry fully.
- Lightly sand if needed for a smoother surface.
- Write your chosen quote using a black paint pen in a neat lettering style.
- Decorate around the text with small florals or borders if desired.
- Seal with matte varnish and add a felt pad to the bottom.
- Time: 30–45 minutes
- Difficulty: Easy
Tip: Practice your lettering on paper first to get the sizing and spacing right before applying to the brick.
8. Painted Brick Monogram Doorstep Decoration
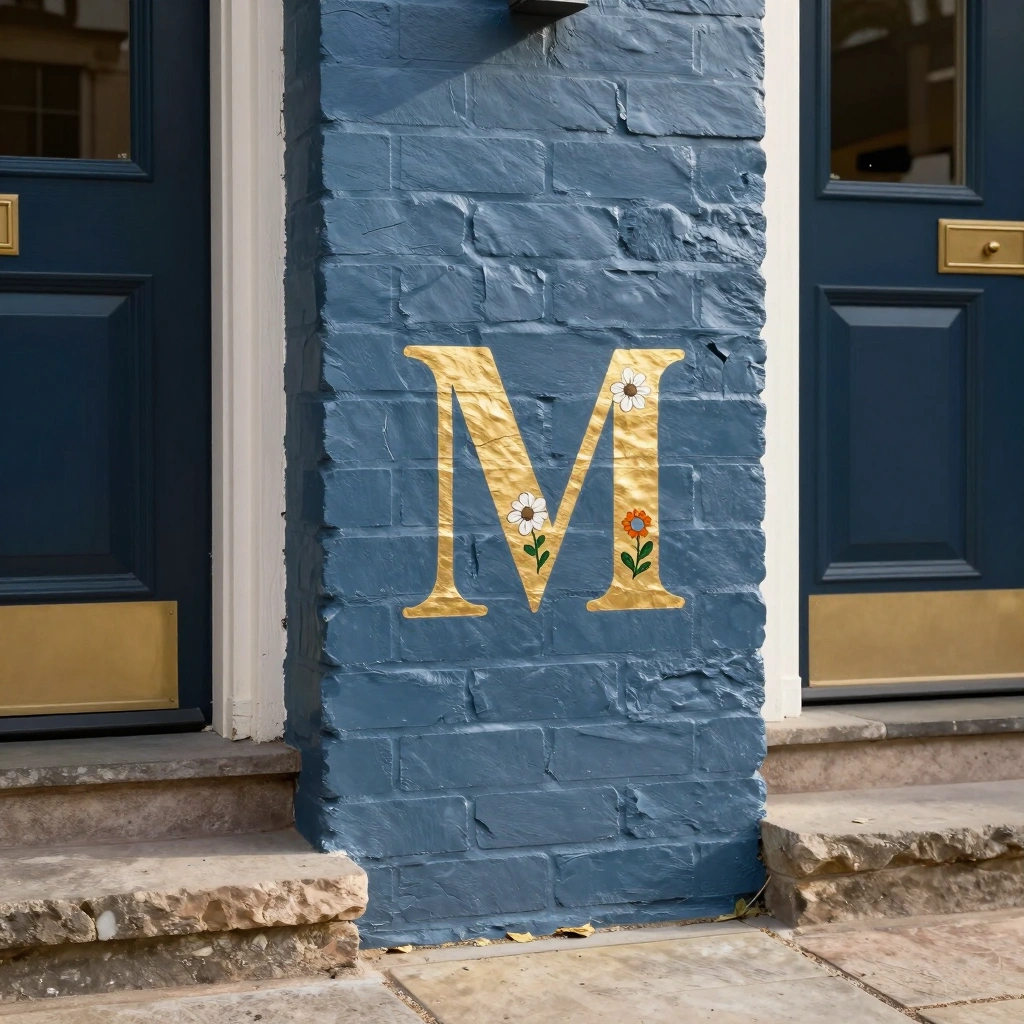
A personalized monogram brick by your front door is a classic touch. It’s welcoming, durable, and looks like it came from a boutique home store.
Materials:
- 1 large brick
- Chalk paint (color of choice)
- Stencil letters OR paint pen
- Decorative elements (small painted flowers or border)
- Matte exterior sealant
Steps:
- Apply 2 coats of chalk paint to the brick in your chosen color. Let dry.
- Center your letter stencil on the brick face and tape down.
- Dab paint carefully over the stencil — don’t brush sideways to avoid bleeding.
- Remove stencil and touch up with a fine brush.
- Add a simple decorative border or small florals around the letter.
- Seal thoroughly with exterior-grade sealant.
- Time: 40–50 minutes
- Difficulty: Medium
Tip: Navy blue with a gold monogram is a timeless combination that suits almost any front door color.
9. Painted Brick Coaster Set
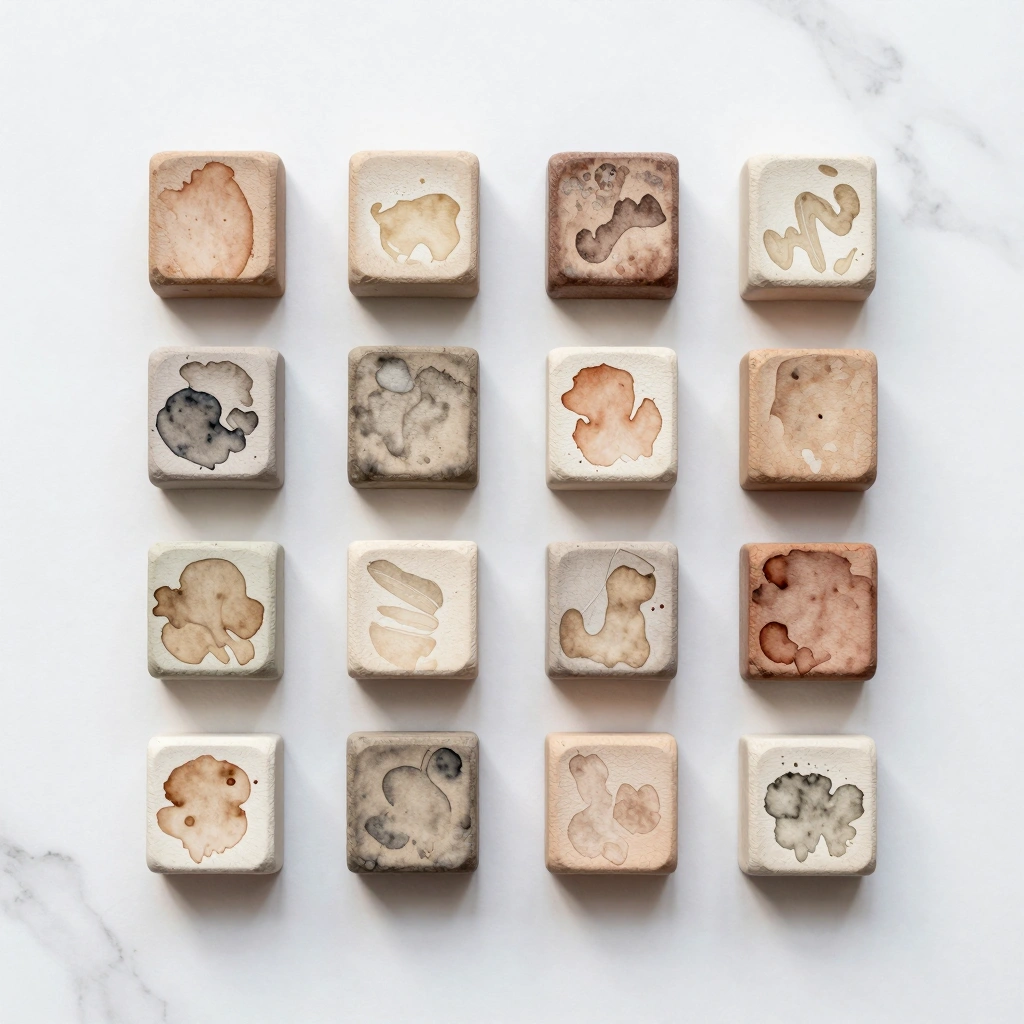
Thin bricks or brick slices (cut pavers) make surprisingly stylish coasters. Sand the surface smooth, paint, and seal — and you have a set that’s both functional and artistic.
Materials:
- 4 thin paver bricks or cut brick slices
- Sandpaper (120 grit)
- Acrylic paint in coordinating colors
- Gloss waterproof sealant
- Cork or felt pads for the bottom
Steps:
- Sand the top surface of each paver until smooth to the touch.
- Wipe clean with a damp cloth and let dry.
- Paint each one a different color or pattern — watercolor washes, geometric shapes, or abstract strokes all work well.
- Apply 3 coats of gloss waterproof sealant, letting each coat dry fully.
- Attach cork or felt pads to the bottom to protect surfaces.
- Time: 1–1.5 hours (plus drying time)
- Difficulty: Medium
Tip: Seal generously — at least 3 coats — to make these truly waterproof for everyday use.
10. Seasonal Welcome Sign Brick Stack

Stack 2–3 painted bricks to create a rustic layered welcome sign you can swap out by season. Each brick holds one word: “WELCOME,” “HOME,” or “HELLO.”
Materials:
- 3 matching bricks
- Chalk paint (white or cream base)
- Black paint pen or stencils
- Matte outdoor sealant
Steps:
- Paint all 3 bricks with chalk paint. Apply 2 coats and let dry.
- Letter one word per brick: “WELCOME,” “TO,” and your house number or name.
- Add simple seasonal illustrations on the side faces (a leaf, snowflake, or sunflower).
- Seal each brick with outdoor-grade matte sealant.
- Stack and arrange near your entryway or garden path.
- Time: 1–1.5 hours
- Difficulty: Easy–Medium
Tip: Use a level surface when stacking — add a thin rubber pad between bricks to keep them from shifting.
Common Mistakes to Avoid
- Skipping the base coat. Brick is porous and absorbs paint unevenly without a primer or solid base coat first. Always apply at least 2 base layers before adding your design.
- Not sealing the finished piece. Paint on an unsealed brick will chip, fade, and peel — especially outdoors. A proper sealant is non-negotiable for longevity.
- Using indoor paint for outdoor projects. Regular acrylic paint won’t hold up to rain and sun. Always use outdoor-rated acrylic or chalk paint and an exterior sealant for anything placed outside.
Tips for Best Results
- Clean first, always. Dust, dirt, and oil prevent paint from adhering. Scrub bricks with a dry brush and wipe with a slightly damp cloth before starting.
- Let each coat dry fully. Rushing between coats causes streaks, lifting, and uneven color. Patience pays off here.
- Use a foam roller for base coats. It fills the texture more evenly than a brush and saves time.
- Work in thin layers. Multiple thin coats give better coverage and a more professional finish than one thick coat.
- Test your sealant. Some glossy sealants can yellow over time — test on a spare brick or hidden area first.
- Embrace imperfection. Handmade charm is the whole point. Slightly wobbly lettering or an uneven edge just adds personality.
FAQs
Q: What kind of paint works best on bricks? Acrylic paint is the most popular choice — it adheres well, dries fast, and comes in hundreds of colors. For outdoor projects, use exterior-grade acrylic or chalk paint and always seal afterward.
Q: Do I need to prime a brick before painting? Not always, but a primer or solid base coat is strongly recommended. Brick is very porous, so a base coat helps paint go on more evenly and use less product overall.
Q: How do I make painted bricks last outdoors? Use exterior-rated paint and apply a minimum of 2–3 coats of outdoor sealant (polyurethane or acrylic varnish). Reapply sealant once a year for bricks that face heavy rain or direct sun.
Q: Can I use regular house bricks from a hardware store? Absolutely. New or reclaimed bricks from a hardware or landscaping store work perfectly. Just make sure they’re clean and fully dry before painting.
Q: How do I get clean lines and sharp edges? Use painter’s tape and press it down firmly before painting. Remove the tape slowly while the paint is still slightly wet (not fully dry) for the crispest edges.
Q: Are painted brick crafts suitable for kids? Yes! Most of these projects are beginner-friendly. Just supervise younger children with paint pens and sealants, and choose simple designs like dots, stripes, or basic shapes for little hands.
Conclusion
Painted Bricks Crafts are one of the most overlooked craft supplies — but now you know better. From garden markers to seasonal welcome signs, these projects prove that creativity doesn’t need expensive materials.
Pick your favorite idea, grab some paint, and get started today. Your next favorite home decoration might be sitting in a pile in the backyard right now.