20 Creative May Crafts for Kids for Colorful Hands-On Fun
May is one of the most magical months to get creative with the little ones. The weather is warming up, flowers are blooming, and there’s energy in the air that makes crafting extra fun.
These 20 may crafts for kids are perfect for rainy afternoon stays-in, classroom activities, or weekend boredom busters. Each idea uses simple, budget-friendly supplies and takes under an hour to complete.
Whether you’re a parent, teacher, or caregiver, you’ll find something here that sparks joy and keeps little hands busy all month long.
1. Paper Plate Sunflower
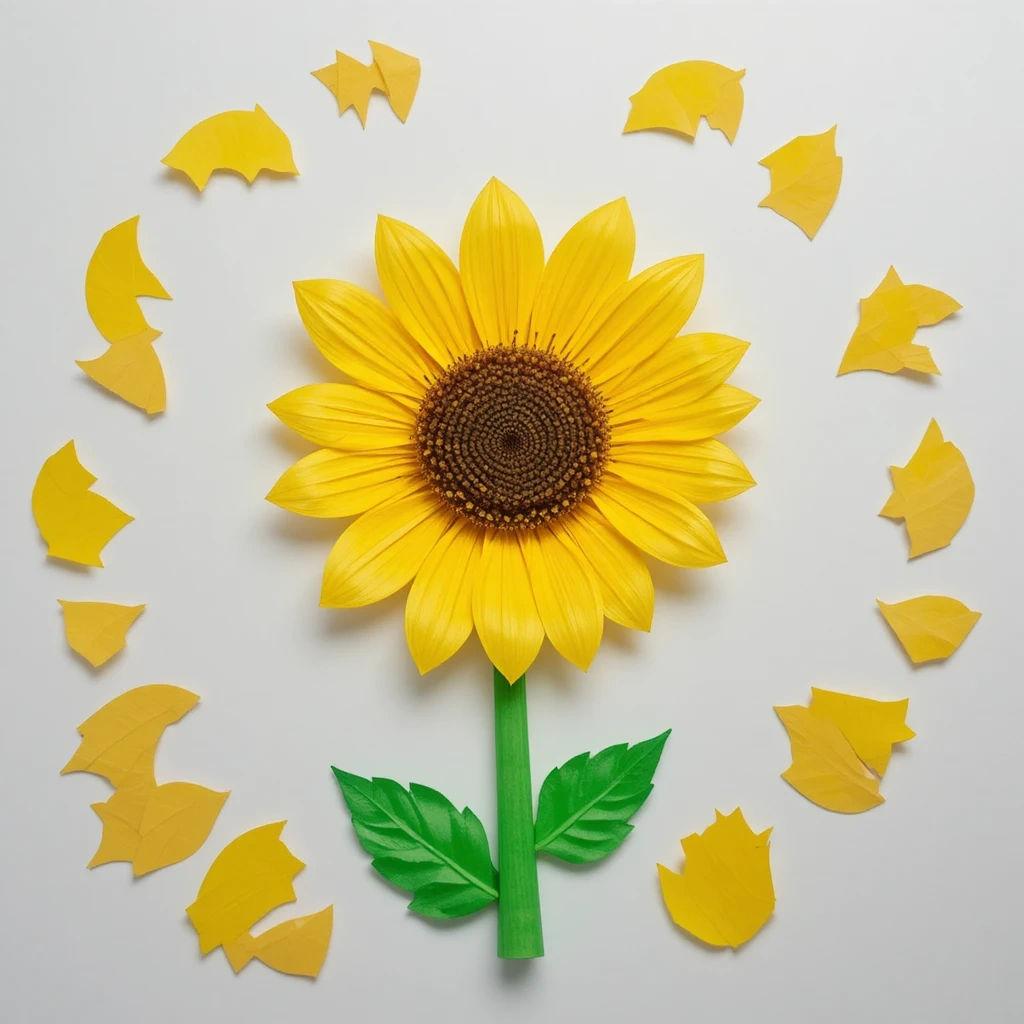
A cheerful sunflower craft that captures the spirit of May blooms. Kids paint a paper plate and add petal strips for a gorgeous 3D effect.
Materials:
- Paper plate
- Yellow & brown paint
- Yellow construction paper
- Scissors & glue stick
Steps:
- Paint the center of the plate brown and let dry.
- Cut yellow strips into petal shapes.
- Glue petals around the brown center.
- Add seeds with a black marker.
- Time: 15–20 minutes
- Difficulty: Easy
Tip: Crinkle the petals slightly before gluing for a more realistic look.
2. Butterfly Handprint Art

Kids trace their own hands to create beautiful butterfly wings — a keepsake craft parents will want to frame.
Materials:
- Watercolor paints
- White cardstock
- Black marker
- Pencil
Steps:
- Trace both hands side by side on cardstock.
- Draw a body between the thumbs.
- Paint wing designs in bright colors.
- Outline with black marker when dry.
- Time: 20–30 minutes
- Difficulty: Easy
3. May Crafts for Kids: Flower Crown Headband
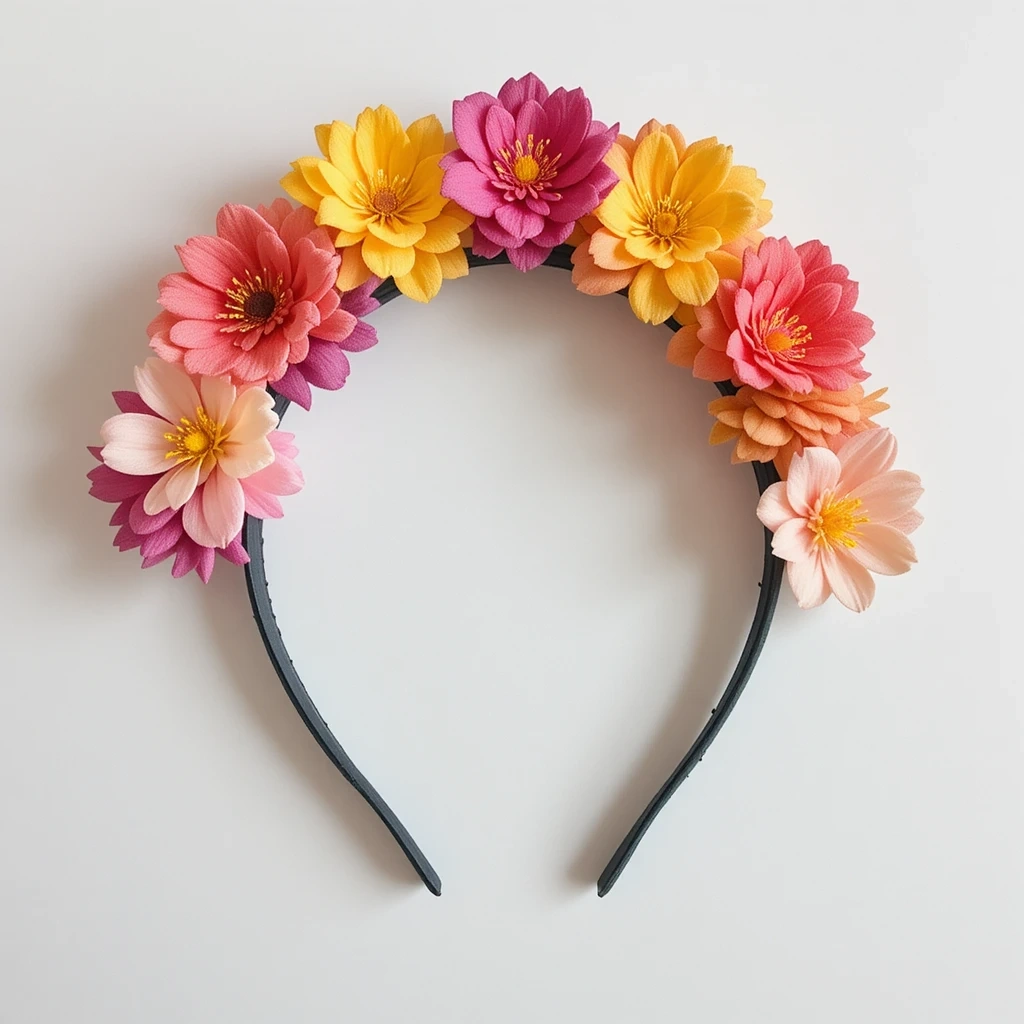
Let kids wear their art! This foam flower crown is perfect for a spring party or Mother’s Day celebration.
Materials:
- Foam sheets (assorted colors)
- Plain plastic headband
- Hot glue (adult supervised)
- Scissors
Steps:
- Cut flower shapes from foam sheets.
- Layer smaller flowers on larger ones.
- Add a button or gem center.
- Glue flowers along the headband.
- Time: 10–15 minutes
- Difficulty: Easy
Tip: Use a low-temp glue gun to keep it safe for older kids to do themselves.
4. Toilet Roll Caterpillar
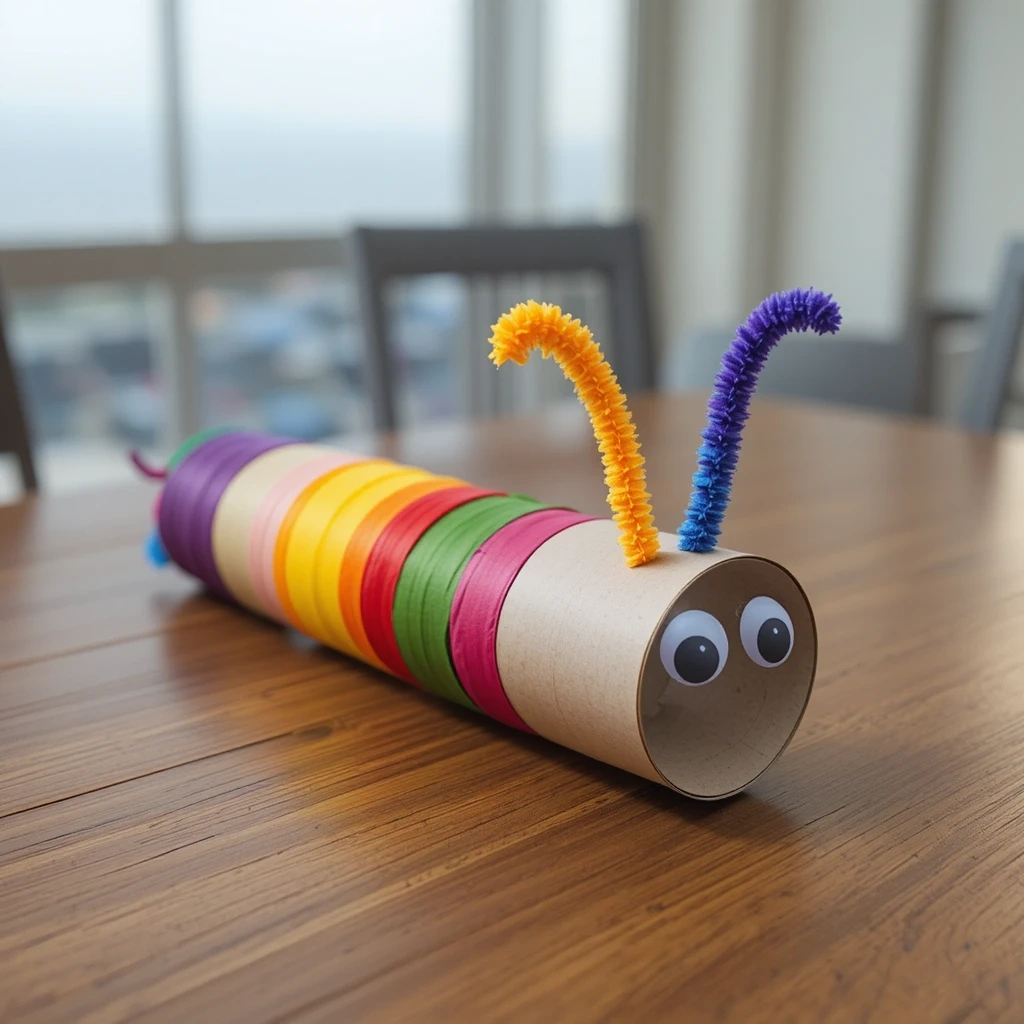
Turn recycled toilet rolls into an adorable caterpillar. Great for Earth Day week or a bug-themed unit study.
Materials:
- 4–6 toilet paper tubes
- Tempera paint
- Googly eyes
- Pipe cleaners & glue
Steps:
- Paint each tube a different color.
- Let dry completely.
- Glue tubes together in a line.
- Add eyes and pipe cleaner antennae to the first tube.
- Time: 30–40 minutes
- Difficulty: Easy
5. Raindrop Suncatcher
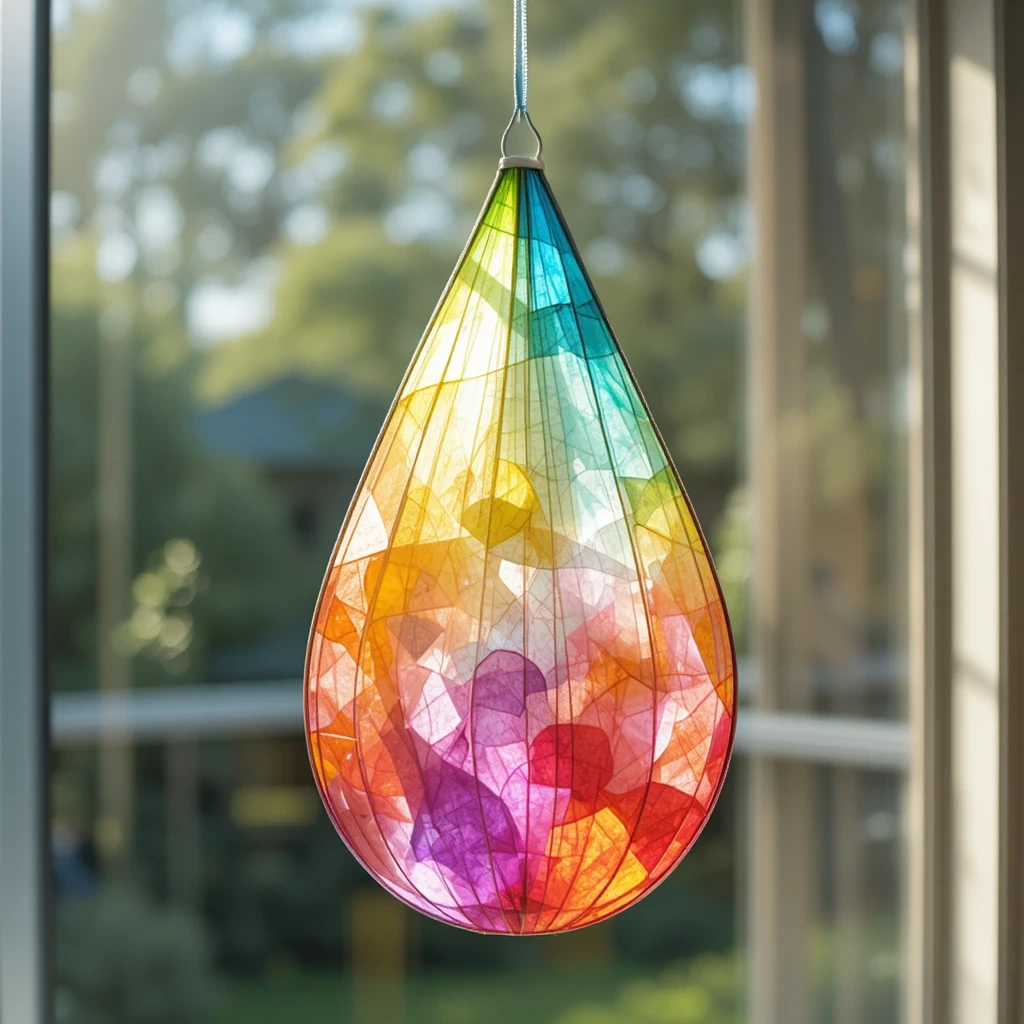
A glittery spring craft that looks stunning hanging in a window. Kids love the colorful light effects it creates.
Materials:
- Clear contact paper
- Tissue paper squares
- Ribbon or string
- Scissors & hole punch
Steps:
- Cut contact paper into a raindrop shape (two pieces).
- Peel one side and press tissue paper squares on.
- Seal with the second piece of contact paper.
- Punch a hole and thread ribbon through.
- Time: 20–25 minutes
- Difficulty: Easy
6. Thumbprint Ladybug Card
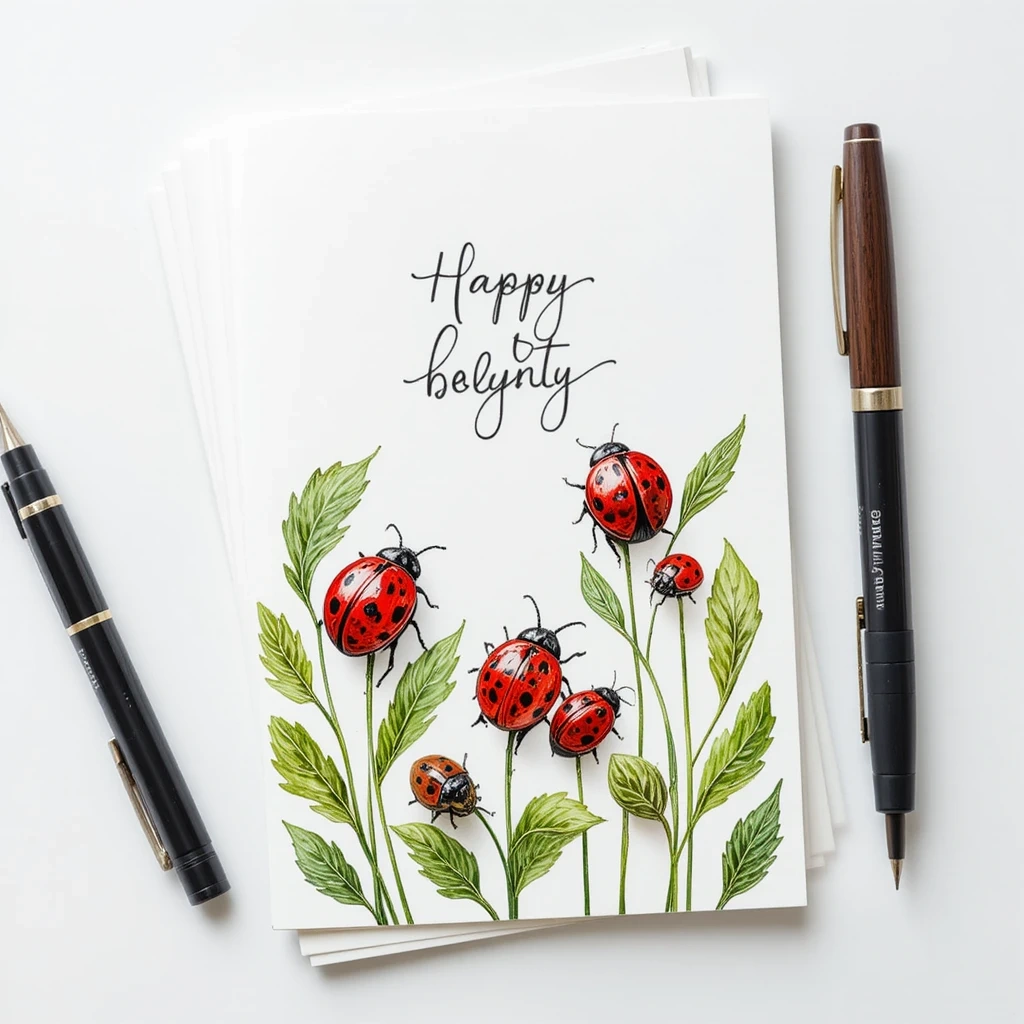
A sweet Mother’s Day or thank-you card kids can make for someone special using just paint and their thumbs.
Materials:
- Blank white card
- Red & black washable paint
- Fine black marker
- Ink pad or paint tray
Steps:
- Dip thumb in red paint and stamp on the card.
- Let dry, then dip thumb in black and add a smaller dot for the head.
- Draw a center line, dots, and antennae with a marker.
- Write a message inside!
- Time: 15–20 minutes
- Difficulty: Easy
7. May Crafts for Kids: Paper Bag Kite
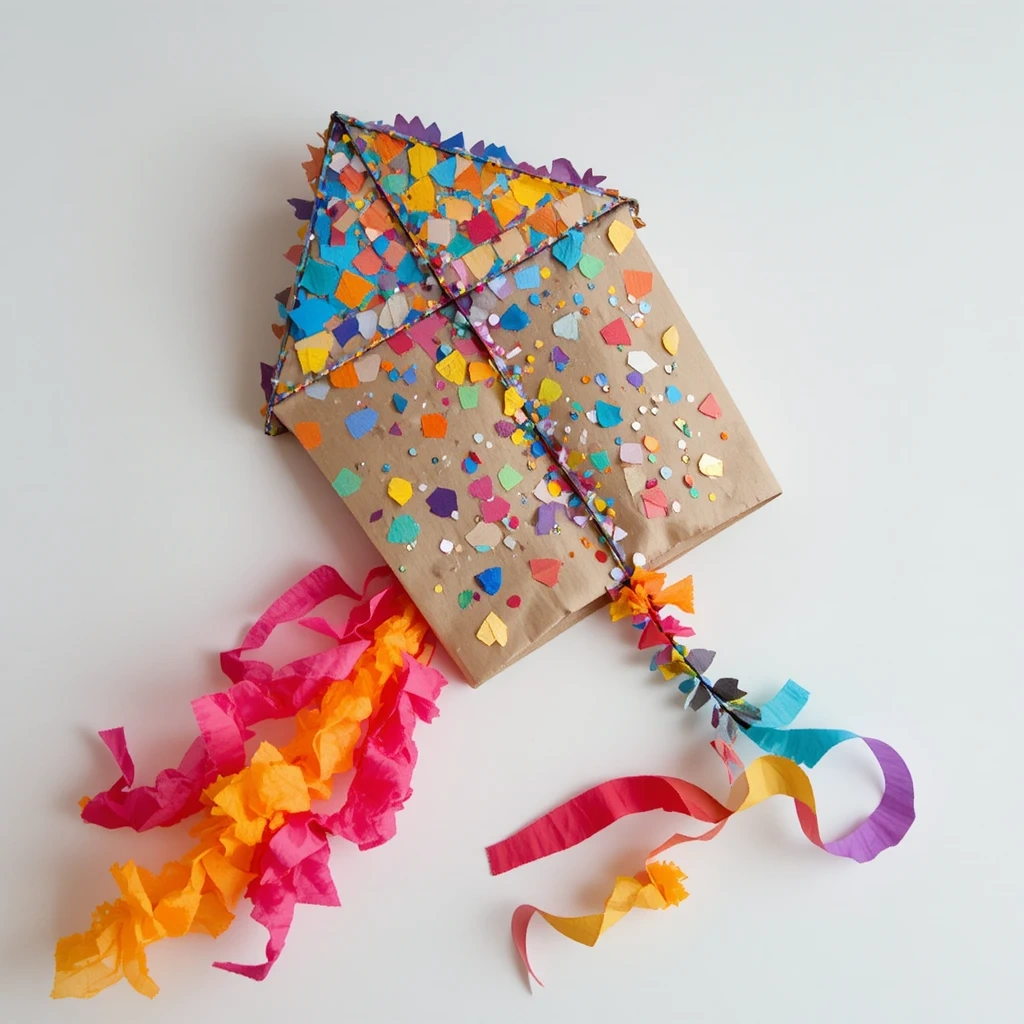
A fun outdoor-inspired craft that kids can actually try to fly. Simple to assemble and wildly fun to decorate.
Materials:
- Brown paper lunch bag
- Tissue paper streamers
- String or yarn
- Markers & stickers
Steps:
- Decorate the bag with markers and stickers.
- Glue streamers to the open bottom end.
- Punch two holes in the closed end.
- Thread and knot string through the holes to hold.
- Time: 25–35 minutes
- Difficulty: Medium
8. Rock Garden Bugs
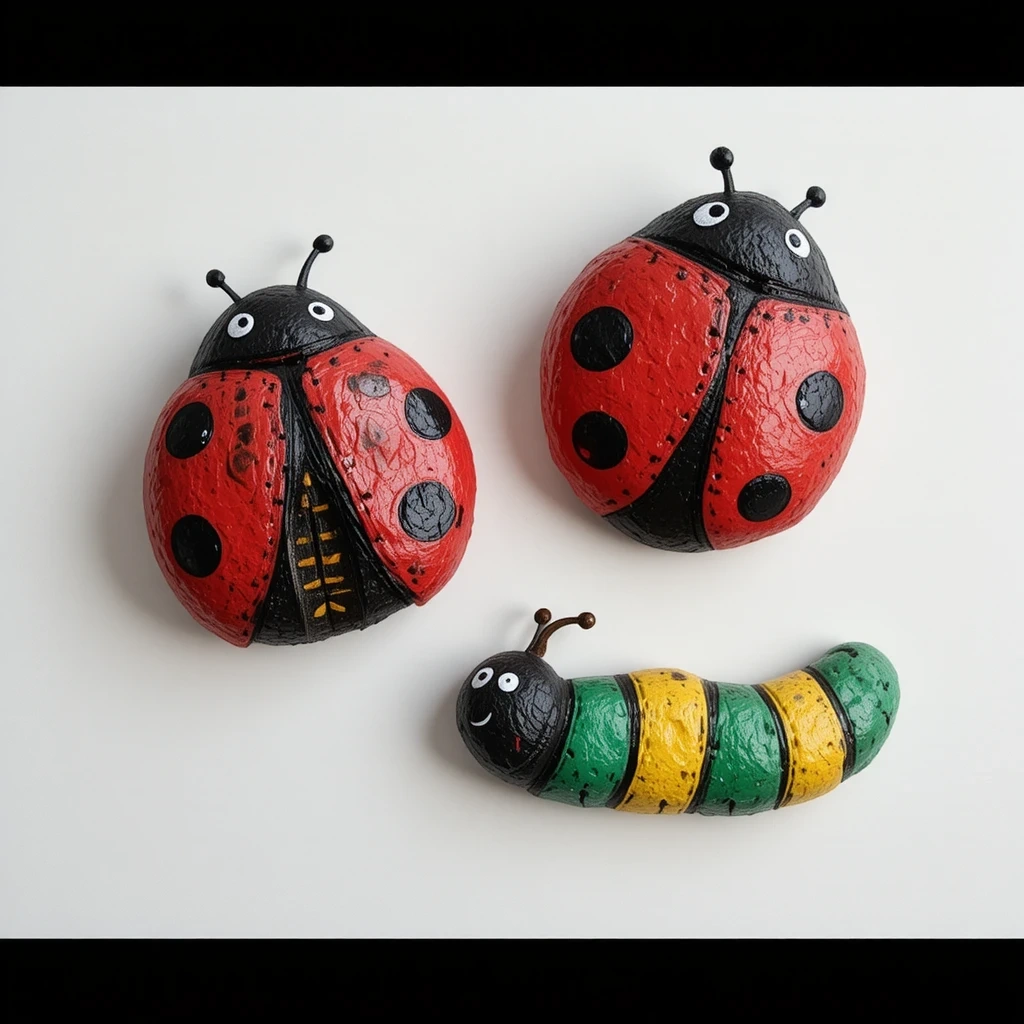
Take a walk outside to collect smooth rocks, then paint them as bees, ladybugs, or beetles. Great for fine motor skills.
Materials:
- Smooth river rocks
- Acrylic paints
- Fine-tip paint pens
- Mod Podge sealer
Steps:
- Paint a solid base color on each rock.
- Let dry completely.
- Add bug details with fine-tip paint pens.
- Seal with Mod Podge for durability.
- Time: 20–30 minutes
- Difficulty: Easy
Tip: Add googly eyes with a dot of super glue for extra cuteness.
9. Coffee Filter Flowers
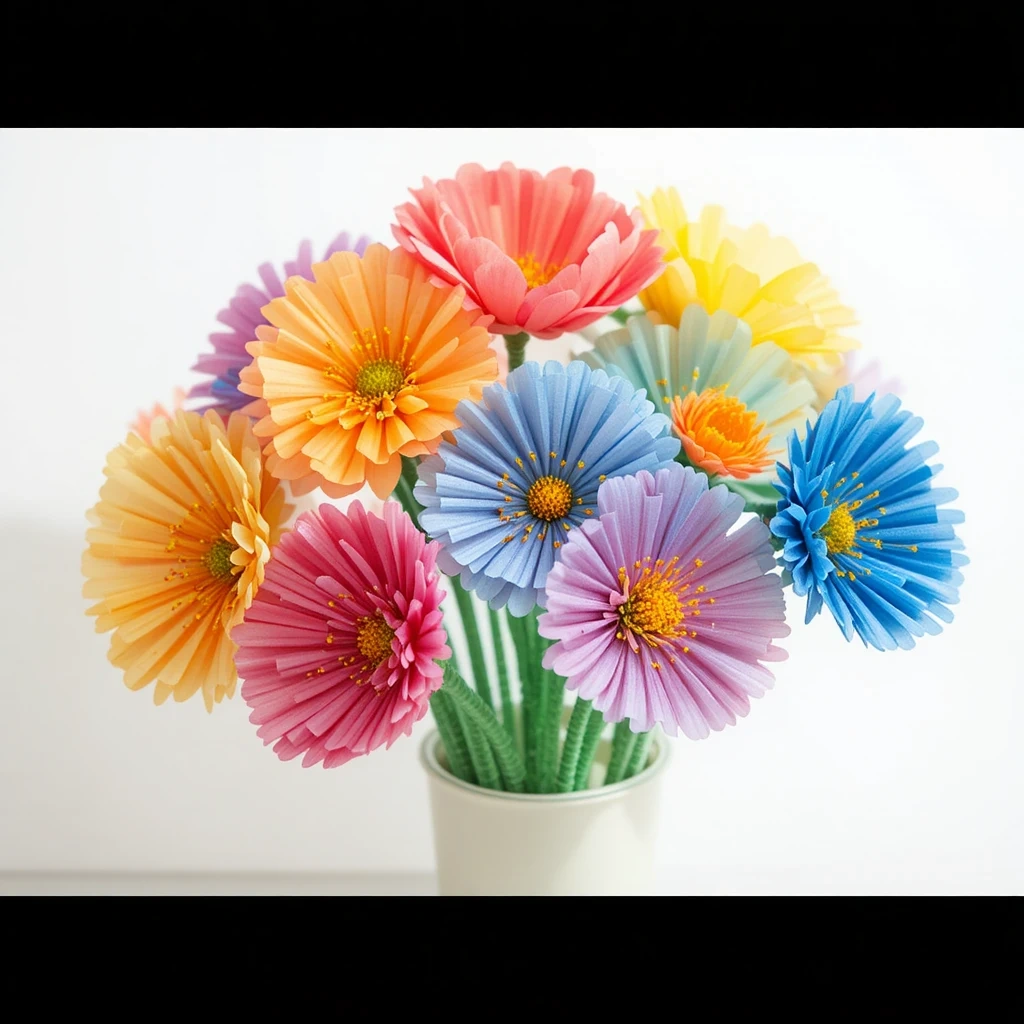
These stunning flowers use a secret ingredient — coffee filters and washable markers. The colors bleed beautifully when water touches them.
Materials:
- Round coffee filters
- Washable markers
- Water spray bottle
- Green pipe cleaners (stems)
Steps:
- Color the filter with markers in any pattern.
- Lightly spritz with water and watch the colors blend.
- Let dry fully.
- Pinch center and wrap with a pipe cleaner stem.
- Time: 15–20 minutes
- Difficulty: Easy
10. Egg Carton Tulips
Upcycle egg cartons into a whole garden of spring tulips. A creative way to teach sustainability through art.
Materials:
- Cardboard egg carton
- Tempera paint (pink, red, purple)
- Green straws or sticks
- Scissors & glue
Steps:
- Cut individual cups from the egg carton.
- Trim edges into petal shapes.
- Paint each cup a bright color.
- Glue or poke a straw through the bottom as a stem.
- Time: 20–30 minutes
- Difficulty: Easy
11. Woven Paper Basket
Teach kids the basics of weaving with this adorable spring basket. Fill it with candy or small gifts for a lovely May Day surprise.
Materials:
- Colored paper strips (1 inch wide)
- Tape or stapler
- A piece of cardboard (base)
- Scissors
Steps:
- Cut a cardboard circle for the base.
- Tape vertical strips to the base radiating outward.
- Weave horizontal strips over and under the verticals.
- Fold over the top and secure with tape. Add a paper handle.
- Time: 30–45 minutes
- Difficulty: Medium
12. Rainy Day Umbrella Art
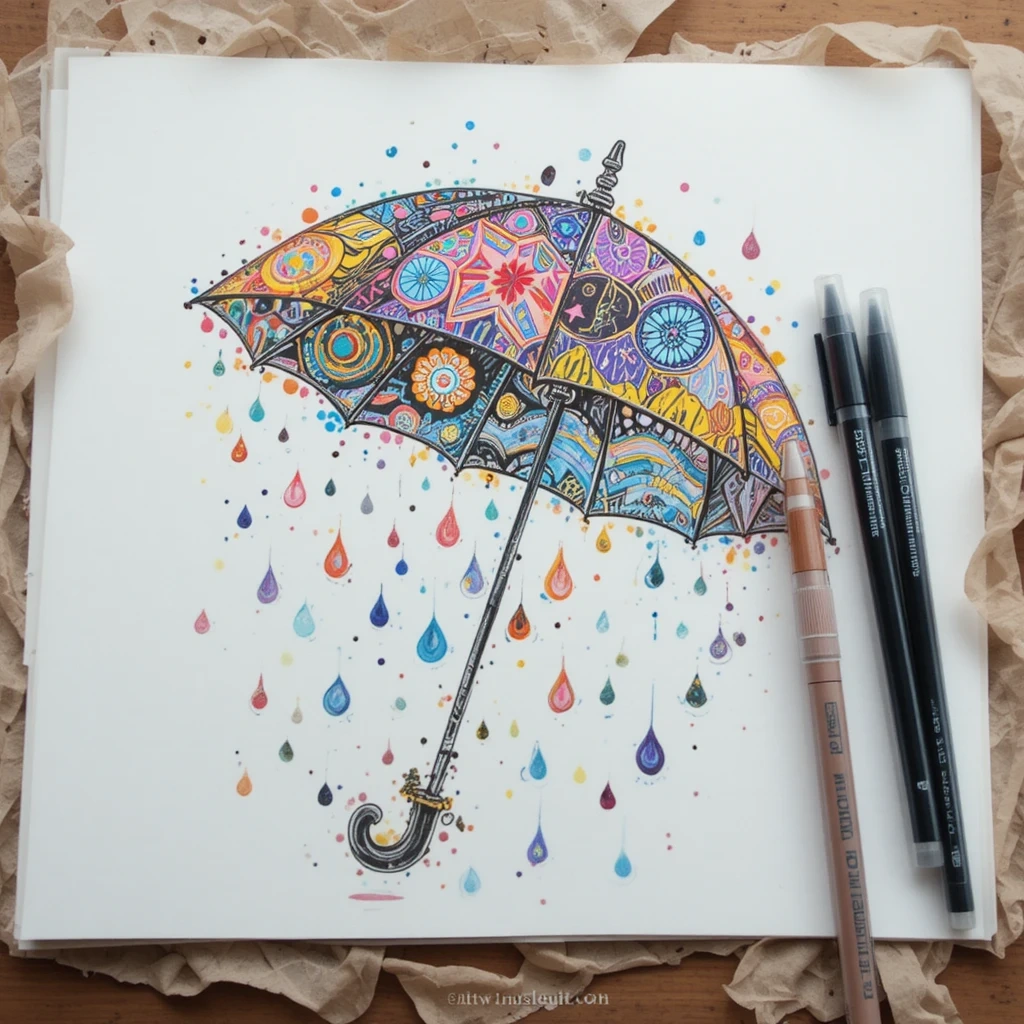
A festive May-themed drawing project inspired by spring showers. Kids practice pattern-making and color mixing all at once.
Materials:
- White drawing paper
- Watercolors or markers
- Black crayon or oil pastel
- Pencil for sketching
Steps:
- Draw an umbrella shape in pencil.
- Divide the dome into sections.
- Color each section a different pattern or color.
- Add raindrops, puddles, and a handle in black.
- Time: 15–25 minutes
- Difficulty: Easy
13. Fingerprint Bumblebee Craft
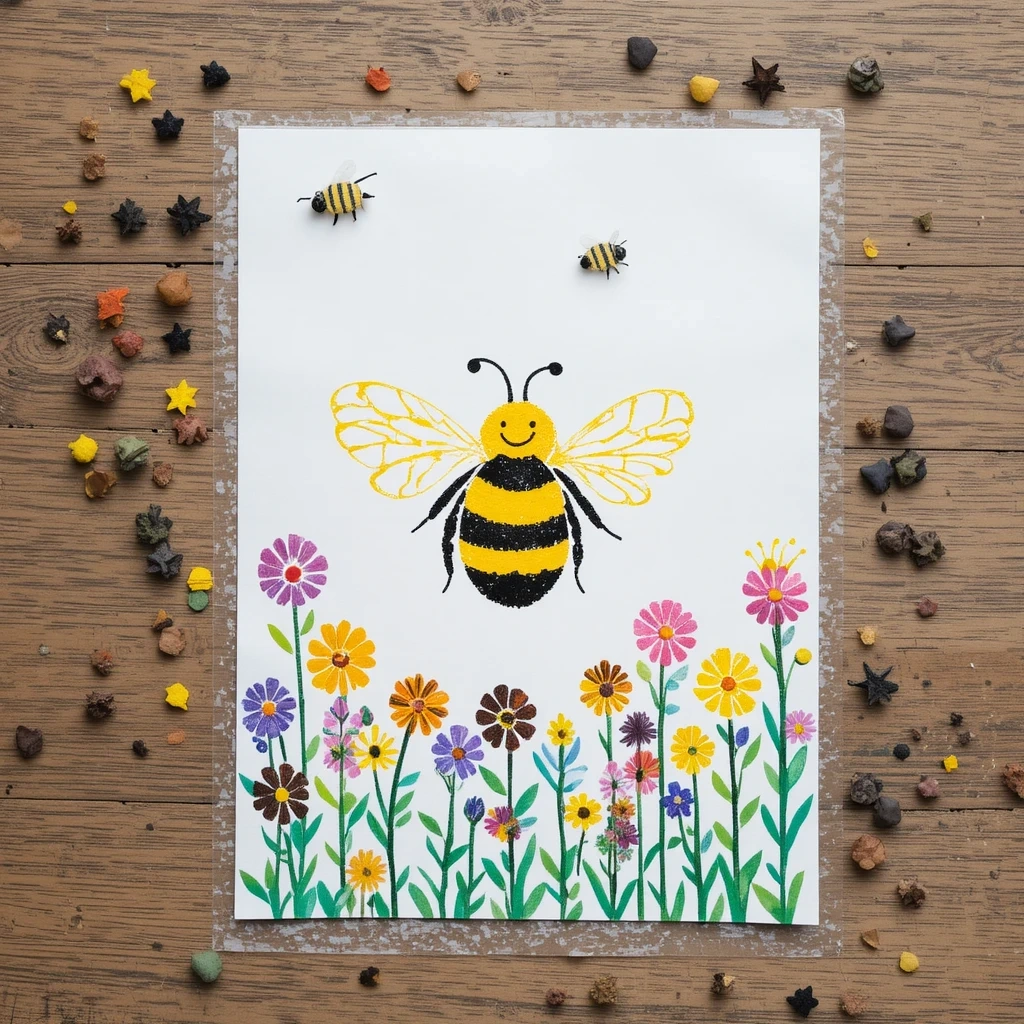
Use yellow and black fingerprints to create a buzzing bumblebee scene kids will want to hang on their wall.
Materials:
- White cardstock
- Yellow & black washable paint
- Blue & green markers
- Fine black marker
Steps:
- Press yellow fingerprints on paper to form bee bodies.
- Add black stripes, wings, and antennae with a marker.
- Draw flowers and grass around the bees.
- Add a sun and sky for a complete scene.
- Time: 20–30 minutes
- Difficulty: Easy
14. May Crafts for Kids: Garden Stepping Stones
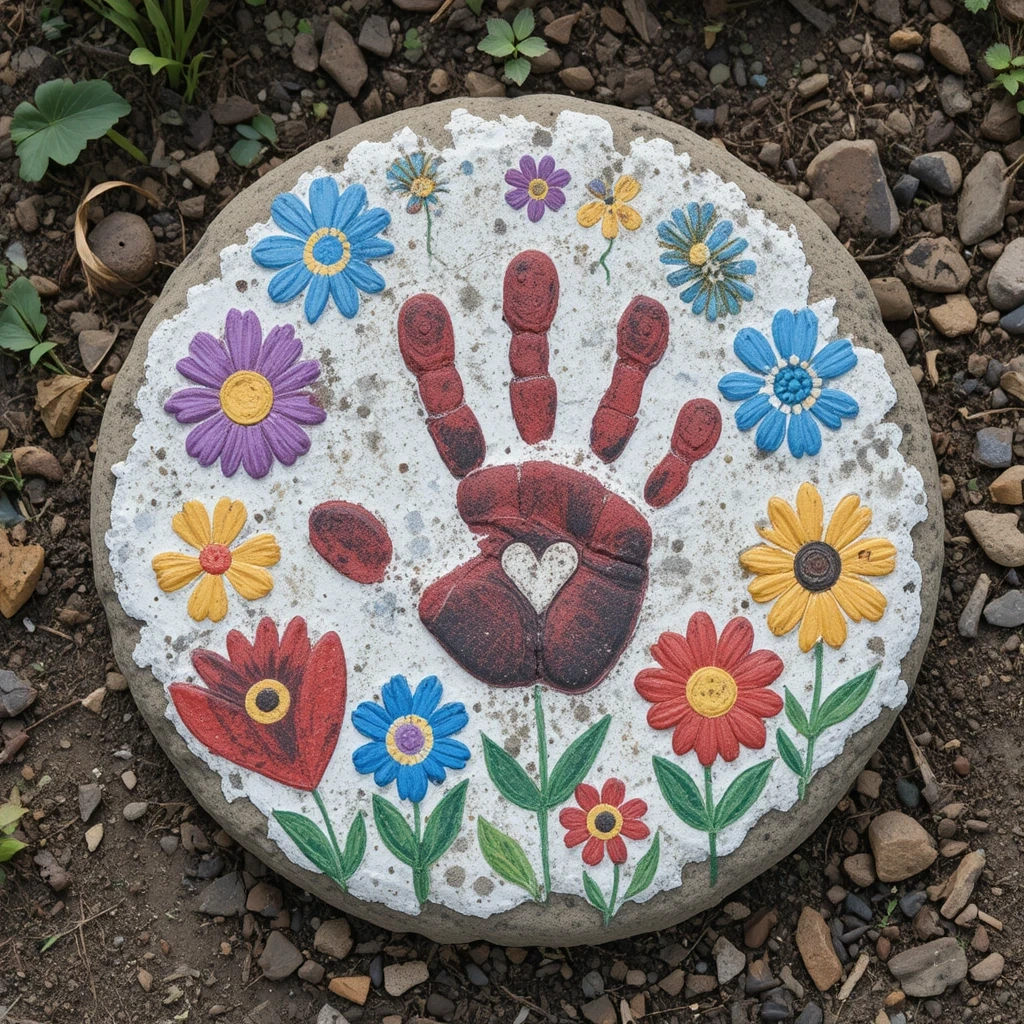
A memorable outdoor project kids will be proud of for years. These plaster stepping stones make a wonderful gift for grandparents too.
Materials:
- Plaster of Paris
- Disposable pie tin (mold)
- Acrylic paints
- Mosaic tiles or glass gems (optional)
Steps:
- Mix plaster per instructions and pour into tin.
- Let set for about 5 minutes until semi-firm.
- Press handprint or footprint into the center.
- Let cure fully overnight, then paint and seal.
- Time: 25–35 minutes
- Difficulty: Medium
Tip: Write the child’s name and date while the plaster is still soft — it becomes a treasured keepsake.
15. Popsicle Stick Fence with Flowers
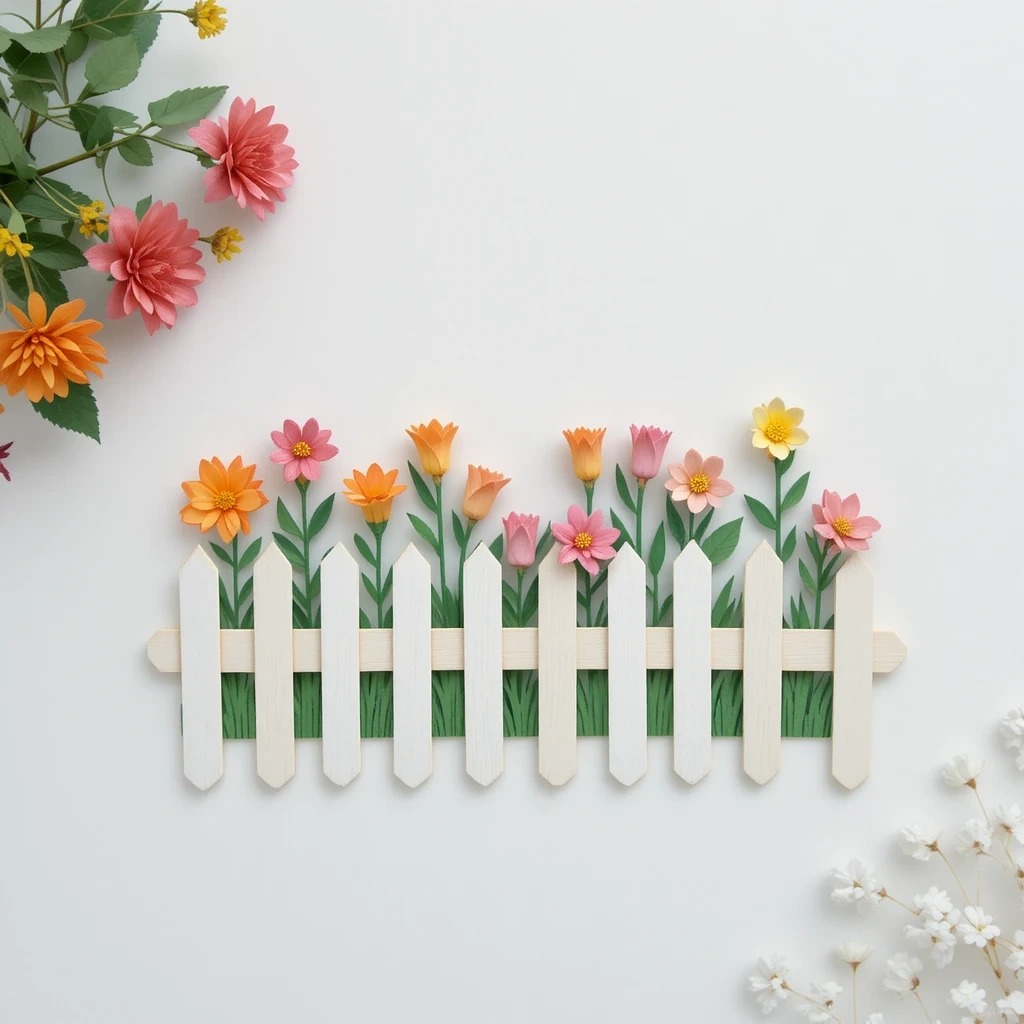
A charming miniature garden scene kids can display on a shelf. It’s an easy introduction to 3D crafting.
Materials:
- Popsicle sticks
- White paint
- Foam flower stickers or paper flowers
- Craft glue
Steps:
- Paint popsicle sticks white and let dry.
- Glue sticks side by side to form a fence panel.
- Attach two horizontal sticks across the back to hold them together.
- Glue paper or foam flowers along the front of the fence.
- Time: 15–20 minutes
- Difficulty: Easy
16. Nature Collage with Pressed Flowers
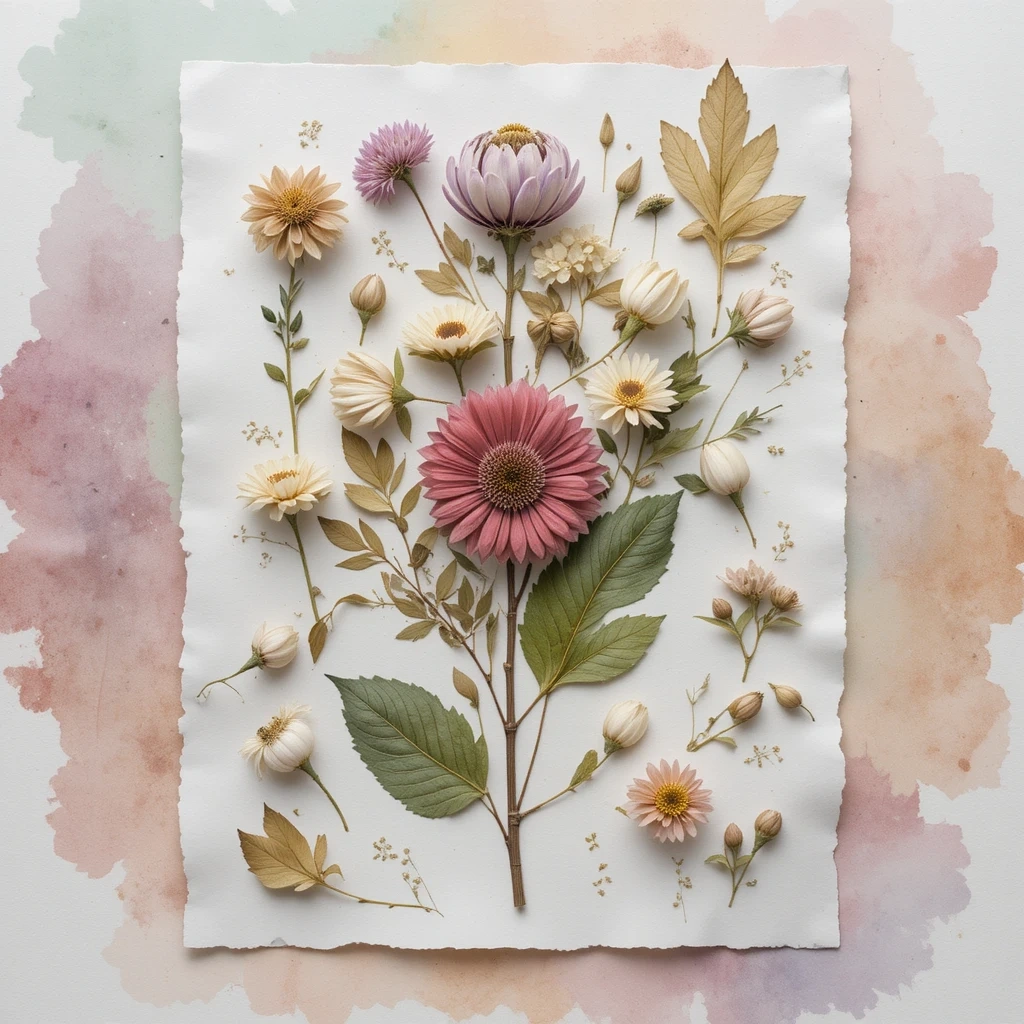
Take a walk and collect petals, leaves, and twigs to create beautiful nature collage art on paper or canvas.
Materials:
- Collected leaves, petals, twigs
- White cardstock or canvas panel
- Mod Podge & brush
- Optional: watercolor background
Steps:
- Paint a soft watercolor wash background and let dry.
- Arrange natural elements into a design.
- Brush Mod Podge under and over each piece to seal.
- Let dry flat for at least one hour.
- Time: 20–30 minutes
- Difficulty: Easy
17. Cupcake Liner Flowers Bouquet
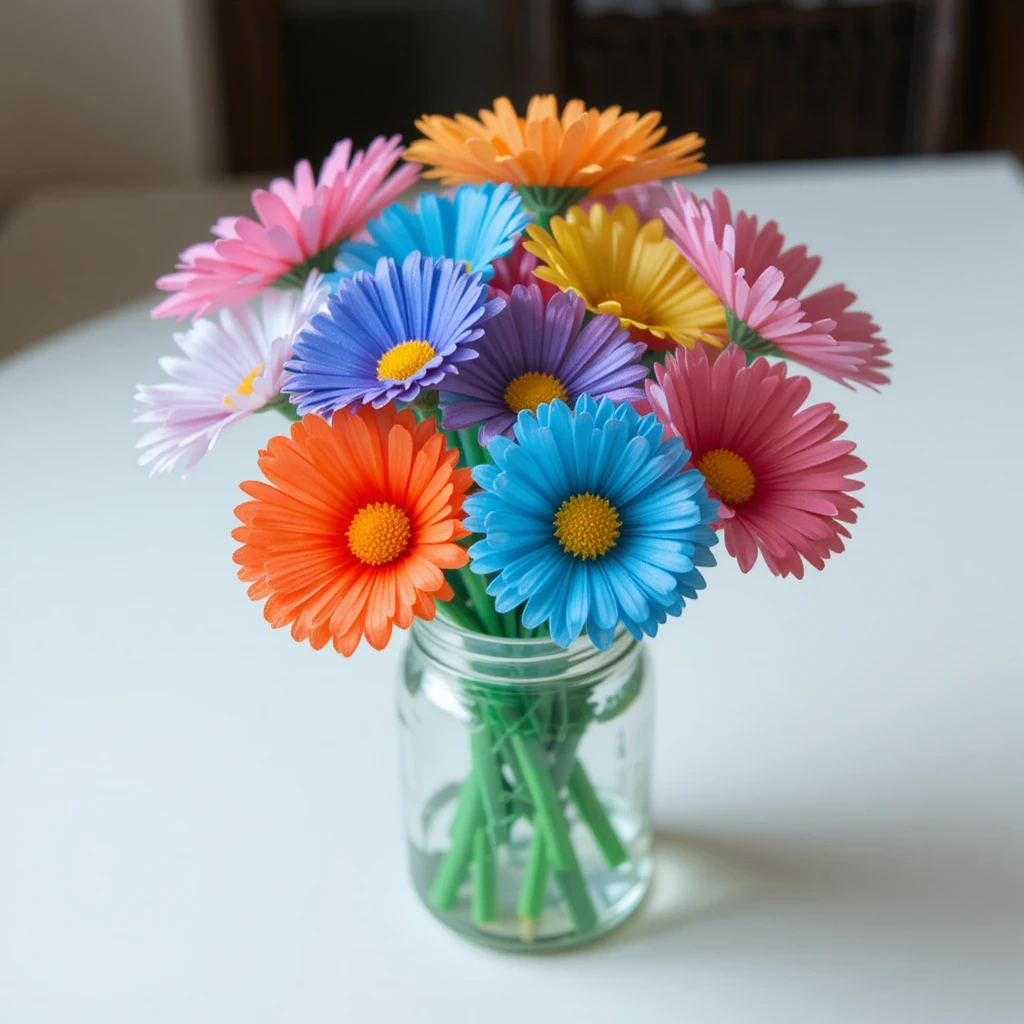
Transform colorful cupcake liners into a gorgeous flower bouquet. No mess, no fuss — and very little cleanup.
Materials:
- Colorful cupcake liners (various sizes)
- Green pipe cleaners
- Yellow pom-poms (centers)
- Glue or tape
Steps:
- Stack two cupcake liners per flower, offsetting the pleats.
- Poke a pipe cleaner through the center from below.
- Glue a pom-pom in the center on top.
- Bend the pipe cleaner to form a leaf partway down.
- Time: 15–20 minutes
- Difficulty: Easy
18. Spring Bird Mobile
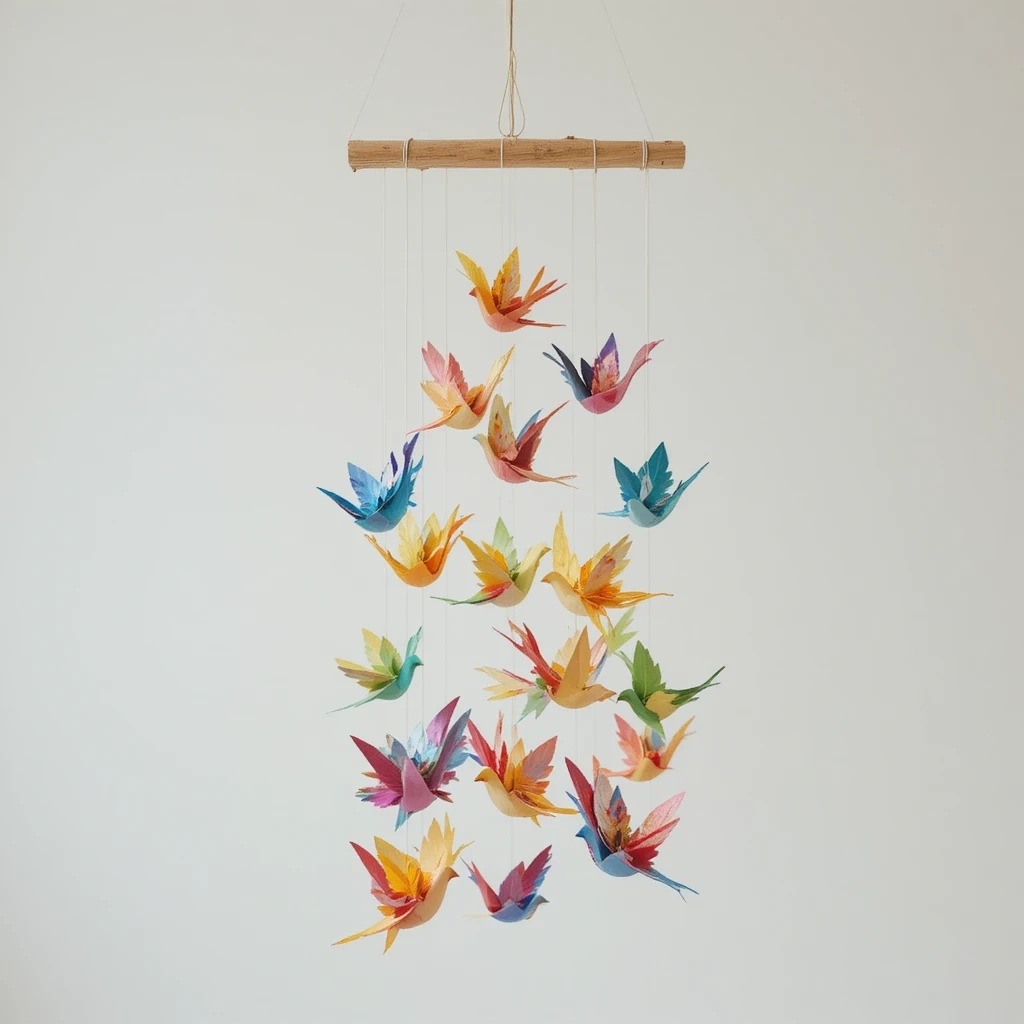
A hanging mobile with colorful paper birds — lovely for a bedroom or classroom. Kids practice cutting and basic origami-style folding.
Materials:
- Colored cardstock
- Scissors
- String or thread
- A stick or wooden dowel
Steps:
- Draw and cut simple bird silhouettes from cardstock.
- Decorate with markers or washi tape wings.
- Tie each bird to a piece of string at varying lengths.
- Tie all strings to a stick or dowel and hang.
- Time: 20–30 minutes
- Difficulty: Easy
19. Mother’s Day Coupon Book
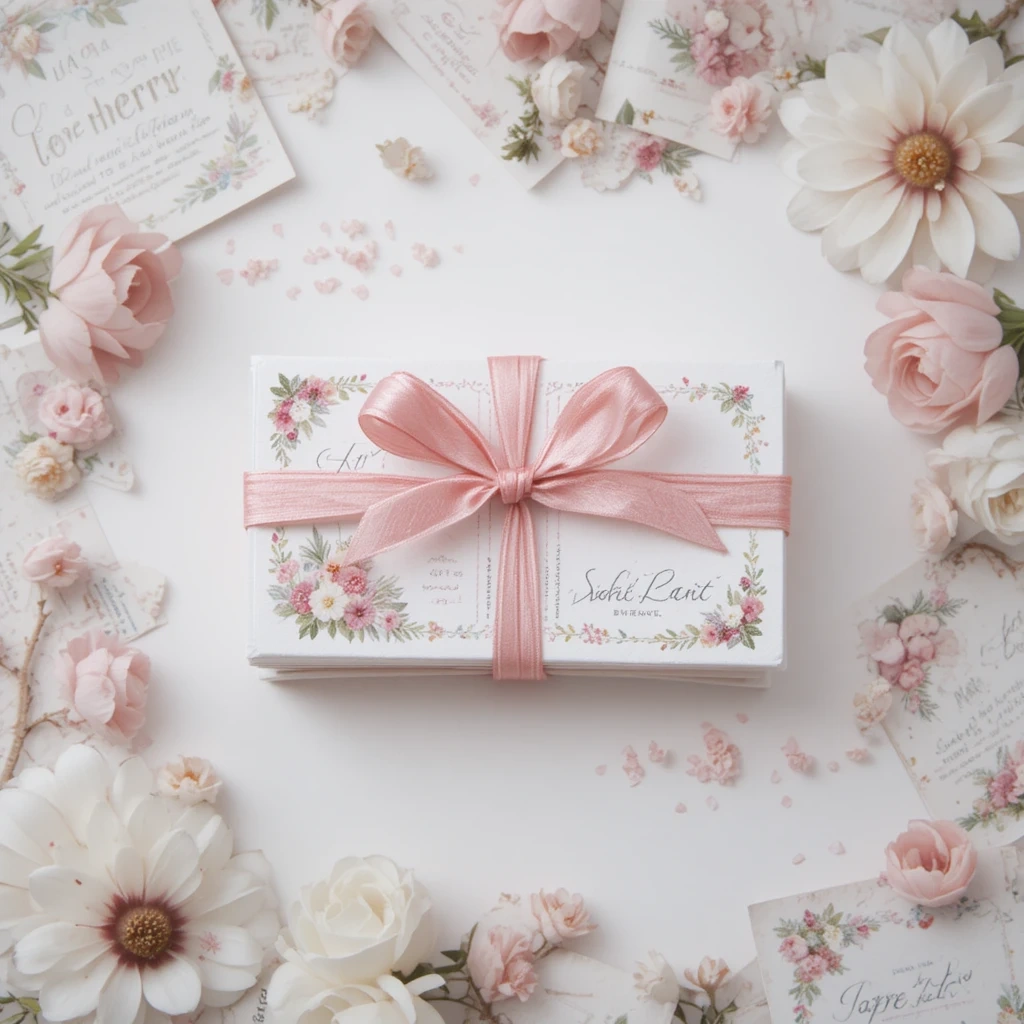
A heartfelt and creative gift kids can make in May. Each coupon offers something special — a hug, a helper day, or breakfast in bed.
Materials:
- Index cards or card strips
- Markers & colored pencils
- Hole punch & ribbon
- Decorative stickers
Steps:
- Write one coupon promise on each card (e.g., “One free hug”).
- Decorate the borders with drawings and stickers.
- Stack cards and punch a hole in one corner.
- Thread ribbon through and tie into a bow.
- Time: 15–25 minutes
- Difficulty: Easy
Tip: Make a decorated cover card that reads “Coupons for Mom — Redeemable Anytime.”
20. Tie-Dye Paper Butterflies
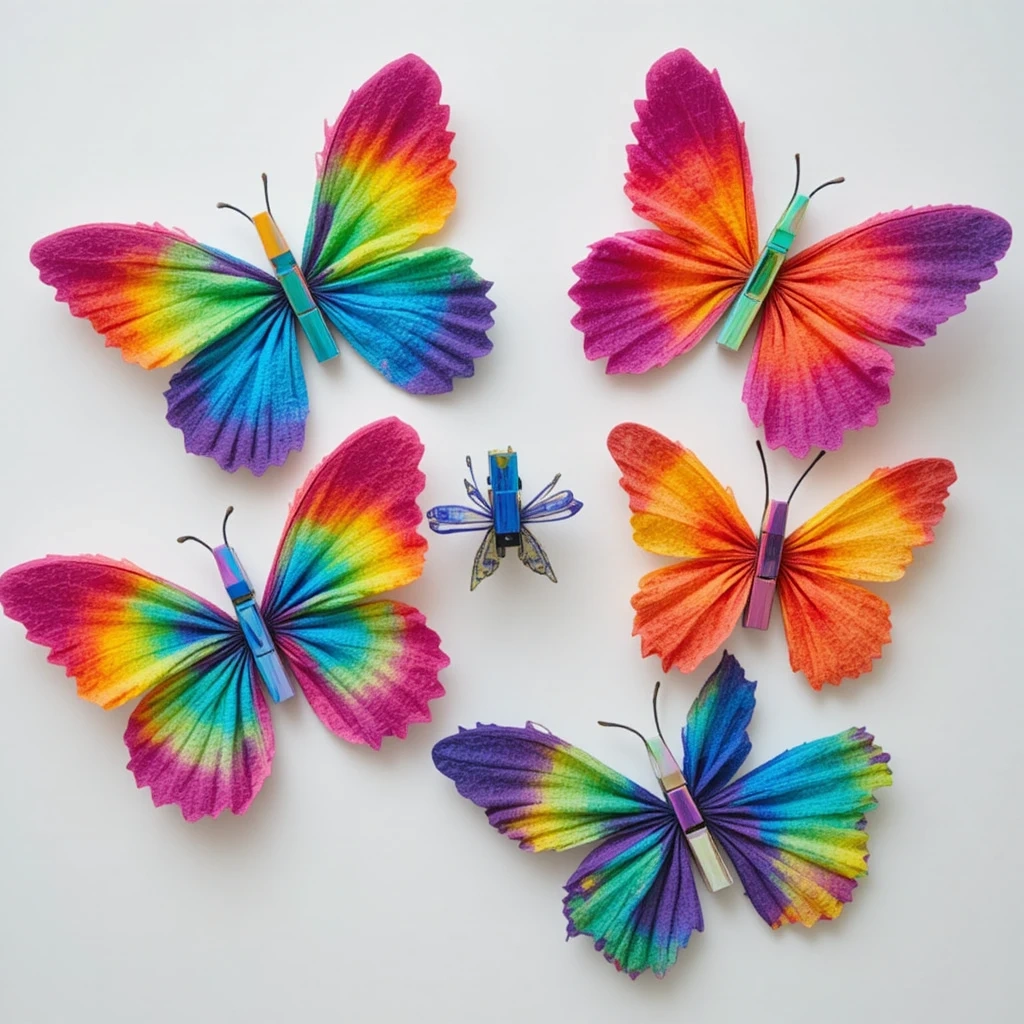
A vibrant end-of-spring project that doubles as a science experiment. Kids are always amazed at how the colors blend and travel through paper.
Materials:
- Paper towels or coffee filters
- Washable markers
- Water & dropper
- Clothespins (body) & pipe cleaners (antennae)
Steps:
- Color bold sections on a folded paper towel with markers.
- Drop water onto the colors and watch them bleed.
- Let dry flat, then fold or gather in the center.
- Clip a clothespin in the center as the body and add antennae.
- Time: 20–30 minutes
- Difficulty: Medium
Common Mistakes to Avoid
1. Not letting paint dry between steps Rushing causes colors to muddy and pieces to fall apart. Always wait until the paint is fully dry before adding the next layer or gluing parts together.
2. Using too much glue at once Excess glue causes paper to warp and bubble. Use a thin, even layer and press pieces firmly for a cleaner, sturdier result.
3. Skipping the sealing step on outdoor or keepsake crafts For stepping stones, rock bugs, or nature collages, skipping the Mod Podge or sealant means the craft won’t last. One coat makes a big difference in durability.
Tips for Best Results
- Prep everything first — Cut, measure, and lay out materials before kids start. It keeps momentum high and frustration low.
- Cover the table — A few sheets of newspaper or a vinyl tablecloth saves a lot of cleanup time on paint-heavy crafts.
- Use washable supplies — For younger kids, always opt for washable markers and paints. Accidents happen — it’s part of the fun!
- Embrace imperfection — The goal is creativity, not perfection. Let kids make design choices freely — those quirks make each craft uniquely theirs.
- Keep a drying station — Designate a flat, clean space where finished pieces can dry without being bumped.
- Display their work — Hanging finished crafts on a gallery wall or window builds pride and motivates kids to keep creating.
Frequently Asked Questions
What age group are these crafts best for? Most of these ideas work well for kids aged 3–10. Simpler crafts like thumbprint art and coffee filter flowers suit toddlers, while stepping stones and woven baskets are great for ages 6 and up.
How can I make these crafts on a tight budget? Most supplies — egg cartons, toilet rolls, paper bags, coffee filters — are free or already at home. Dollar stores are excellent for paint, foam sheets, pipe cleaners, and googly eyes.
Can these be done in a classroom setting? Absolutely. Most ideas use low-mess, quick-drying materials perfect for a classroom. The fingerprint bee, rainy day umbrella art, and cupcake liner flowers all work beautifully in groups.
How long do these crafts take to complete? Most are designed to be done in 15–45 minutes. A few, like garden stepping stones, need overnight drying time, but active crafting time is still under 30 minutes.
Are any of these crafts good for Mother’s Day gifts? Yes! The handprint butterfly, flower crown, Mother’s Day coupon book, and stepping stones all make incredibly thoughtful and personal May gifts for moms and grandmothers.
What if I don’t have all the materials listed? Most crafts are flexible. Substitute watercolors for markers, yarn for ribbon, or cardboard for cardstock. The most important material is creativity — everything else is adaptable!
Conclusion
Spring is the perfect season to slow down, get a little messy, and make something beautiful together.
Whether you try one of this Best 20 May Crafts for Kids or work through them all, each of these crafts gives kids a chance to explore, create, and feel proud of what their hands can make.
Pick your favorite, gather your supplies, and let the crafting begin. You’ve got this — and so do they!