10 Bug Crafts for Toddlers for Easy Sensory Play Activities
Toddlers are naturally curious about the tiny creatures crawling around outside — so why not bring that wonder indoors? These bug crafts for toddlers turn that excitement into hands-on creativity, using simple supplies you probably already have at home.
Great for rainy days, summer themes, or nature units at preschool. Each project below is quick, mess-friendly, and designed for little hands.
1. Bug Crafts for Toddlers: Paper Plate Ladybug
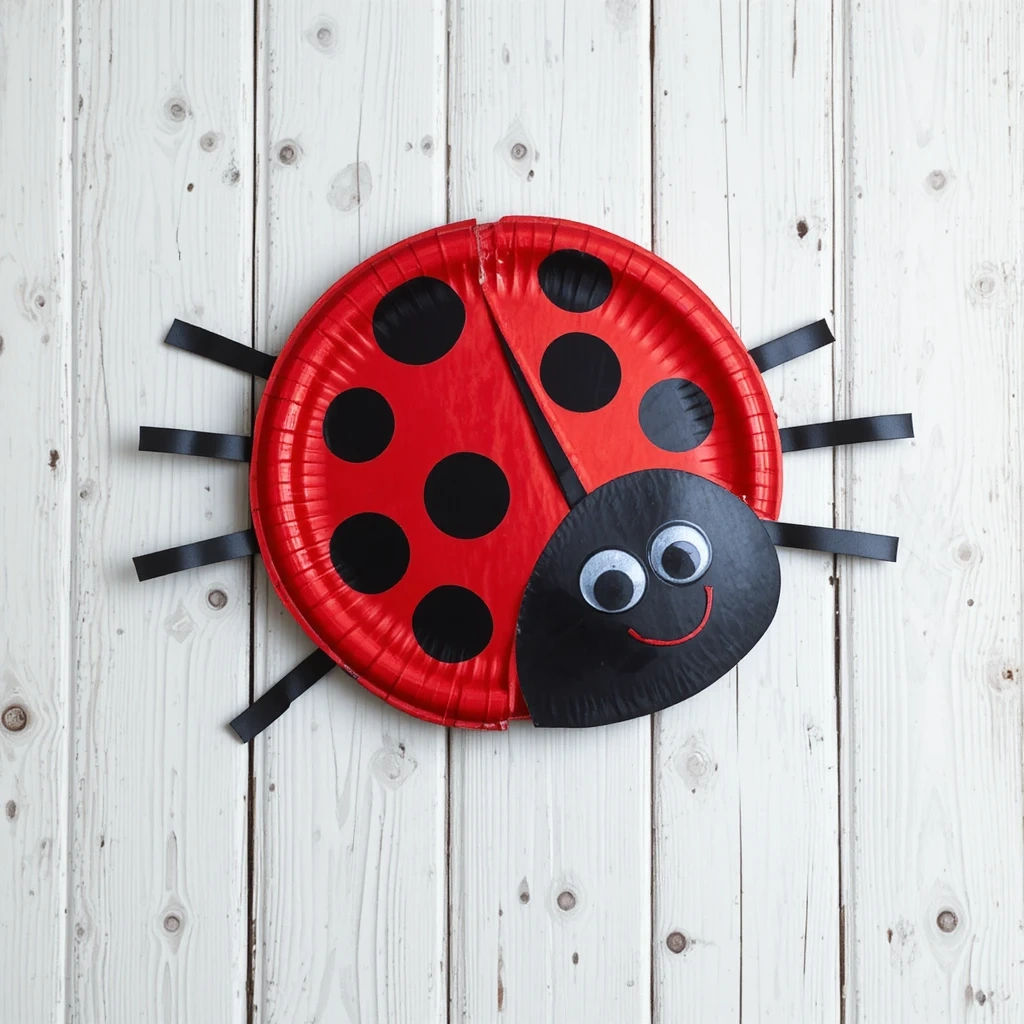
A classic for good reason — this cheerful red ladybug is one of the easiest bug crafts for toddlers to make. It uses a paper plate as the base, so there’s no cutting stress for little ones. The result is bright, bold, and perfect for hanging on the fridge.
Materials:
- 1 white paper plate
- Red and black tempera paint
- Black construction paper
- White googly eyes (x2)
- Glue stick
- Paintbrush
Steps:
- Paint the paper plate red and let it dry completely.
- Paint a black circle in the center to create the ladybug’s head.
- Paint a black line down the middle of the body.
- Add black dot spots on each wing.
- Cut two antennae from black paper and glue them to the back.
- Glue on googly eyes.
- Time: 20–30 minutes (including drying)
- Difficulty: Easy
💡 Tip: Use a sponge brush for easier painting with toddlers — less mess, more coverage.
2. Egg Carton Caterpillar
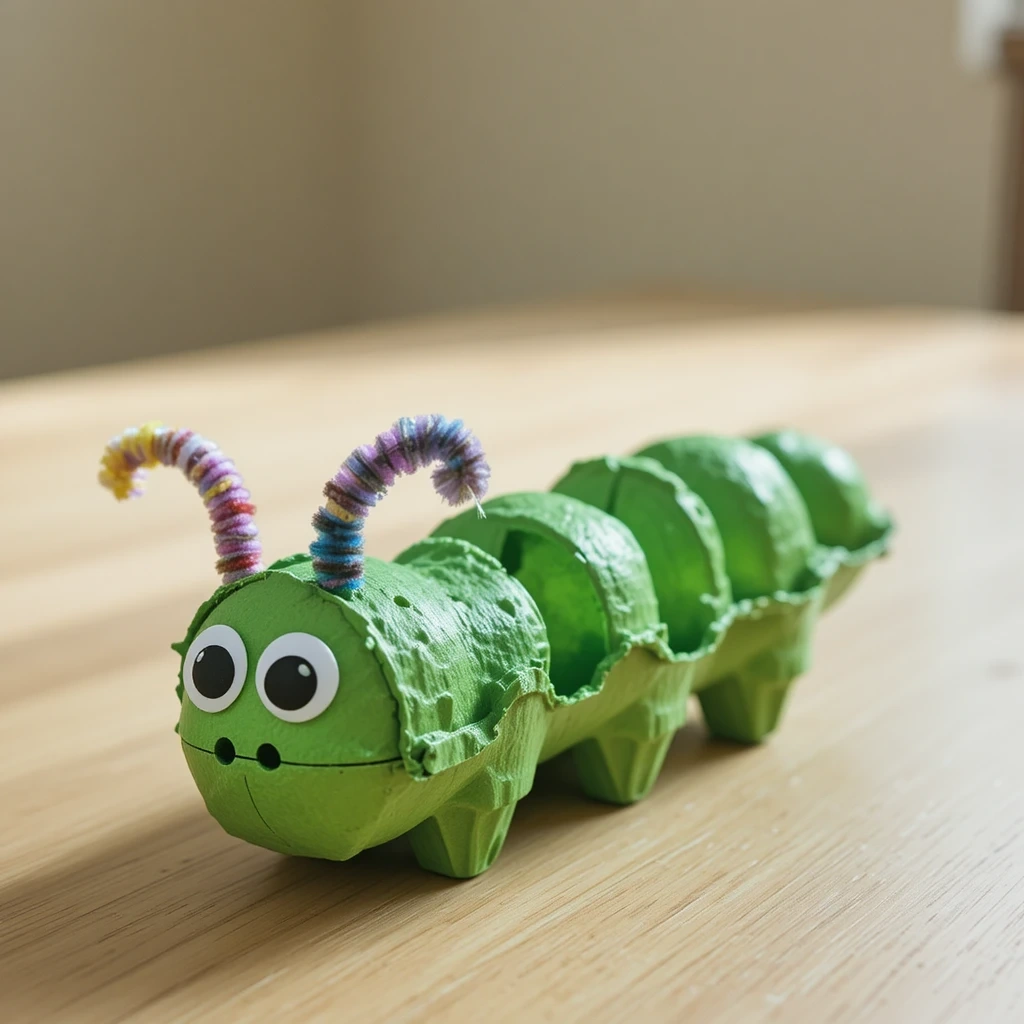
Transform a recycled egg carton into an adorable wiggly caterpillar. This is a fantastic way to introduce recycled crafting to toddlers. The bumpy texture of the carton gives it a naturally segmented look — just like a real caterpillar!
Materials:
- 1 egg carton (cut into a row of 6 cups)
- Green paint
- Googly eyes (x2)
- Pipe cleaners (x2)
- Glue
- Paintbrush
Steps:
- Cut the egg carton into a single row of 6 connected cups.
- Paint the entire row green and allow to dry.
- Poke two small holes in the first cup for antennae.
- Thread pipe cleaners through the holes and curl the tips.
- Glue googly eyes to the front cup.
- Time: 15–25 minutes
- Difficulty: Easy
💡 Tip: Add a silly smile with a red marker to give the caterpillar personality!
3. Handprint Butterfly
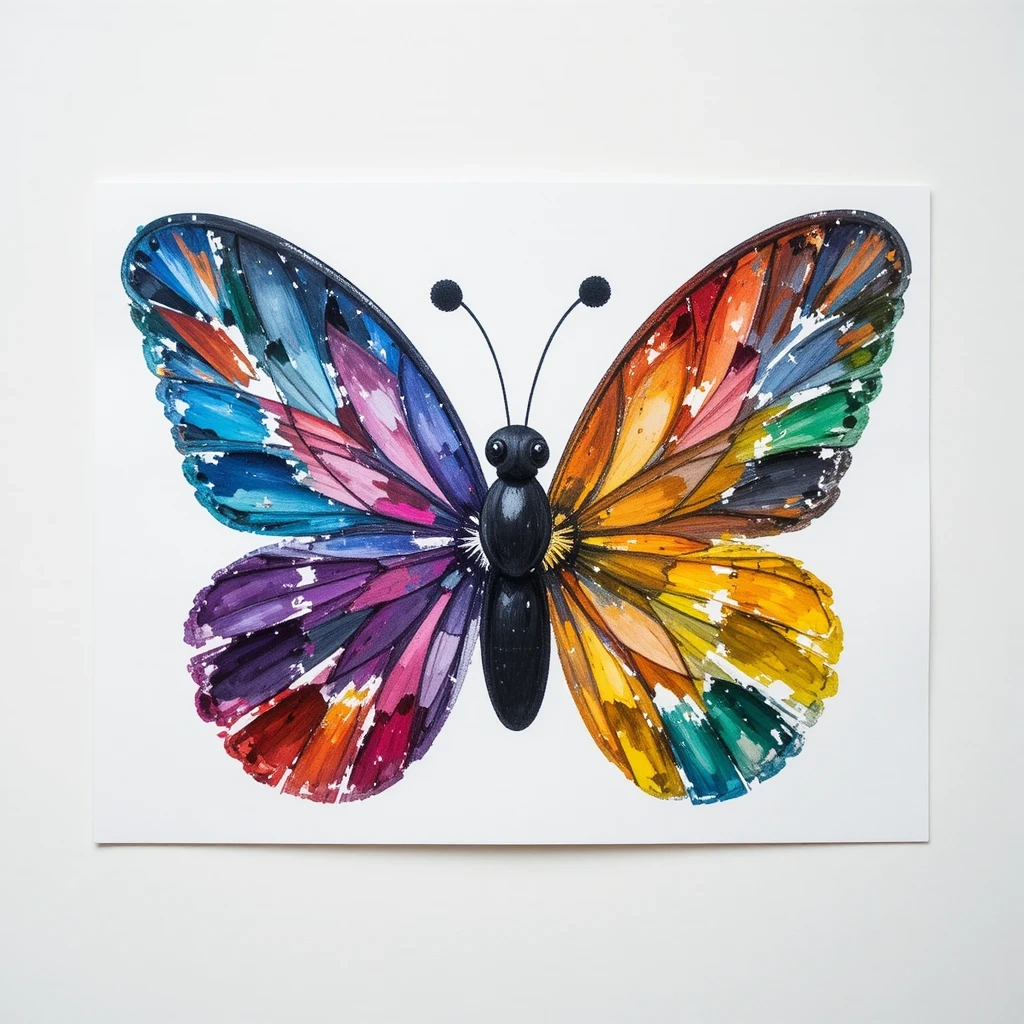
This one becomes a keepsake. Your toddler’s handprints form the butterfly wings — making it personal, precious, and surprisingly easy. Display it in a frame or use it as a card for grandparents.
Materials:
- Washable paint (2–3 colors)
- White cardstock or thick paper
- Black marker
- Googly eyes
- Glue
Steps:
- Paint the child’s palm and fingers in bright colors.
- Press one hand on each side of the paper, thumb-side facing inward — these are the wings.
- Let dry completely.
- Draw a butterfly body down the center with a black marker.
- Add a smiley face and glue on googly eyes.
- Draw antennae at the top.
- Time: 10–15 minutes
- Difficulty: Easy
💡 Tip: Use multiple colors on the same hand for a rainbow wing effect.
4. Toilet Roll Bumblebee
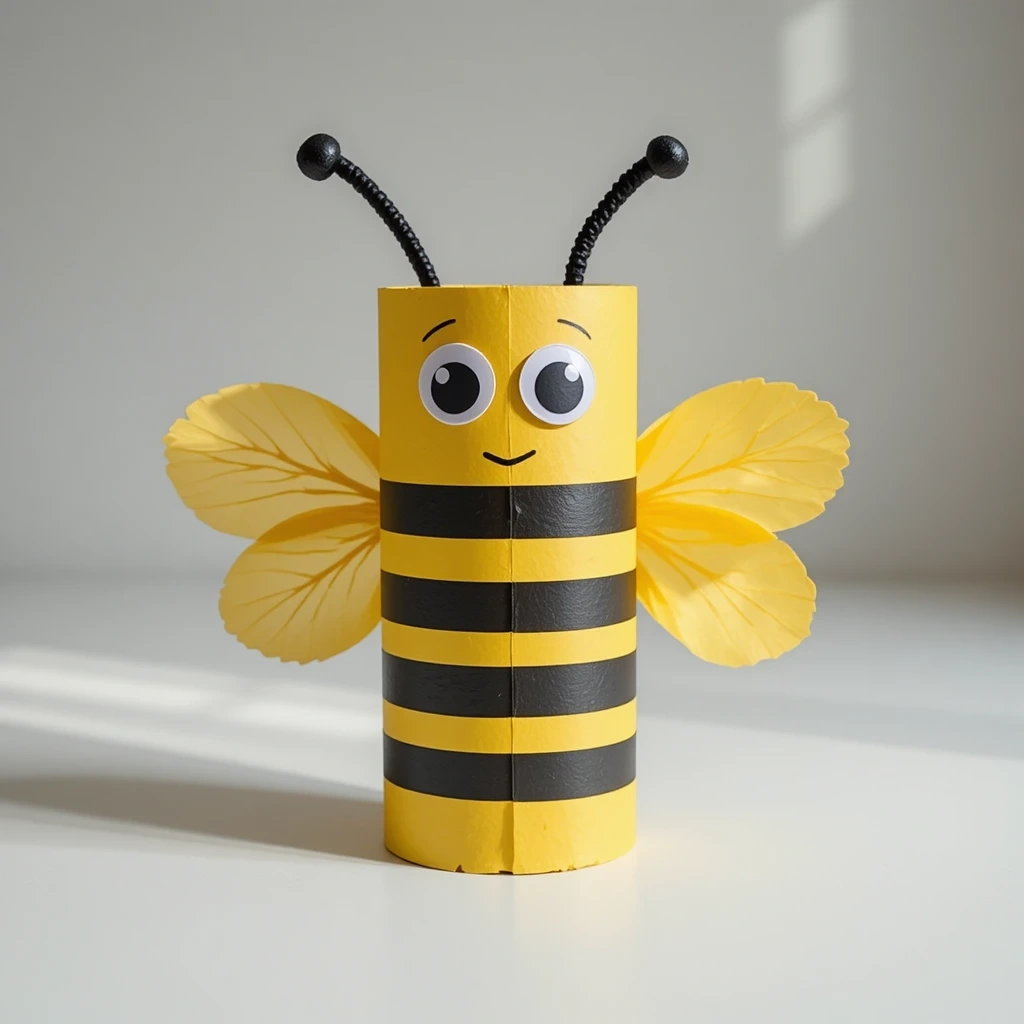
Turn an empty toilet paper roll into a buzzing bumblebee in under 20 minutes. This 3D craft looks impressive but is beginner-friendly. It also makes a great little decoration or pretend-play prop for toddlers.
Materials:
- 1 toilet paper roll
- Yellow and black paint or tape
- White tissue paper or wax paper (wings)
- Googly eyes (x2)
- Glue
- Scissors (adult use)
Steps:
- Paint the roll yellow and let dry.
- Add black stripes using paint or black electrical tape.
- Cut two oval wing shapes from tissue paper or wax paper.
- Glue the wings to the back of the roll.
- Glue googly eyes to the front.
- Add a smile with a black marker.
- Time: 15–20 minutes
- Difficulty: Easy
💡 Tip: Use black washi tape for the stripes — no painting required and toddlers can apply it themselves.
5. Bug Crafts for Toddlers: Coffee Filter Dragonfly
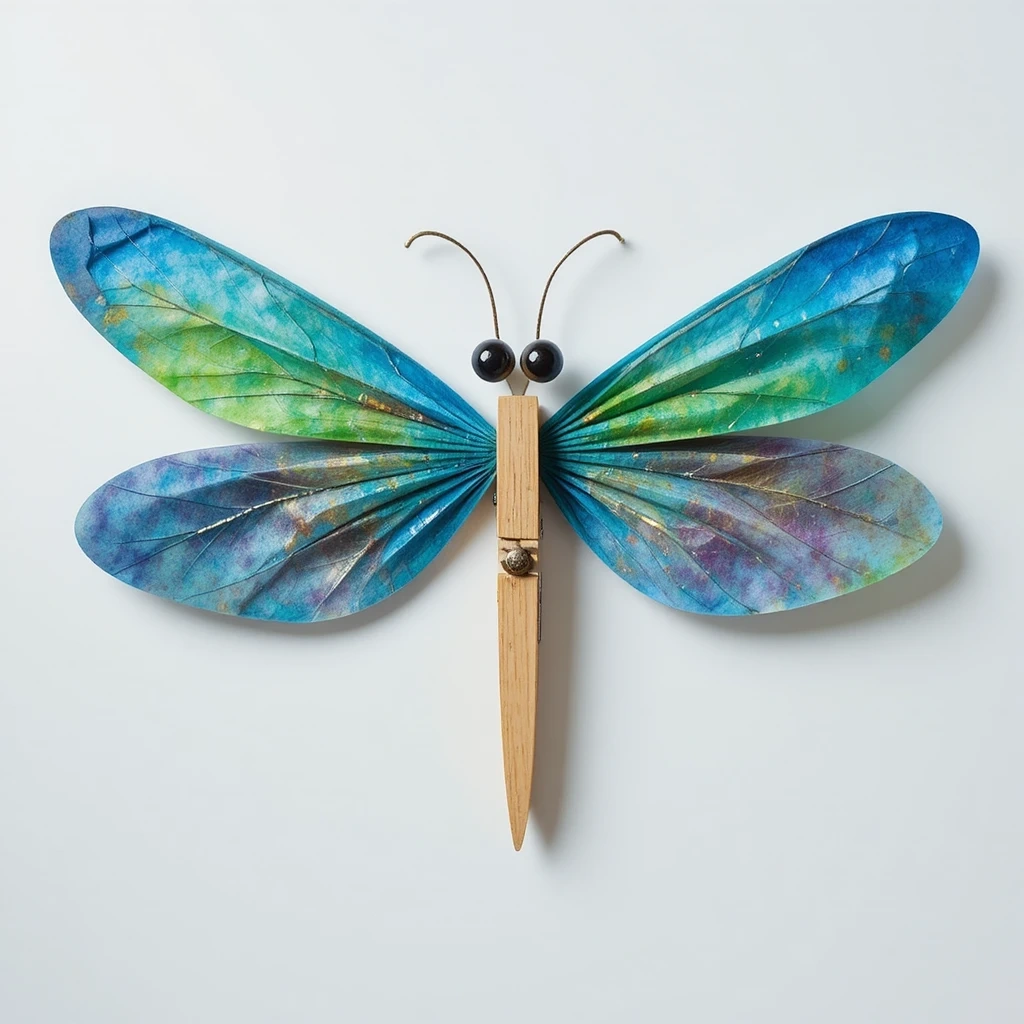
Coffee filters make magical, soft wings when colored with washable markers and spritzed with water. This dragonfly project introduces simple color mixing and feels a bit like magic to toddlers — watching the colors bleed and blend is half the fun.
Materials:
- 2 round coffee filters
- Washable markers (various colors)
- Spray bottle with water
- 1 wooden clothespin
- Googly eyes (x2)
- Glue
Steps:
- Color the coffee filters with bright marker designs.
- Lightly spritz with water and watch the colors blend.
- Allow to dry completely.
- Gather each coffee filter in the center to form wings.
- Clip the clothespin over the center of both filters to hold them.
- Glue googly eyes onto the top of the clothespin.
- Time: 20–30 minutes (including drying)
- Difficulty: Easy
💡 Tip: Blue and green markers create a beautiful, realistic dragonfly wing effect.
6. Pom Pom Spider

This fluffy little spider is more cute than creepy — perfect for toddlers who love fuzzy textures. It comes together in minutes and requires zero painting. Great for a Halloween theme or an “insects and arachnids” unit.
Materials:
- 1 large black pom pom
- 8 black pipe cleaners
- Googly eyes (x2)
- Glue gun (adult use only)
- Red or white cardstock (optional base)
Steps:
- Fold each pipe cleaner in half to create 8 bent legs.
- Use the glue gun to attach all 8 legs around the center of the pom pom (adult step).
- Bend the ends of each leg slightly to create feet.
- Glue googly eyes to the front of the pom pom.
- Optional: glue spider to a cardstock web background.
- Time: 10–15 minutes
- Difficulty: Easy
💡 Tip: Let the toddler bend the pipe cleaner legs into fun shapes — each spider will have its own character!
7. Fingerprint Ladybug Garden Card
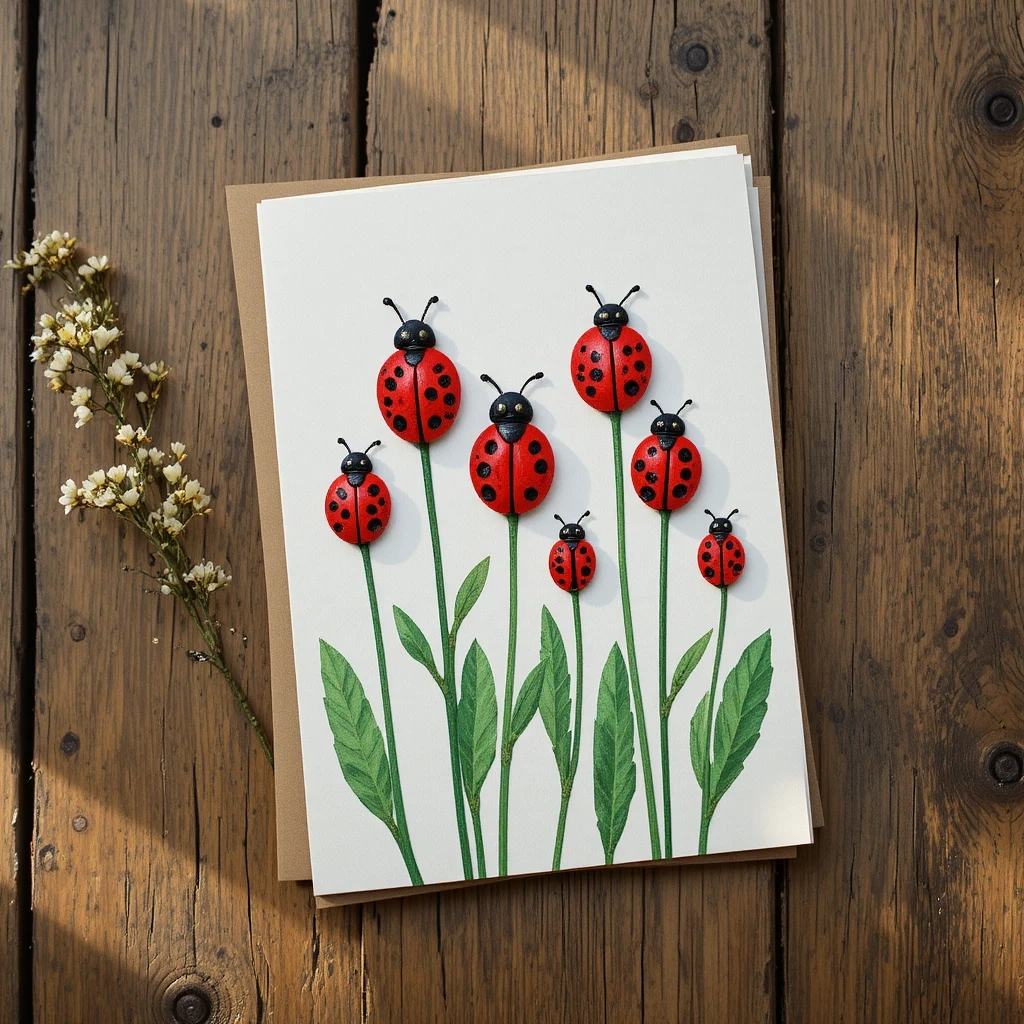
Combine art and literacy with this sweet fingerprint bug card. Toddlers use their fingertips to stamp little ladybugs onto green stems — the result looks like a garden scene. It doubles as a gift card for Mother’s Day or a birthday.
Materials:
- White or cream cardstock
- Red and black washable ink pads or paint
- Green marker or paint
- Fine-tip black marker (adult use)
Steps:
- Draw simple flower stems and leaves in green across the card.
- Dip the toddler’s finger in red ink and stamp bug bodies on the stems.
- Allow to dry.
- Add black spots and a head dot with the fine-tip marker.
- Draw tiny antennae lines from each bug.
- Time: 10–15 minutes
- Difficulty: Easy
💡 Tip: Make a whole family of cards — grandparents absolutely love fingerprint keepsakes.
8. Bug Crafts for Toddlers: Rocks Painted as Bugs
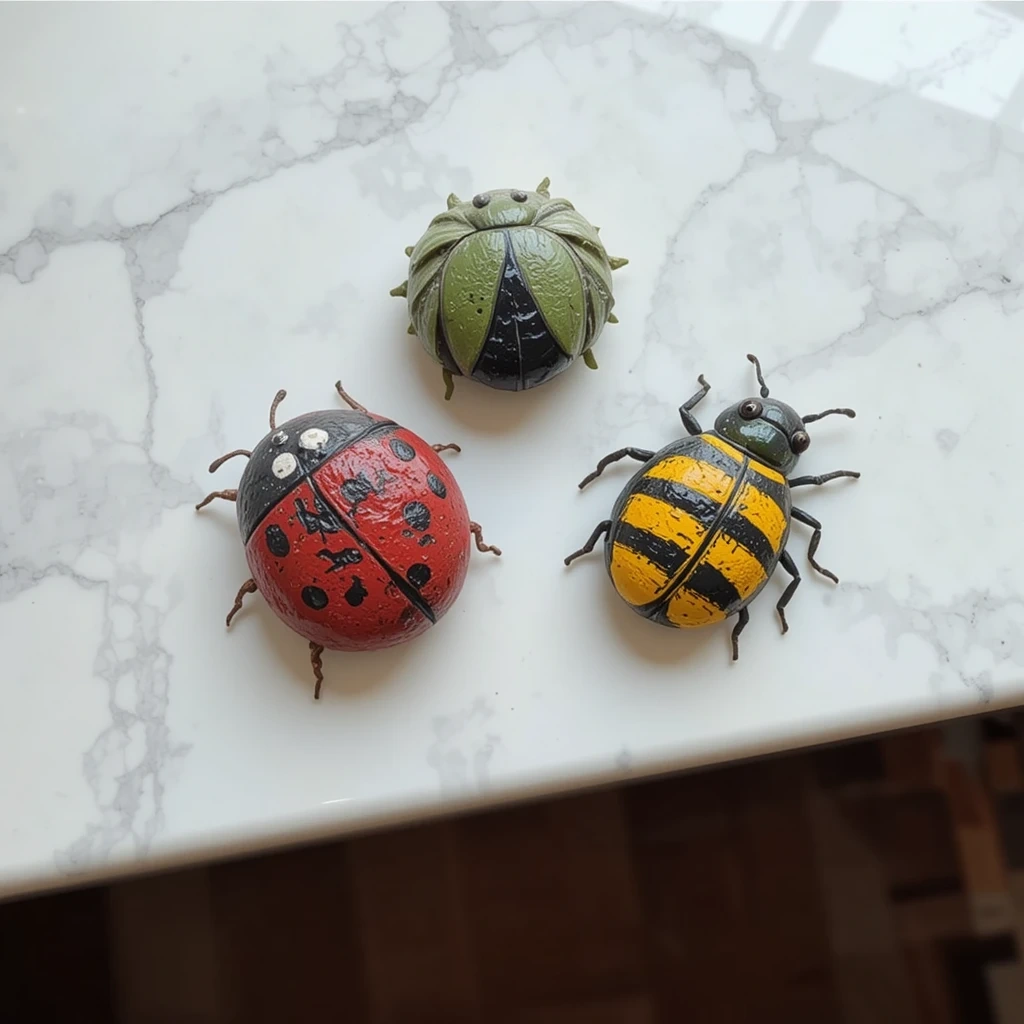
Painted rocks are endlessly satisfying to make — and they last forever. In this version of bug crafts for toddlers, smooth stones become beetles, ladybugs, or caterpillars with just a few strokes of paint. These make great garden decorations or tabletop displays.
Materials:
- Smooth, flat rocks (palm-sized)
- Acrylic or tempera paint
- Paintbrushes (various sizes)
- Black marker
- Mod Podge or clear sealant (optional, adult step)
Steps:
- Wash and dry rocks thoroughly.
- Paint the rock a base color (red, green, blue, etc.) and let dry.
- Add bug details: spots, stripes, wings, and eyes with paint.
- Once dry, use a black marker to outline details and add antennae.
- Optional: seal with Mod Podge to preserve the design.
- Time: 25–35 minutes
- Difficulty: Easy–Medium
💡 Tip: Collect rocks on a nature walk first — it adds an extra adventure layer to the craft!
9. Paper Bag Caterpillar Puppet
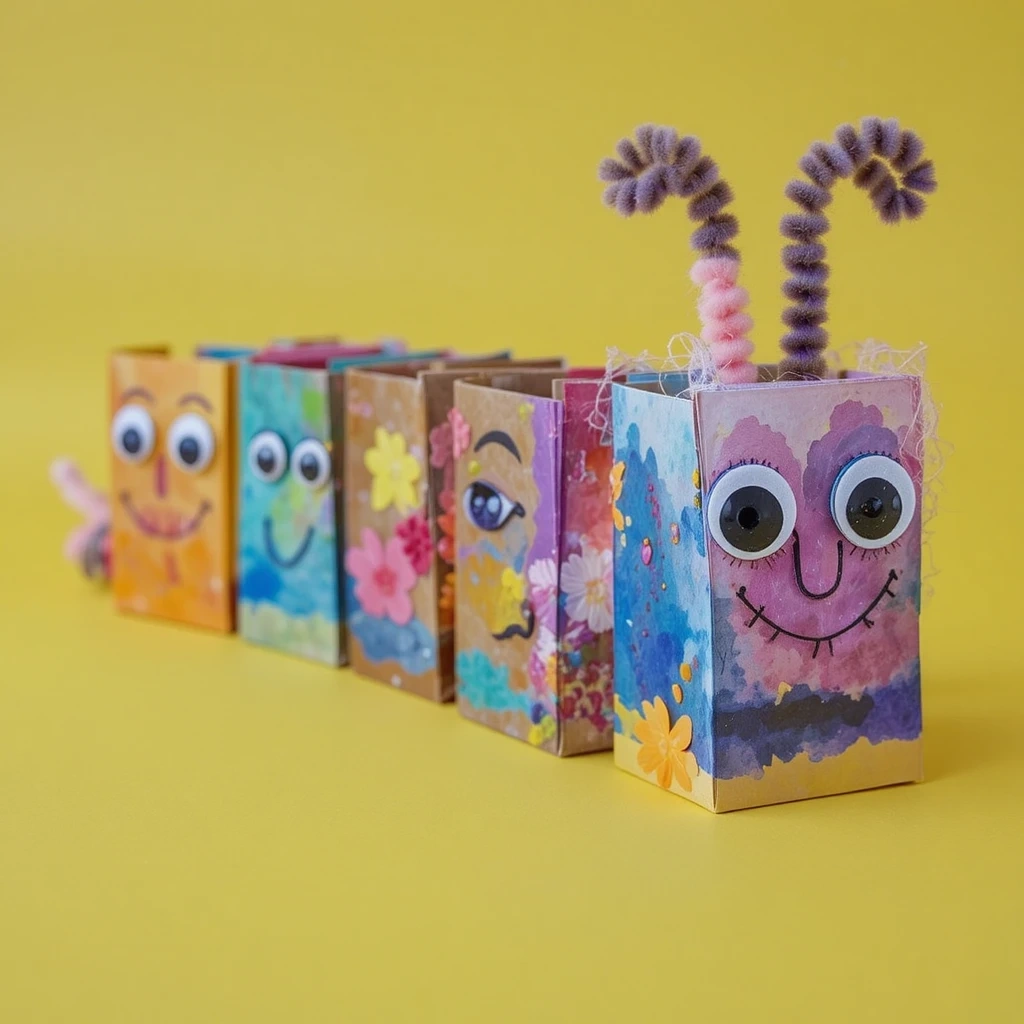
This wiggly caterpillar puppet is made from small paper lunch bags and doubles as a storytelling prop. Toddlers can use it for imaginative play long after the crafting is done. It’s colorful, silly, and great for fine motor skills.
Materials:
- 4–5 small paper lunch bags
- Colorful paint or markers
- Googly eyes (x2)
- Tape or stapler (adult use)
- Pipe cleaner (x1)
Steps:
- Decorate each paper bag with colorful polka dots or stripes.
- Stuff the bags loosely with crumpled newspaper for body shape.
- Tape or staple the bags together in a row.
- Glue googly eyes on the first bag (the head).
- Poke a pipe cleaner through the head for antennae and curl the tips.
- Time: 20–30 minutes
- Difficulty: Easy–Medium
💡 Tip: Leave the last bag open as a hand puppet so toddlers can make the caterpillar “talk.”
10. Cupcake Liner Bee
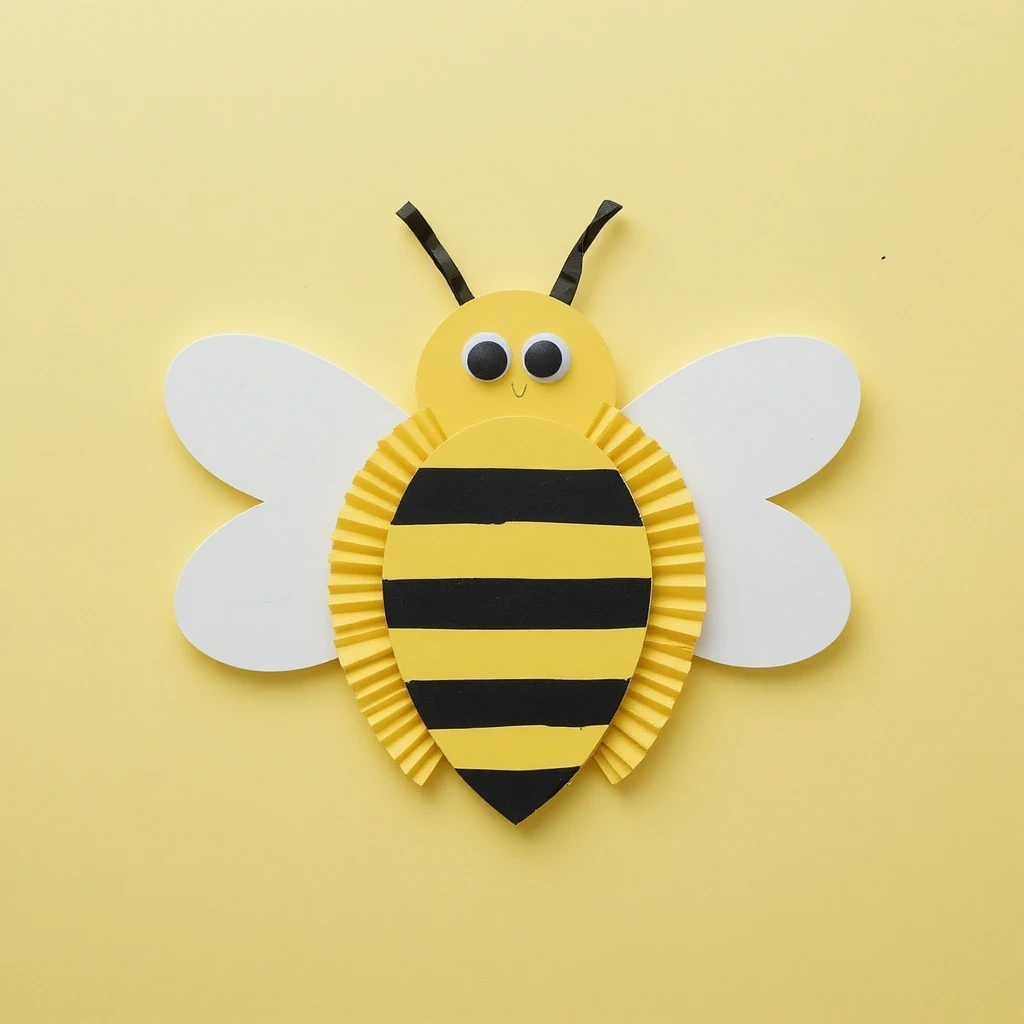
Cupcake liners have the perfect circular shape for bee wings — and toddlers love peeling and placing them. This simple bee uses minimal materials and comes together in just a few steps. It’s a great last-minute craft for a bug-themed party.
Materials:
- 2 white or silver cupcake liners (flatten them)
- Yellow and black construction paper
- Googly eyes (x2)
- Glue stick
- Black marker
Steps:
- Cut a rounded oval body shape from yellow construction paper.
- Add black stripes with a marker or cut thin black paper strips and glue on.
- Flatten two cupcake liners and glue them to the back as wings.
- Glue on googly eyes.
- Draw a small smile and antennae.
- Time: 10–15 minutes
- Difficulty: Easy
💡 Tip: Use metallic or iridescent cupcake liners for extra sparkly wings!
Common Mistakes to Avoid
1. Using paint that’s too thin Watery paint bleeds and takes much longer to dry. Use thicker tempera or acrylic paint to get clean, vibrant results — especially on paper plates and cardstock.
2. Rushing the drying time Adding the next step before paint is fully dry leads to smearing and frustrated toddlers. Always wait until each layer is completely dry before moving on.
3. Skipping prep Setting up materials before the toddler sits down prevents mid-craft chaos. Pre-cut shapes, pre-sort supplies, and have paper towels ready before you begin.
Tips for Best Results
- Work on a covered surface — use a plastic tablecloth or newspaper to protect your table.
- Keep wipes nearby — toddlers will touch everything, including their faces.
- Embrace imperfection — wiggly lines and misplaced eyes are part of the charm.
- Let toddlers lead color choices — it builds confidence and ownership over the project.
- Do the glue gun steps yourself — always handle hot glue away from little hands.
- Display the finished crafts — showing off their work builds pride and encourages creativity.
Frequently Asked Questions
What age are these bug crafts suitable for? Most of these projects are designed for toddlers ages 2–4. Some steps (like using a glue gun or fine marker details) should be done by an adult. The painting, stamping, and sticking steps are perfect for little hands.
What kind of paint is safest for toddlers? Always use washable, non-toxic tempera paint for toddlers. It’s easy to clean off skin and clothing, and it dries quickly on most surfaces.
How do I keep toddlers engaged during crafts? Keep sessions short (15–20 minutes max), have all materials ready in advance, and let them make choices — like picking colors or placing googly eyes. Toddlers stay engaged when they feel in control.
Can these crafts be done at preschool or daycare? Absolutely! All 10 of these projects are classroom-friendly. They use inexpensive, widely available supplies and can be adapted for groups easily.
How do I store or display finished bug crafts? Hang lightweight crafts with a string and tape, or display 3D crafts (like the toilet roll bee) on a shelf. For keepsakes like the handprint butterfly, frame them or add a date on the back.
What if my toddler doesn’t want to follow the steps? That’s completely fine! Let them explore freely. The goal is sensory play and creativity — not a perfect end result. The process matters more than the product at this age.
Conclusion
There’s something truly special about watching a toddler create their own little bug world from paper plates, paint, and googly eyes. These 10 projects are designed to be low-stress, high-fun, and packed with learning benefits — from fine motor skills to color mixing to imaginative play.
Pick one to try today. You don’t need a special occasion — a Tuesday afternoon is the perfect time to make a ladybug.