10 Fun Craft Activities for Kids for Creative Learning Time
Getting kids away from screens doesn’t have to be a battle. A few simple supplies and a little creativity go a long way.
These 10 craft activities for kids are beginner-friendly, budget-conscious, and genuinely enjoyable — for both children and the grown-ups helping them.
1. Paper Plate Animals
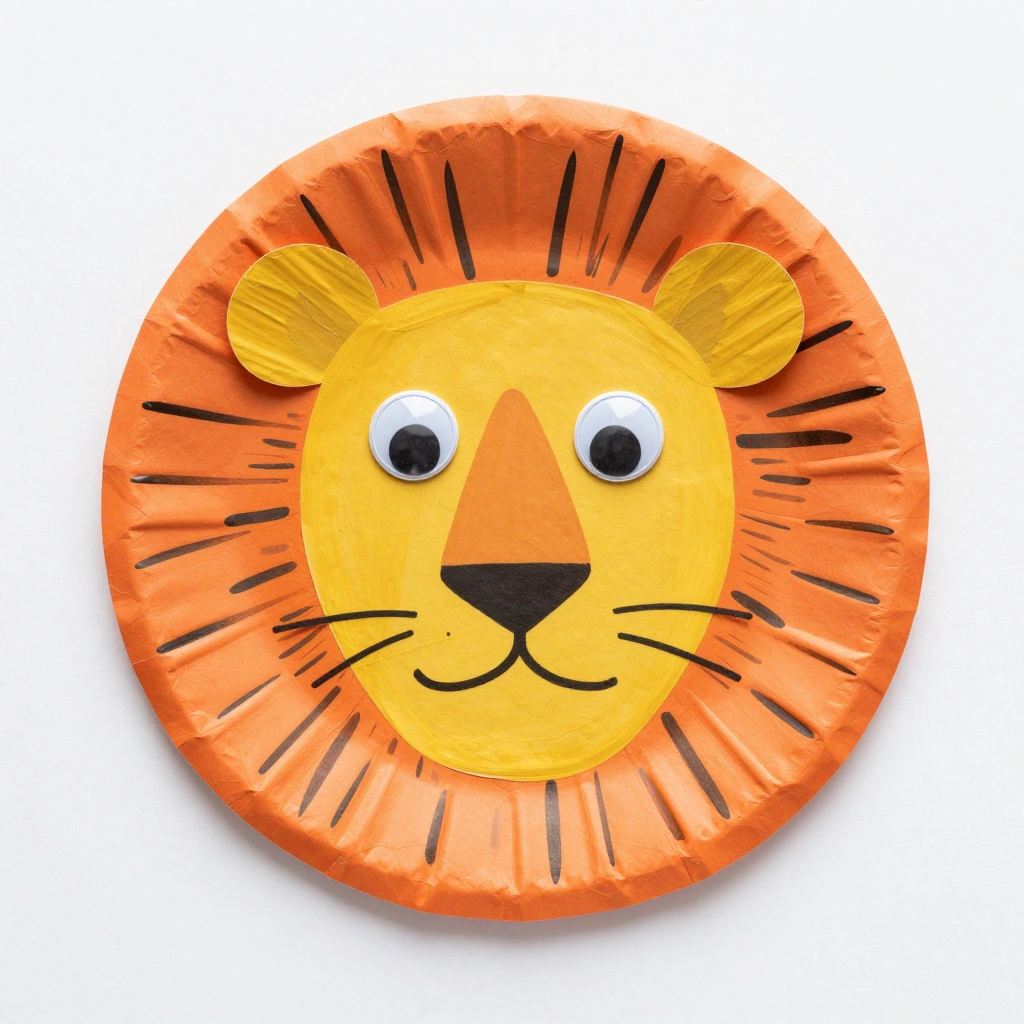
Turn a humble paper plate into a roaring lion, a silly frog, or a friendly owl. This is one of those projects that looks impressive but takes almost no time or skill.
Materials:
- Paper plates
- Tempera or acrylic paint
- Googly eyes
- Construction paper
- Glue stick or craft glue
- Scissors
Steps:
- Paint the paper plate in your chosen animal’s base color.
- Let it dry completely (about 10 minutes).
- Cut ears, beaks, or horns from construction paper and glue them on.
- Stick on googly eyes and draw details with a marker.
- Add any finishing touches — stripes, spots, feathers.
- Time: 20–30 minutes
- Difficulty: Easy
💡 Tip: Use a blow dryer on low to speed up drying time between steps.
2. Homemade Slime

Slime is practically a childhood rite of passage. It’s stretchy, satisfying, and endlessly customizable with glitter, beads, or food coloring.
Materials:
- 1 cup white PVA school glue
- 1 tsp baking soda
- 2–3 tbsp contact lens solution
- Food coloring (optional)
- Glitter or foam beads (optional)
Steps:
- Pour glue into a mixing bowl.
- Add food coloring and stir well.
- Mix in the baking soda until combined.
- Add contact lens solution one tablespoon at a time, stirring constantly.
- Knead the slime with your hands until it’s smooth and no longer sticky.
- Time: 10–15 minutes
- Difficulty: Easy
💡 Tip: If the slime is too sticky, add a few more drops of contact lens solution. If it’s too stiff, work in a tiny drop of lotion.
3. Craft Activities for Kids: Pressed Flower Cards
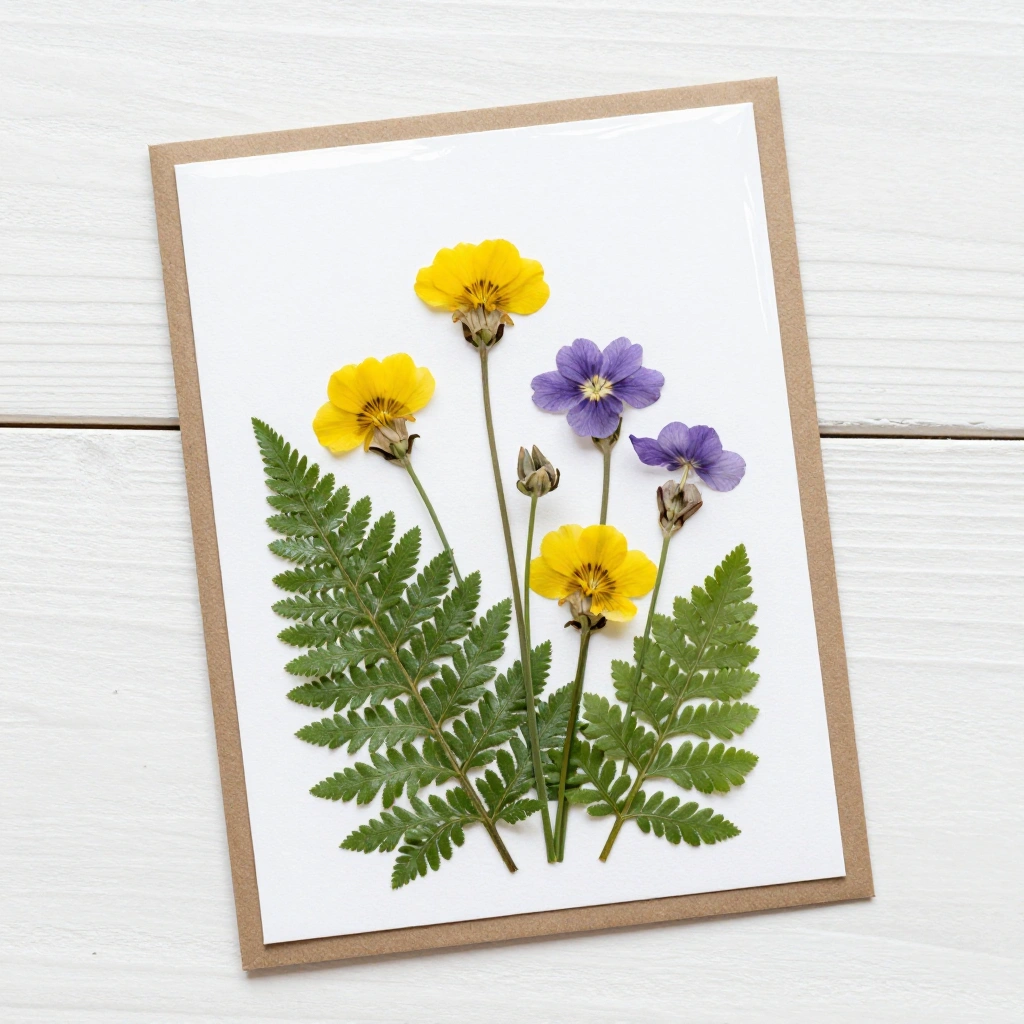
This nature-inspired project doubles as a gorgeous handmade gift. Kids collect flowers, press them, and turn them into one-of-a-kind greeting cards.
Materials:
- Fresh flowers and leaves
- Heavy books or a flower press
- Blank cardstock or folded cards
- Mod Podge or clear-drying glue
- Small paintbrush
Steps:
- Collect small, flat flowers and leaves from the garden.
- Place them between two sheets of parchment inside a heavy book.
- Leave for 5–7 days until fully dried and pressed.
- Arrange the pressed flowers on a blank card.
- Seal everything in place with a thin coat of Mod Podge using the paintbrush.
- Let dry completely before gifting.
- Time: 15 minutes (plus 5–7 days pressing time)
- Difficulty: Easy
💡 Tip: Pansies, daisies, and ferns press particularly well and hold their color beautifully.
4. Toilet Roll Binoculars
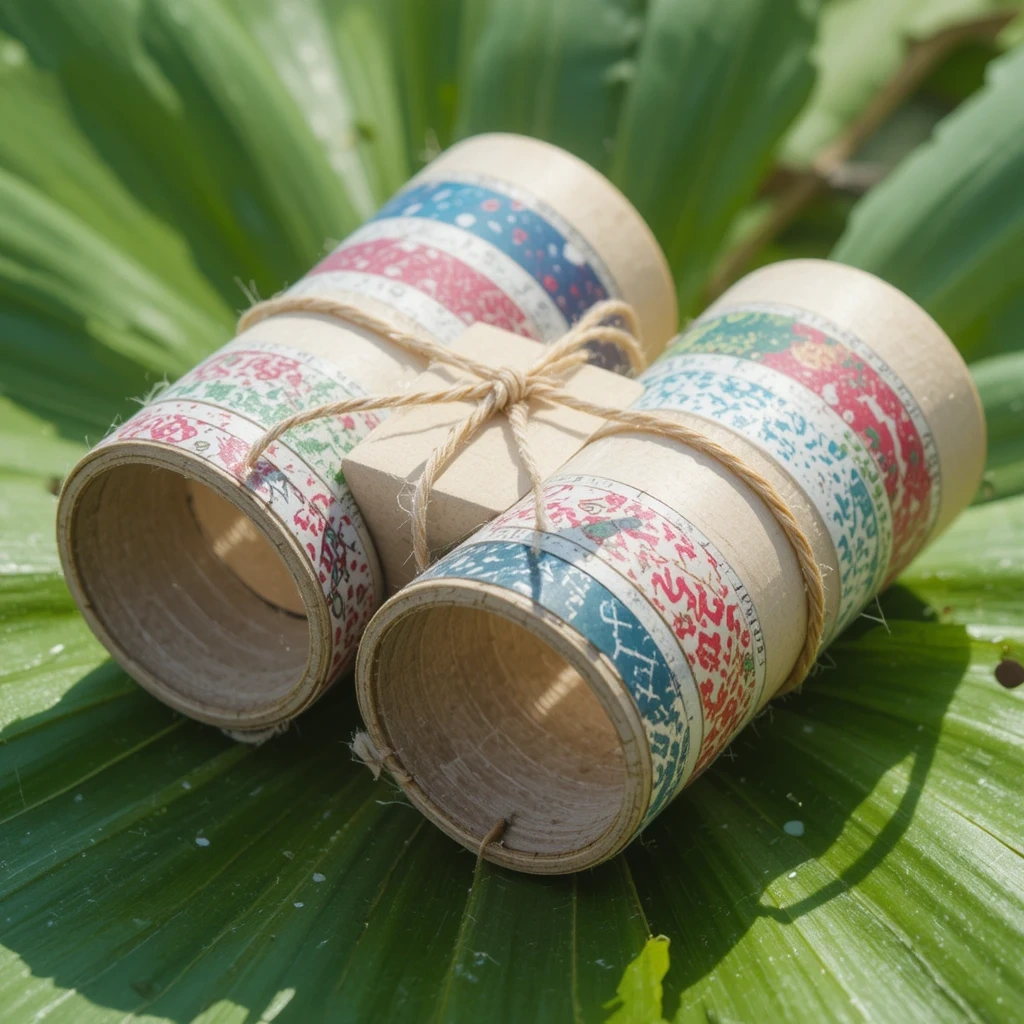
Repurpose cardboard tubes into explorer binoculars. Perfect for imaginative outdoor play right after crafting.
Materials:
- 2 toilet paper rolls
- Tape or glue
- Paint or washi tape
- Hole punch
- String or yarn
Steps:
- Decorate both toilet paper rolls with paint or washi tape.
- Once dry, tape or glue the two rolls side by side.
- Punch a hole on each outer side.
- Thread a piece of yarn through both holes and tie it off to create a neck strap.
- Let dry and head outside for an adventure.
- Time: 15–20 minutes
- Difficulty: Easy
💡 Tip: Add stickers or foam shapes for extra personalization.
5. Salt Dough Ornaments
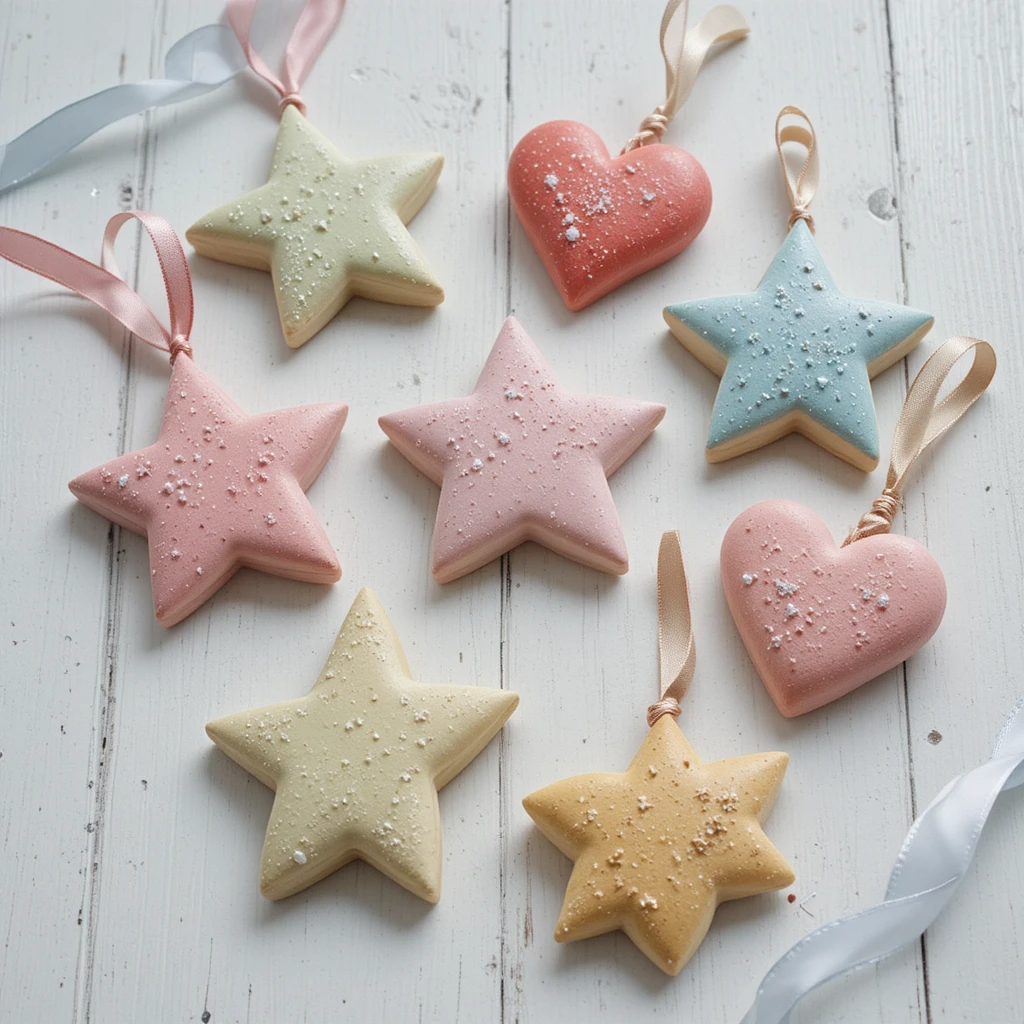
Salt dough is one of the most versatile craft materials around. Kids can stamp, cut, and paint their creations to keep or give as gifts.
Materials:
- 1 cup all-purpose flour
- ½ cup salt
- ½ cup warm water
- Cookie cutters
- Straw (for making holes)
- Acrylic paint and sealer
Steps:
- Mix flour and salt together in a bowl.
- Gradually add warm water and knead until a smooth dough forms.
- Roll out to about ½ cm thickness on a floured surface.
- Cut shapes with cookie cutters and use a straw to punch a hole at the top.
- Bake at 120°C (250°F) for 2–3 hours until fully hardened.
- Once cool, paint and seal with an acrylic varnish.
- Time: 30 minutes active + baking time
- Difficulty: Medium
💡 Tip: Seal with two coats of Mod Podge to make them last for years.
6. 10 Craft Activities for Kids: Watercolor Resist Art
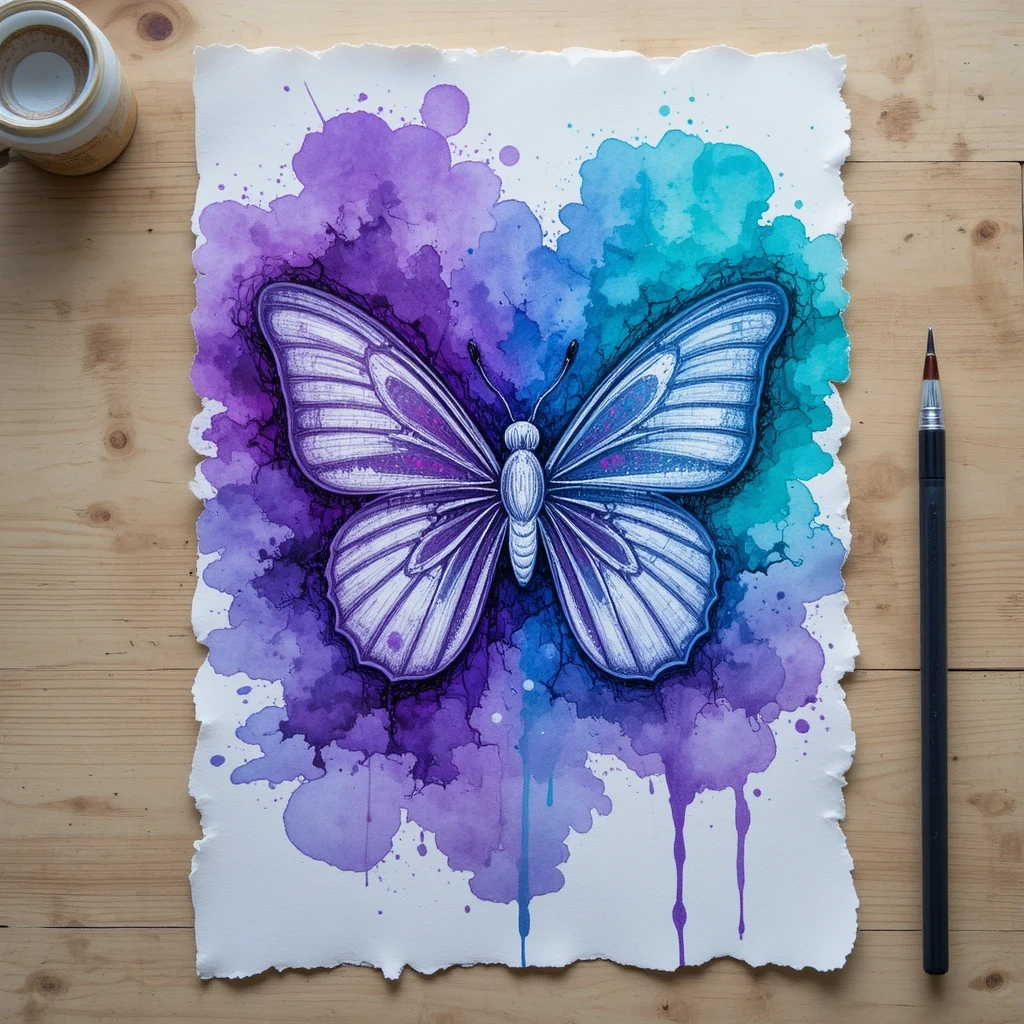
This magic-reveal technique never gets old. Kids draw with white crayon, paint over it with watercolors, and watch their hidden design appear like magic.
Materials:
- White crayons
- White cardstock or watercolor paper
- Watercolor paints
- Paintbrushes
- Water cup
Steps:
- Use a white crayon to draw a picture, pattern, or message on white paper.
- Mix watercolor paints to desired shades.
- Brush watercolor paint across the paper in wide strokes.
- Watch the hidden crayon design appear as if by magic.
- Let dry flat to prevent warping.
- Time: 15–20 minutes
- Difficulty: Easy
💡 Tip: Press firmly with the white crayon for a stronger resist effect.
7. Yarn-Wrapped Shapes
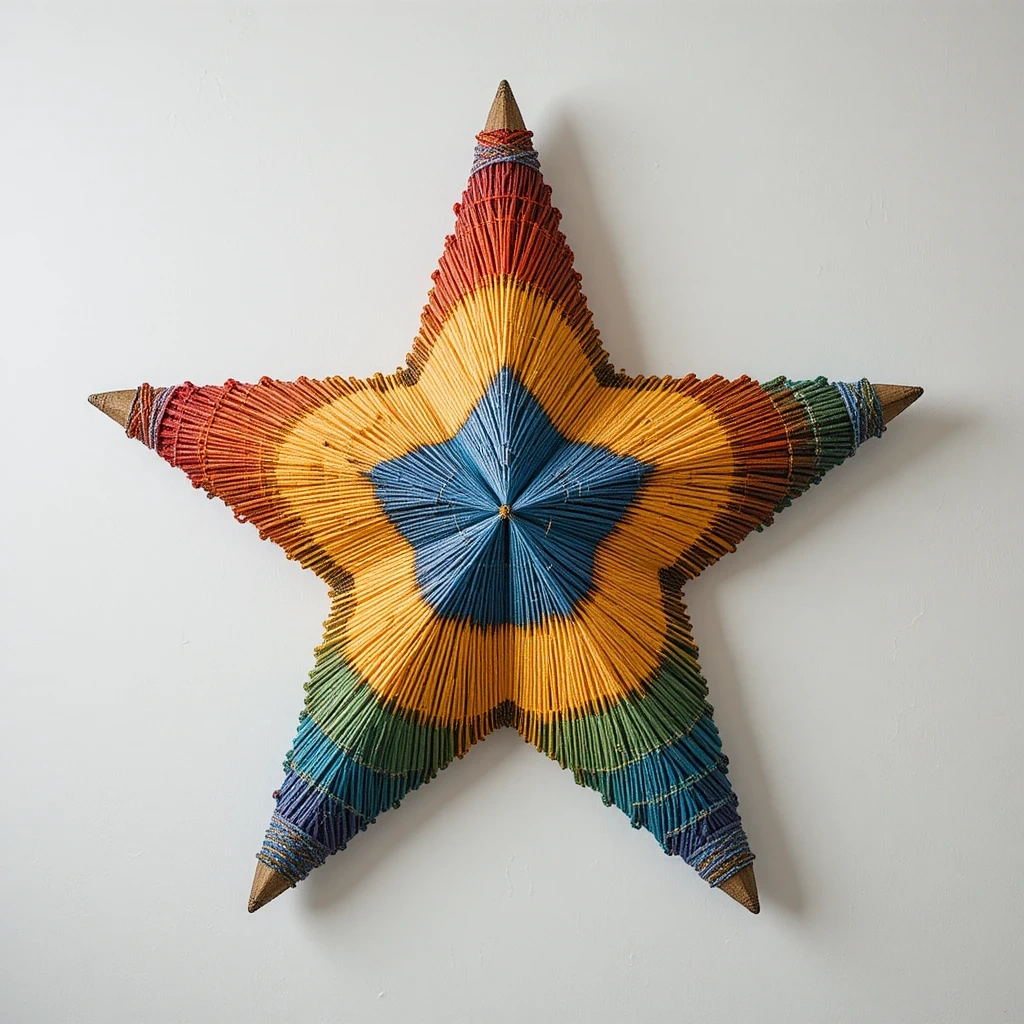
This tactile craft builds fine motor skills while producing bold, colorful wall art. All you need is cardboard and yarn.
Materials:
- Thick cardboard
- Scissors
- Assorted yarn colors
- Craft glue or tape
Steps:
- Cut a large shape from cardboard — a star, heart, letter, or animal.
- Secure the yarn end to the back with tape.
- Wrap yarn tightly around the shape, covering the cardboard completely.
- Switch colors by tying yarn ends together or securing with a dab of glue.
- Tuck the final end neatly under a few strands and secure.
- Time: 20–40 minutes
- Difficulty: Easy–Medium
💡 Tip: Chunky yarn covers the cardboard faster, making it better for younger kids.
8. Egg Carton Caterpillars
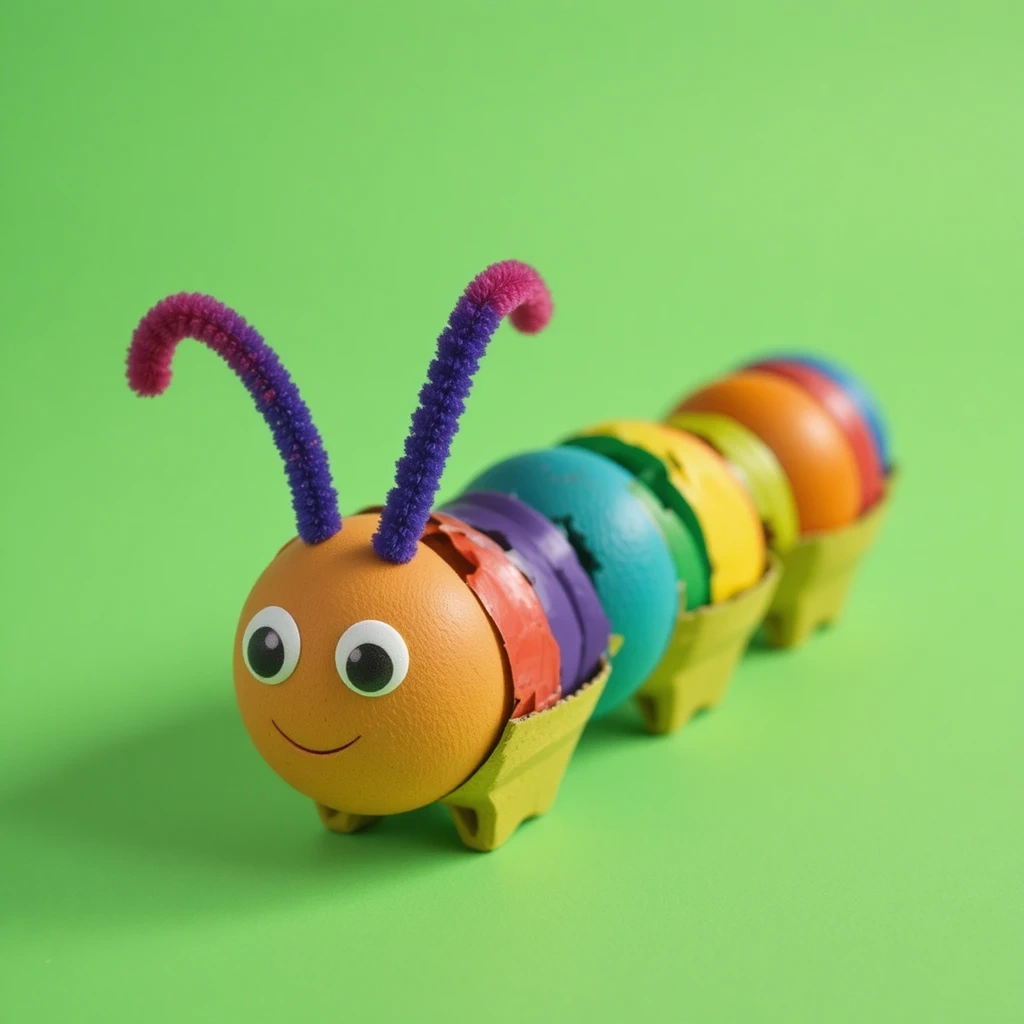
Egg cartons make surprisingly perfect caterpillar bodies. This is a great low-waste craft that uses materials you’d otherwise throw away.
Materials:
- Cardboard egg carton
- Paint
- Pipe cleaners
- Googly eyes
- Craft glue
- Scissors
Steps:
- Cut the egg carton lengthwise into a single row of cups.
- Paint each cup a different color and let dry.
- Poke two small holes in the front cup and thread a pipe cleaner through for antennae.
- Curl the antennae ends around a pencil for a wavy effect.
- Glue googly eyes onto the front cup and draw a smile with a marker.
- Time: 20–25 minutes
- Difficulty: Easy
💡 Tip: Use a foam brush for easier, more even coverage on the bumpy egg cups.
9. Bubble Wrap Printed Art
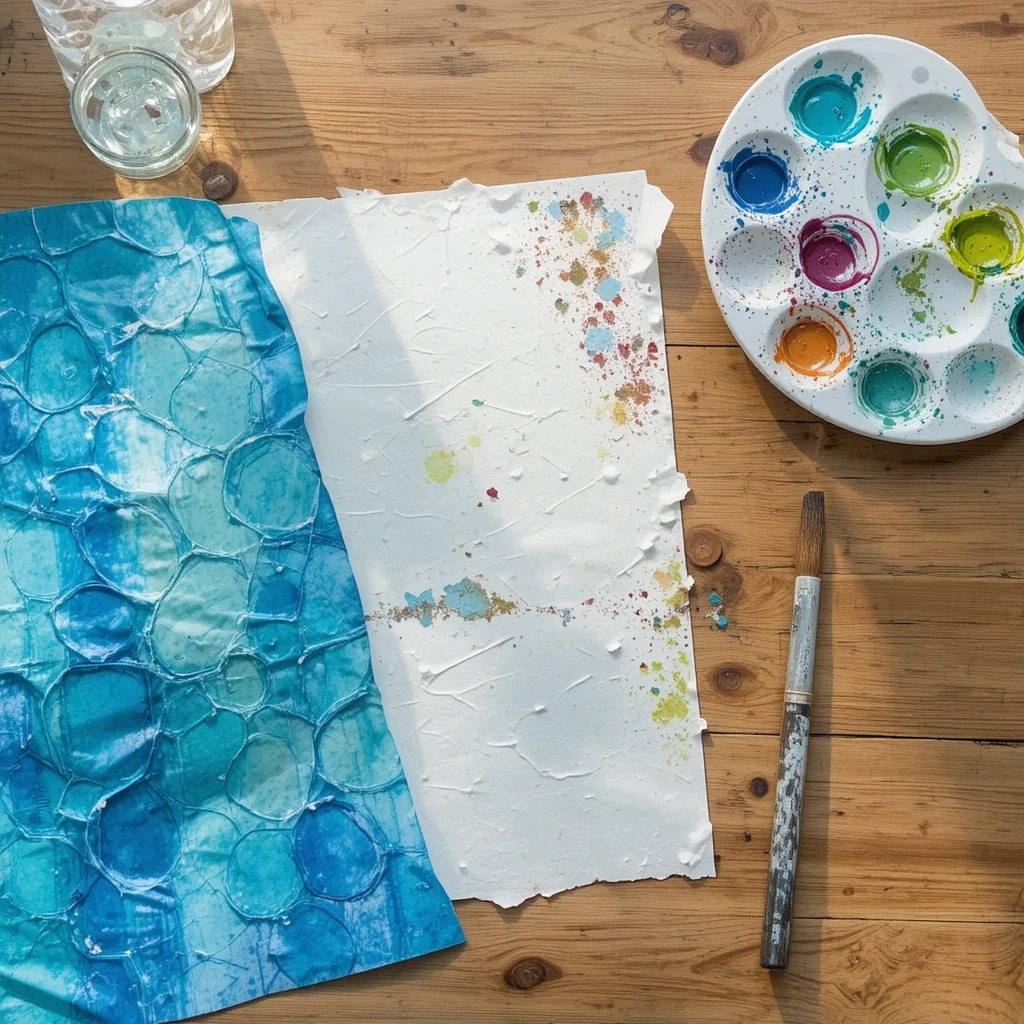
Bubble wrap isn’t just for popping — it makes the most satisfying textured print pattern. This is a great sensory craft for all ages.
Materials:
- Bubble wrap sheet
- Tempera paint
- White paper or canvas
- Paintbrush or foam roller
- Tape (to hold bubble wrap flat)
Steps:
- Lay the bubble wrap flat on a protected surface, bubble side up.
- Use a paintbrush or roller to apply paint evenly over the bubbles.
- Carefully press the paper onto the painted bubble wrap.
- Smooth gently with your hands to transfer the print.
- Peel the paper away slowly to reveal the pattern.
- Let dry flat before displaying.
- Time: 10–15 minutes
- Difficulty: Easy
💡 Tip: Try layering two colors for a more complex, beautiful effect.
10. Craft Activities for Kids: DIY Bookmarks
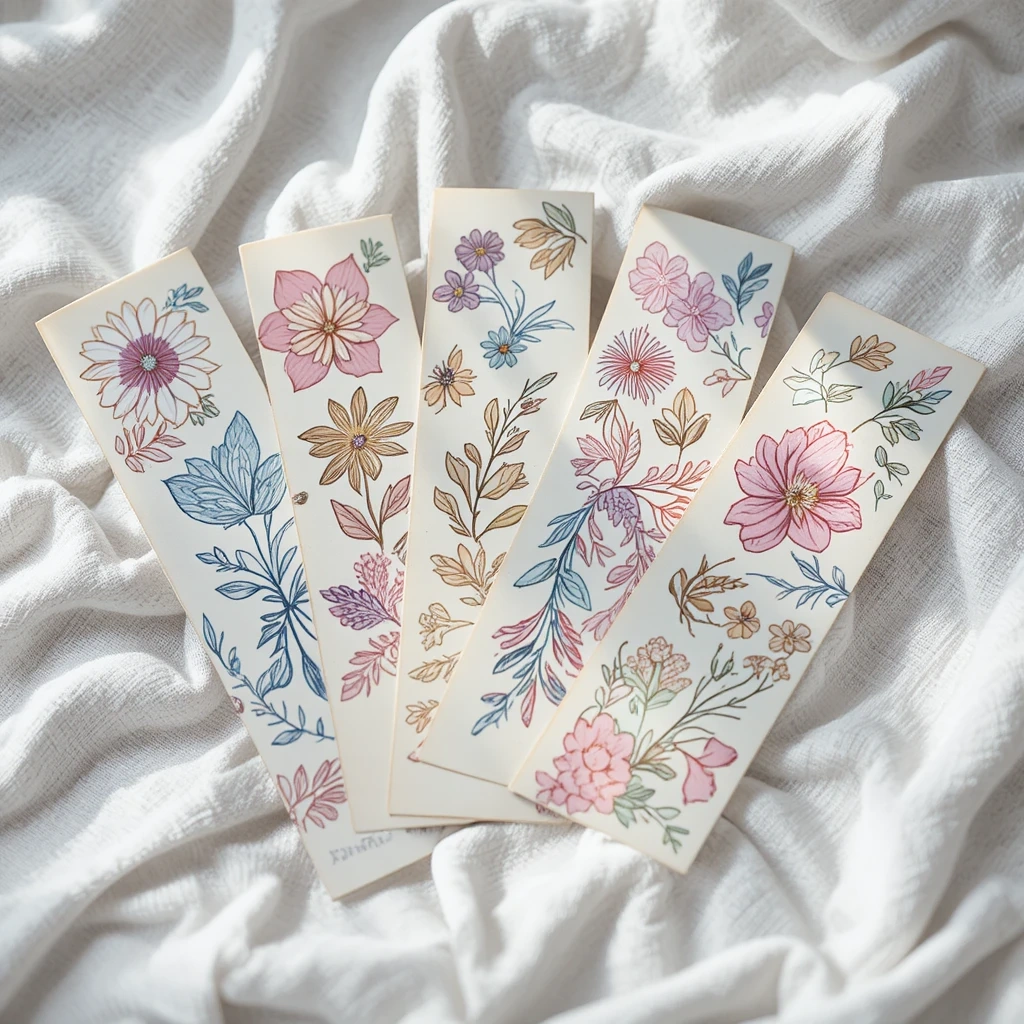
These are quick, practical, and perfect for book-loving kids. They also make wonderful gifts for teachers, grandparents, or friends.
Materials:
- Cardstock or old cereal box cardboard
- Scissors or a paper cutter
- Markers, colored pencils, or paint
- Laminator or clear tape (optional)
- Hole punch and ribbon (optional)
Steps:
- Cut cardstock into strips roughly 5 cm x 18 cm.
- Decorate with drawings, patterns, or a motivational quote.
- Add a hole punch at the top and tie a small ribbon through it.
- Optional: laminate for durability or cover both sides with clear tape.
- Press under a heavy book overnight if the bookmark curls.
- Time: 10–20 minutes
- Difficulty: Easy
💡 Tip: Waterproof markers work best if you plan to laminate the bookmark afterward.
Common Mistakes to Avoid
- Skipping the drying time. Rushing between steps — especially with paint — leads to smearing and frustration. Build rest time into your craft session.
- Using too much glue. A thin, even layer bonds better than a thick glob. Too much glue warps paper and takes forever to dry.
- Choosing projects too advanced for the age group. Match the craft to the child’s fine motor ability. Frustrated kids lose interest fast — start simple and build up.
Tips for Best Results
- Protect the surface first. Lay down newspaper, a plastic tablecloth, or a silicone mat before starting any paint or glue project.
- Prep materials in advance. Pre-cut shapes and pre-measure ingredients so kids can focus on the creative part.
- Use washable paint for younger children — it saves clothing, tables, and your sanity.
- Keep wet wipes nearby. Sticky hands transferring paint to everything is real.
- Display finished work. Hanging or showcasing completed crafts boosts confidence and motivates kids to make more.
- Embrace the mess. The process matters more than perfection. Let kids experiment freely.
FAQs
Q: What age are these crafts suitable for? Most of these projects work well for children aged 3–10. Simpler ones like paper plate animals and binoculars suit toddlers with adult supervision, while pressed flowers and salt dough are better for ages 6 and up.
Q: How do I keep kids engaged throughout a craft project? Break the project into small, exciting steps. Let kids make choices — what color, which animal, what pattern — so they feel ownership over the final result.
Q: What basic supplies should I always have at home? Stock your craft drawer with: glue sticks, washable paint, construction paper, googly eyes, scissors, pipe cleaners, and cardboard. These materials cover the majority of kids’ craft projects.
Q: Are these crafts affordable? Yes — most use everyday household items or very low-cost supplies. Many ideas here rely on recycled materials like egg cartons, toilet rolls, and cardboard.
Q: How do I store finished crafts neatly? Flat projects (drawings, cards, bookmarks) slide into a portfolio folder. 3D projects can be displayed on a shelf or kept in a labelled shoebox sorted by child and date.
Q: Can kids do these crafts independently? Older kids (7+) can handle most of these solo. Younger ones need help with cutting, hot surfaces (like baking), and steps requiring precise measuring.
Conclusion
Craft Activities gives kids something screens simply can’t: the pride of making something real with their own hands. Whether you have 10 minutes or a whole rainy afternoon, there’s a project on this list that fits.
Pick one, gather your supplies, and let the creativity flow. The mess washes off — but the memories stick around.