12 Inspiring Fall Embroidery Designs Crafts for Autumn Lovers
Fall is the perfect season to pick up a needle and thread. The warm colors, cozy textures, and nature-inspired motifs make embroidery feel right at home this time of year. Whether you are a complete beginner or a seasoned stitcher, these 12 fall embroidery designs Crafts will inspire you to create something beautiful.
From pumpkins to woodland mushrooms, each design captures the magic of the season in thread and fabric. Keep reading to find step-by-step guidance, materials lists, and helpful tips to bring every stitch to life.
12 Fall Embroidery Designs You Need to Try This Season
1. Classic Pumpkin Patch
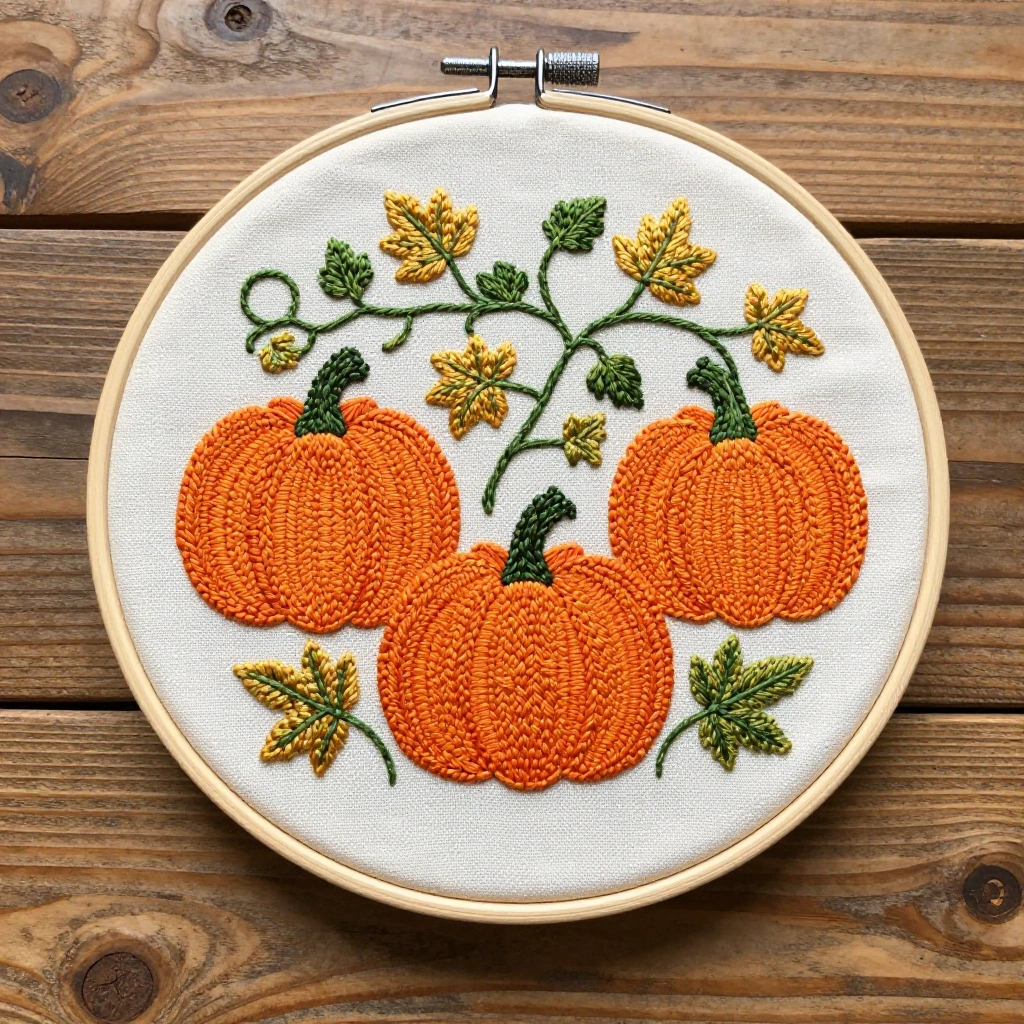
A beloved fall staple, the pumpkin patch design features a cluster of round pumpkins with curling vines and a few scattered leaves. It works beautifully on tea towels, tote bags, or hoop art. The chunky shapes are beginner-friendly and forgiving with stitching.
Materials:
- White or cream cotton fabric
- Embroidery hoop (6–8 inch)
- DMC floss: burnt orange, warm brown, forest green, golden yellow
- Embroidery needle (size 7)
- Water-soluble transfer pen
Steps:
- Transfer your pumpkin sketch onto the fabric using the transfer pen.
- Outline each pumpkin with a backstitch in burnt orange.
- Fill the pumpkin body using satin stitch, working in vertical sections.
- Stitch the stem in straight stitch using warm brown.
- Add curling vines with a stem stitch in forest green.
- Finish with a few scattered leaves in golden yellow using lazy daisy stitch.
Time: 2–3 hours Difficulty: Easy
Tip: Separate your floss into 2 strands for fine detail work and use all 6 strands for solid fills.
2. Harvest Wheat Bundle
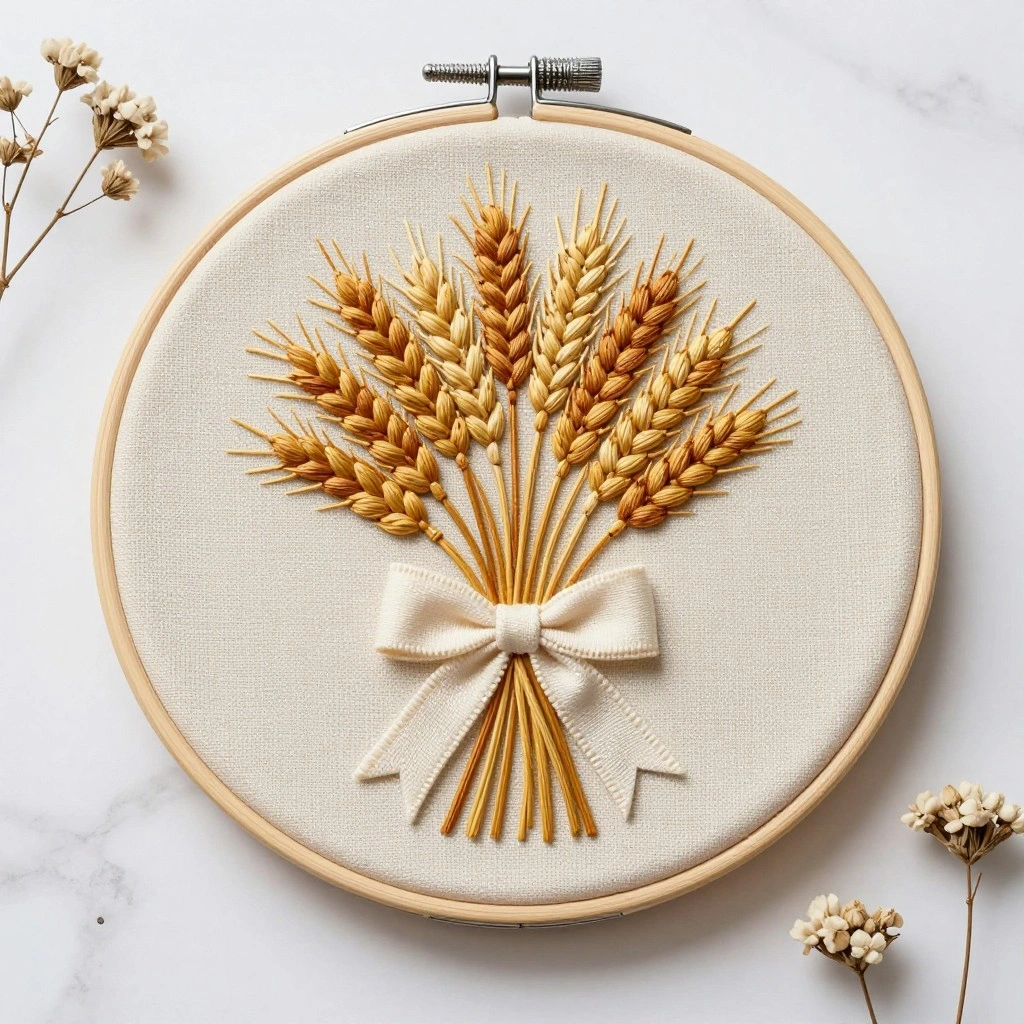
A bundle of golden wheat tied with a simple bow is both rustic and elegant. This design looks stunning as hoop art or stitched onto a linen napkin. The linear structure makes it great for practicing straight and satin stitches.
Materials:
- Natural linen fabric
- Embroidery hoop (5–6 inch)
- DMC floss: golden wheat, warm tan, cream, deep brown
- Embroidery needle
- Pencil or iron-on transfer paper
Steps:
- Sketch a vertical bundle of 8–10 wheat stalks onto the fabric.
- Stitch each stalk using a long straight stitch in warm tan.
- Add wheat heads at the top using fishbone stitch in golden wheat.
- Tie the bundle with a small bow using satin stitch in cream or soft brown.
- Add a few loose grains with tiny French knots around the bundle.
Time: 1.5–2.5 hours Difficulty: Easy
Tip: Keep your wheat stalks slightly uneven in height for a more natural, hand-gathered look.
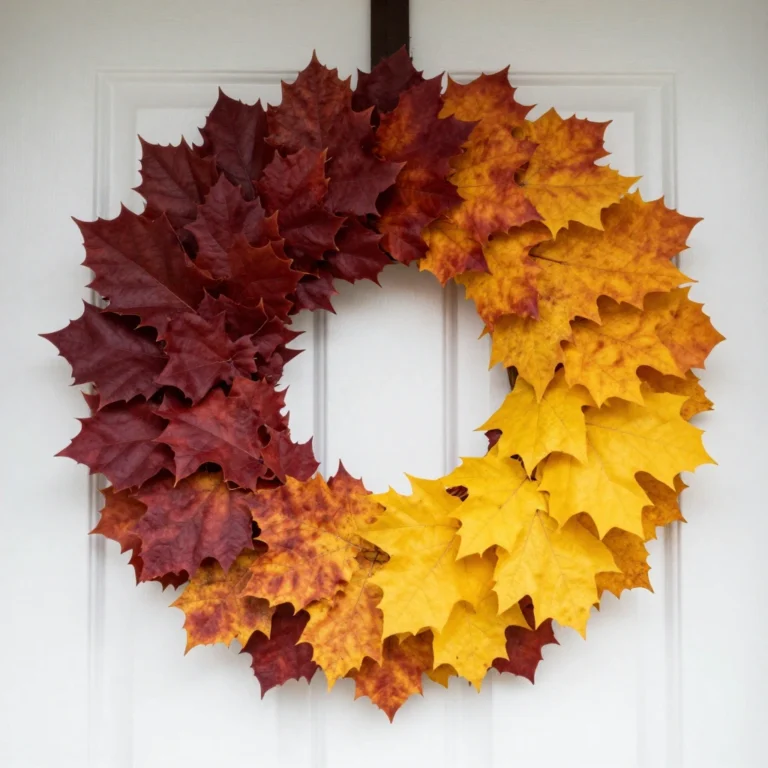
3. Acorn and Oak Leaf Wreath

A circular wreath made of oak leaves and acorns is one of the most iconic fall embroidery designs. It fits perfectly inside a round hoop and makes a stunning wall piece. Vary the leaf colors to capture the full spectrum of autumn foliage.
Materials:
- White cotton fabric
- 8-inch embroidery hoop
- DMC floss: rust red, burnt sienna, golden orange, olive green, dark brown
- Needle and scissors
Steps:
- Lightly draw a circle as your wreath guide on the fabric.
- Stitch oak leaves around the circle using fishbone or satin stitch in varied fall colors.
- Add acorn caps using seed stitch in dark brown.
- Fill the acorn body with smooth satin stitch in warm tan.
- Connect leaves with small stem stitches and add a bow at the bottom for a finished look.
Time: 3–4 hours Difficulty: Medium
Tip: Alternate leaf colors as you go around the wreath so no two same-colored leaves sit side by side.
4. Cozy Mushroom Cluster
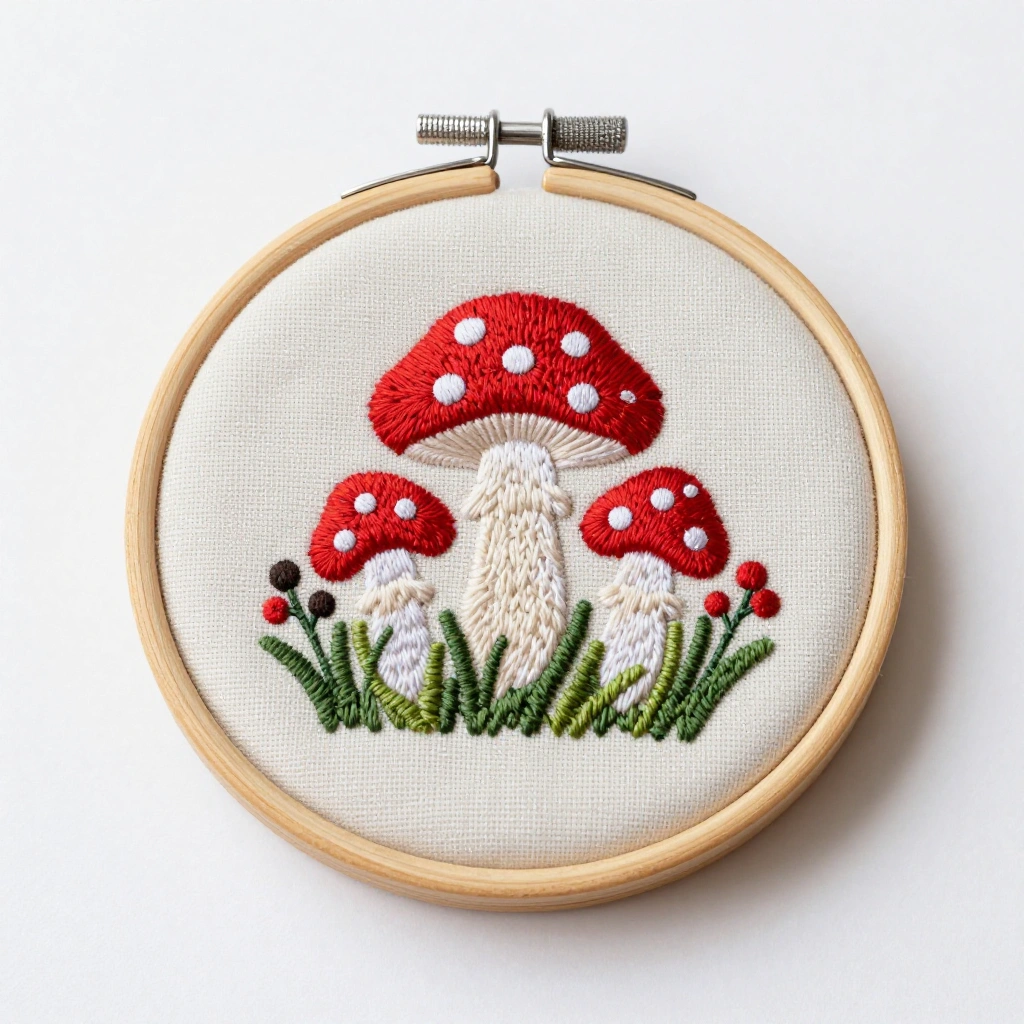
Woodland mushrooms have become a modern embroidery favorite. A cluster of spotted mushrooms with grass and tiny berries creates a whimsical forest-floor vibe perfect for fall. This design looks charming on patches, pouches, or framed hoop art.
Materials:
- Light grey or sage green fabric
- 5-inch hoop
- DMC floss: brick red, cream, dark brown, pale pink, forest green
- Water-soluble marker
Steps:
- Sketch 3 mushrooms of varying heights onto the fabric.
- Fill mushroom caps with satin stitch in brick red.
- Add white dot accents using straight stitches or French knots.
- Stitch the mushroom stems in long and short stitch using cream and tan.
- Add tiny blades of grass in straight stitch and small berries using French knots.
Time: 2–3 hours Difficulty: Easy
Tip: Use slightly darker thread at the mushroom cap edges to create a natural shading effect.
5. Autumn Sunflower Bouquet
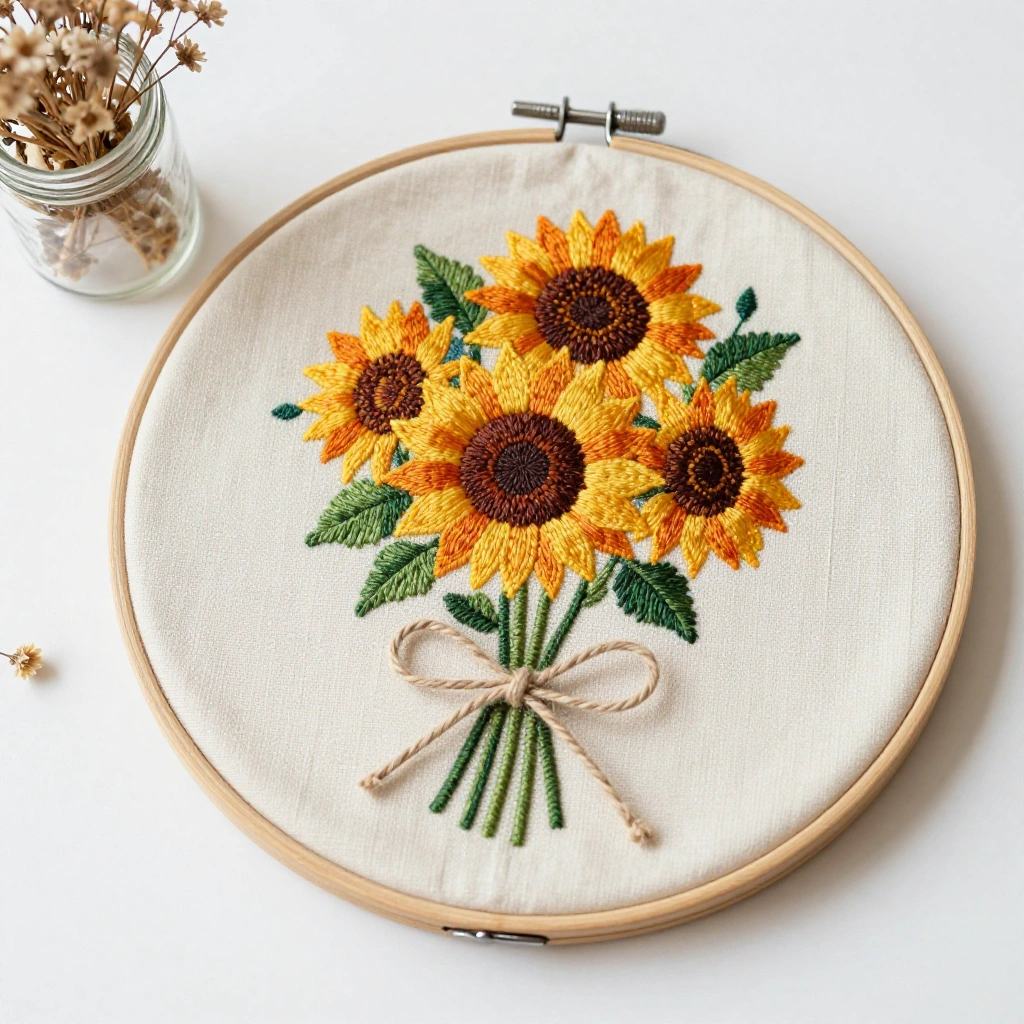
Sunflowers are the signature bloom of late summer and early fall. A loose bouquet of sunflowers with stems and leaves stitched in a mason jar or tied with twine makes a cheerful and vibrant design. This one is especially popular for kitchen decor.
Materials:
- Cream or butter-yellow cotton fabric
- 7-inch hoop
- DMC floss: golden yellow, dark brown, olive green, warm tan
- Needle and embroidery scissors
Steps:
- Sketch 3 sunflower heads at varying heights with stems and a few leaves.
- Stitch petals using long straight stitches or lazy daisy stitch in golden yellow.
- Fill the center circle with dense French knots in dark brown.
- Add stems with a double backstitch in olive green.
- Stitch leaves using fishbone stitch and add a twine bow at the base in tan thread.
Time: 2.5–3.5 hours Difficulty: Easy to Medium
Tip: Add a second layer of petals in a slightly darker yellow to give the sunflowers depth.
6. Spooky Haunted Tree
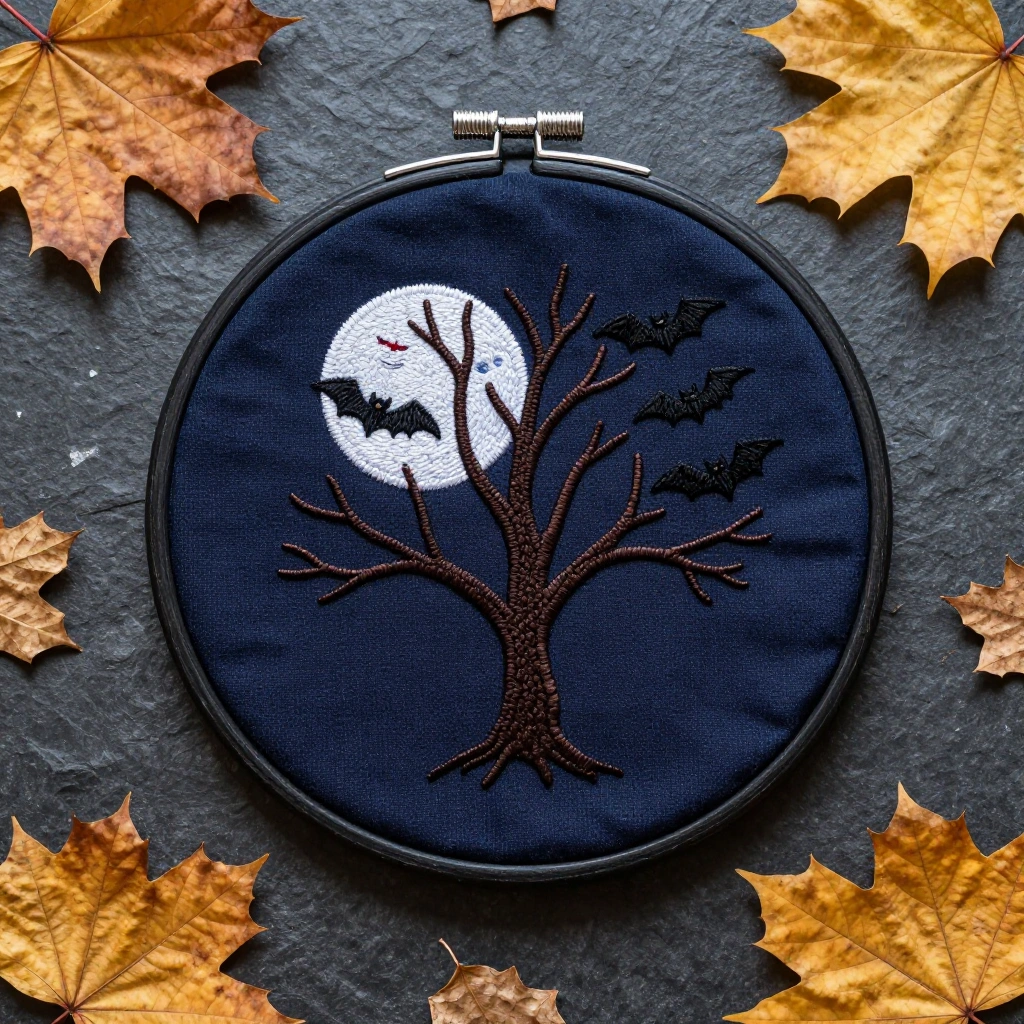
A bare, twisted tree silhouette with a full moon behind it and a few bats in the sky brings just the right amount of spooky charm to fall decor. This design relies on clean outline work and looks striking in black and gold thread.
Materials:
- Black or navy fabric
- 6-inch hoop
- DMC floss: cream, gold, dark grey
- Needle and sharp scissors
Steps:
- Transfer the tree silhouette and moon outline onto the fabric.
- Outline the full moon with a neat backstitch in cream, then fill with long-and-short stitch.
- Stitch the tree trunk and bare branches using split stitch or backstitch in dark grey.
- Add 3–5 small bats in the sky using straight stitch in dark grey.
- Add a few stars with tiny cross stitches in gold thread.
Time: 2–3 hours Difficulty: Medium
Tip: Use a lightbox or window to trace the design onto dark fabric before stitching.
7. Cinnamon Apple Slice
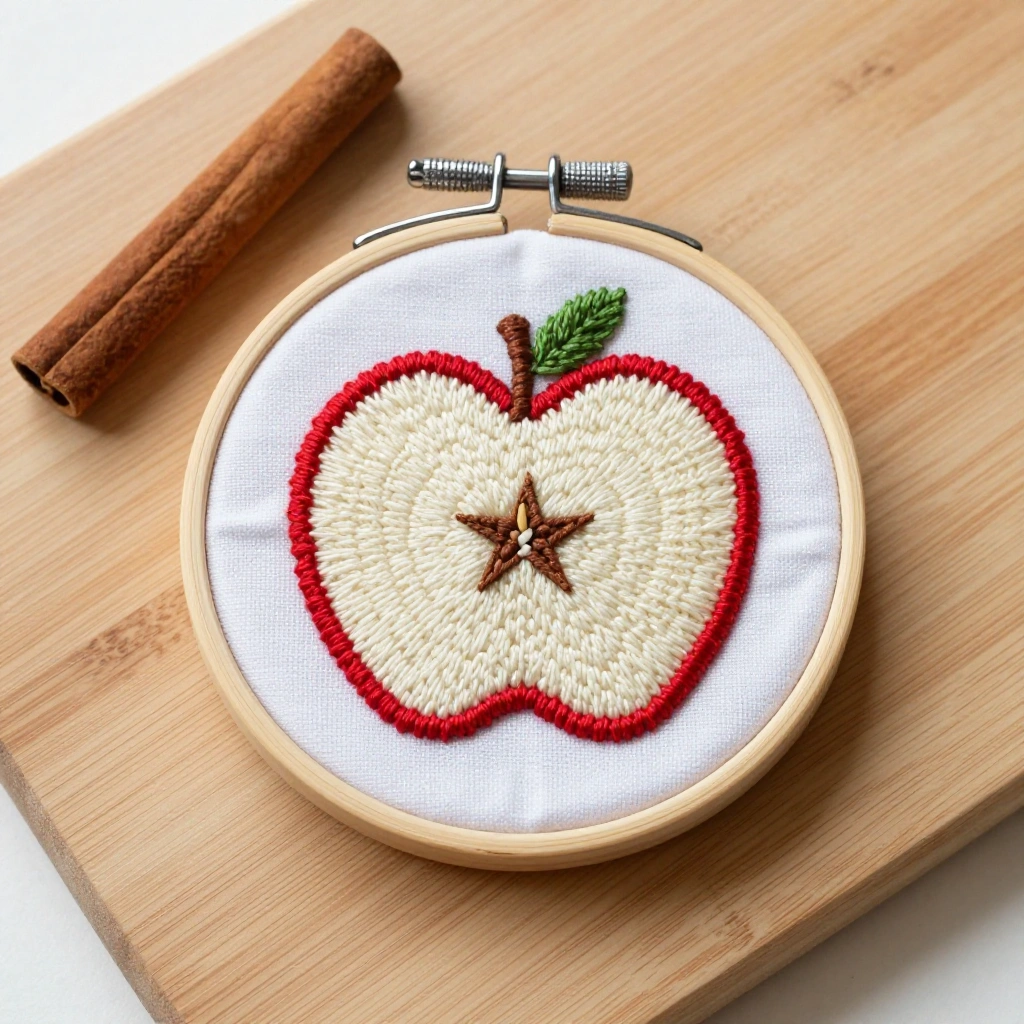
A single apple cut in half, revealing its seed star and warm flesh, is a simple yet satisfying design. It is ideal for beginners and works beautifully stitched onto aprons, dish towels, or small pouches. The classic fall color palette makes it instantly seasonal.
Materials:
- White cotton fabric
- 4–5 inch hoop
- DMC floss: deep red, cream, warm brown, pale pink, hunter green
- Transfer pen
Steps:
- Draw a half-circle apple shape with a cross-section showing seeds and core.
- Fill the apple skin edge with satin stitch in deep red.
- Stitch the inner flesh with long-and-short stitch in cream and pale pink.
- Add the seed star using small straight stitches in warm brown.
- Stitch a small stem and leaf using backstitch and satin stitch in hunter green.
Time: 1.5–2 hours Difficulty: Easy
Tip: Iron your fabric smooth before beginning to prevent the satin stitch from puckering.
8. Woodland Fox Portrait
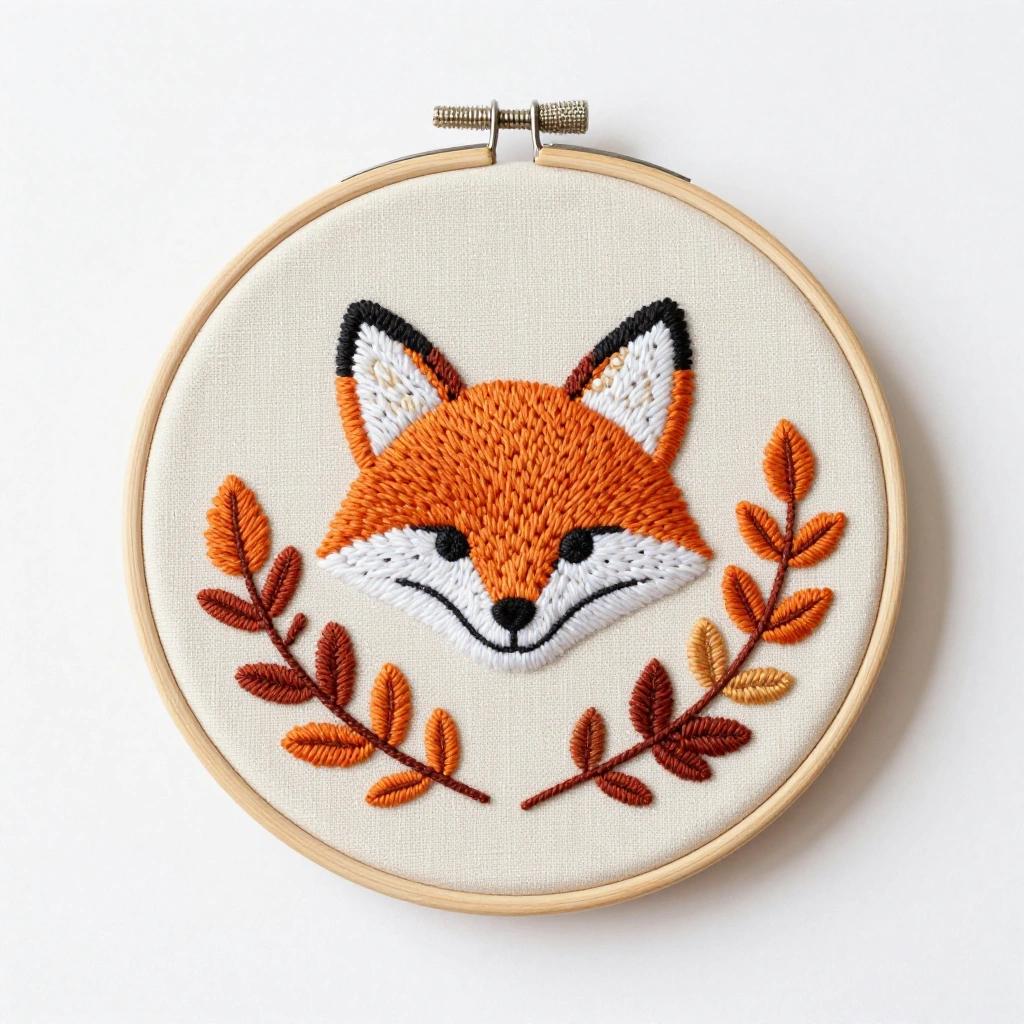
A simple fox face peeking through autumn leaves is a modern and popular fall motif. With its warm orange tones and black-tipped features, the fox fits perfectly into the fall color palette. This design works well as a framed art piece or iron-on patch.
Materials:
- Cream or oatmeal linen fabric
- 6-inch hoop
- DMC floss: burnt orange, white, black, warm brown, golden yellow
- Transfer paper
Steps:
- Transfer a simple front-facing fox face onto the fabric.
- Fill the main face area with long-and-short stitch in burnt orange.
- Stitch the white muzzle patch with smooth satin stitch.
- Add black-tipped ears and nose details with straight stitches.
- Surround the fox with small leaves and berries using lazy daisy and French knots.
Time: 3–4 hours Difficulty: Medium
Tip: Work from the center of the face outward for better proportion and symmetry.
9. Falling Maple Leaves Scatter
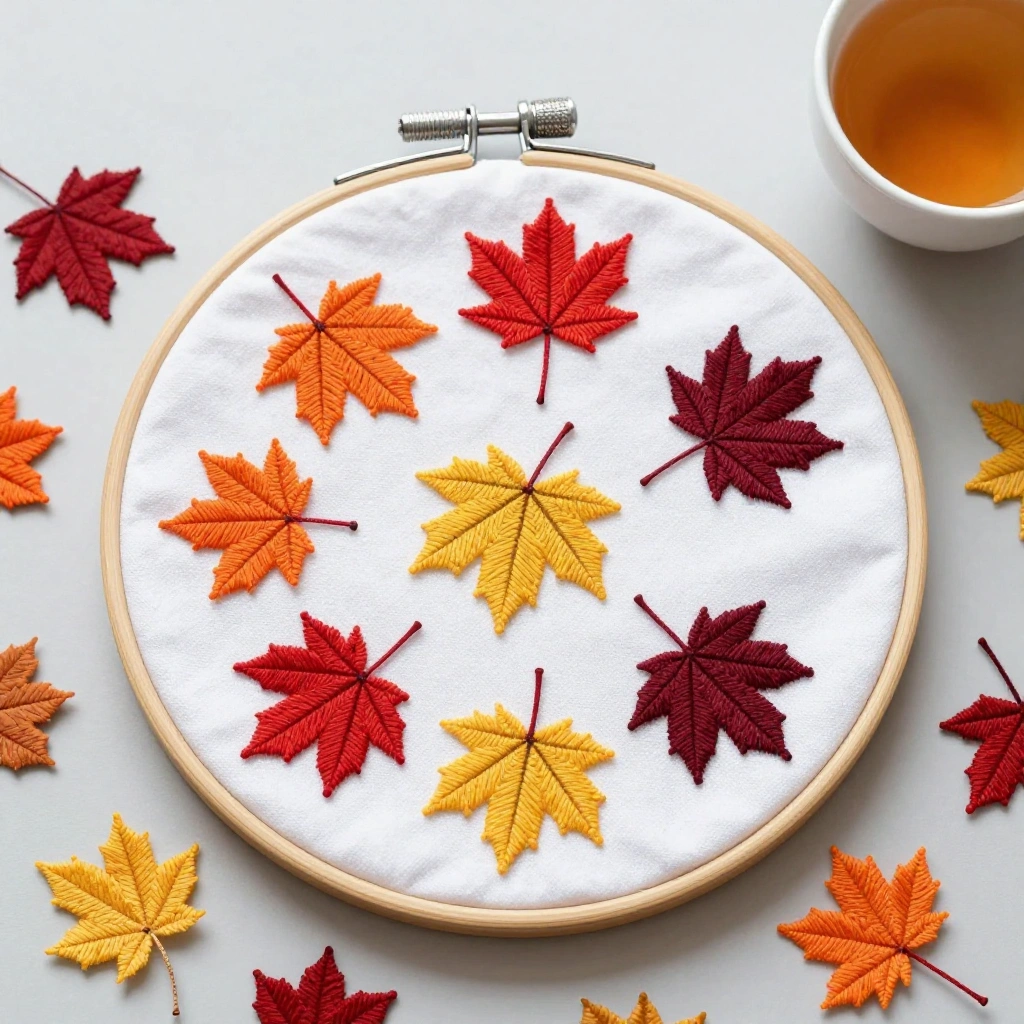
A loose scatter of maple leaves in varying sizes and fall colors across a hoop creates a natural, breezy design. No two leaves need to look the same, which makes this perfect for stitchers who love creative freedom. It is one of the most versatile fall embroidery designs.
Materials:
- White or off-white cotton
- 8-inch hoop
- DMC floss: rust red, golden orange, mustard yellow, deep burgundy, warm brown
- Marker
Steps:
- Lightly sketch 6–8 maple leaf shapes scattered across the fabric.
- Outline each leaf with backstitch using a matching thread color.
- Fill each leaf using satin stitch, working in the direction of the veins.
- Add leaf veins with a single backstitch line down the center and smaller branches.
- Leave some leaves as outlines only for a light, airy feel.
Time: 2.5–3 hours Difficulty: Easy
Tip: Vary the size of your leaves and tilt them at different angles for a realistic windswept feel.
10. Cozy Sweater and Mug
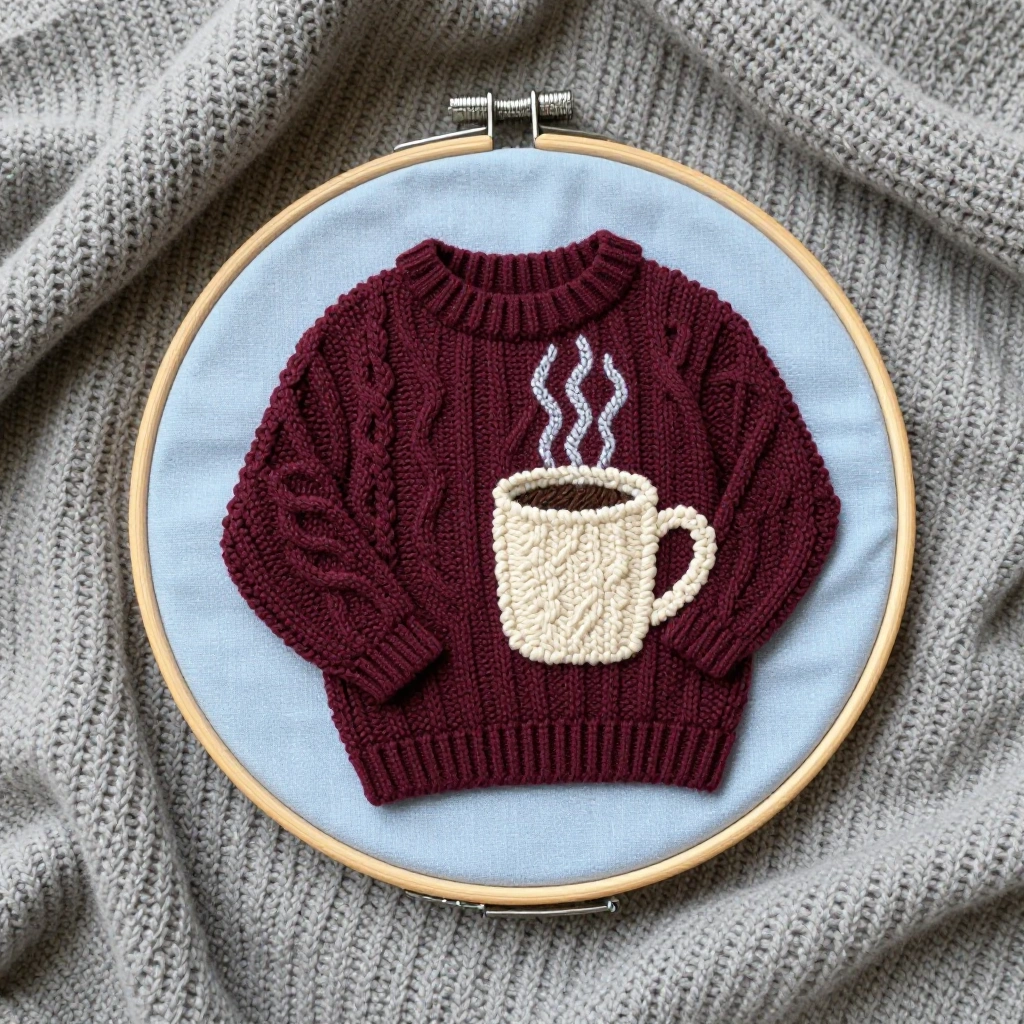
A small embroidered scene of a chunky knit sweater folded next to a steaming mug of hot cocoa captures the hygge spirit of fall. This design is sweet and simple, great for gifts or small framed pieces. It celebrates the cozy indoor side of the season.
Materials:
- Pale blue or cream fabric
- 5-inch hoop
- DMC floss: deep burgundy, cream, warm brown, light grey, rust orange
- Pencil
Steps:
- Sketch a folded sweater shape with cable-knit texture lines and a mug beside it.
- Fill the sweater with horizontal rows of chain stitch in burgundy to mimic knit fabric.
- Stitch the mug using satin stitch in cream or warm brown.
- Add steam rising from the mug with two or three curved backstitches in light grey.
- Embellish with small hearts or snowflakes using cross stitch or straight stitch.
Time: 2–3 hours Difficulty: Easy to Medium
Tip: Chain stitch is the best stitch for mimicking knit texture because of its looped, linked structure.
11. Autumn Forest Landscape
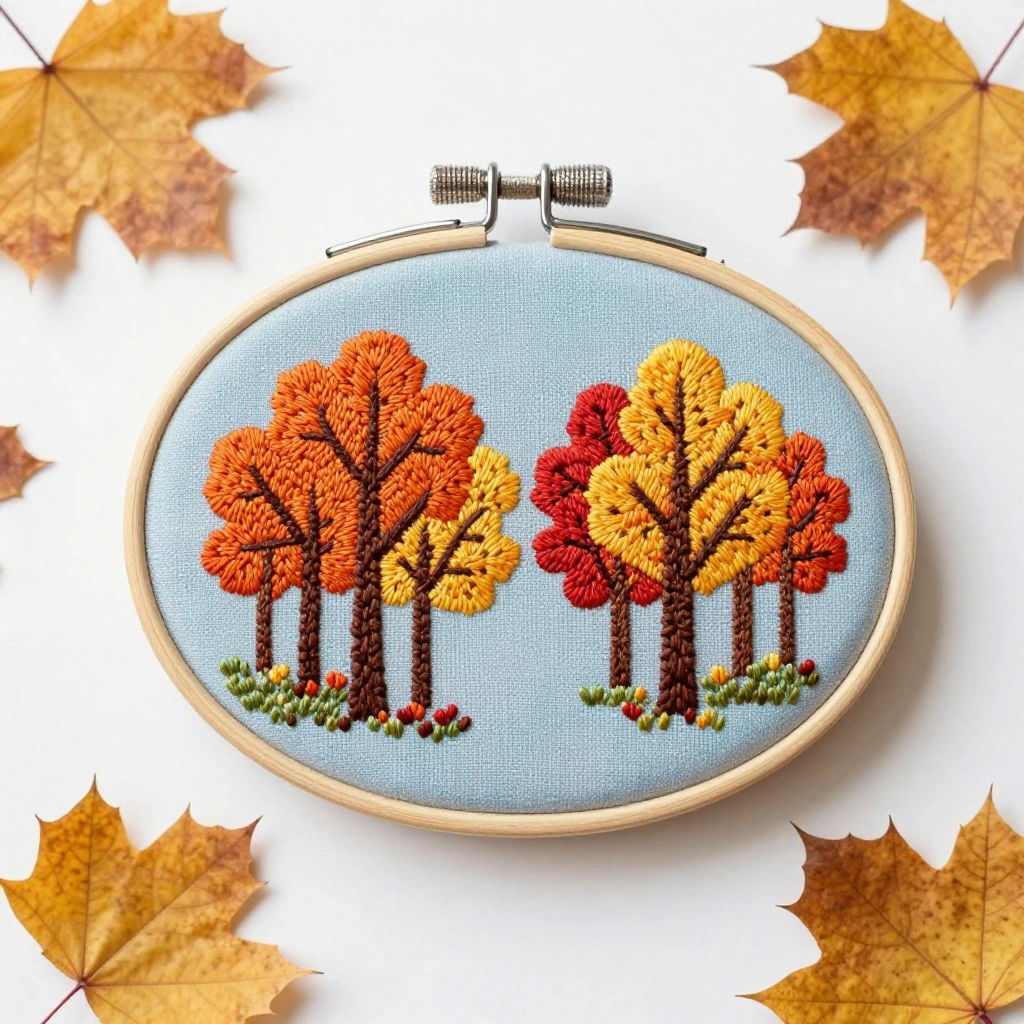
A mini landscape showing a row of trees in peak fall foliage is one of the most rewarding fall embroidery designs to complete. The layers of color and varying tree shapes create a painterly result. This works beautifully in a wide oval or rectangular hoop.
Materials:
- Sky blue or pale grey fabric
- Oval 5×7-inch hoop or 8-inch round
- DMC floss: deep orange, rust, golden yellow, dark green, cream, warm brown
- Transfer pen
Steps:
- Draw a simple horizon line across the lower third of the hoop.
- Stitch the sky area first using horizontal straight stitches in pale blue or leave the fabric bare.
- Build tree silhouettes using French knots clustered together for the canopy in fall colors.
- Stitch tree trunks below the canopy using straight stitches in brown.
- Add a simple ground line using chain stitch in green and scatter a few French knot leaves on the ground.
Time: 4–5 hours Difficulty: Medium
Tip: Use a variety of floss weights and cluster your French knots more densely at the top of the canopy to add dimension.
12. Fall Embroidery Designs: Thankful Lettering Sampler
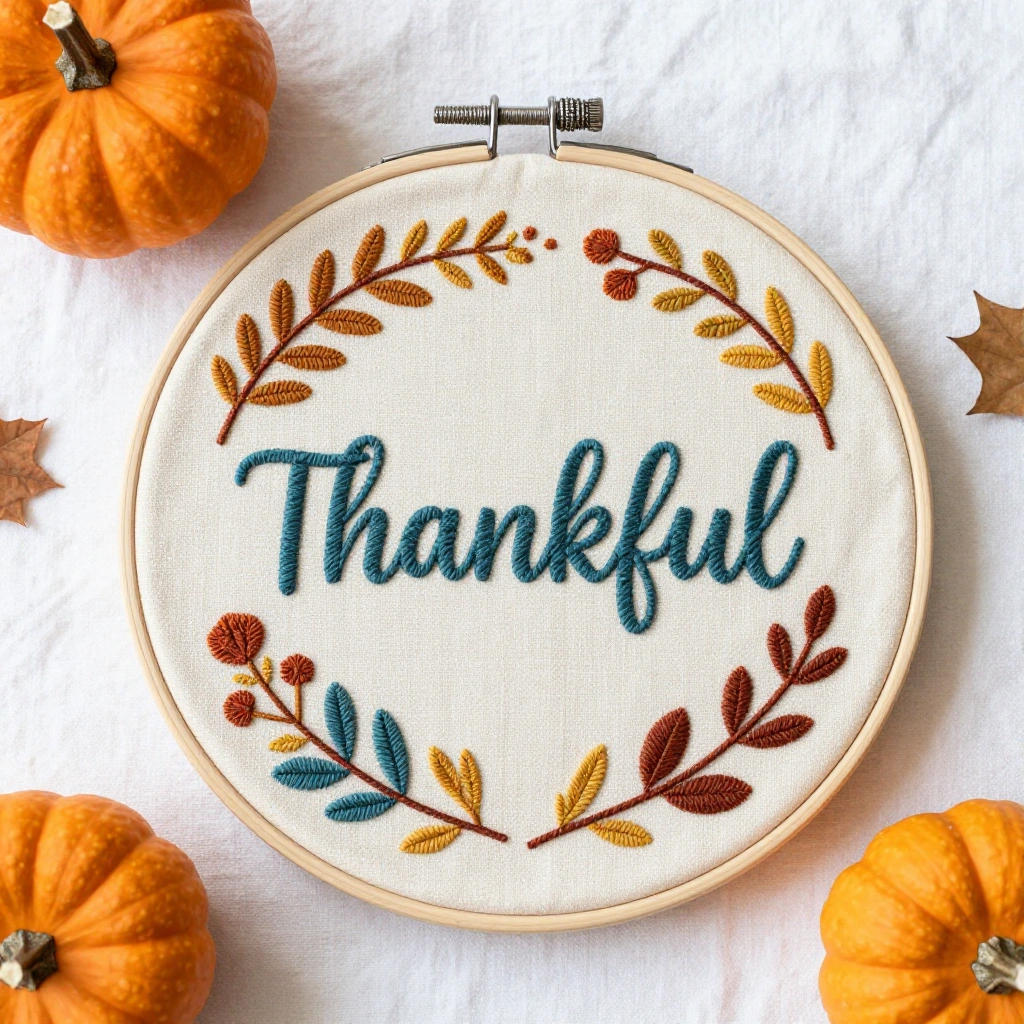
A hand-lettered word like “Thankful,” “Grateful,” or “Hello Fall” combined with small botanical accents makes a meaningful and decorative piece. Lettering embroidery doubles as a typography exercise and a heartfelt home accent for the Thanksgiving season.
Materials:
- White or cream cotton fabric
- 7–8 inch hoop
- DMC floss: deep teal, mustard, rust, warm brown
- Printable lettering guide or transfer paper
Steps:
- Print or transfer your chosen word in a casual script or block letter style onto the fabric.
- Stitch the letters using backstitch or split stitch for smooth, clean lines.
- Thicken down-strokes by stitching a second parallel row alongside the first.
- Add small leaf, berry, and branch accents around the lettering using satin and lazy daisy stitch.
- Optional: add a small border or decorative line around the full composition.
Time: 2.5–4 hours Difficulty: Medium
Tip: Print your font at the exact size of your hoop and trace directly onto the fabric for clean, even letterforms.
Common Mistakes to Avoid
1. Not using a hoop Stitching without a hoop causes the fabric to pucker and your tension to become uneven. Always stretch your fabric tightly in the hoop before you begin stitching and re-tighten as needed throughout the project.
2. Using too many thread strands for detail work Using all 6 strands for fine detail like leaf veins or facial features results in bulky, imprecise lines. Drop down to 1 or 2 strands when working on small or intricate areas for clean, crisp results.
3. Pulling thread too tight Over-pulling your thread distorts the fabric and causes bunching on the back. Keep a relaxed, even tension and let the needle glide through smoothly rather than tugging each stitch into place.
Tips for Best Results
- Pre-wash your fabric before stitching to prevent shrinkage after the project is finished.
- Keep your thread lengths short — work with 18-inch lengths to reduce tangling and fraying.
- Iron your finished piece face-down on a thick towel to fluff up the stitches without flattening them.
- Use a needle minder to keep your needle safe when you set the hoop down mid-project.
- Start with a waste knot instead of a regular knot so the back of your work stays neat.
- Store finished hoops away from direct sunlight to prevent thread colors from fading over time.
FAQs
What fabric is best for fall embroidery designs? Cotton and linen are the most popular choices. Cotton is easier for beginners because of its tight, even weave. Linen gives a more rustic, natural look that suits fall aesthetics beautifully.
Can beginners try these fall embroidery designs? Yes. Most of the designs in this list are rated Easy and require only a handful of basic stitches like backstitch, satin stitch, and French knots. Start with the apple slice or the wheat bundle for quick, rewarding results.
How do I transfer a design onto fabric? The easiest methods are a water-soluble transfer pen (trace directly onto light fabric), iron-on transfer paper, or a lightbox. For dark fabrics, a chalk pencil works best.
How long does a fall embroidery project take? Most small designs take 1.5–4 hours depending on complexity and your experience level. Larger or more detailed pieces like the forest landscape may take 5+ hours across multiple sessions.
What size hoop should I use? Match the hoop size to your design. Small motifs like an apple slice fit a 4–5 inch hoop. Full bouquets, wreaths, or landscapes work best in a 7–8 inch hoop. Leave at least 1 inch of extra fabric around the design.
How do I finish and display my embroidery hoop? Trim the excess fabric to about 1 inch around the hoop edge, fold it neatly, and secure with a running stitch or fabric glue. Hot-glue a ribbon loop at the top for hanging.
Conclusion
Fall is the most inspiring season for embroidery, and these 12 fall embroidery designs give you something beautiful to stitch every week of the season. Whether you prefer cozy motifs like mugs and sweaters or natural elements like leaves and woodland animals, there is a project here for every skill level.
Pick up your hoop, thread your needle, and bring the colors of autumn into your home one stitch at a time. Share your finished pieces and inspire others to craft this fall.