12 Creative Snowman Crafts for Kids and Families
Winter is the perfect season to get creative indoors. Whether you’re crafting with kids or decorating your home, these snowman crafts bring all the cozy magic of a snowy day — no freezing temperatures needed.
These ideas work for all skill levels. From simple paper projects to charming jar decorations, there’s something here for everyone.
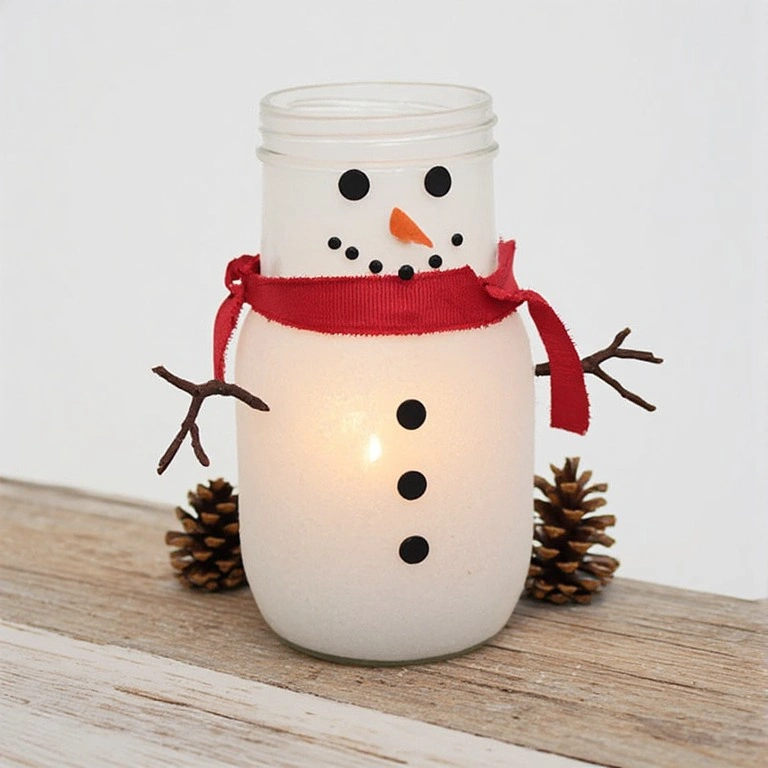
1. Mason Jar Snowman
Description
Transform a plain mason jar into an adorable snowman with just a few supplies. It doubles as a candle holder or a candy jar — perfect for holiday gifting.
Materials:
- Clear mason jar
- White acrylic paint
- Black and orange permanent markers
- Ribbon or burlap strip
- Tea light candle (optional)
Steps:
- Paint the outside of the jar with two coats of white acrylic paint. Let dry completely.
- Draw two black dot eyes and a small orange triangle nose with markers.
- Add a row of small black dots for the mouth.
- Tie a ribbon or burlap strip around the jar’s neck as a scarf.
- Place a tea light inside for a warm glow.
- Time: 20–30 minutes
- Difficulty: Easy
Tip: Use a sponge brush for a smoother, more even paint finish.
2. Sock Snowman

Description
Old socks get a second life as the cutest little snowmen. These no-sew decorations are soft, squeezable, and great for kids to make.
Materials:
- White tube sock
- Rice or poly-fil stuffing
- Rubber bands
- Black buttons or googly eyes
- Orange felt (for nose)
- Mini scarf (strip of fleece fabric)
Steps:
- Fill the sock with rice or stuffing to about three-quarters full.
- Tie off the top with a rubber band to close it.
- Create a “head” section by wrapping another rubber band one-third down from the top.
- Glue on button eyes and a small orange felt triangle for the nose.
- Wrap a fleece strip around the neck as a scarf.
- Time: 15–25 minutes
- Difficulty: Easy
Tip: Use scented rice to make it a subtle room freshener too.
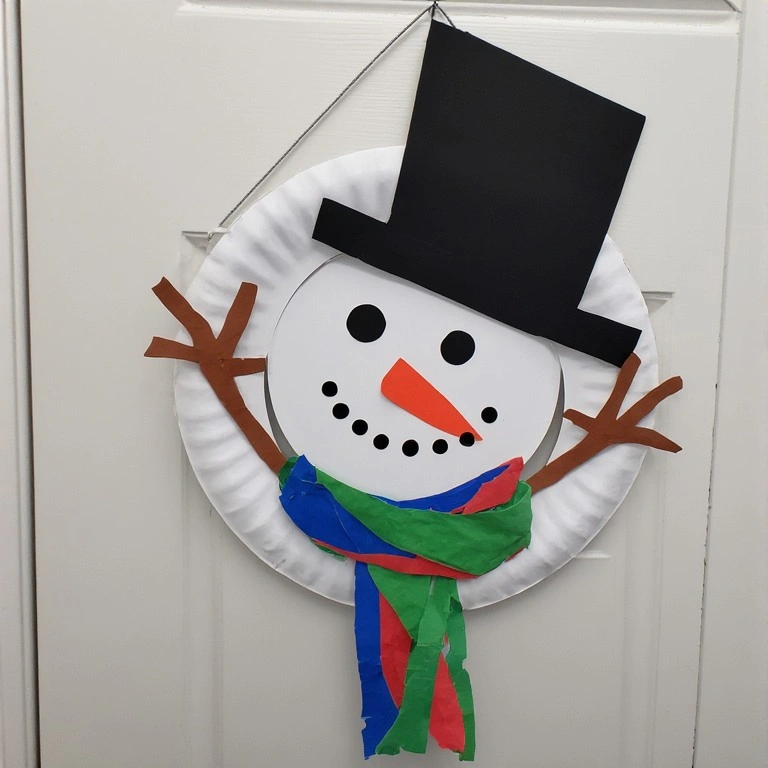
3. Paper Plate Snowman Wreath
Description
Stack paper plates and a little paint to create a fun wreath that hangs beautifully on any door or wall. This is one of the best snowman crafts for young children.
Materials:
- 3 white paper plates
- Black, orange, and colored construction paper
- Glue or stapler
- Ribbon for hanging
- Markers or paint
Steps:
- Stack the three paper plates vertically and staple or glue them together to form a snowman shape.
- Cut small circles from black paper for eyes, buttons, and mouth.
- Cut an orange triangle for the nose and glue everything on.
- Cut a hat shape from black construction paper and attach to the top plate.
- Glue on a paper scarf and tie a ribbon loop to the back for hanging.
- Time: 20–30 minutes
- Difficulty: Easy
Tip: Laminate it after assembly to make it weatherproof for outdoor use.
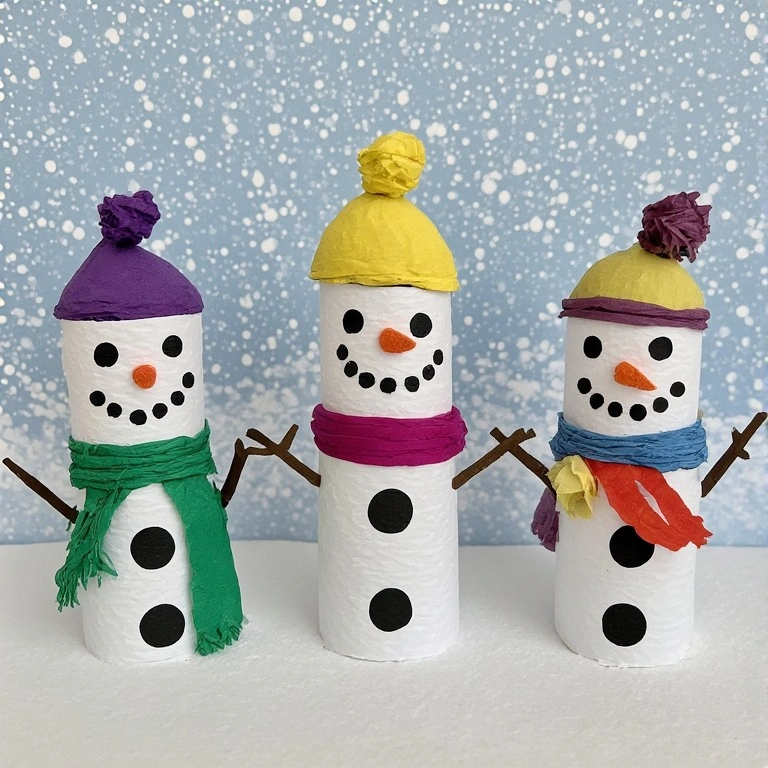
4. Toilet Paper Roll Snowman
Description
Save your empty toilet paper rolls — they make surprisingly adorable little snowmen. Quick, cheap, and endlessly customizable.
Materials:
- 2–3 toilet paper rolls
- White paint
- Markers
- Construction paper scraps
- Glue
- Mini pompoms or buttons (optional)
Steps:
- Paint all toilet paper rolls white. Let dry.
- Stack them vertically and glue together (3 rolls = large snowman, 2 = small).
- Draw a face on the top roll using markers.
- Cut a scarf strip from colored paper and wrap it between the top two rolls.
- Cut a hat from black paper and glue on top.
- Add button details down the front with a marker or mini pompoms.
- Time: 15–20 minutes
- Difficulty: Easy
5. Clay Pot Snowman
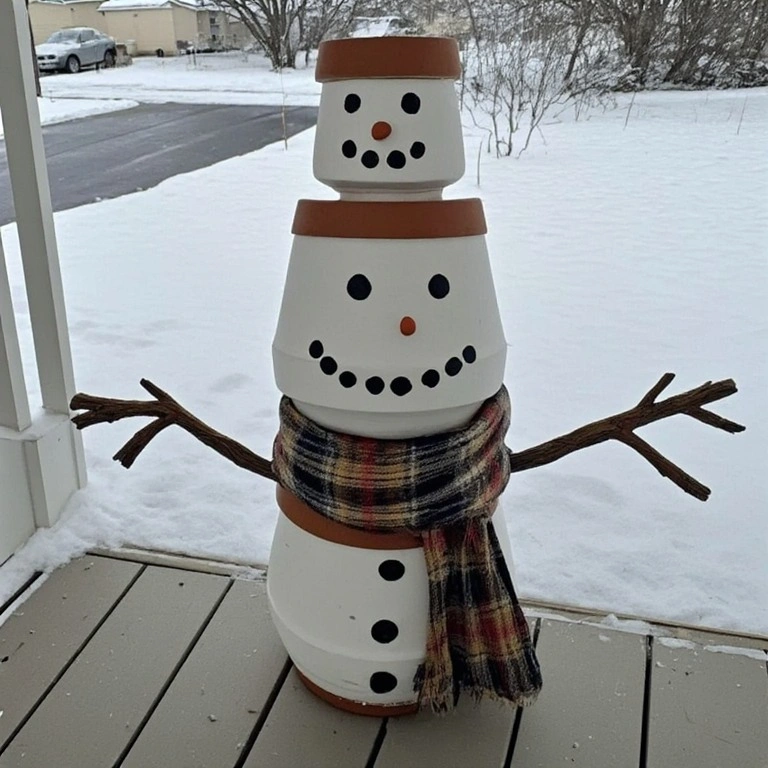
Description
Stack small terracotta pots upside down to create a sturdy, long-lasting snowman decoration. This one looks great on a porch or shelf.
Materials:
- 2 terracotta pots (different sizes)
- White spray paint
- Black and orange craft foam or paint
- Hot glue gun
- Twigs (for arms)
- Mini hat or fabric scarf
Steps:
- Spray paint both pots white on the outside. Let dry fully.
- Glue the smaller pot on top of the larger one (both upside down).
- Use black craft foam circles for eyes, mouth, and buttons.
- Cut an orange foam triangle for the nose and glue it on.
- Hot glue small twigs to the sides as arms.
- Add a mini top hat or wrap fabric around the “neck” as a scarf.
- Time: 30–45 minutes
- Difficulty: Medium
Tip: Seal with a clear outdoor sealant spray to make it weather-resistant.
6. Painted Rock Snowman

Description
Smooth river rocks become charming little snowmen with just a bit of paint. These make wonderful table decorations, paperweights, or holiday gifts.
Materials:
- 2–3 smooth round rocks (graduated sizes)
- White acrylic paint
- Fine-tip black and orange paint pens
- Clear sealer spray
- Strong craft glue
Steps:
- Paint all rocks white with two coats. Let each coat dry.
- Stack rocks from largest to smallest and glue together with strong craft glue.
- Use a black paint pen to add eyes, mouth, and buttons.
- Draw a tiny orange carrot nose with an orange paint pen.
- Paint on a colorful scarf or hat detail around the top and neck rocks.
- Seal with clear sealer spray when dry.
- Time: 45–60 minutes (including drying time)
- Difficulty: Medium
12 Snowman Crafts for Every Budget: Cheap Supply Ideas
Before diving into more projects, here’s a quick tip: most of these snowman crafts can be made entirely from dollar store supplies. Foam balls, acrylic paints, googly eyes, and felt are all budget-friendly staples that work across nearly every idea on this list.
7. Foam Ball Snowman Ornament
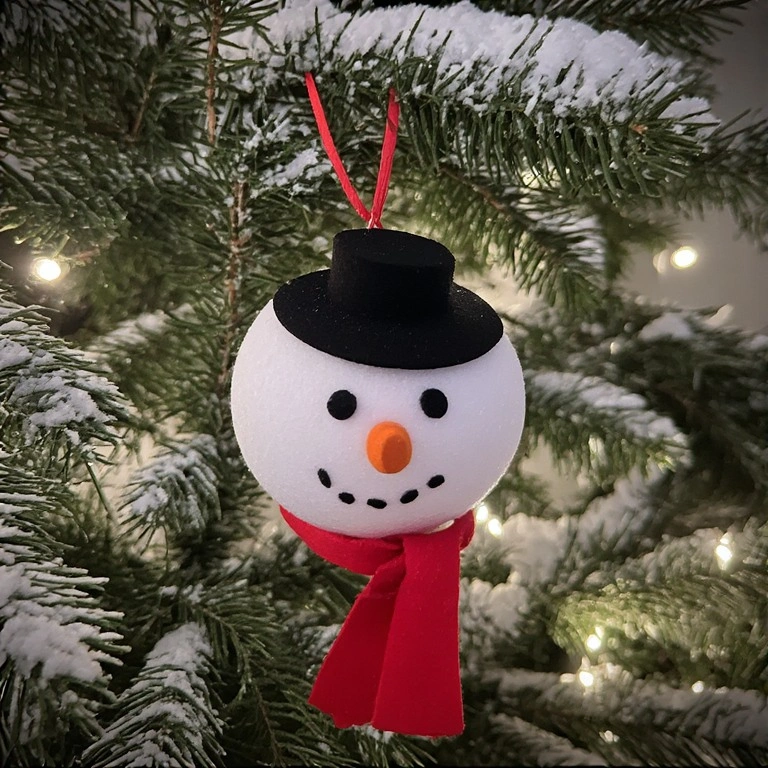
Description
Craft store foam balls turn into delightful snowman ornaments for your Christmas tree. Lightweight and customizable, these are perfect for personalizing with names or dates.
Materials:
- 2 white foam balls (different sizes)
- Toothpick or skewer
- Black and orange paint or markers
- Ribbon
- Mini felt hat or fabric scraps
- Glitter (optional)
Steps:
- Push a toothpick halfway into the smaller foam ball, then connect it to the larger one.
- Draw or paint a face on the smaller ball.
- Cut a small orange triangle nose and push it into the foam.
- Make a tiny hat from black felt and glue on top.
- Wrap a thin ribbon around the “neck” as a scarf.
- Add a loop of ribbon to the top for hanging.
- Time: 20–30 minutes
- Difficulty: Easy
Tip: Use a thick skewer instead of a toothpick for extra stability.
9. Felt Snowman Ornament
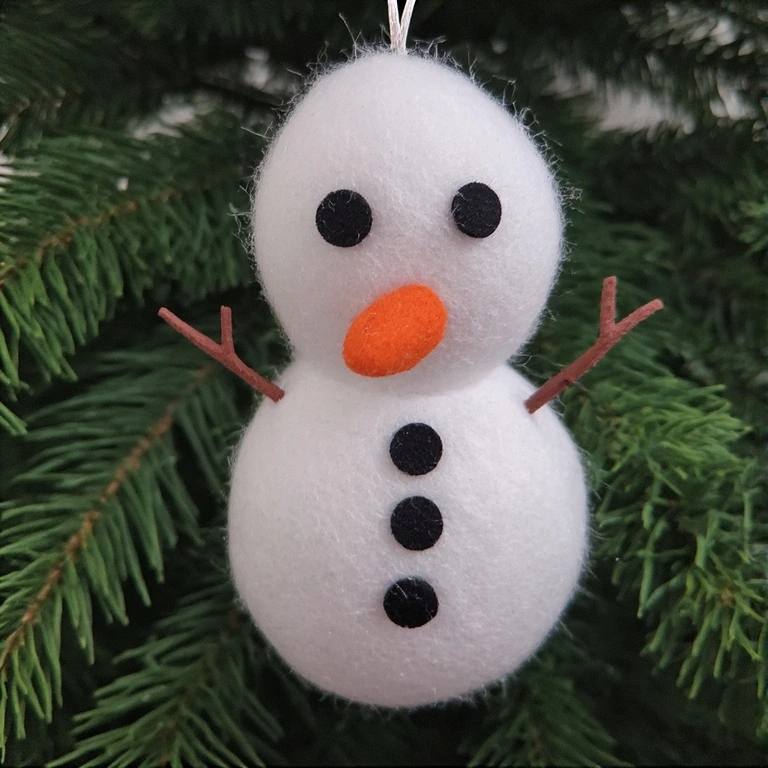
Description
Soft felt makes for the most tactile and cozy snowman ornament imaginable. These are also great for sensory play with toddlers and make sweet handmade gifts.
Materials:
- White felt sheets
- Black, orange, and colored felt scraps
- Scissors
- Needle and white thread (or fabric glue)
- Polyester stuffing
- Ribbon for hanging
Steps:
- Cut two identical snowman shapes from white felt.
- Cut small felt circles (black) for eyes, mouth, and buttons; an orange triangle for the nose.
- Glue or sew the decorations onto the front piece.
- Place both felt pieces together and sew around the edge, leaving a small gap.
- Stuff lightly with polyester filling, then sew shut.
- Attach a ribbon loop at the top for hanging.
- Time: 30–45 minutes
- Difficulty: Medium
Tip: Use fabric glue instead of sewing for a completely no-sew version.
10. Lightbulb Snowman

Description
Recycle old incandescent lightbulbs into whimsical snowman figures. The rounded bulb shape is already perfectly snowman-like — you just need to add the details.
Materials:
- Old incandescent lightbulb (cleaned)
- White acrylic paint
- Black and orange paint or markers
- Hot glue gun
- Twine or ribbon
- Small fabric hat or pompom
Steps:
- Paint the lightbulb white, covering the glass completely. Let dry.
- Paint or draw the face on the round part of the bulb.
- Add black dot buttons down the center.
- Hot glue a small twine or ribbon scarf around the metal base.
- Glue a tiny hat or pompom on top of the bulb.
- Time: 25–35 minutes
- Difficulty: Easy
Tip: Handle old bulbs with care. Wrap the metal base in tape while painting for a clean grip.
11. Wooden Bead Snowman Garland
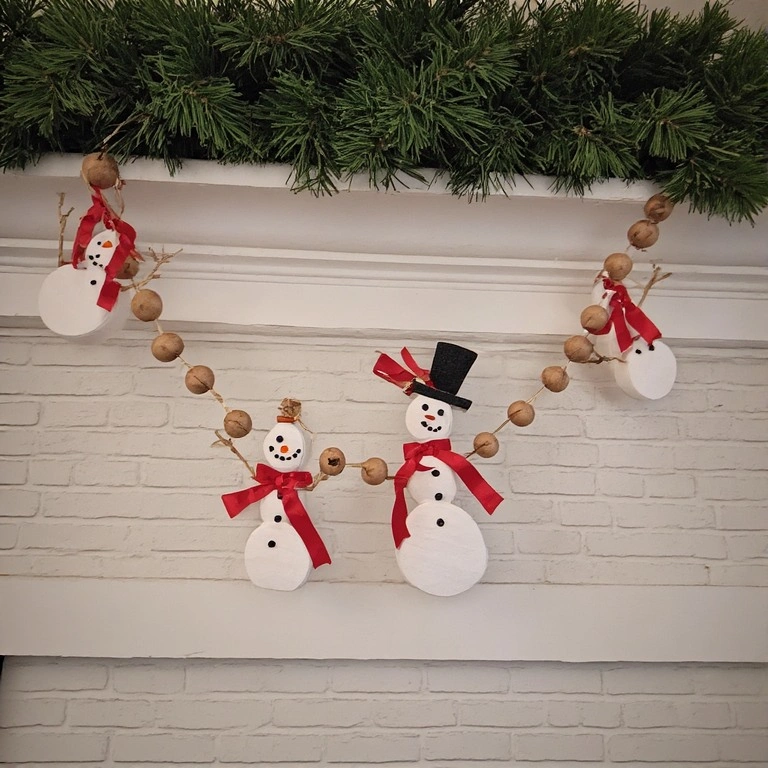
Description
String wooden beads into a charming snowman garland to drape across a mantel, shelf, or Christmas tree. It’s simple, repeatable, and endlessly festive.
Materials:
- Large round wooden beads (white-painted or natural)
- Smaller beads for eyes and buttons (black)
- Orange clay or paint for noses
- Twine or jute cord
- Ribbon scraps
Steps:
- Paint large wooden beads white if not already. Let dry.
- Use a black paint pen to draw a tiny face on each large bead.
- Cut small ribbon strips and tie around the twine between beads as scarves.
- Thread beads onto twine, alternating snowman beads with decorative spacers.
- Knot at each end and leave a long tail for tying.
- Time: 40–60 minutes
- Difficulty: Medium
12 Snowman Crafts Finale: Snow Globe Jar
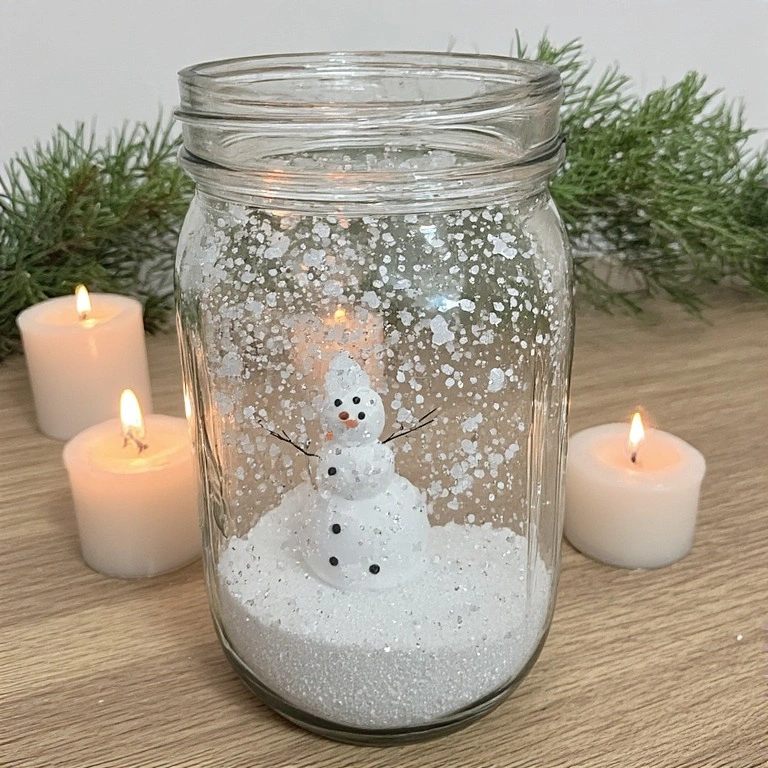
Description
This last idea is the showstopper of the bunch. A DIY snow globe using a mason jar makes one of the most magical — and giftable — snowman decorations you can create at home.
Materials:
- Wide-mouth mason jar with lid
- Small plastic or ceramic snowman figurine
- Distilled water
- Waterproof glue (like E6000)
- White glitter or fake snow
- Glycerin (optional, for slow-falling effect)
Steps:
- Glue the snowman figurine to the inside of the jar lid. Let cure fully (at least 24 hours).
- Fill the jar with distilled water, leaving a small space at the top.
- Add a few drops of glycerin for a slower snow-fall effect.
- Add a tablespoon of white glitter or fake snow into the water.
- Carefully screw the lid on tight, with the snowman submerged.
- Seal the lid edge with waterproof glue and let dry before flipping.
- Time: 30 minutes + 24 hours drying
- Difficulty: Medium
Tip: Use baby oil instead of water for an even slower, dreamier snow effect.
Common Mistakes to Avoid
- Skipping the drying time between paint coats Rushing this step leads to streaky, peeling paint. Always let each coat dry fully before adding the next — especially on glass or terracotta.
- Using the wrong glue for the material Hot glue works on most crafts, but it doesn’t hold well on glass or wet surfaces. Use E6000 or waterproof adhesive for glass and outdoor projects.
- Overcrowding small details on tiny surfaces When working on small snowmen (corks, beads), less is more. Stick to eyes, a nose, and a mouth — too many details look messy at small scale.
Tips for Best Results
- Prep your surfaces — wipe glass, rocks, and corks clean before painting to help paint stick.
- Use a white base coat — even on white materials, a base layer creates a brighter, more consistent finish.
- Work in layers — build up colors gradually instead of applying thick coats all at once.
- Let adhesives cure fully — don’t rush gluing steps; a properly cured bond prevents everything from falling apart later.
- Add a sealer at the end — a clear matte or gloss sealer protects painted surfaces and extends the life of your decoration.
- Gather all supplies first — lay out everything before starting so you’re not pausing mid-craft to hunt for scissors.
FAQs
Q: What age are these snowman crafts suitable for? Most of these projects are suitable for ages 5 and up with adult supervision. Simpler ones like the paper plate wreath and sock snowman are great even for toddlers with help.
Q: Can I use these as Christmas gifts? Absolutely. The mason jar snowman, snow globe jar, and felt ornament all make beautiful handmade gifts. Add a personalized tag for an extra touch.
Q: What paint works best on glass jars? Use glass-specific acrylic paint or regular acrylic paint with a glass primer. Always seal the finished piece with a glass-safe sealer for durability.
Q: Do I need special tools to make these? No special tools required. A hot glue gun, scissors, basic acrylic paints, and markers will cover most of these projects. Everything is beginner-friendly.
Q: How do I store these decorations after the season? Wrap delicate pieces in tissue paper and store them in a labeled box. Keep painted projects away from moisture and direct sunlight to prevent fading.
Q: Can I make these snowman crafts in summer? Yes! Seasonal crafts don’t have to stay seasonal. These make fun summer camp activities, and the figurines work as year-round shelf decor too.
Conclusion
There you have it — 12 creative ways to bring the charm of a snowman into your home any time of year. From five-minute sock snowmen to stunning snow globe jars, every project on this list is achievable, affordable, and genuinely fun to make.
Pick one idea and start today. You might just discover that crafting is your new favorite winter tradition.