10 Beach Crafts for Kids That Are Easy, Fun, and Totally Creative
Summer is the perfect time to turn a handful of sand, shells, and sea glass into something truly magical. These 10 beach crafts for kids will keep little hands busy and imaginations running wild — whether you’re right on the shore or back at home with a bag of collected treasures.
Each idea below is beginner-friendly and uses simple, affordable materials. Get ready to create!
1. Painted Seashell Magnets
A classic and colorful way to display shells from your beach trip. Kids can paint any design they like — polka dots, stripes, little faces — and turn them into functional fridge magnets.
Materials:
- Collected seashells (cleaned and dried)
- Acrylic paints
- Small paintbrushes
- Strong craft glue or hot glue gun
- Round magnets
Steps:
- Rinse and dry your shells completely.
- Paint shells with acrylic paints and let them dry for 20–30 minutes.
- Add a second coat or details if desired.
- Glue a magnet to the flat back of each shell.
- Let dry overnight before using.
Time: 30–40 minutes (plus drying time) Difficulty: Easy
💡 Tip: Use a clear sealant spray over the paint to make the colors last longer.
2. Beach Crafts for Kids: Sand Art Bottles
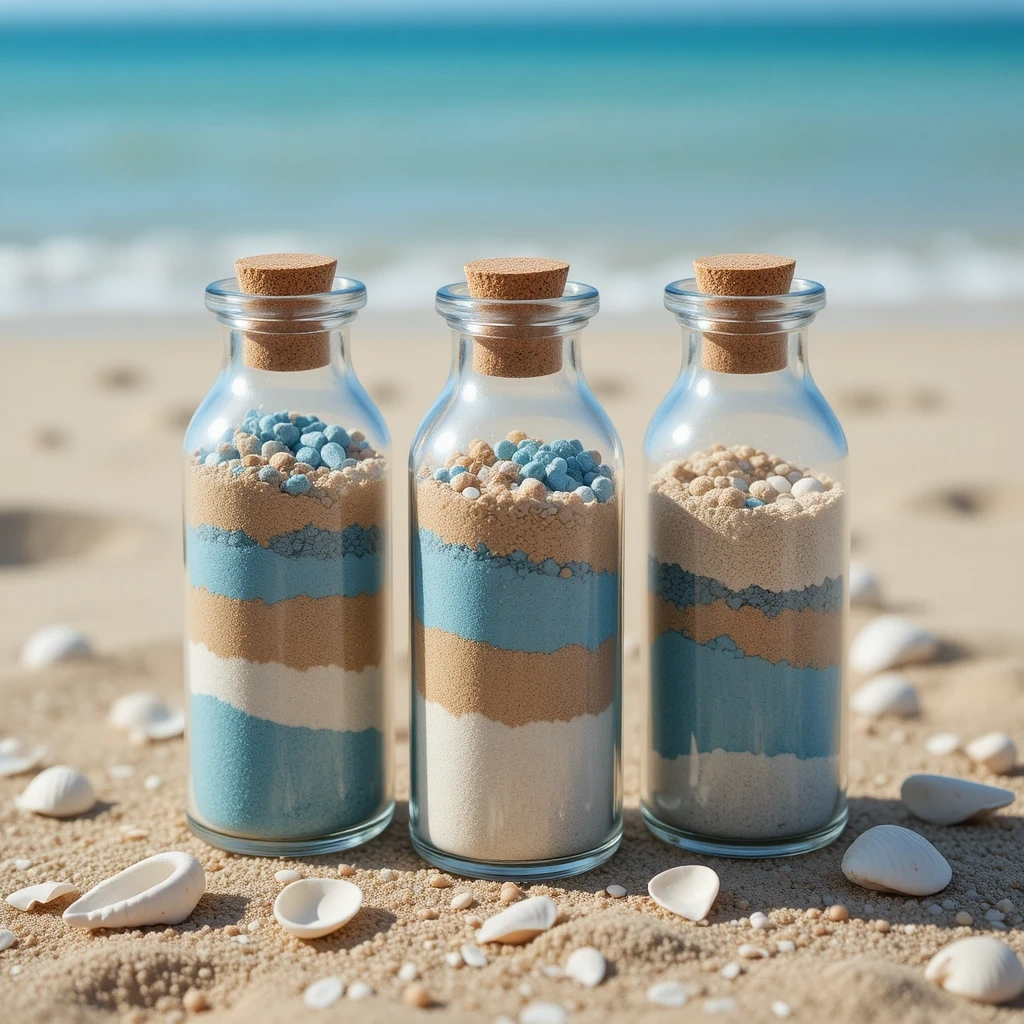
This is one of the most beloved beach crafts for kids — simple, mess-friendly, and endlessly customizable. Kids layer colored sand into a clear bottle to create their own mini landscape or abstract design.
Materials:
- Small clear plastic or glass bottles with lids
- Fine sand (collected or craft sand)
- Powdered tempera paint or food coloring
- Plastic cups for mixing
- Funnel or folded paper cone
- Spoon
Steps:
- Divide sand into separate cups.
- Mix a different paint color into each cup.
- Using a funnel, pour colored sand in layers into the bottle.
- Alternate colors to create a striped or wavy effect.
- Seal the lid tightly when full.
Time: 20–30 minutes Difficulty: Easy
💡 Tip: Use a chopstick to drag a thin line down the inner edge of the bottle for a wave effect between layers.
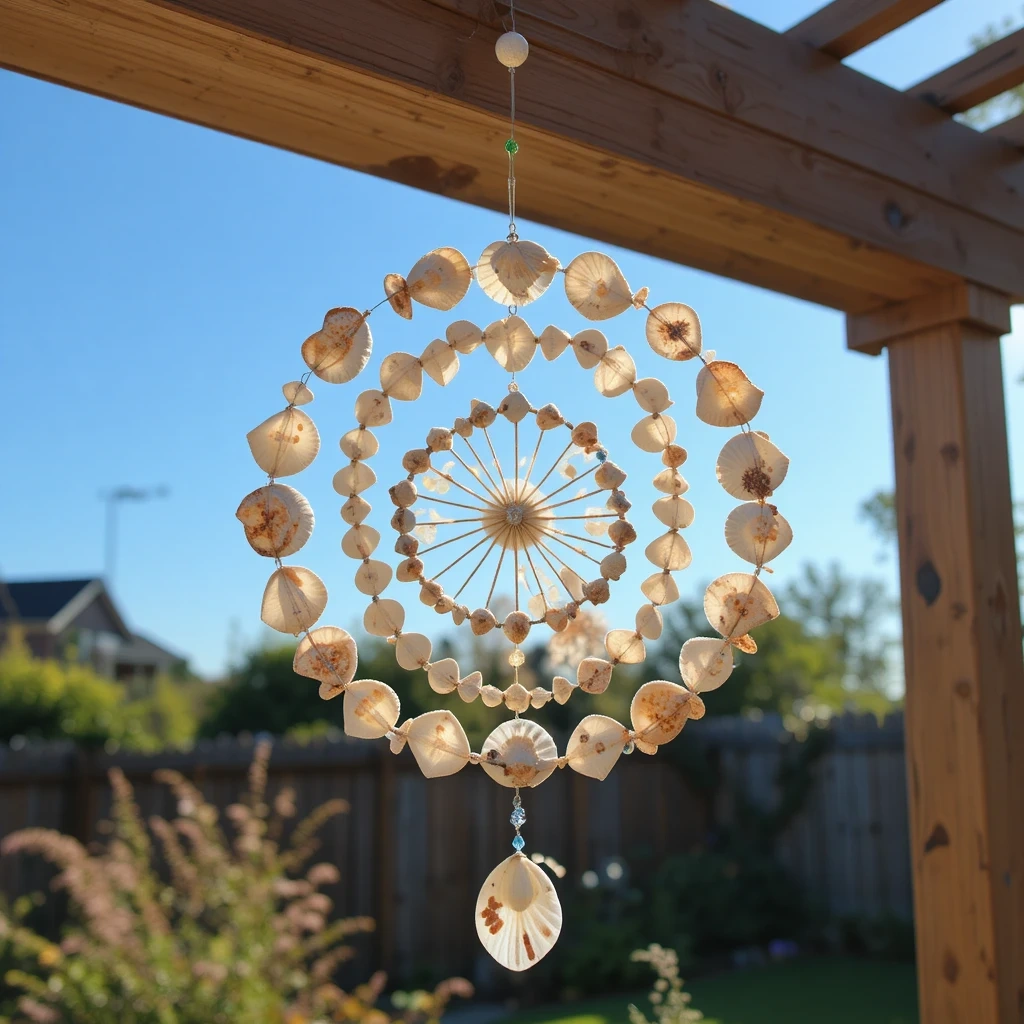
3. Driftwood Wind Chime
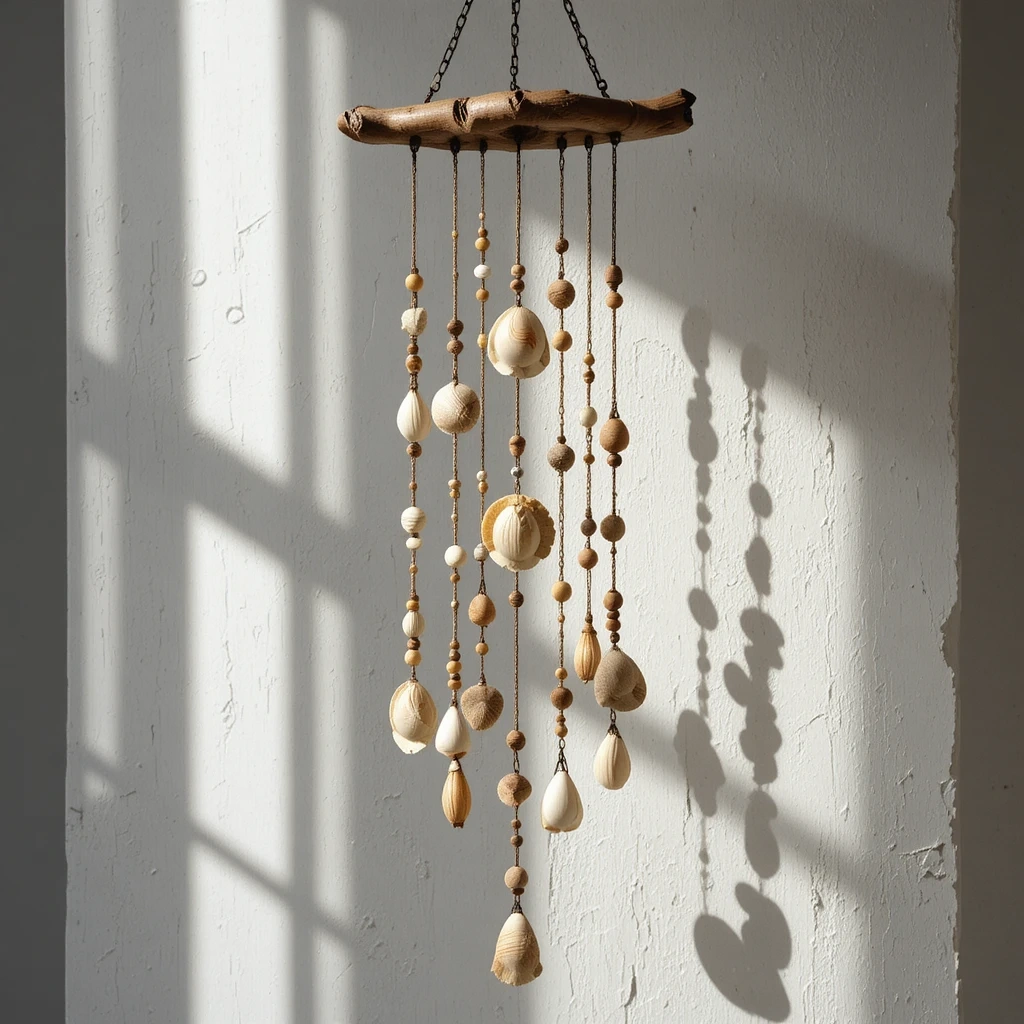
Turn a simple piece of driftwood into a beautiful wind chime using shells, beads, and string. This one takes a little more patience but the result is stunning.
Materials:
- 1 piece of driftwood (about 30 cm wide)
- Assorted shells with natural holes or pre-drilled
- Jute twine or fishing line
- Wooden beads (optional)
- Drill with small bit (adult use only)
- Scissors
Steps:
- Tie a long loop of twine around both ends of the driftwood for hanging.
- Cut 5–7 pieces of twine in varying lengths.
- Thread shells and beads onto each piece, knotting between them.
- Tie the finished strands along the driftwood, spaced evenly.
- Hang and adjust for balance.
Time: 45–60 minutes Difficulty: Medium
💡 Tip: Shells with natural holes (like scallops or whelks) work best. Check the shoreline carefully!
4. Sea Glass Sun Catchers
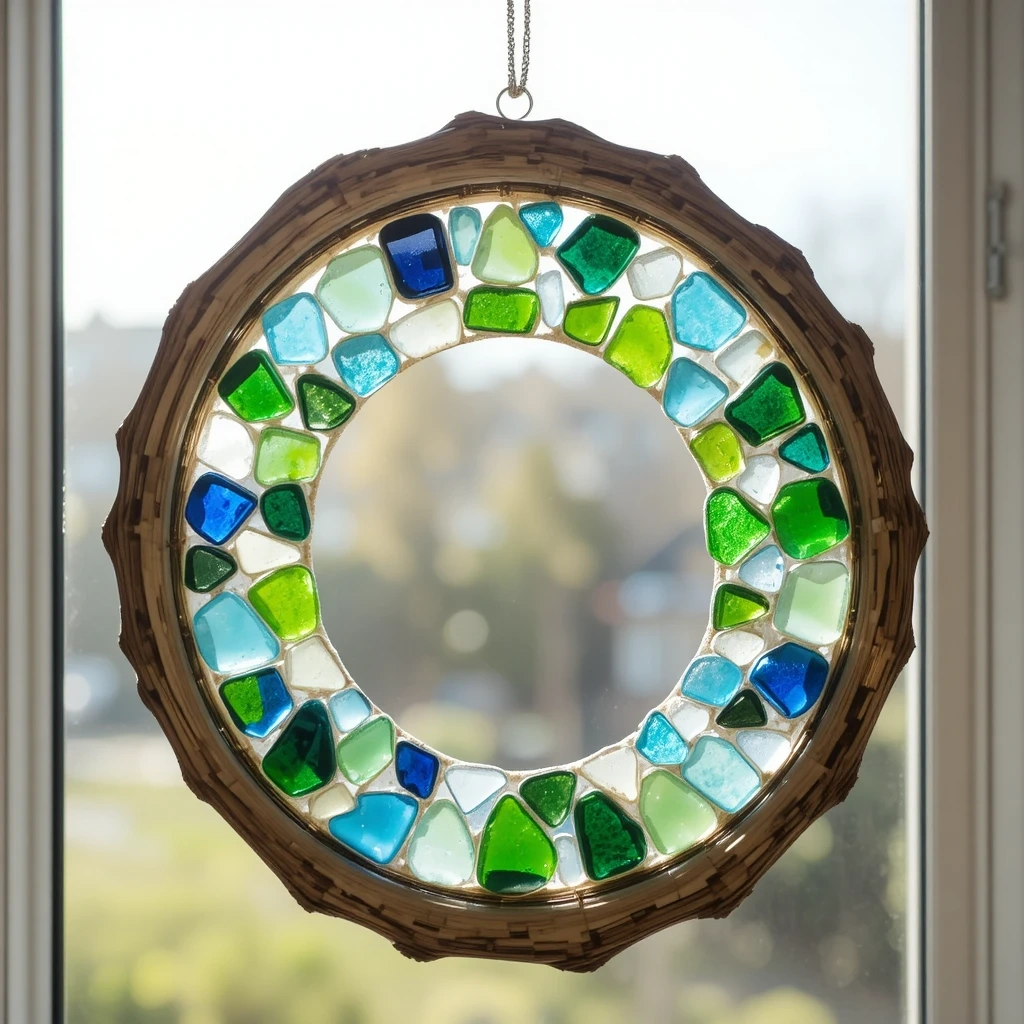
Sea glass is a treasure on its own — but suspended in a window with sunlight streaming through, it becomes magical. This craft is perfect for older kids who enjoy a bit of patience.
Materials:
- Collected sea glass (various colors)
- Clear contact paper or resin (for simpler version: use contact paper)
- Cardboard for frame
- Scissors
- String or ribbon for hanging
Steps:
- Cut two identical square or circle frames from cardboard.
- Cut contact paper slightly larger than the opening.
- Lay one piece sticky-side up and arrange sea glass pieces on top.
- Cover with a second piece of contact paper, sticky-sides together.
- Trim edges, mount in frame, and add hanging string.
Time: 30–45 minutes Difficulty: Medium
💡 Tip: Hold up pieces to a light source before arranging to see how the colors will look when sunlit.
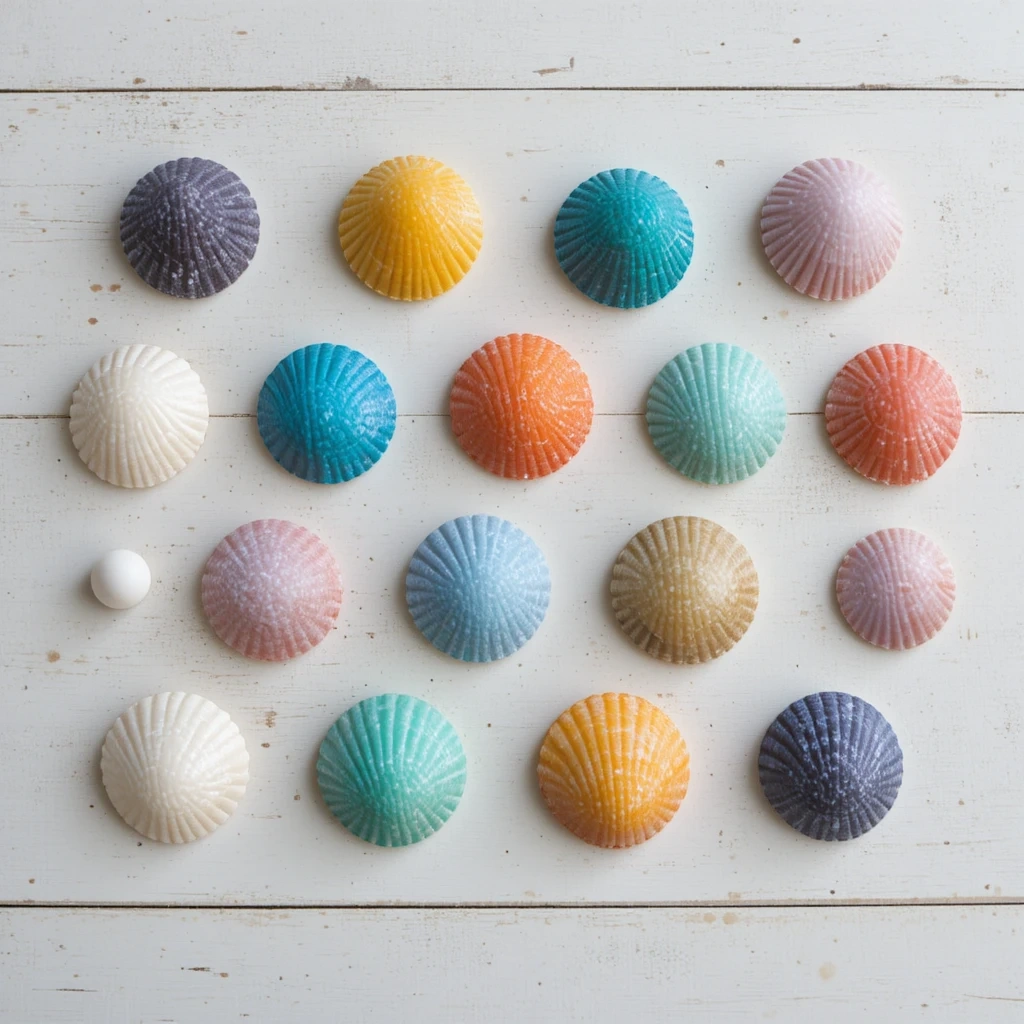
5. Beach Crafts for Kids: Seashell Candle Holders
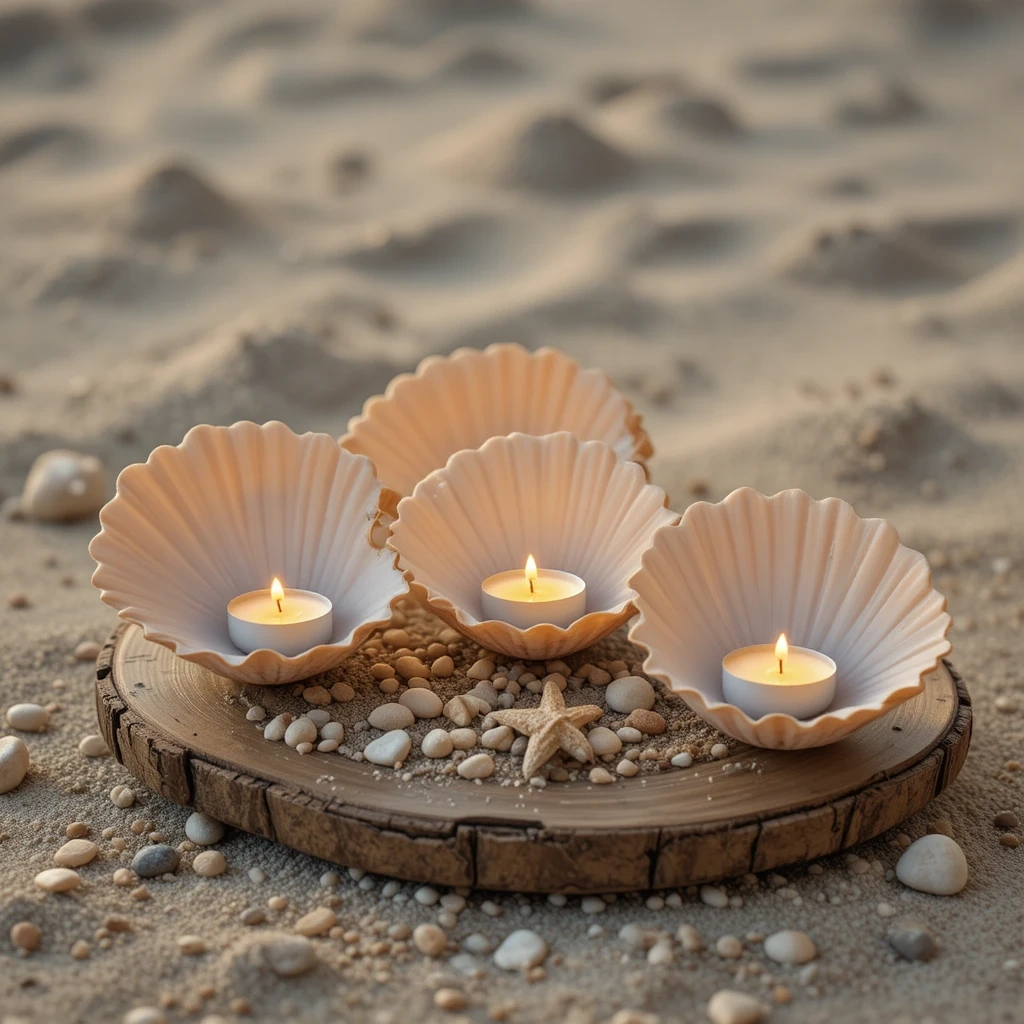
Large clamshells make the most gorgeous natural candle holders. This is a quick craft that looks elegant and is completely safe when used with tea lights.
Materials:
- Large, flat clamshells or scallop shells
- Tea light candles
- Small decorative stones or sand
- Optional: paint or glitter for decoration
Steps:
- Clean and dry shells thoroughly.
- Optional: paint the outside of the shell and let it dry.
- Add a small layer of sand or tiny pebbles inside the shell.
- Press a tea light candle gently into the sand layer.
- Arrange on a table with other shells for a centerpiece look.
Time: 15–20 minutes Difficulty: Easy
💡 Tip: Never leave lit candles unattended around children. These are also beautiful unlit as decorative pieces!
6. Pebble Animal Paintings
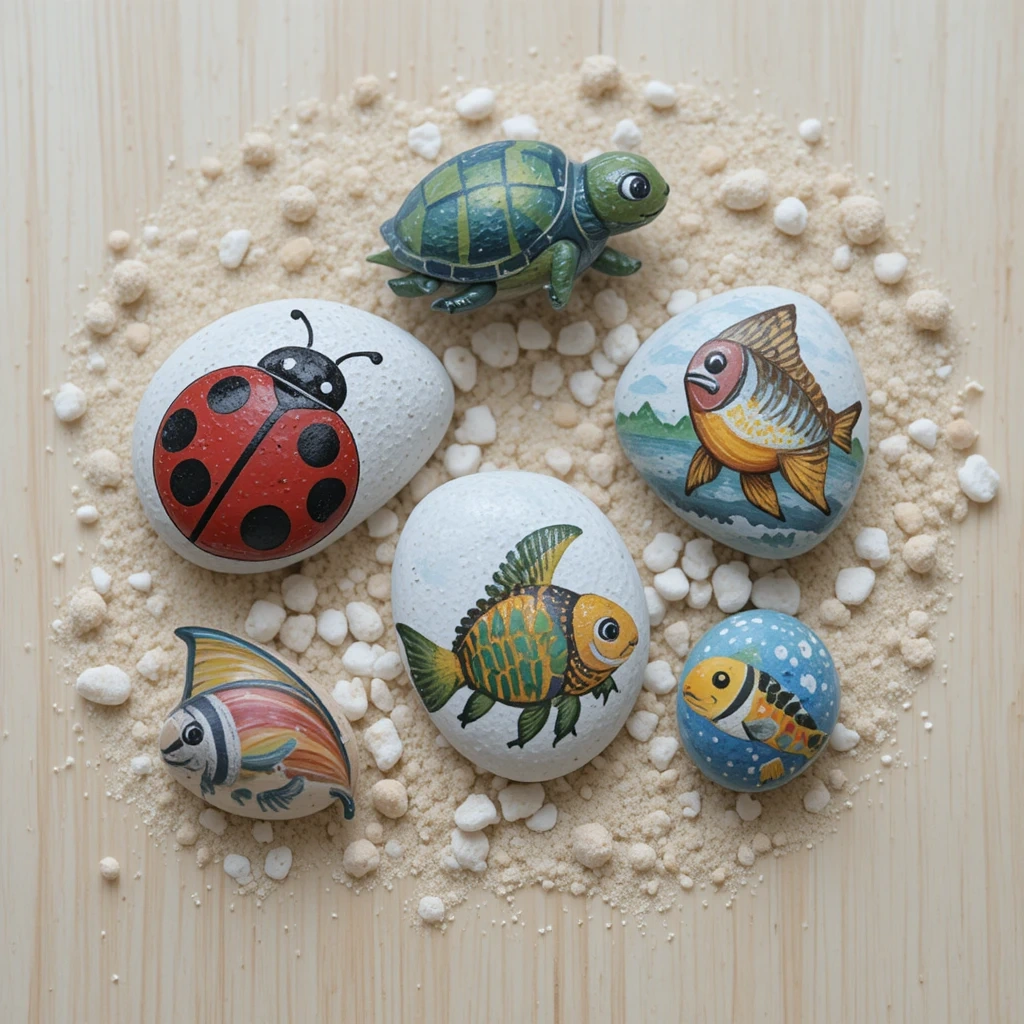
Smooth, flat beach pebbles are the perfect canvas for tiny creatures. Kids love transforming a plain rock into a ladybug, turtle, fish, or their favorite animal.
Materials:
- Smooth, flat beach pebbles
- Acrylic paints in multiple colors
- Small and medium paintbrushes
- Pencil (for sketching design first)
- Clear varnish or Mod Podge sealant
Steps:
- Wash and dry pebbles completely.
- Apply a white base coat and let dry.
- Lightly sketch your animal design with pencil.
- Paint the design, starting with background colors, then details.
- Let dry, then seal with clear varnish for a glossy finish.
Time: 40–60 minutes Difficulty: Easy to Medium
💡 Tip: Encourage kids to pick a pebble shape that suggests an animal — a round pebble for a hedgehog, an oval for a fish.
7. Shell Photo Frame
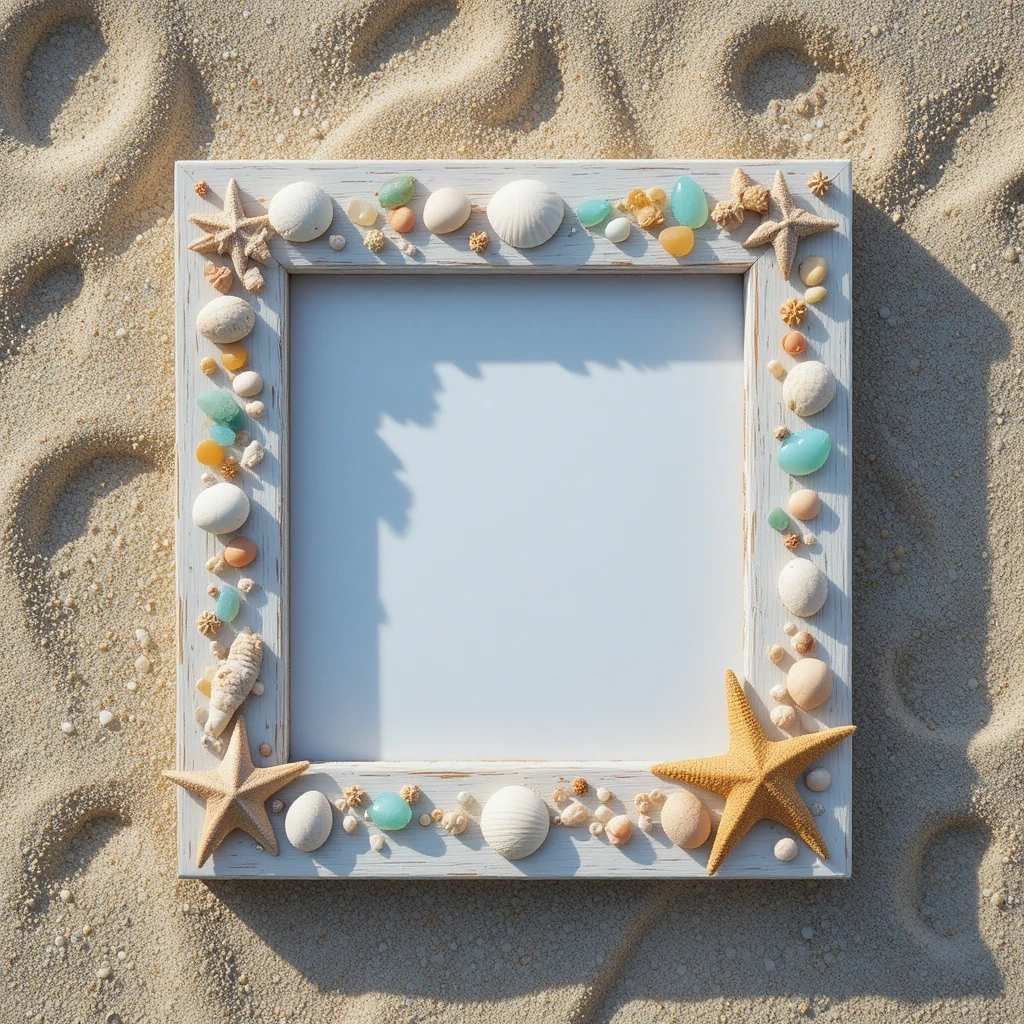
Give an ordinary photo frame a beach makeover using shells, sea glass, and a bit of glue. This makes a wonderful gift and a lasting memory from a beach trip.
Materials:
- Plain wooden or cardboard photo frame
- Assorted small shells and sea glass
- Craft glue or hot glue gun
- Optional: sand, small starfish, or twine accents
- Acrylic paint (for base coat)
Steps:
- Paint the frame in a base color (white or sandy beige works great).
- Let dry completely.
- Arrange your shells and sea glass on the frame before gluing.
- Glue pieces in place, starting from corners and edges.
- Fill any gaps with small pebbles, sand sprinkles, or extra shells.
- Let dry flat for at least one hour before inserting a photo.
Time: 45–60 minutes Difficulty: Easy
💡 Tip: Plan your full layout before gluing anything — it’s much easier to adjust placement while pieces are still loose.
8. Sand Dollar Ornaments

Sand dollars are naturally stunning, but with a little paint and ribbon they become beautiful hanging ornaments for windows, Christmas trees, or coastal decor year-round.
Materials:
- Dried sand dollars (natural or craft store)
- White and gold acrylic paint
- Fine paintbrush
- Thin ribbon or twine
- Hole punch or small drill bit
- Optional: glitter glue
Steps:
- Make a small hole near the top edge of the sand dollar (adult assistance needed).
- Paint the sand dollar white as a base.
- Once dry, add gold accents along the natural star pattern on top.
- Optional: add a tiny dot of glitter glue in the center.
- Thread ribbon through the hole and tie a loop for hanging.
Time: 20–30 minutes Difficulty: Easy
💡 Tip: Real sand dollars are fragile — handle with care and work on a soft surface to avoid cracking.
9. Beach Crafts for Kids Feature: Seashell Wind Spinner
This eye-catching craft is one of the most creative ideas in our full list of 10 beach crafts for kids. It spins beautifully in the breeze and doubles as a garden or porch decoration.
Materials:
- 5–8 large shells with holes
- Thin copper wire or fishing line
- One large washer or metal ring for the top
- Small beads (glass or wooden)
- Scissors or wire cutters
Steps:
- Cut 5–8 strands of wire, each about 30 cm long.
- Thread shells and beads alternately onto each wire strand.
- Twist the top of each strand tightly through the large ring.
- Space strands evenly around the ring.
- Add a longer center wire for hanging.
- Hang outdoors and watch it spin in the wind.
Time: 40–50 minutes Difficulty: Medium
💡 Tip: Mix shell sizes — a large shell at the bottom of each strand adds weight and helps the spinner rotate more freely.
10. Pressed Seaweed Art
Seaweed pressing is an old-fashioned art form that produces stunning, one-of-a-kind prints. Each piece looks like underwater botanical artwork and is completely unique.
Materials:
- Fresh seaweed (various shapes and sizes)
- White cardstock or watercolor paper
- Flat tray or dish
- Heavy books for pressing
- Optional: watercolor paints and frame
Steps:
- Rinse seaweed gently in fresh water to remove sand and debris.
- Float seaweed in a tray of water and slide your paper beneath it.
- Lift the paper slowly, letting seaweed arrange itself naturally on top.
- Place between sheets of newspaper and press under heavy books.
- Leave for 24–48 hours until fully dry.
- The seaweed will stick to the paper naturally as it dries.
- Frame or use as-is for a nature art display.
Time: 20 minutes active + 24–48 hours drying Difficulty: Easy
💡 Tip: Use freshly collected seaweed — dried or old seaweed won’t adhere as well to the paper.
Common Mistakes to Avoid
1. Not cleaning materials before crafting Sand, salt, and debris can ruin paint adhesion and cause shells or pebbles to smell over time. Always rinse collected items thoroughly and let them dry completely before using.
2. Rushing the drying time It’s tempting to move on to the next step before paint or glue is fully dry — but doing so leads to smudged designs and pieces falling apart. Build drying time into your craft schedule.
3. Using the wrong glue for shells Regular school glue (PVA) is too weak to hold heavy shells on frames or wood. Use a strong craft glue or a low-temperature hot glue gun for any shell-to-surface bonding.
Tips for Best Results
- Prep materials the night before — clean, dry, and sort your shells, pebbles, and sea glass in advance so craft time flows smoothly.
- Work on a protected surface — lay down newspaper or a silicone mat to keep tables clean, especially when painting.
- Use a light pencil sketch first — for painted rocks and frames, sketch your design lightly before picking up a brush.
- Let kids lead the design — there’s no “wrong” way to decorate a shell. Encourage creativity over perfection.
- Store leftover colored sand in labeled zip-lock bags for future projects.
- Seal everything — a coat of Mod Podge or clear acrylic sealant will protect painted and decorated crafts from fading or chipping.
Frequently Asked Questions
Q: What age group are these beach crafts suitable for? Most of these crafts are ideal for kids ages 4–12. Simpler projects like sand art bottles and pebble painting work well for younger kids, while wind chimes and seaweed pressing suit older children with a bit more patience.
Q: Do we need to be at the beach to do these crafts? Not at all! You can find shells, sea glass, sand, and driftwood at craft stores. Many of these crafts work just as well as rainy-day activities at home using materials bought in advance.
Q: How do I safely clean seashells before crafting? Soak shells in a 50/50 mix of water and white vinegar for 30 minutes, scrub gently with an old toothbrush, rinse well, and allow to air dry completely.
Q: What type of paint works best on shells and rocks? Acrylic paint is the best choice — it adheres well to porous surfaces, dries quickly, and comes in vibrant colors. Always finish with a sealant coat to protect your work.
Q: Can these crafts be done indoors? Yes! Most of these crafts are perfectly suited for indoor settings. Just make sure you have a protected work surface and good ventilation if using spray sealants or acrylic paints.
Q: Are sand dollars safe to collect from the beach? In most places, only empty, bleached sand dollars (white and dry) are safe and legal to collect. Green or brown sand dollars are still alive and should be left in the water. Always check local regulations before collecting natural materials.
Conclusion
Whether you’re on the shore or recreating that beachy feeling at home, these ideas prove that some of the best art supplies come straight from nature.
Grab a bucket, fill it with treasures, and let creativity take over. With just a little prep and a lot of imagination, every shell, pebble, and piece of sea glass becomes a masterpiece waiting to happen. Now go make something beautiful!