12 Cute Rainforest Crafts Ideas for Preschool and Toddlers
Bring the magic of the jungle into your home with these creative rainforest crafts. Whether you’re crafting with kids or looking for a fun DIY weekend project, there’s something here for everyone. These 12 rainforest crafts ideas range from paper art to sensory play — all inspired by the lush, wild beauty of tropical forests.
These projects use simple, affordable materials you likely already have at home. Let’s dive in!
1. Tropical Leaf Stamping Art
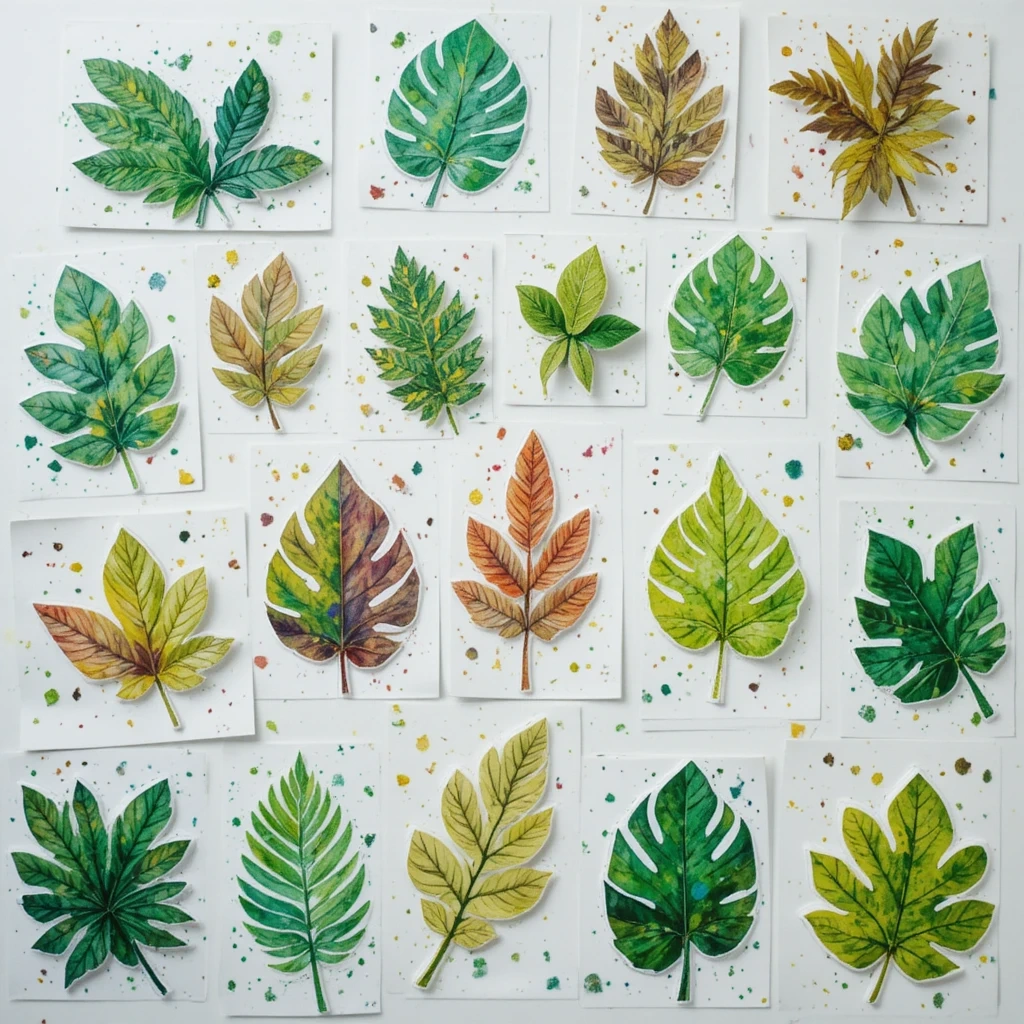
Transform ordinary paper into a jungle masterpiece using leaf shapes and paint. This is one of the easiest rainforest crafts for young children and beginners.
Materials:
- Green, yellow, and brown craft paint
- Sponge brushes
- White cardstock or canvas paper
- Leaf-shaped foam stamps (or cut from a sponge)
- Palette or paper plate
Steps:
- Pour paint colors onto your palette.
- Press the foam leaf stamp into the paint evenly.
- Stamp firmly onto the paper and lift straight up.
- Repeat with different colors and overlapping layers.
- Add vein details with a thin brush once dry.
Time: 15–25 minutes Difficulty: Easy
Tip: Layer dark green leaves behind lighter ones to create a realistic jungle canopy effect.
2. Paper Plate Toucan
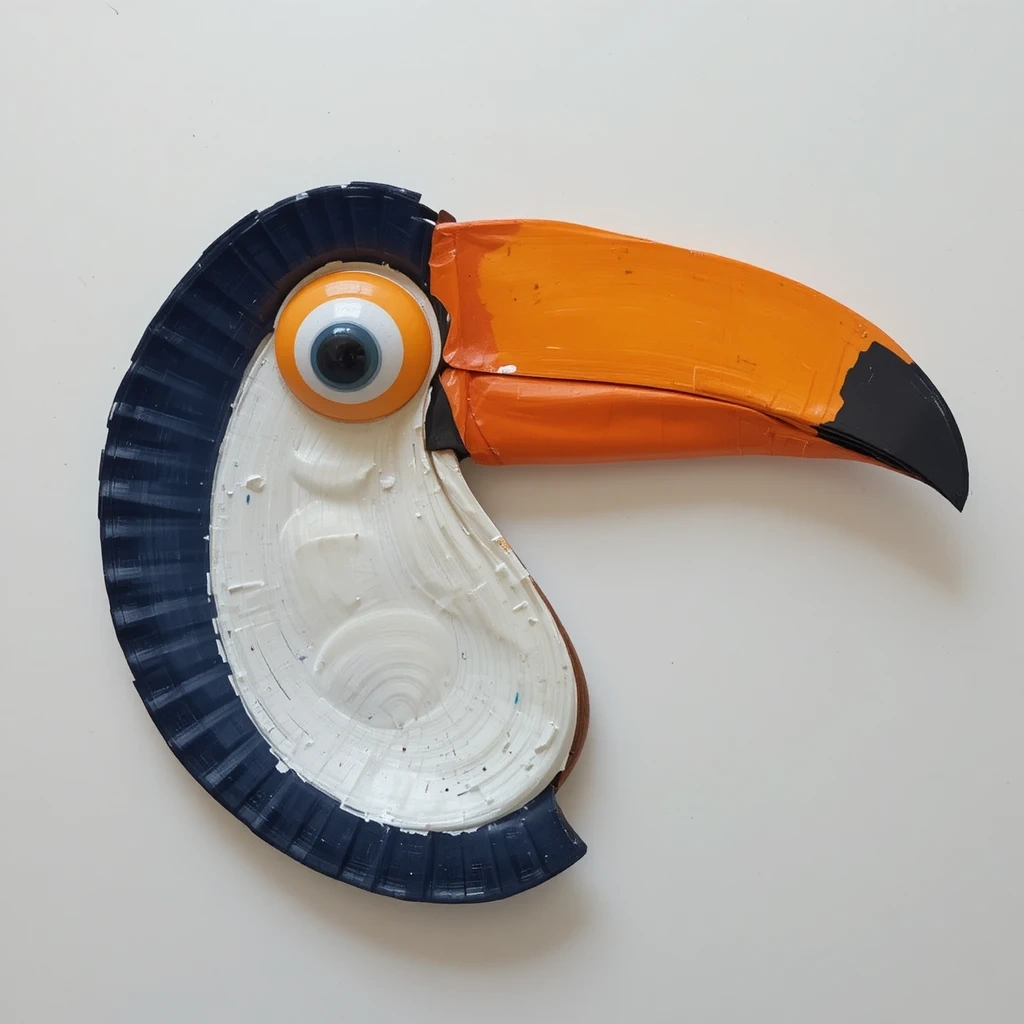
This bright, cheerful toucan is one of the most beloved rainforest crafts ideas for kids. It makes a great classroom decoration or bedroom wall art.
Materials:
- 1 large paper plate
- Black, orange, yellow, and red paint
- Construction paper (white and black)
- Googly eye (1 large)
- Scissors and glue stick
Steps:
- Paint the paper plate black and let dry completely.
- Cut a large beak from orange and yellow construction paper.
- Glue the beak to the center-lower area of the plate.
- Add a white oval for the throat patch.
- Glue a googly eye above the beak.
- Cut feather shapes from black paper and layer around the edges.
Time: 20–30 minutes Difficulty: Easy
Tip: Use glossy paint for a more vibrant, realistic feather look.
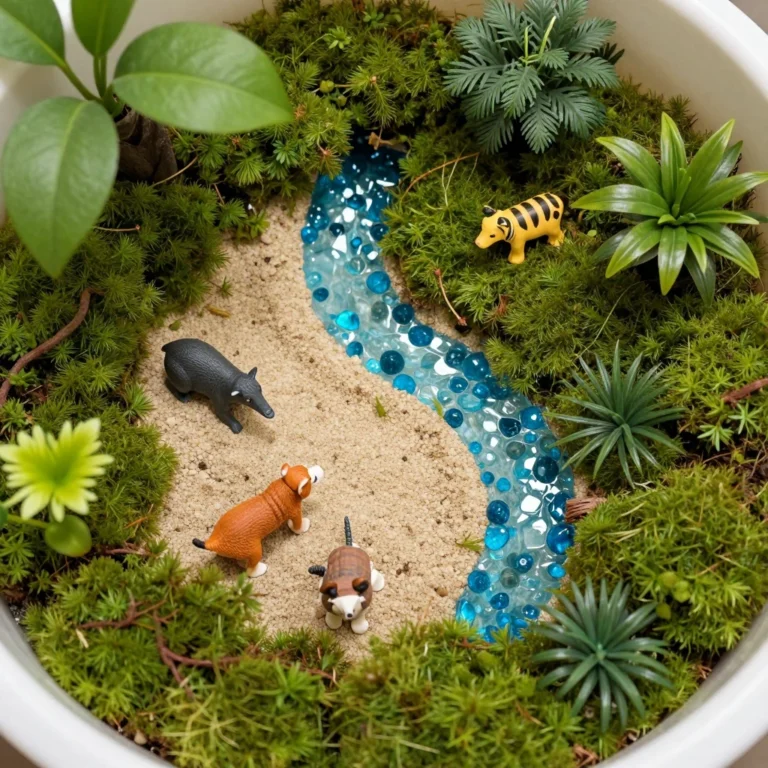
3. Rainforest Crafts Sensory Bin
3. Rainforest Crafts Sensory Bin

A sensory bin is a hands-on activity that lets toddlers and young children explore jungle textures, colors, and materials. It’s also wonderfully calming.
Materials:
- Shallow plastic bin or tray
- Dried green lentils or shredded green paper
- Small plastic jungle animals (frogs, snakes, tigers)
- Craft moss or fake leaves
- Smooth pebbles and small sticks
Steps:
- Fill the bin with green lentils as the “jungle floor.”
- Tuck in fake leaves, moss, and small sticks.
- Place plastic jungle animals throughout.
- Add pebbles as rocks or a “river.”
- Let children explore freely with their hands.
Time: 10–15 minutes to set up Difficulty: Easy
Tip: Add a few drops of lavender or eucalyptus essential oil to the lentils for an immersive sensory experience.
4. Jungle Vine Wreath
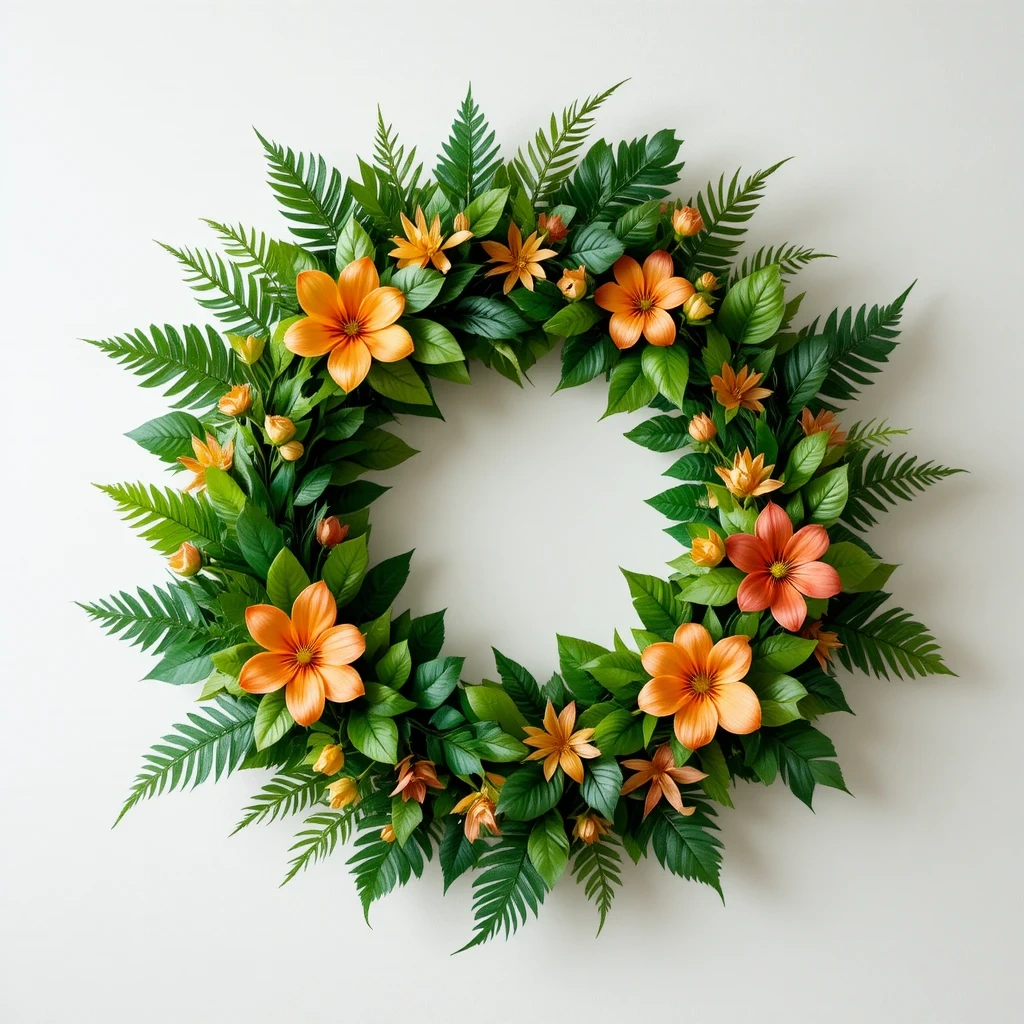
This stunning wreath brings rainforest vibes to your front door or wall. It’s surprisingly simple and uses mostly dollar-store materials.
Materials:
- Foam wreath base (12-inch)
- Artificial green vines (2–3 bundles)
- Tropical silk leaves (large and small)
- Faux tropical flowers (optional)
- Hot glue gun and glue sticks
- Twine for hanging
Steps:
- Wrap green vines tightly around the foam base, securing with hot glue.
- Tuck and glue large tropical leaves around the wreath.
- Fill gaps with smaller leaves for a lush, full look.
- Add tropical flowers for pops of color.
- Attach a twine loop to the back for hanging.
Time: 30–45 minutes Difficulty: Medium
Tip: Use leaves in varying shades of green — lime, forest, olive — for a realistic layered jungle look.
5. Watercolor Rainforest Scene
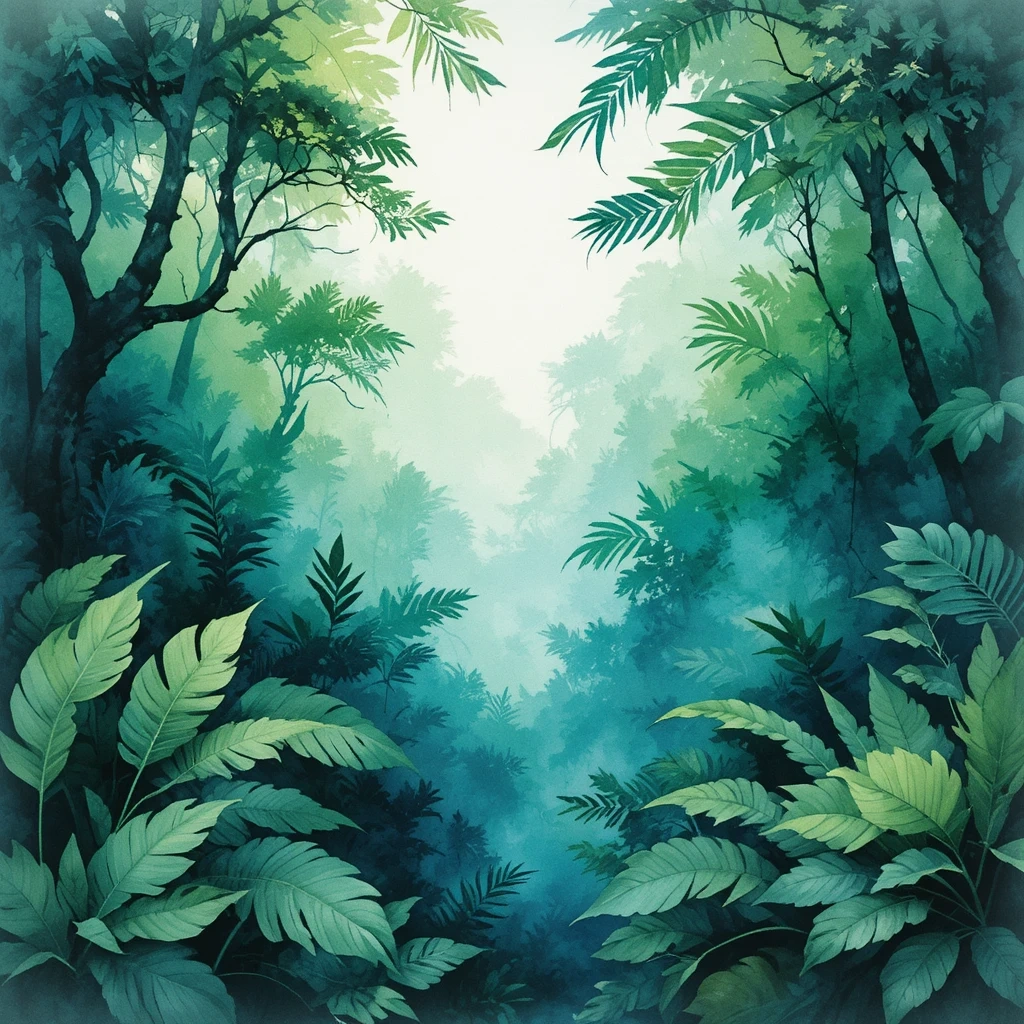
Watercolor painting is the perfect medium for capturing the misty, dreamy atmosphere of a tropical rainforest. This project suits kids and adults alike.
Materials:
- Watercolor paper (cold press, 140 lb)
- Watercolor paints (greens, blues, yellows)
- Various paintbrushes (round and flat)
- Water cup and palette
- Masking tape
Steps:
- Tape paper edges to your table to prevent warping.
- Wet the paper lightly with a flat brush (wet-on-wet technique).
- Drop in greens and blues loosely to create a background wash.
- Once dry, paint tree silhouettes and large leaf shapes.
- Add details like vines, flowers, or a waterfall last.
Time: 30–60 minutes Difficulty: Medium
Tip: Let each layer dry fully before adding details — patience is the secret to beautiful watercolor.
6. Cardboard Tube Parrot
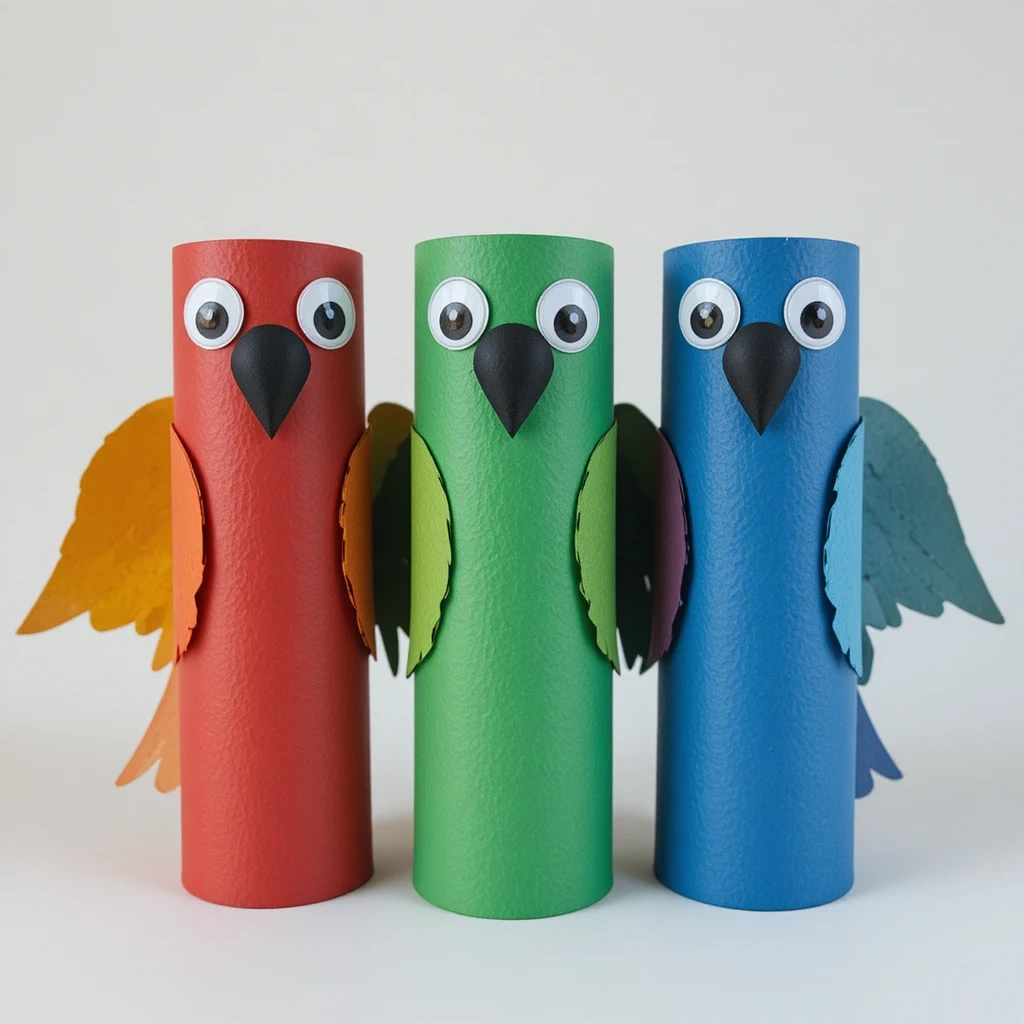
Transform empty toilet paper rolls into brilliant jungle parrots. This is one of the most fun rainforest crafts ideas to do with a group.
Materials:
- 1–2 cardboard tubes (toilet paper rolls)
- Red, yellow, blue, and green craft paint
- Construction paper for wings and beak
- Googly eyes (2 per parrot)
- Scissors and craft glue
Steps:
- Paint the tube in bright red or green. Let dry.
- Cut wing shapes from construction paper and paint them.
- Cut a small diamond beak from yellow paper and fold in half.
- Glue the beak and googly eyes onto the tube top.
- Glue wings to the sides at a slight angle.
- Add a tail from layered paper strips at the bottom.
Time: 20–30 minutes Difficulty: Easy
Tip: Make a whole flock in different colors — the more, the merrier!
7. Rainforest Crafts Butterfly Mobile
7. Rainforest Crafts Butterfly Mobile
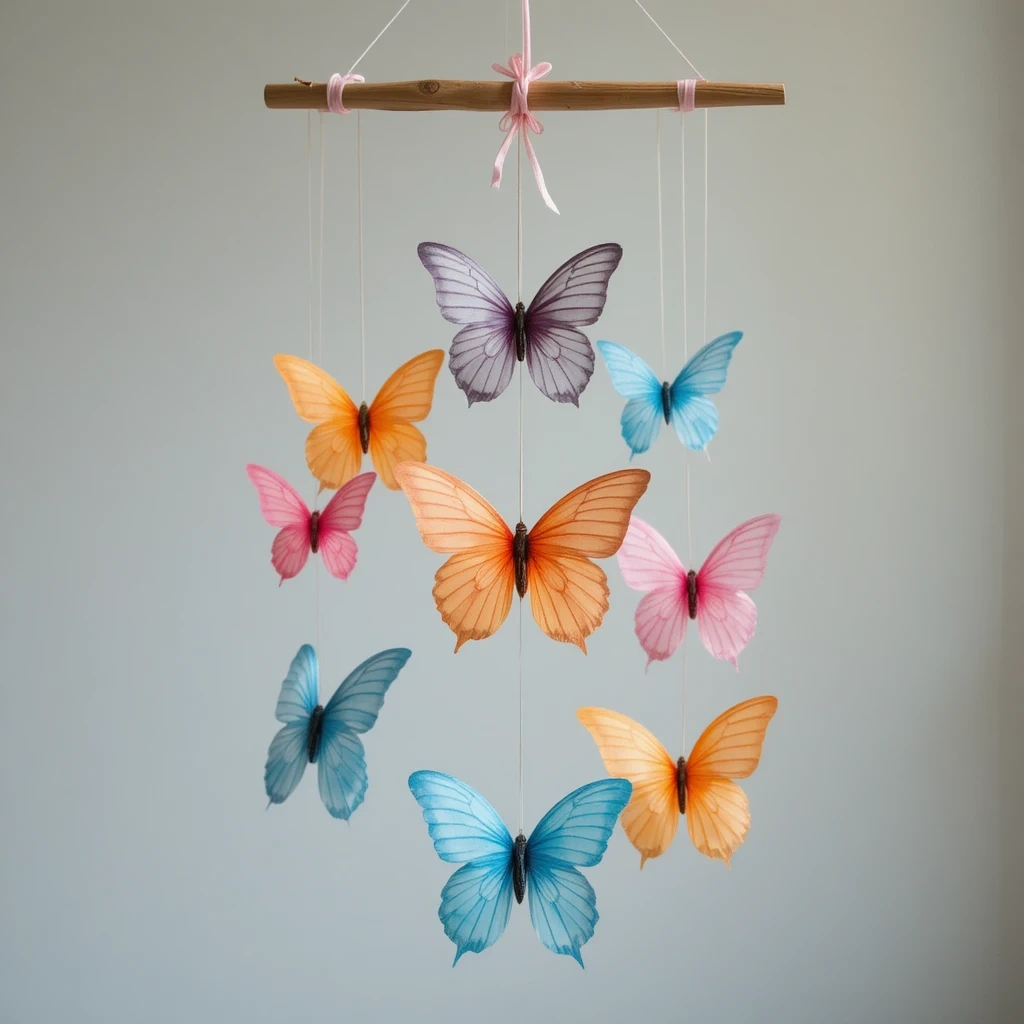
Tropical butterflies are iconic symbols of the rainforest. This hanging mobile adds color and movement to any room.
Materials:
- Coffee filters (large, basket style)
- Washable markers in bright colors
- Spray bottle with water
- Black pipe cleaners
- String or fishing line
- Wooden dowel or stick
Steps:
- Lay coffee filters flat and color with bright markers.
- Lightly spray with water and watch colors blend and bleed.
- Allow to dry completely (about 20 minutes).
- Pinch the center of each filter and wrap with a pipe cleaner for the body.
- Twist the pipe cleaner ends upward to form antennae.
- Tie each butterfly to the dowel with varying string lengths.
Time: 40–50 minutes (including drying) Difficulty: Easy
Tip: Hold finished butterflies near a window — the light shining through makes the colors glow beautifully.
8. Frog on a Lily Pad (Paper Craft)
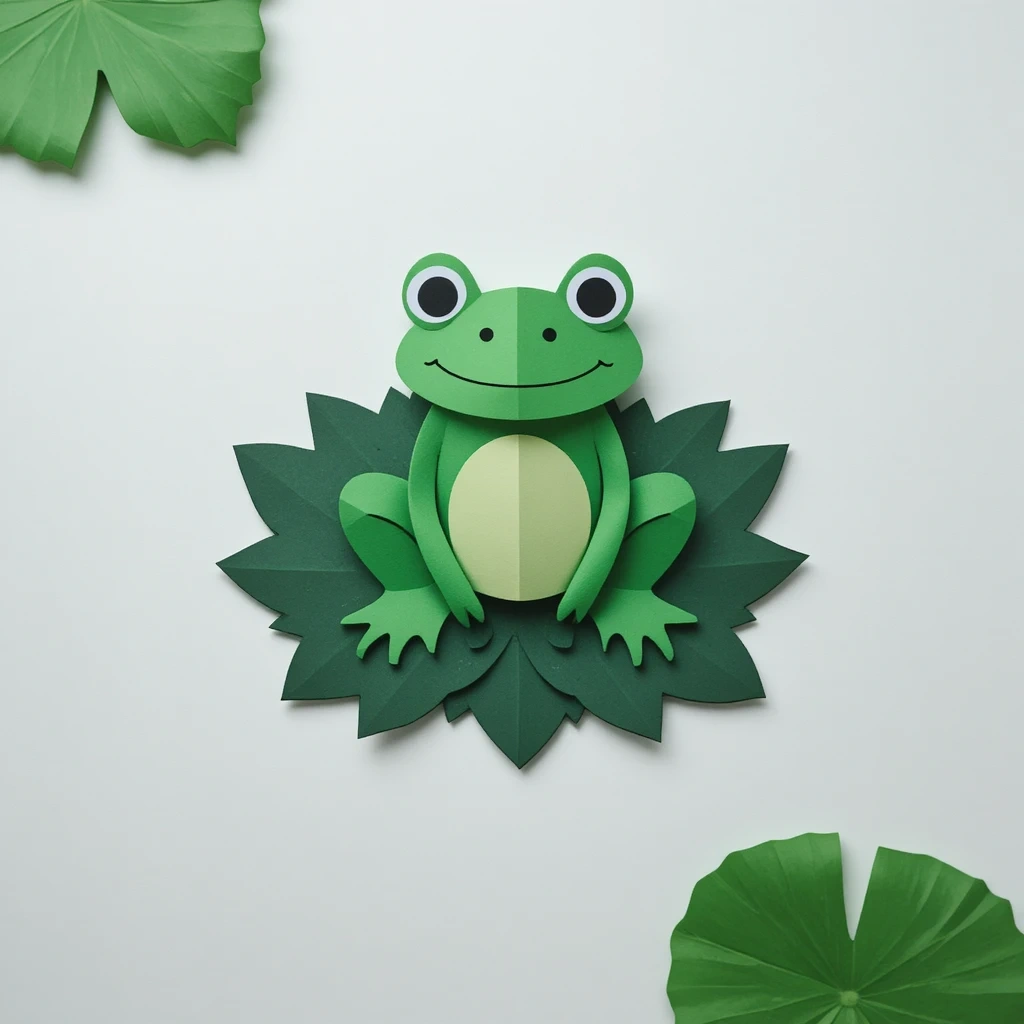
Frogs are one of the most recognizable rainforest animals. This sweet paper craft doubles as a cute greeting card or desk decoration.
Materials:
- Green cardstock (2 shades)
- Red paper or felt (for tongue)
- Googly eyes (2 small)
- Scissors, ruler, and glue
- Black marker
Steps:
- Cut a large circle from dark green cardstock for the lily pad.
- Cut a small wedge out of the circle and fold up the edges slightly.
- Cut a frog body from bright green cardstock — oval body with four legs.
- Cut a thin red strip for the curled tongue and glue it inside the mouth.
- Glue googly eyes on top.
- Draw nostrils and a smile with the black marker.
- Glue the frog onto the lily pad.
Time: 20–30 minutes Difficulty: Easy
Tip: Score and fold the lily pad edges slightly upward so it looks like it’s floating on water.
9. Tropical Fish Wind Sock
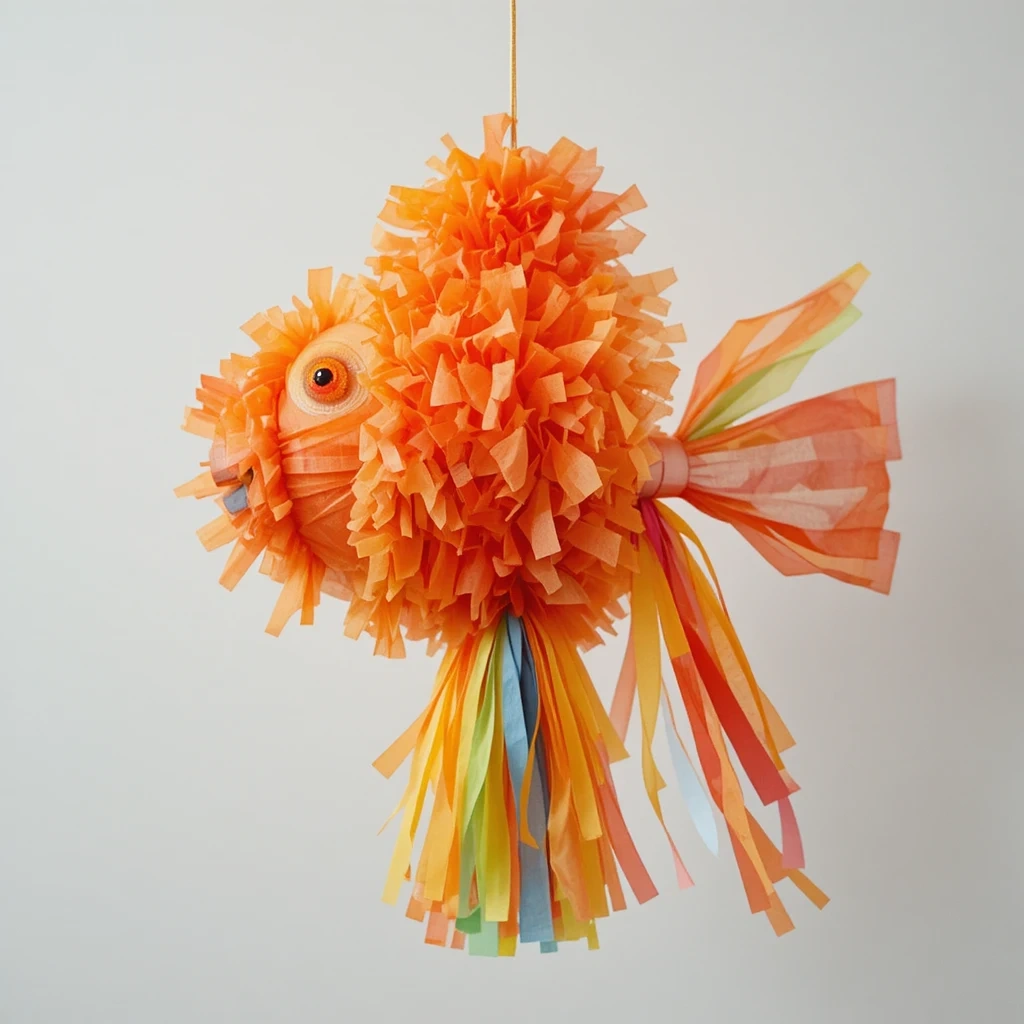
Inspired by the colorful fish found in rainforest rivers, this wind sock dances in the breeze and makes a cheerful outdoor decoration.
Materials:
- Cardstock in bright colors (orange, yellow, blue)
- Tissue paper in matching colors (cut into strips)
- Clear tape and stapler
- String or ribbon
- Hole punch and markers
Steps:
- Roll cardstock into a cylinder and staple or tape to secure.
- Draw fish scales and an eye on the outside with markers.
- Cut tissue paper into long strips for the tail.
- Tape tissue strips to the inside of one end of the cylinder.
- Punch two holes at the open end and tie string for hanging.
Time: 20–25 minutes Difficulty: Easy
10. Moss and Twig Terrarium Frame
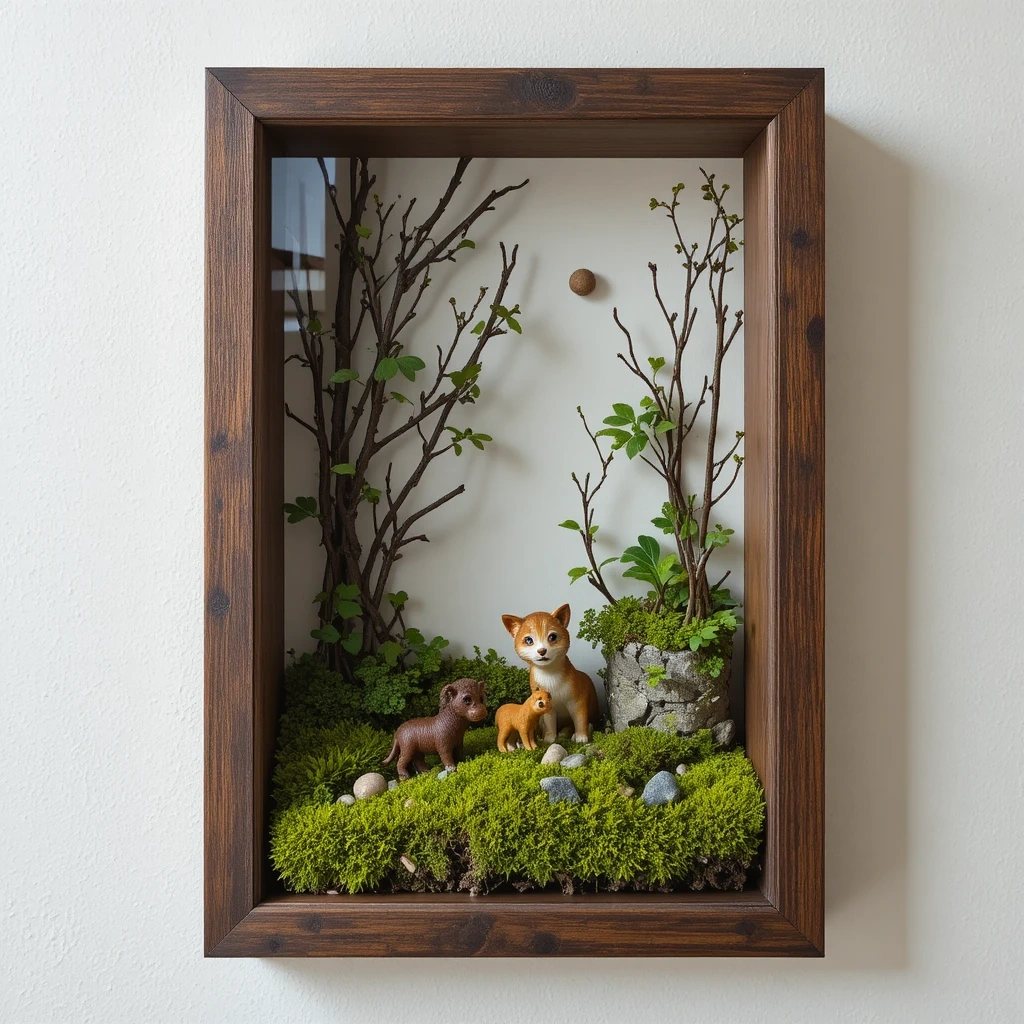
This mini nature-inspired art piece uses real or faux moss to create a living rainforest scene in a picture frame.
Materials:
- Shadowbox or deep picture frame
- Sheet moss (real or preserved)
- Small twigs and pebbles
- Tiny plastic jungle animals or figurines
- Hot glue gun
- Backing board (cardboard painted dark green)
Steps:
- Paint the backing board dark green and let dry.
- Glue sheet moss across the lower half of the backing board.
- Arrange and glue twigs vertically as trees.
- Add pebbles at the base for texture.
- Position small jungle animals within the scene.
- Place the backing inside the shadowbox frame.
Time: 30–45 minutes Difficulty: Medium
Tip: Use preserved (not live) moss for a long-lasting display that won’t dry out or attract insects.
11. Rainforest Animal Masks
11. Rainforest Animal Masks
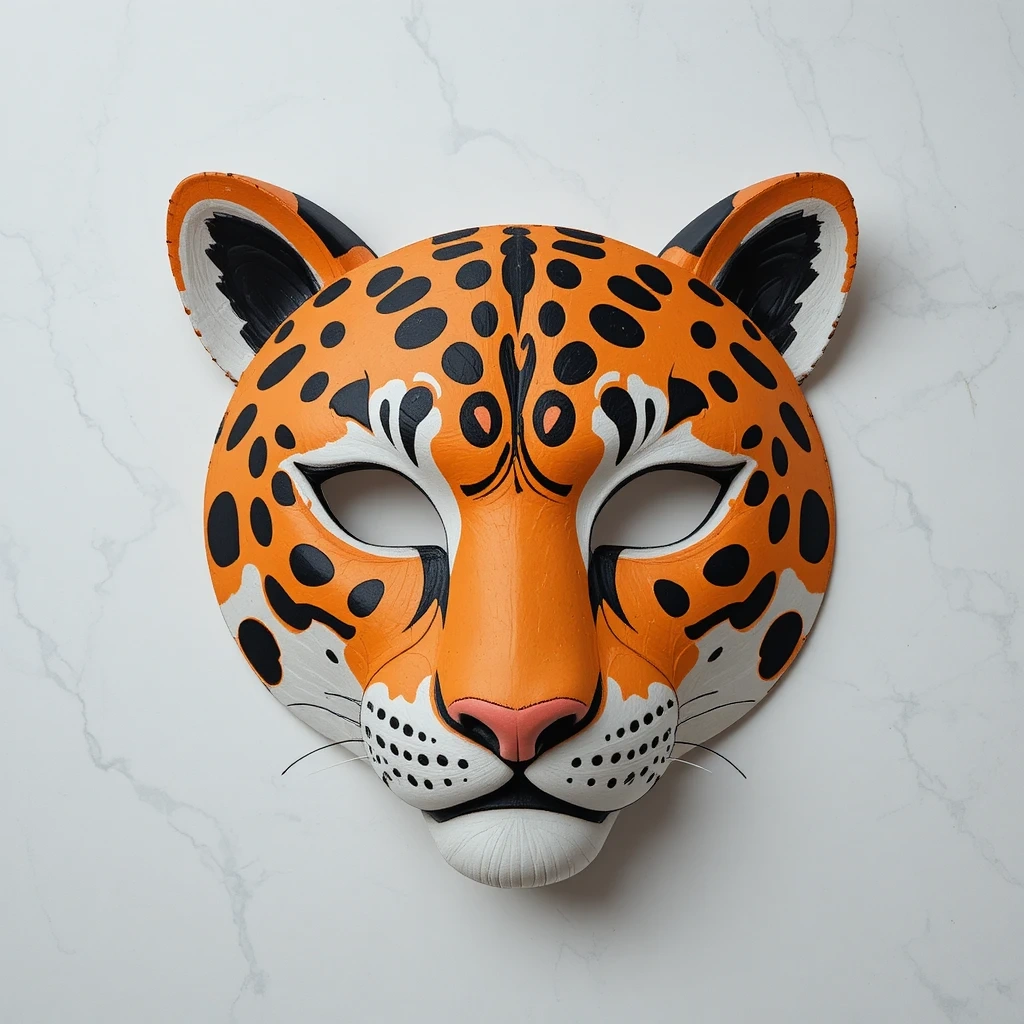
Crafting animal masks is one of the most imaginative rainforest crafts ideas — perfect for dress-up, school plays, or themed parties.
Materials:
- Cardboard or thick cardstock
- Craft paint in jungle colors
- Elastic cord or wooden stick
- Scissors, hole punch
- Feathers, glitter, or foam for decoration
Steps:
- Draw a mask outline on cardboard (oval with eye holes).
- Cut it out carefully, including eye holes.
- Choose your animal — jaguar, monkey, frog, or parrot — and paint accordingly.
- Add details: spots for jaguar, stripes, or colorful parrot markings.
- Decorate with feathers, glitter, or foam cutouts.
- Punch holes on each side and thread elastic cord through.
Time: 25–40 minutes Difficulty: Medium
Tip: Look up reference photos of real rainforest animals to make the mask markings more accurate and impressive.
12. Woven Rainforest Bookmark
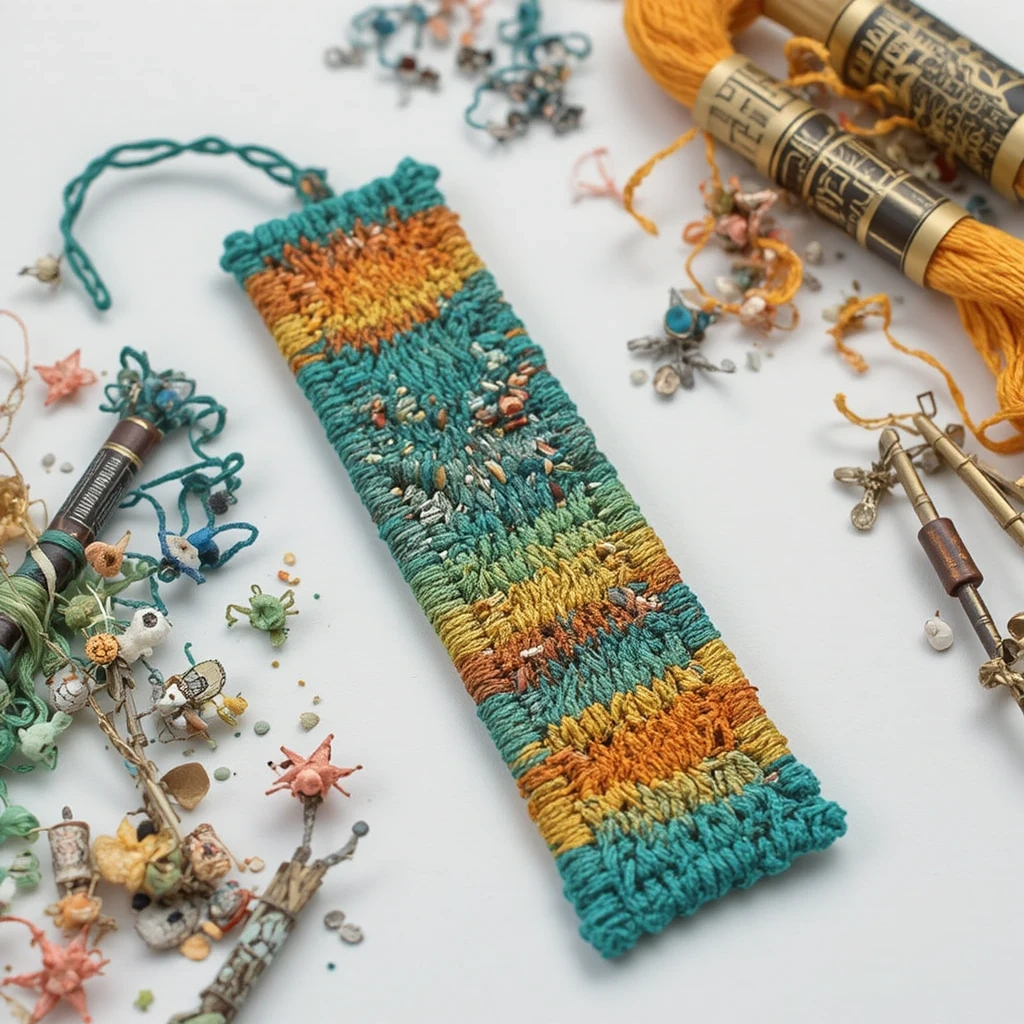
This simple weaving project creates beautiful bookmarks inspired by the woven patterns of indigenous rainforest crafts. Great for older kids and adults.
Materials:
- Cardboard strip (2 x 8 inches)
- Embroidery floss in tropical colors (green, teal, yellow, orange)
- Tape and scissors
- Large plastic needle
Steps:
- Cut slits every 0.5 cm along the top and bottom of the cardboard strip.
- Thread vertical warp strings through the slits and tape ends to the back.
- Thread your needle with a bright color and begin weaving horizontally (over, under, over, under).
- Push each row tightly together as you go.
- Change colors every few rows for a striped tropical look.
- Remove from cardboard and tie off ends securely.
Time: 30–45 minutes Difficulty: Medium
Tip: Use at least 4–5 different colors to mimic the vibrant hues of a real rainforest.
Common Mistakes to Avoid
- Rushing the drying time. Many rainforest crafts involve multiple paint layers. Skipping drying time causes colors to bleed, smear, or peel. Always wait between layers.
- Using too little glue. Lightweight materials like feathers, moss, and tissue paper need enough adhesive to hold. Use a hot glue gun for heavier elements rather than a glue stick.
- Choosing only one shade of green. Real rainforests have dozens of green tones. Using a single shade makes crafts look flat. Mix lime, emerald, olive, and forest green for a richer, more realistic result.
Tips for Best Results
- Prep your workspace first. Cover your surface with newspaper or a silicone mat to make cleanup easy.
- Batch your crafts. If making multiples (like butterflies or parrots), complete each step for all pieces at once before moving to the next.
- Use reference images. A quick search for real rainforest animals, leaves, or patterns gives your crafts a more authentic, detailed look.
- Mix textures. Combine smooth paint, rough moss, shiny foil, and soft felt for crafts that are visually interesting to touch and see.
- Seal finished pieces. Spray finished crafts with a clear matte sealant to protect paint and prevent fading over time.
- Start simple. If you’re new to crafting, begin with the leaf stamping or paper plate toucan before tackling the terrarium or weaving project.
FAQs
Q: What age are these rainforest crafts suitable for? Most of these crafts are suitable for ages 4 and up with adult supervision. Projects like the woven bookmark and terrarium frame are best for ages 8 and up or for adult crafters.
Q: Where can I find cheap tropical craft supplies? Dollar stores, craft stores like Michaels or Hobby Lobby, and online retailers like Amazon carry affordable jungle-themed supplies. Many items — like egg cartons, cardboard tubes, and coffee filters — are free household items.
Q: Can I use real leaves for the leaf stamping project? Absolutely! Real leaves actually work better than foam stamps. Use large, waxy leaves like magnolia or monstera for the clearest impressions.
Q: How do I make these crafts last longer? Apply a clear acrylic sealant spray once the craft is fully dry. For paper crafts, laminating adds durability. Store in a dry place away from direct sunlight to prevent fading.
Q: Are these crafts good for classroom or group projects? Yes! Most of these crafts are designed to be beginner-friendly and work great in groups. The paper plate toucan, butterfly mobile, and animal masks are especially popular for classrooms, camps, and birthday parties.
Q: Can I adapt these crafts to a specific rainforest region? Definitely. Research animals and plants from a specific rainforest — Amazon, Congo, Borneo — and use those as inspiration for colors, patterns, and species to recreate.
Conclusion
From butterflies and toucans to lush terrariums and woven bookmarks, these 12 rainforest craft ideas bring the jungle to life in the most creative and colorful ways. Whether you’re crafting solo, with your kids, or in a classroom, there’s a project here that will inspire and delight.
Pick one that excites you most — and don’t be afraid to get a little messy. That’s where the real magic happens. Happy crafting!