10 Bird Crafts That Are Fun, Easy, and Totally Adorable
Bird crafts are one of the most versatile and delightful DIY projects you can try at home. Whether you’re crafting with kids or looking for a peaceful solo project, birds offer endless inspiration.
From paper to clay to recycled materials, the options are truly endless. These 10 ideas range from beginner-friendly to mildly challenging — but all of them are achievable and rewarding.
1. Paper Plate Robin
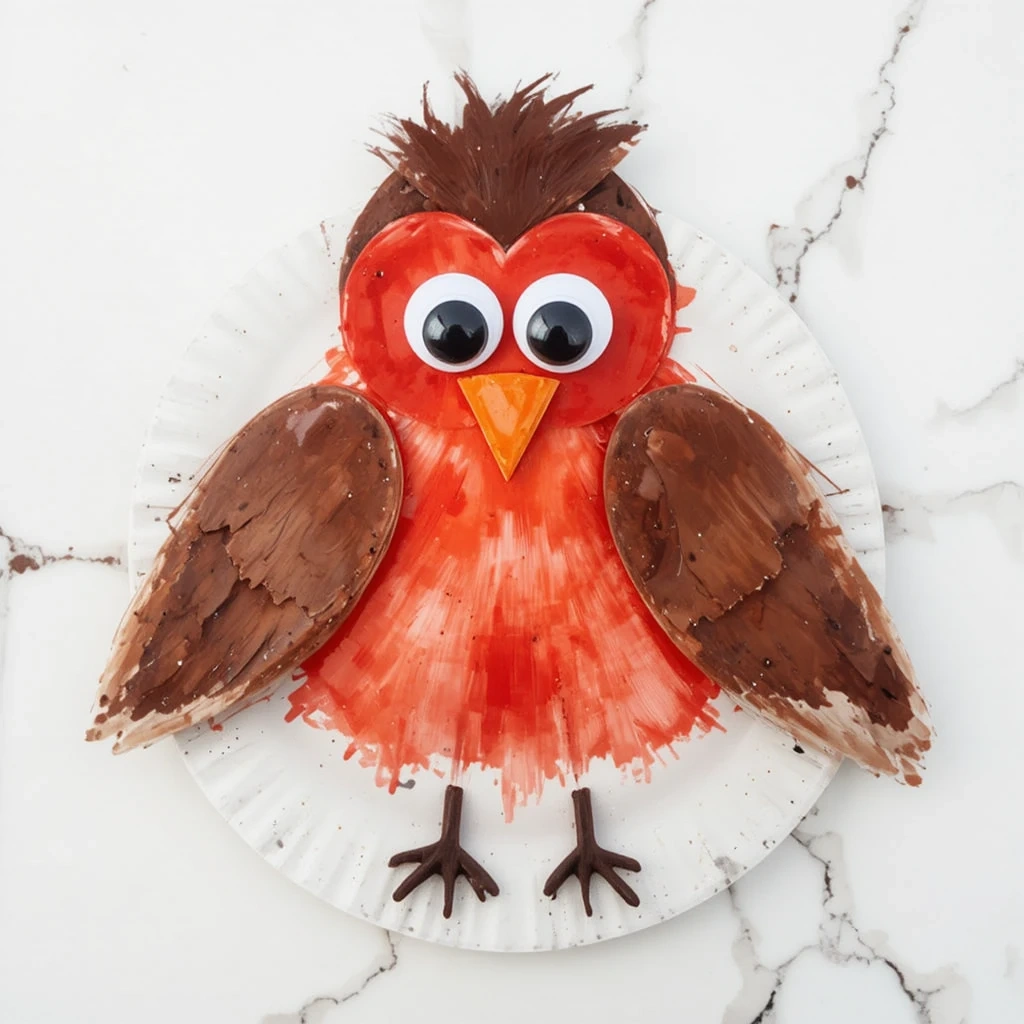
A cheerful project that uses one of the most common craft supplies around. This paper plate robin is perfect for young kids and takes almost no time to put together. It’s bright, bold, and great for spring-themed displays.
Materials:
- Paper plate
- Red and brown paint
- Black marker
- Googly eyes
- Orange cardstock (for beak)
- Scissors and glue
Steps:
- Paint the center of the paper plate red and the outer ring brown. Let it dry.
- Cut a small triangle from orange cardstock for the beak.
- Glue on two googly eyes above the beak.
- Draw two small legs with a black marker at the bottom.
- Add wing shapes by cutting and folding the plate edges slightly inward.
Time: 15–20 minutes Difficulty: Easy
Tip: Use a sponge instead of a brush for a more textured, feathery paint effect.
2. Toilet Paper Roll Owl
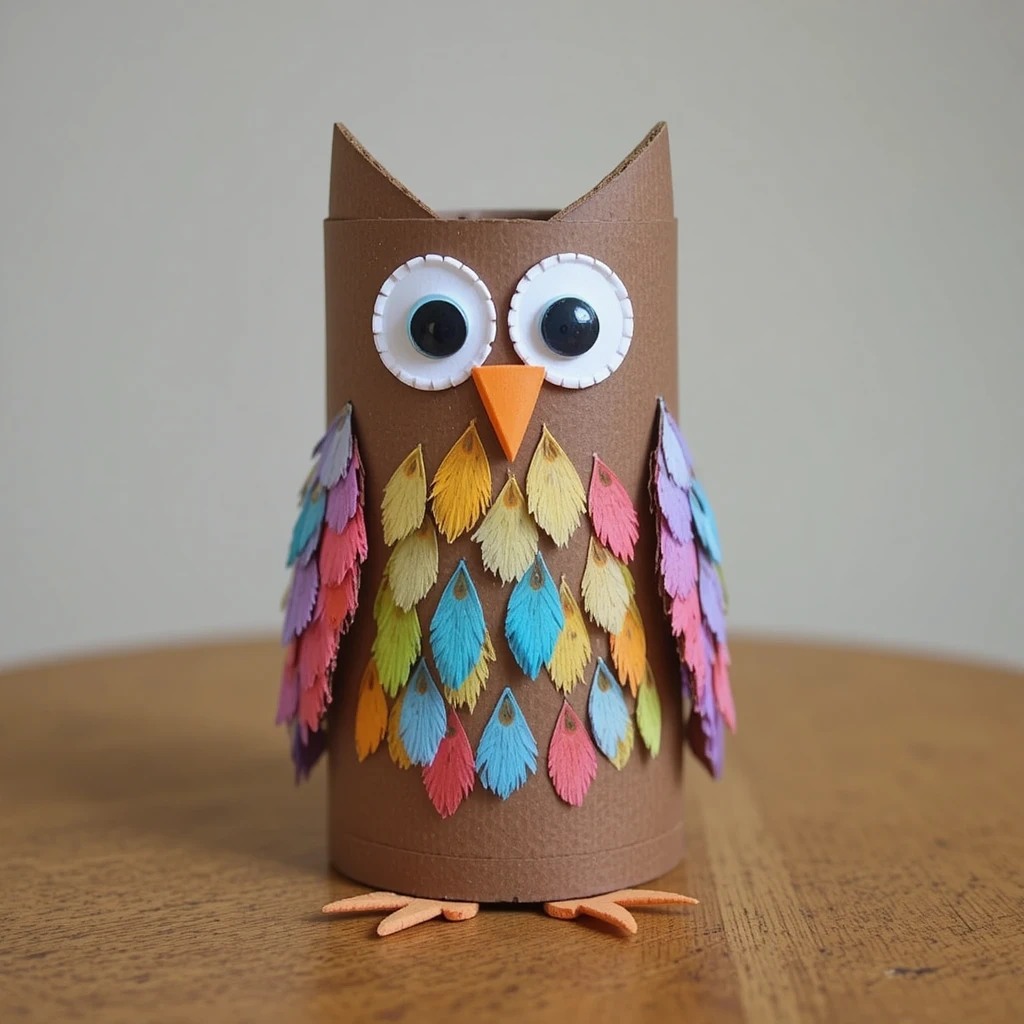
Give those empty toilet rolls a second life with this adorable owl craft. It’s a great way to introduce kids to recycling while making something cute for their room. The result looks surprisingly polished with minimal materials.
Materials:
- Toilet paper roll
- Brown and yellow paint
- Feathers (craft store)
- Googly eyes
- Orange felt or foam (for beak)
- Glue
Steps:
- Paint the toilet roll brown and let it dry completely.
- Pinch the top two corners inward and secure with glue to form ear tufts.
- Glue feathers around the lower half of the roll.
- Cut a small diamond from orange felt, fold in half, and glue on as the beak.
- Attach two large googly eyes above the beak.
Time: 20–30 minutes Difficulty: Easy
Tip: Add a coat of Mod Podge once dry to give it a finished, sturdy look.
3. Bird Crafts Favorite — Salt Dough Bird Ornaments
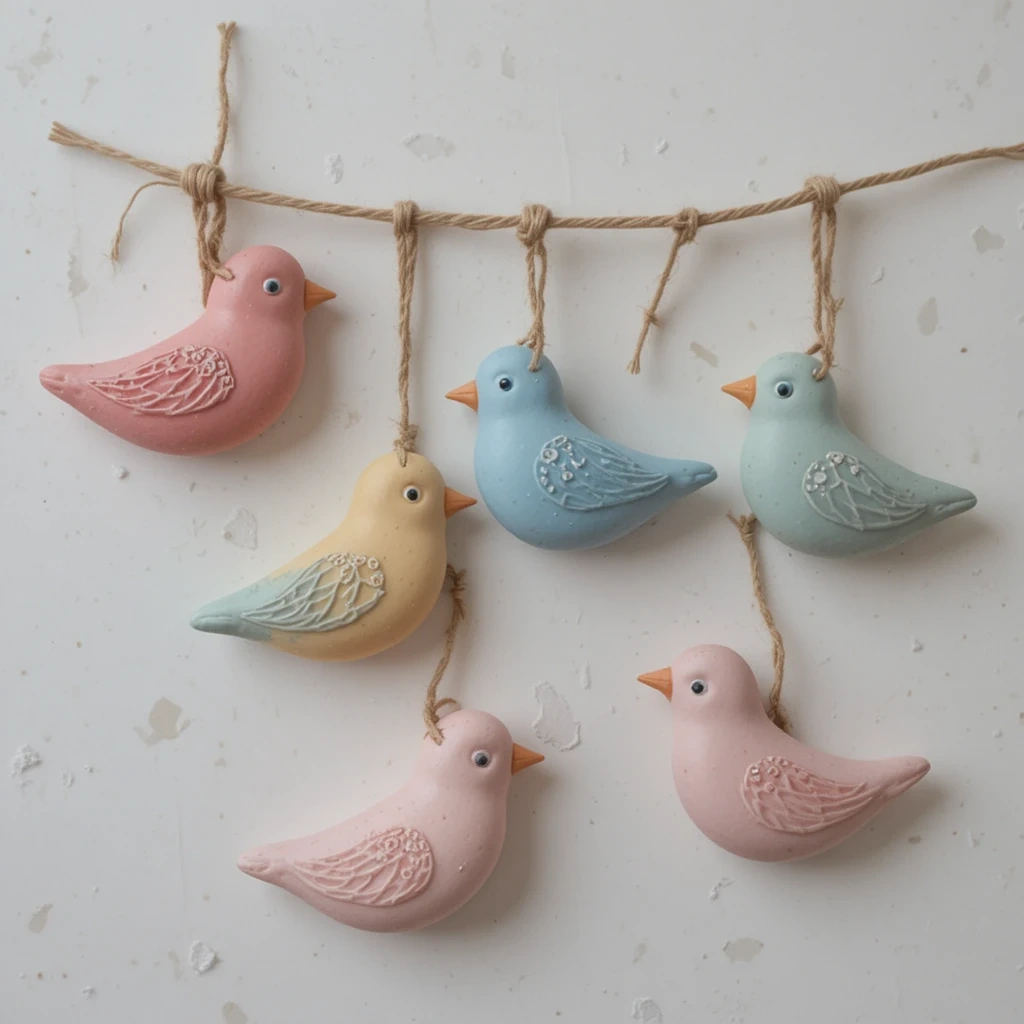
Salt dough is a timeless craft medium, and shaping it into birds makes for beautiful, keepsake-worthy ornaments. These are great for holiday trees, window hangings, or garlands. You can paint them in any color palette you like.
Materials:
- 2 cups flour
- 1 cup salt
- ¾ cup water
- Rolling pin
- Bird-shaped cookie cutter
- Straw (for hanging hole)
- Acrylic paints
- Ribbon or twine
Steps:
- Mix flour, salt, and water until a smooth dough forms.
- Roll out to about ½ inch thickness.
- Press the bird cookie cutter into the dough and lift out the shapes.
- Use a straw to punch a hole near the top of each bird.
- Bake at 250°F (120°C) for 2–3 hours until fully hardened.
- Let cool, then paint and decorate as desired.
- Thread ribbon through the hole once paint is dry.
Time: 3–4 hours (including bake time) Difficulty: Easy
Tip: Seal with clear varnish after painting to protect from moisture and make colors pop.
4. Watercolor Bird Bookmark

This elegant craft doubles as a functional accessory. Using simple watercolor techniques, you can create a soft, artistic bird design on a cardstock bookmark. It’s a thoughtful handmade gift too.
Materials:
- White cardstock (cut to bookmark size)
- Watercolor paints
- Fine-tip black pen
- Paintbrush
- Ruler and scissors
- Hole punch and ribbon (optional)
Steps:
- Cut cardstock into a bookmark shape (roughly 2″ x 7″).
- Lightly sketch a simple bird silhouette in pencil.
- Fill in with watercolors — use wet-on-wet for a soft, blended look.
- Let it dry completely.
- Trace over the bird outline with a fine-tip black pen for definition.
- Add dots, branches, or leaf details around the bird.
- Punch a hole at the top and thread through a ribbon if desired.
Time: 20–30 minutes Difficulty: Easy–Medium
Tip: Use a light pencil sketch and don’t press too hard — watercolor paper (or thick cardstock) works best.
5. Yarn-Wrapped Bird Sculpture
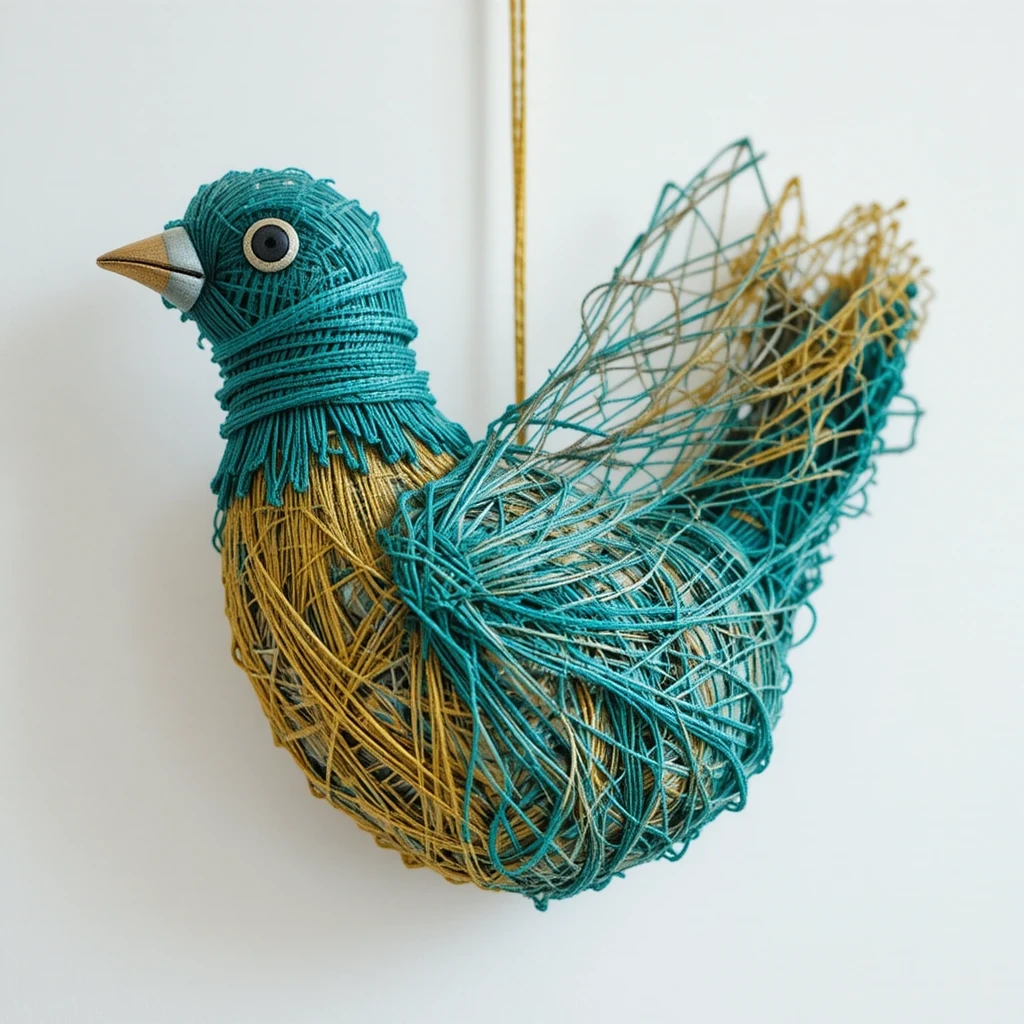
Yarn wrapping is a meditative, tactile craft that results in a beautifully textured finished piece. Wrapping a wire or cardboard bird frame in colorful yarn creates a stunning 3D sculpture. Perfect for home décor or as a wall accent.
Materials:
- Thick wire or cardboard bird template
- Assorted yarn (various colors)
- Scissors
- Craft glue
- Googly eyes or felt for details
Steps:
- Bend wire into a simple bird silhouette, or cut one from thick cardboard.
- Starting at the tail, begin wrapping yarn tightly around the frame.
- Change colors as desired — secure ends with a small dab of glue.
- Continue wrapping until the entire bird is covered.
- Glue on googly eyes or small felt details for the face.
- Add a loop of yarn at the top for hanging.
Time: 45–60 minutes Difficulty: Medium
Tip: Use complementary colors for a boho or gradient effect — it photographs beautifully.
6. Bird Crafts Pick — Painted Rock Flamingo
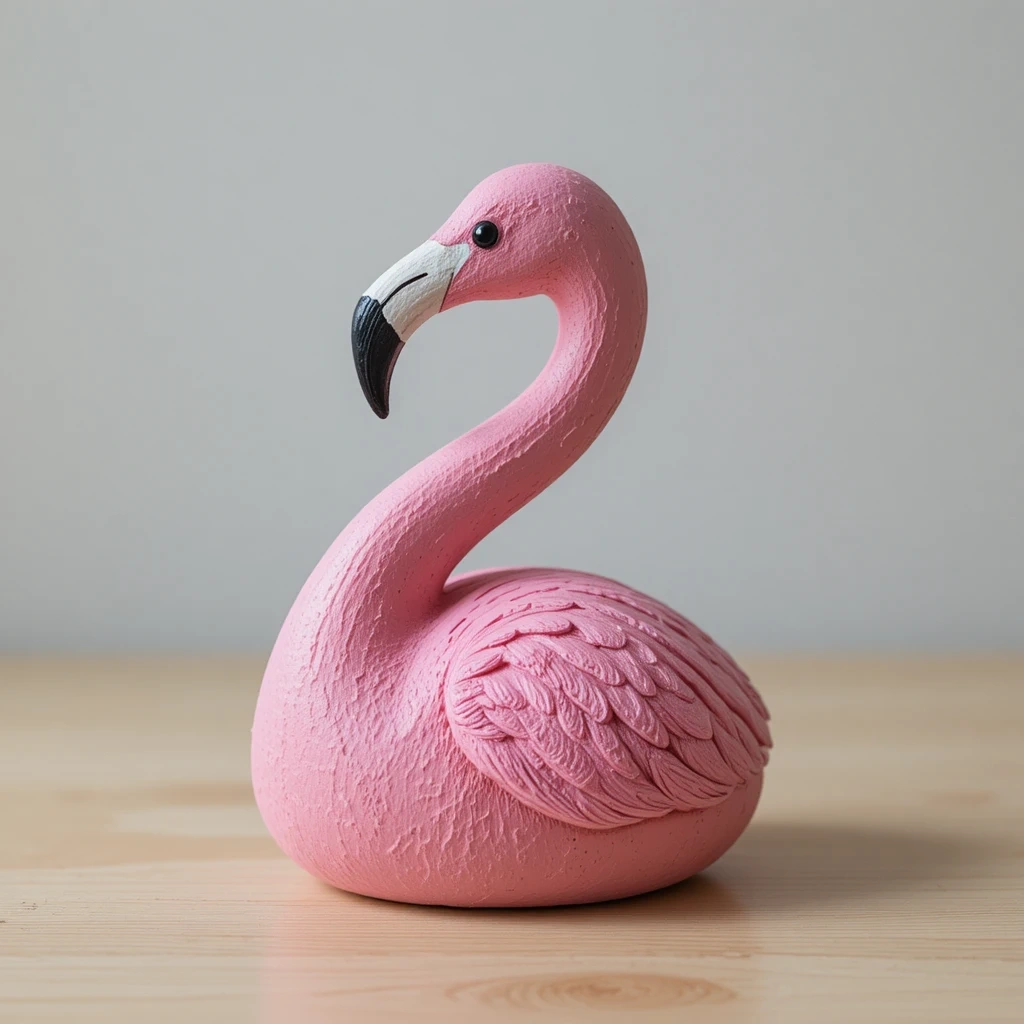
Rocks make the most satisfying painting canvases. A smooth, oval rock is perfect for painting a flamingo — that curved neck translates beautifully to the natural shape of most pebbles. Display them in a plant pot or garden.
Materials:
- Smooth oval rock
- Pink, black, and white acrylic paint
- Thin paintbrush
- Sealant spray or Mod Podge
Steps:
- Paint the entire rock pink and let dry.
- Add a second coat for full coverage.
- Using a thin brush, paint a curved neck and small head at one end.
- Add a black-tipped beak and a tiny white eye highlight.
- Paint simple wing detail lines with a slightly darker pink.
- Seal with spray sealant once fully dry.
Time: 30–45 minutes (plus drying) Difficulty: Medium
Tip: Use a white base coat first if your rock is dark — it makes the pink much more vibrant.
7. Origami Crane Mobile
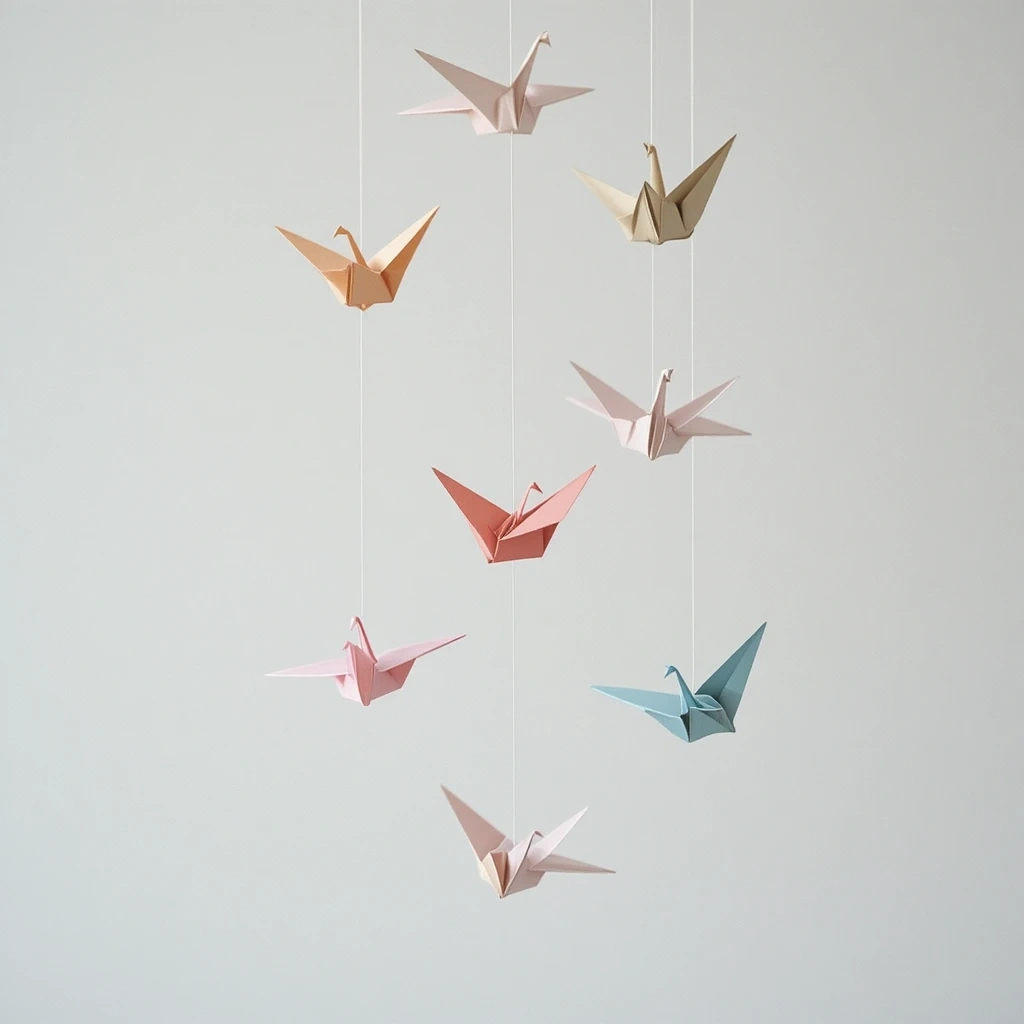
The origami crane is one of the most iconic paper-folding designs in the world. Making a mobile from several cranes in coordinating colors creates a stunning, minimal piece of art. It looks elegant hanging in a nursery, bedroom, or above a desk.
Materials:
- Square origami paper (various colors or patterns)
- String or fishing line
- A thin wooden dowel or stick
- Scissors
Steps:
- Fold 6–10 origami cranes following a standard crane tutorial.
- Thread a needle with fishing line and pierce through the back of each crane.
- Tie cranes at varying heights on the strings.
- Attach multiple strings to a wooden dowel, spacing them evenly.
- Tie a loop at the center of the dowel for hanging.
- Adjust string lengths until the mobile hangs balanced.
Time: 1–1.5 hours Difficulty: Medium
Tip: Use patterned washi paper for cranes — the results are stunning and very Pinterest-worthy.
8. Feather-Print Canvas Art
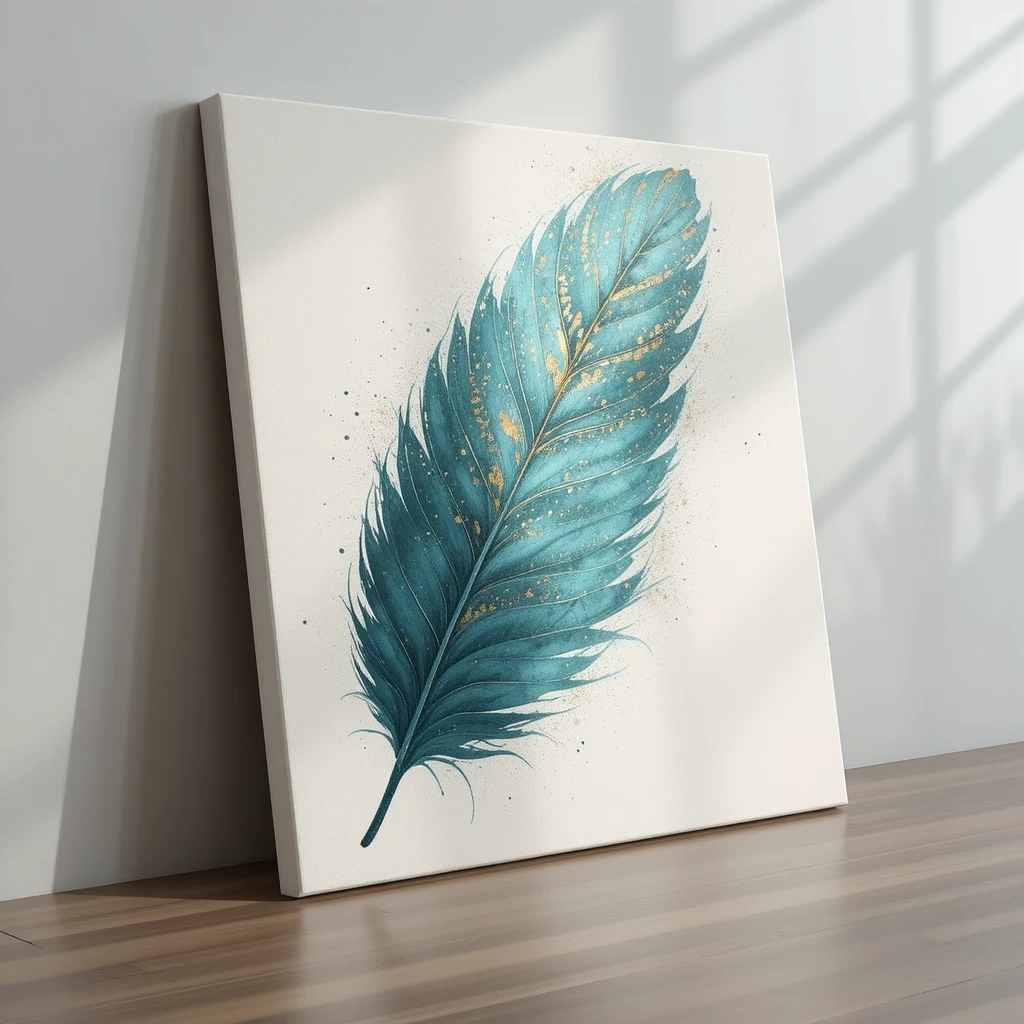
No brushes needed — feathers themselves become the painting tool in this beautiful nature-inspired craft. The results are abstract, textured, and genuinely unique. Every print is one of a kind.
Materials:
- Canvas or thick paper
- Acrylic paints (2–3 colors)
- Real or craft feathers
- Paper plate (for paint palette)
- Optional: white paint pen for details
Steps:
- Squeeze a small amount of paint onto a paper plate.
- Press a feather gently into the paint, coating one side evenly.
- Press the painted feather firmly onto the canvas and lift cleanly.
- Repeat with different feathers and colors, overlapping slightly.
- Let dry fully.
- Add fine details or outlines with a white paint pen if desired.
Time: 20–30 minutes Difficulty: Easy
Tip: Layer colors from light to dark for depth — gold over navy looks especially stunning.
9. Birdhouse Painted with Boho Patterns
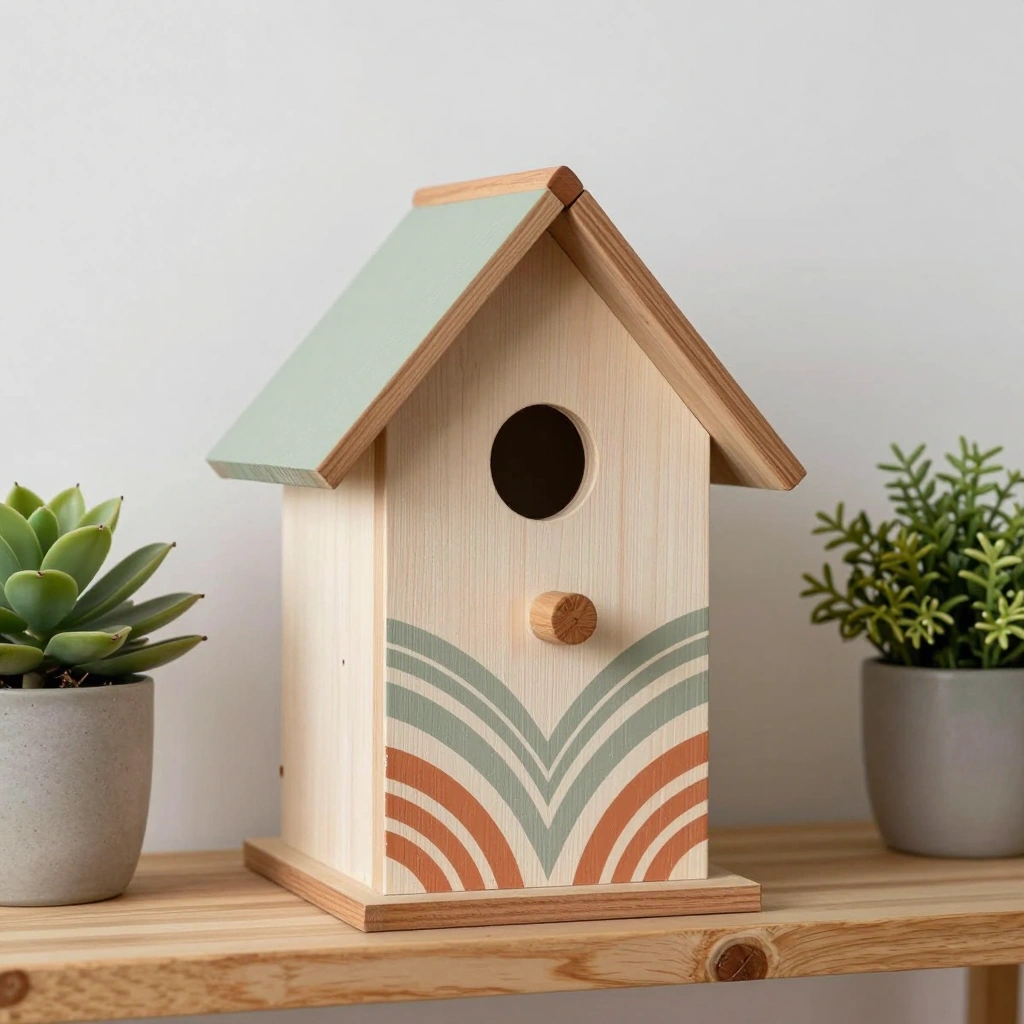
Take a plain wooden birdhouse (available at most craft stores) and transform it into a boho-patterned showpiece. It’s a satisfying afternoon project and makes a gorgeous garden accent or shelf display.
Materials:
- Unfinished wooden birdhouse
- Acrylic paints (earthy tones or pastels)
- Fine and medium paintbrushes
- Pencil
- Sealant spray
Steps:
- Base coat the entire birdhouse in a soft neutral color. Let dry.
- Lightly pencil in geometric or floral patterns on each panel.
- Paint in your design using 2–3 accent colors.
- Add fine details — dots, lines, small leaves — with a thin brush.
- Let everything dry for at least an hour.
- Seal with outdoor-safe sealant spray if placing in the garden.
Time: 1–2 hours Difficulty: Medium
Tip: Use painter’s tape along roof edges for crisp, clean lines between sections.
10. Bird Crafts Finale — Egg Carton Peacock
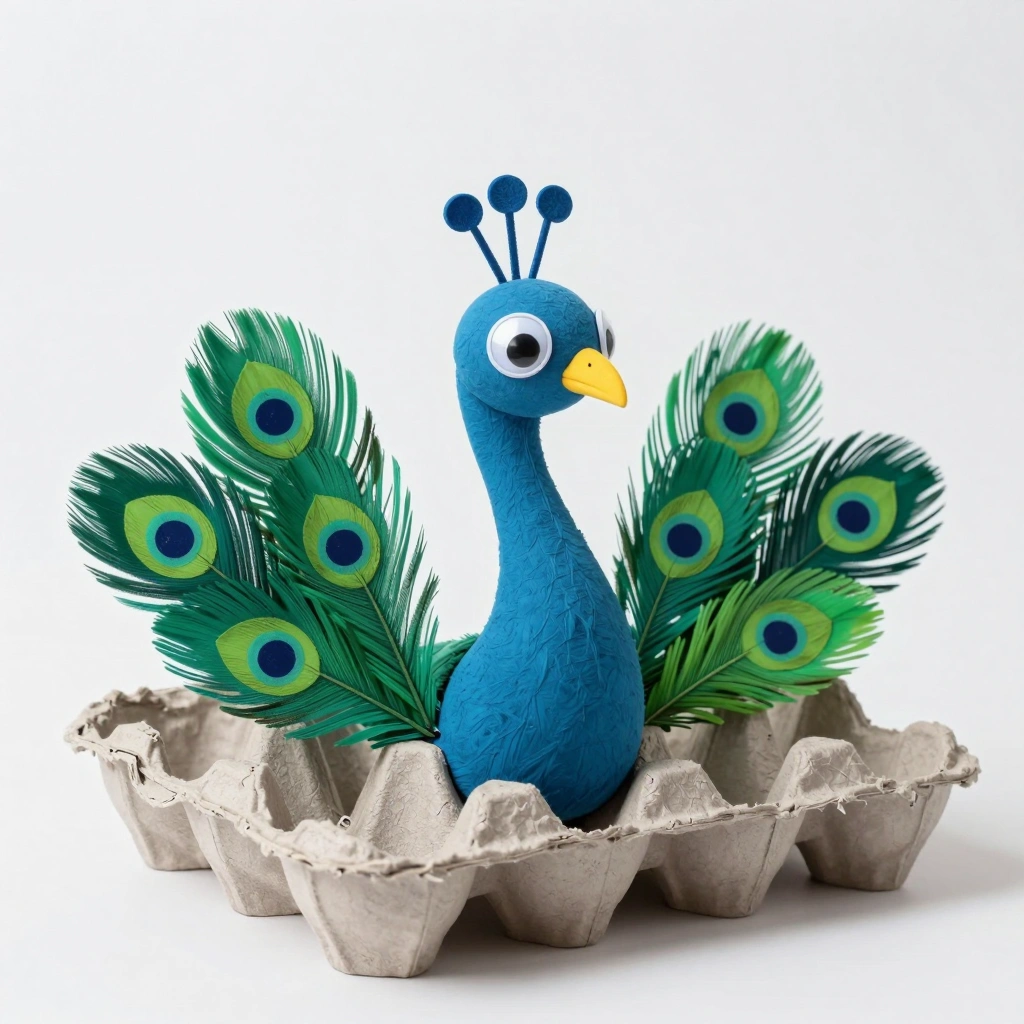
This show-stopping craft uses an unlikely material — an egg carton — to create a peacock with gorgeous fanned tail feathers. It’s colorful, creative, and makes a brilliant kids’ craft. Adults will love it too.
Materials:
- One cardboard egg carton
- Blue, green, and teal paint
- Scissors
- Googly eyes
- Yellow felt or foam (for beak)
- Glue
- Metallic markers or stickers for “eye” details on feathers
Steps:
- Cut the egg carton into individual cups and one long strip of connected cups for the tail.
- Paint the tail strip in a gradient of blue, teal, and green. Let dry.
- Shape one cup into the peacock’s body — paint it blue.
- Cut a second cup into a crown/crest shape and glue it to the head.
- Glue on googly eyes and a small yellow felt beak.
- Attach the tail strip fanned out behind the body.
- Use metallic markers or stickers to add “eye” spots on each tail feather.
Time: 40–50 minutes Difficulty: Easy–Medium
Tip: Curl the tail cups slightly outward with a pencil for a more realistic fanned look.
Common Mistakes to Avoid
- Skipping the drying time between layers — Rushing paint layers leads to muddy colors and smearing. Always wait for each coat to dry fully before adding the next.
- Using too much glue — Excess glue creates messy, visible residue and can warp paper or cardstock. Use a small, precise amount and press firmly for a few seconds instead.
- Choosing the wrong paint for the surface — Not all paints stick to all materials. Use acrylic for wood and rocks, watercolor for paper, and always test on a scrap piece first.
Tips for Best Results
- Prep your workspace before starting — cover surfaces with newspaper or a silicone mat.
- Use quality brushes — cheap brushes leave streaks and shed bristles into your paint.
- Work in good lighting — natural light helps you see colors accurately as you paint.
- Keep a cup of water and paper towels nearby to quickly rinse and blot brushes between colors.
- Don’t rush the creative process — take your time with small details, they make the biggest difference.
- Seal finished pieces with Mod Podge or varnish to make them last longer and look more polished.
FAQs
Q: What age is best for these bird crafts? Most of these projects are suitable for ages 5 and up with adult supervision. Simpler ones like the paper plate robin and feather prints are great for toddlers (ages 3+) with help.
Q: Where can I buy craft supplies for these projects? Most materials are available at craft stores like Michaels, Hobby Lobby, or online via Amazon. Many items like toilet rolls, paper plates, and egg cartons are free from household recycling.
Q: How do I make my painted rock last outdoors? Use outdoor-safe acrylic paint and finish with at least two coats of UV-resistant outdoor sealant spray. This protects against rain, sun fading, and general wear.
Q: Can I use these crafts as classroom activities? Absolutely. Projects like the paper plate robin, egg carton peacock, and toilet roll owl are excellent for group settings. They’re low-cost, quick, and highly customizable.
Q: What’s the best way to display finished bird crafts?
- Flat crafts look great in frames or on a bulletin board.
- 3D crafts like yarn birds or birdhouses work well on shelves or windowsills.
- Ornaments and mobiles can be hung near windows to catch the light.
Q: Can I sell these crafts? Yes! Many of these designs — especially painted rocks, birdhouses, and salt dough ornaments — sell well on platforms like Etsy. Make sure to seal and finish pieces properly before listing them.
Conclusion
There’s a bird craft here for every skill level, every age, and every style. Whether you pick one idea or work through all ten, you’re in for a genuinely fun creative experience.
Grab your supplies, clear a space on the table, and get started. The only thing better than making these crafts is seeing how beautiful they turn out. Happy crafting!