20 Back to School Crafts Kids Will Actually Love Making
Back-to-school season is the perfect time to spark creativity before the pencils hit the notebooks. These 20 back to school crafts are fun, easy, and budget-friendly — great for parents, teachers, and kids alike.
Whether you’re prepping a classroom or keeping little hands busy at home, each project is beginner-friendly and uses simple supplies.
1. Painted Pencil Holder
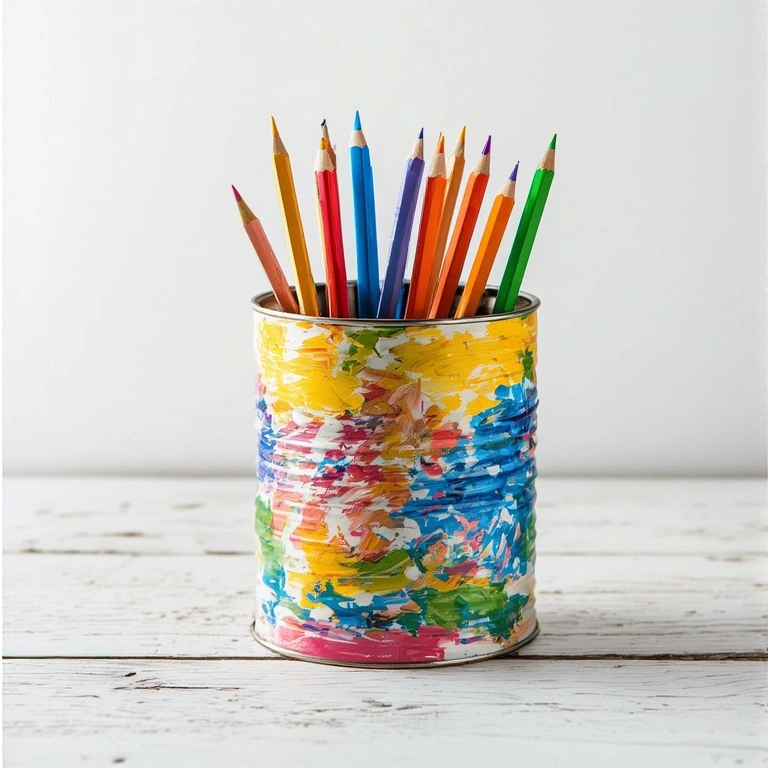
A cheerful desk organizer made from a recycled tin can. Kids can personalize it with their favorite colors and patterns — it’s functional and totally unique.
Materials:
- Empty tin can (clean and dry)
- Acrylic paint
- Paintbrushes
- Mod Podge or clear sealant
- Washi tape (optional)
Steps:
- Clean and dry the tin can thoroughly.
- Paint the outside with a base coat and let dry.
- Add patterns, stripes, or dots with contrasting colors.
- Seal with Mod Podge once dry.
- Decorate the rim with washi tape for a finishing touch.
Time: 20–30 minutes | Difficulty: Easy
Tip: Add a coat of white paint first so colors pop on the metal surface.
2. DIY Notebook Cover
Transform a plain composition notebook into a personalized masterpiece. This is one of the most popular back to school crafts because every child ends up with something one-of-a-kind.
Materials:
- Composition notebook
- Decorative paper or fabric
- Mod Podge
- Scissors
- Foam brush
Steps:
- Cut your paper or fabric slightly larger than the notebook cover.
- Brush Mod Podge onto the notebook front.
- Press the paper/fabric onto it, smoothing out bubbles.
- Fold and glue edges to the inside.
- Seal the outside with another layer of Mod Podge.
Time: 15–25 minutes | Difficulty: Easy
Tip: Use patterned scrapbook paper for an instantly polished look.
3. Crayon Name Art
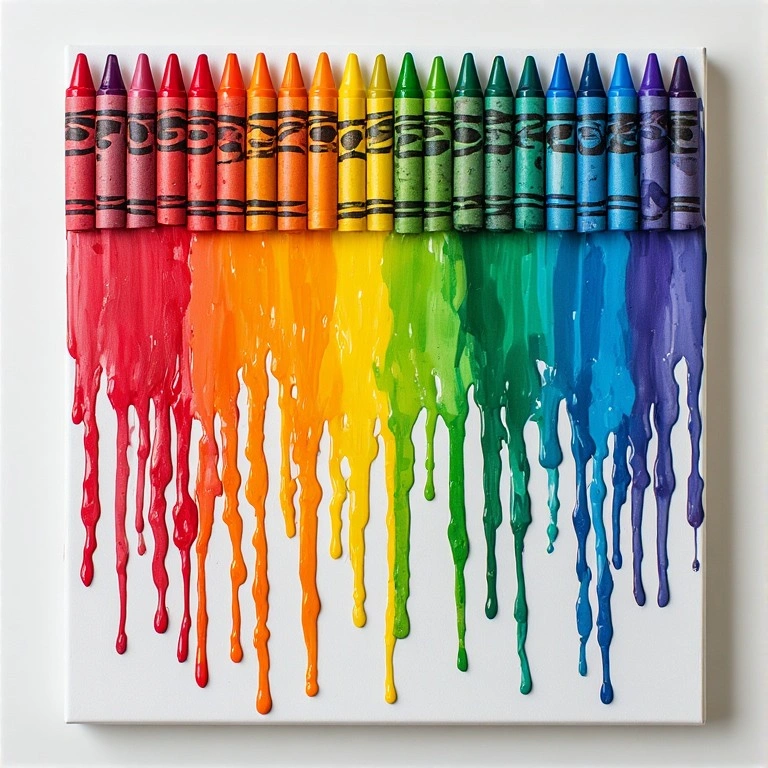
A bold, colorful piece of wall art that doubles as a name display. Melt crayons above a painted name for a dramatic rainbow drip effect.
Materials:
- Canvas board
- Crayons (full box)
- Hot glue gun
- Black acrylic paint
- Heat gun or hair dryer
Steps:
- Paint the child’s name in large black letters on the canvas.
- Glue crayons side by side along the top edge.
- Tilt the canvas at an angle.
- Apply heat until crayons melt and drip down.
- Let dry flat before hanging.
Time: 30–45 minutes | Difficulty: Medium
Tip: Remove crayon wrappers for faster, more even melting.
4. Mason Jar Supply Organizer
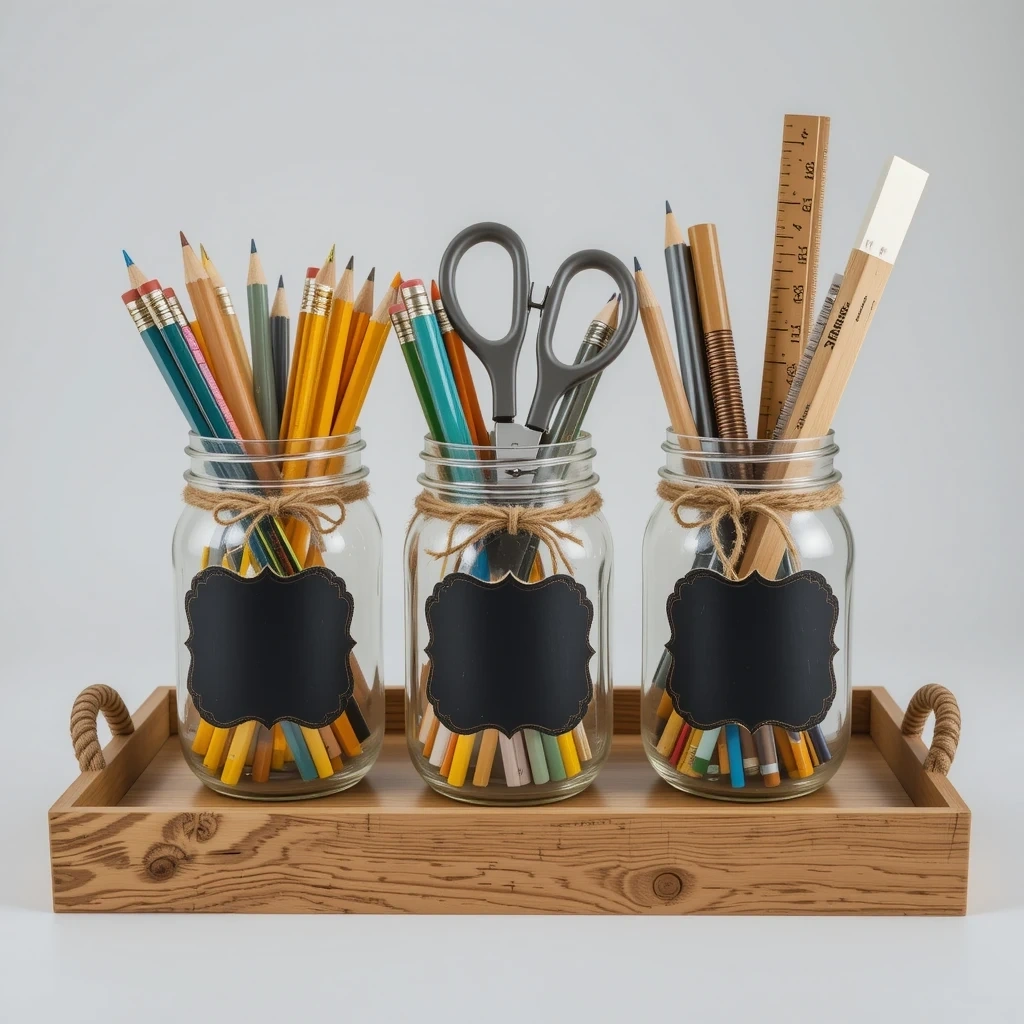
A simple and stylish way to keep school supplies sorted. Decorate mason jars with twine, paint, or chalkboard labels for a farmhouse-style desk setup.
Materials:
- Mason jars (various sizes)
- Chalkboard paint or labels
- Jute twine
- Hot glue gun
- Chalk marker
Steps:
- Clean and dry the mason jars.
- Paint the lower half with chalkboard paint or attach labels.
- Wrap jute twine around the jar neck and secure with hot glue.
- Write supply names with chalk marker once dry.
- Fill and arrange on a tray.
Time: 20–30 minutes | Difficulty: Easy
5. Fabric Book Sleeve
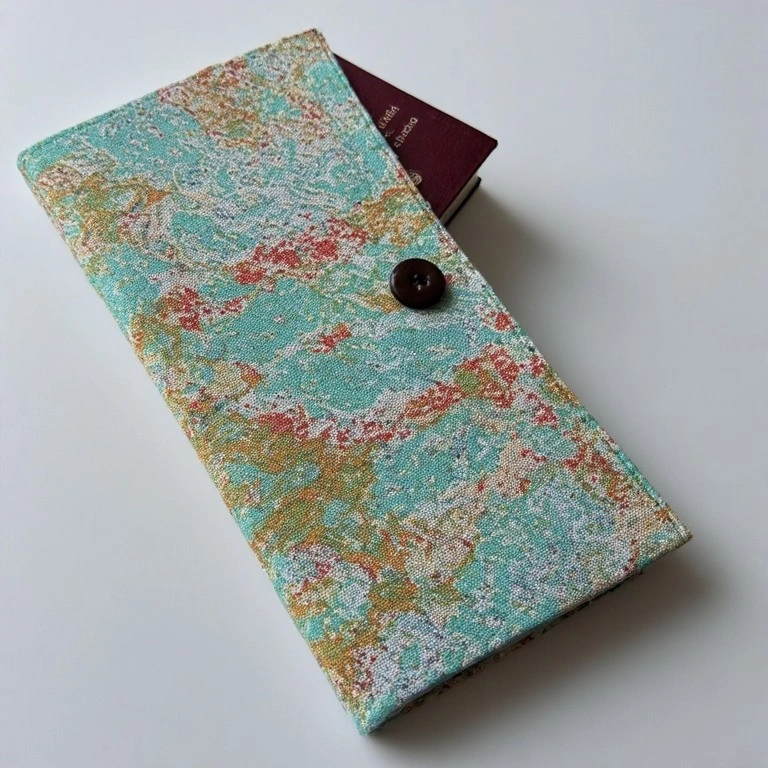
A soft protective sleeve for books or tablets — practical and easy to sew (or glue!). Kids can pick their favorite fabric print for a truly personalized touch.
Materials:
- Fat quarter of cotton fabric (2 pieces)
- Scissors or rotary cutter
- Sewing machine or fabric glue
- Iron and ironing board
- Ribbon or button closure (optional)
Steps:
- Cut two fabric pieces slightly larger than your book.
- Place right sides together and sew (or glue) three sides.
- Turn right-side out and press flat with an iron.
- Fold the open edge inward and stitch closed.
- Add a ribbon loop and button for a closure.
Time: 25–40 minutes | Difficulty: Medium
Tip: Use iron-on hem tape for a no-sew version — perfect for younger crafters.
6. Chalkboard Growth Chart
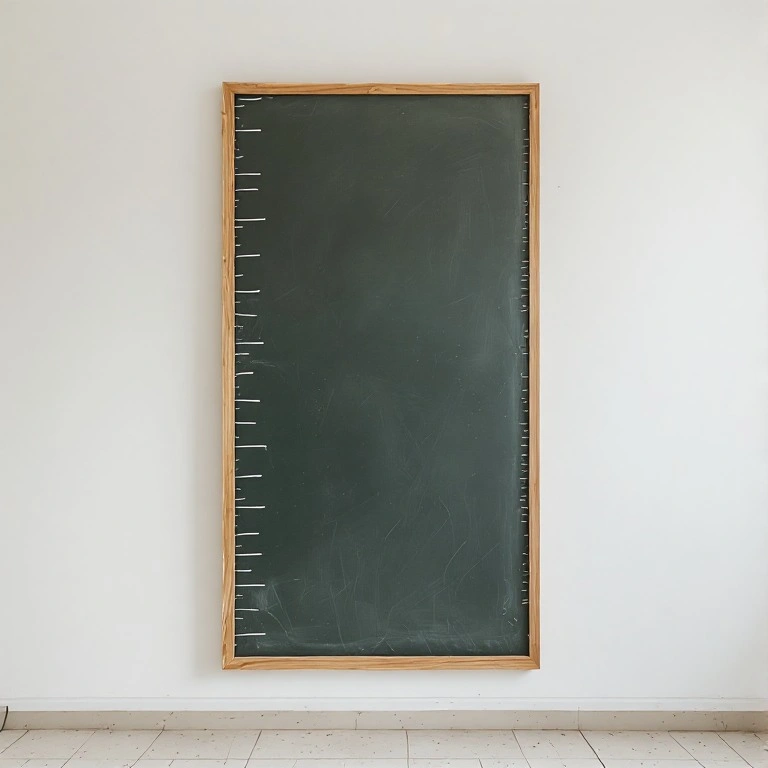
Back to School Crafts for the Classroom
A tall chalkboard strip that tracks height all year — a meaningful keepsake and a functional classroom display.
Materials:
- Chalkboard contact paper or painted board
- Ruler and chalk marker
- Stickers or vinyl letters
- Wooden frame or wall mount
- Chalk
Steps:
- Cut chalkboard paper to your desired height.
- Use a ruler to mark height increments.
- Label the measurements with a chalk marker.
- Decorate the top and sides with school-themed stickers.
- Mount to the wall and start marking heights.
Time: 20–30 minutes | Difficulty: Easy
7. Paper Roll Bookmarks
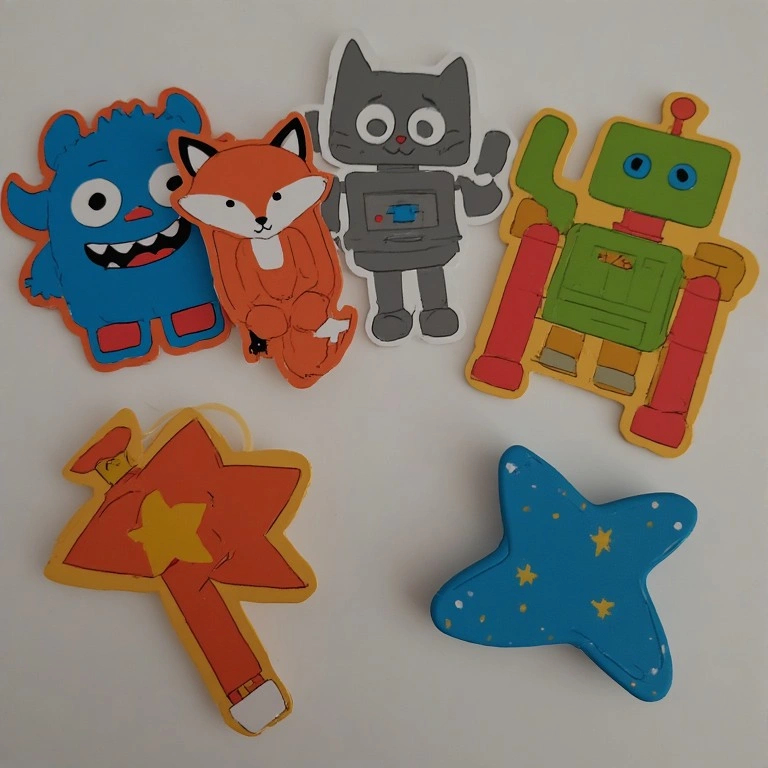
Cute, reusable bookmarks made from cardstock or painted paper rolls. Kids can make monsters, animals, or favorite characters in just minutes.
Materials:
- Cardstock or thin cardboard
- Scissors
- Markers or paint
- Googly eyes
- Glue
Steps:
- Cut cardstock into strips about 2 inches wide by 6 inches long.
- Fold the bottom third up to form a pocket.
- Glue the sides of the pocket closed.
- Decorate the front with a face, ears, or design.
- Slide onto a book page corner to use.
Time: 10–15 minutes | Difficulty: Easy
Tip: Laminate finished bookmarks for extra durability.
8. Washi Tape Ruler
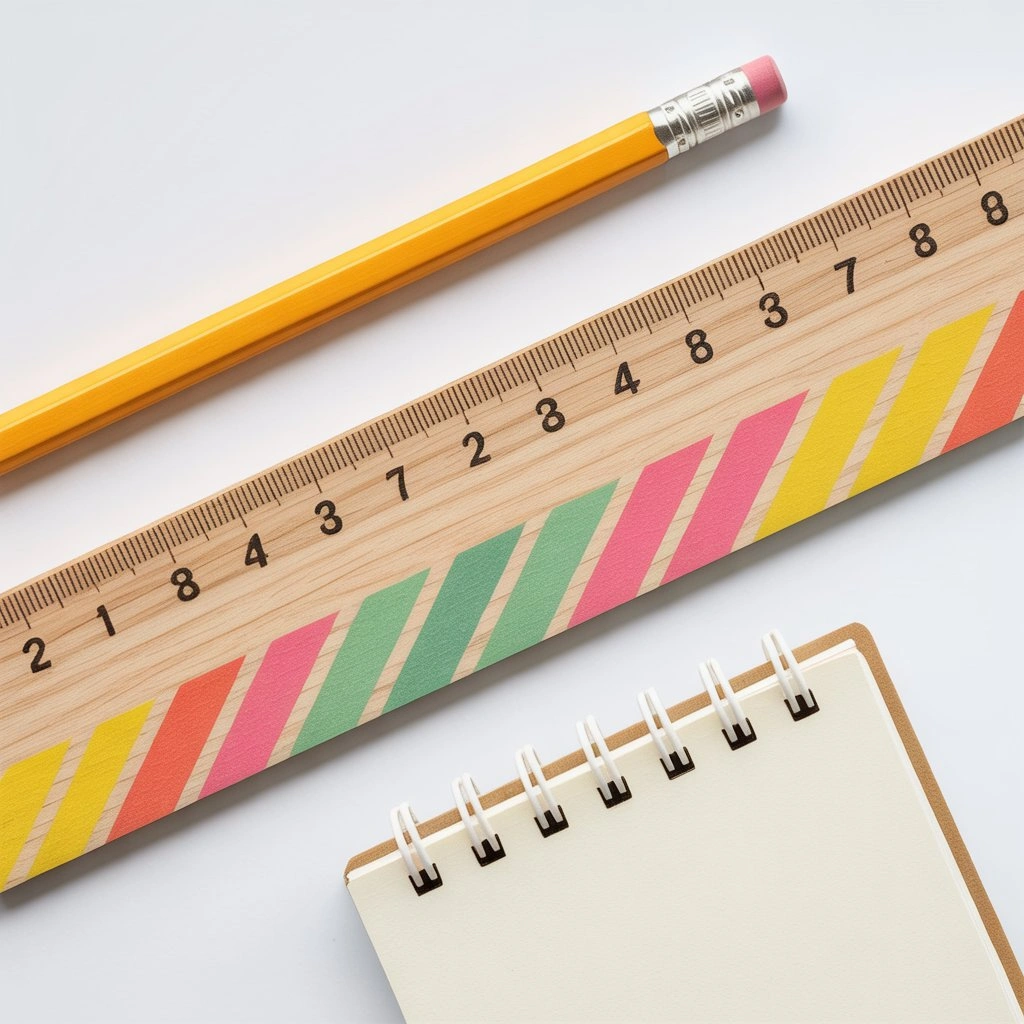
A plain wooden ruler upgraded with colorful washi tape stripes. Functional, pretty, and done in under 10 minutes.
Materials:
- Wooden ruler
- Assorted washi tapes
- Scissors
- Clear nail polish or Mod Podge (to seal)
Steps:
- Lay washi tape strips lengthwise along the ruler.
- Overlap slightly for a stripe effect.
- Trim edges flush with scissors.
- Seal with a coat of clear nail polish or Mod Podge.
- Let dry before using.
Time: 10–15 minutes | Difficulty: Easy
9. Emoji Eraser Stamps
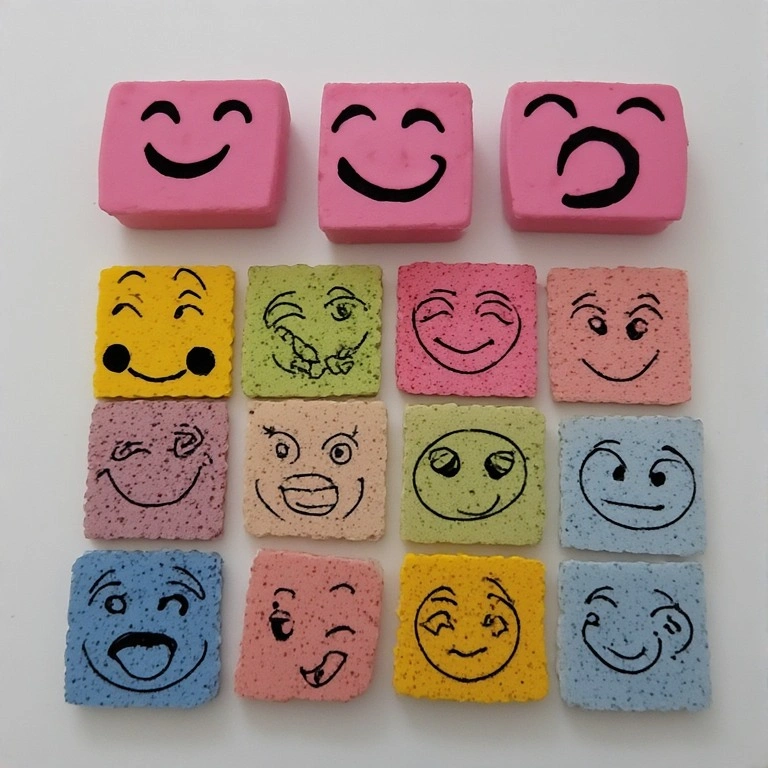
Carve simple emoji faces into large erasers to create custom stamps. A super fun project for older kids who love printmaking.
Materials:
- Large pink erasers
- Linoleum carving tool or toothpick
- Stamp ink pads
- Paper
- Pencil
Steps:
- Sketch an emoji face lightly on the eraser with pencil.
- Carefully carve along the lines with a carving tool.
- Press the eraser into an ink pad.
- Stamp onto paper and repeat.
- Clean eraser between colors with a damp cloth.
Time: 20–30 minutes | Difficulty: Medium
Tip: Start with simple designs like smiley faces or stars before trying complex shapes.
10. Yarn-Wrapped Letters
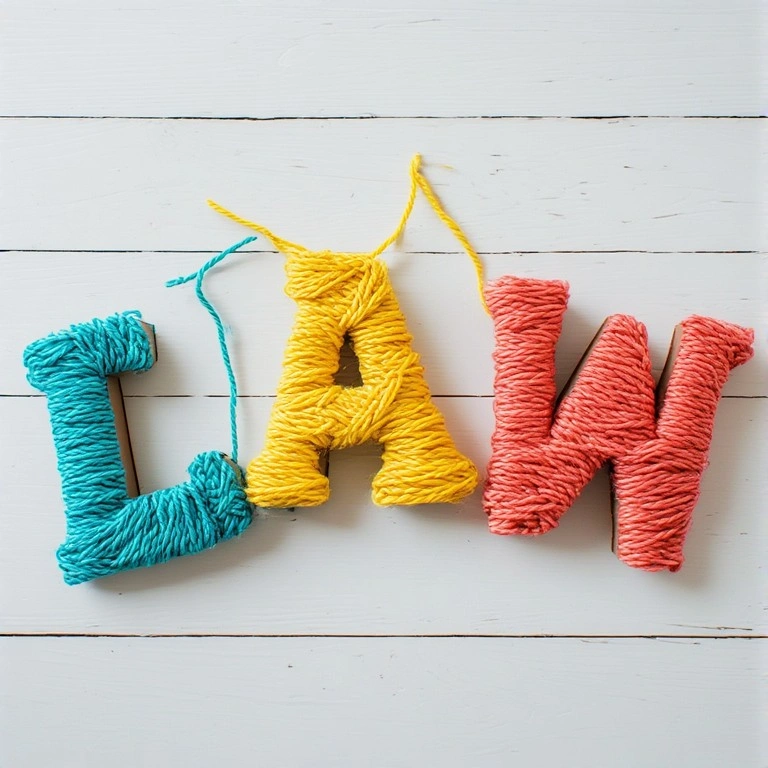
Chunky, colorful letters that spell out a name or word — perfect for a bedroom door or locker decoration.
Materials:
- Cardboard or foam letters
- Colorful yarn
- White glue or hot glue
- Scissors
- Optional: beads or sequins
Steps:
- Apply a thin line of glue along the letter’s edge.
- Start wrapping yarn tightly from one end.
- Continue adding glue as you wrap to secure.
- Tuck the end neatly into a wrapped section.
- Add beads or sequins for extra flair.
Time: 20–35 minutes per letter | Difficulty: Easy
11. Paper Bag Backpack Decoration
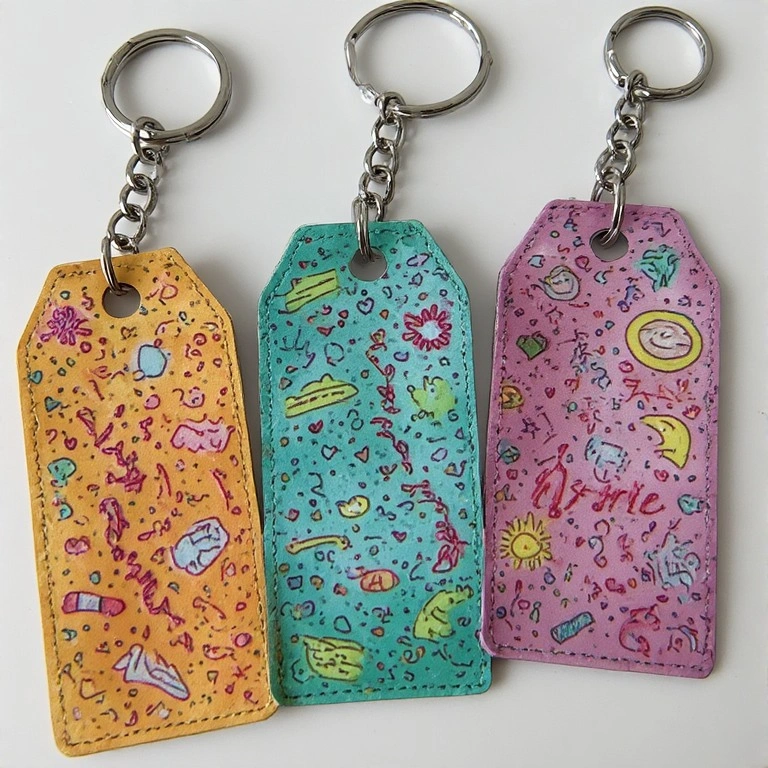
Decorative paper bag tags that clip onto backpack zippers. Quick to make, easy to personalize, and great for identifying bags.
Materials:
- Thick cardstock or cardboard
- Scissors
- Markers or watercolor paint
- Hole punch
- Keyring or carabiner
Steps:
- Cut cardstock into a tag shape (rectangle, star, etc.).
- Decorate with name, doodles, or watercolor designs.
- Laminate or seal with Mod Podge.
- Punch a hole at the top.
- Attach to a keyring or carabiner and clip to backpack.
Time: 10–20 minutes | Difficulty: Easy
Tip: Write the child’s name and school on the back for a handy ID tag.
12. Crayon Roll-Up Pouch
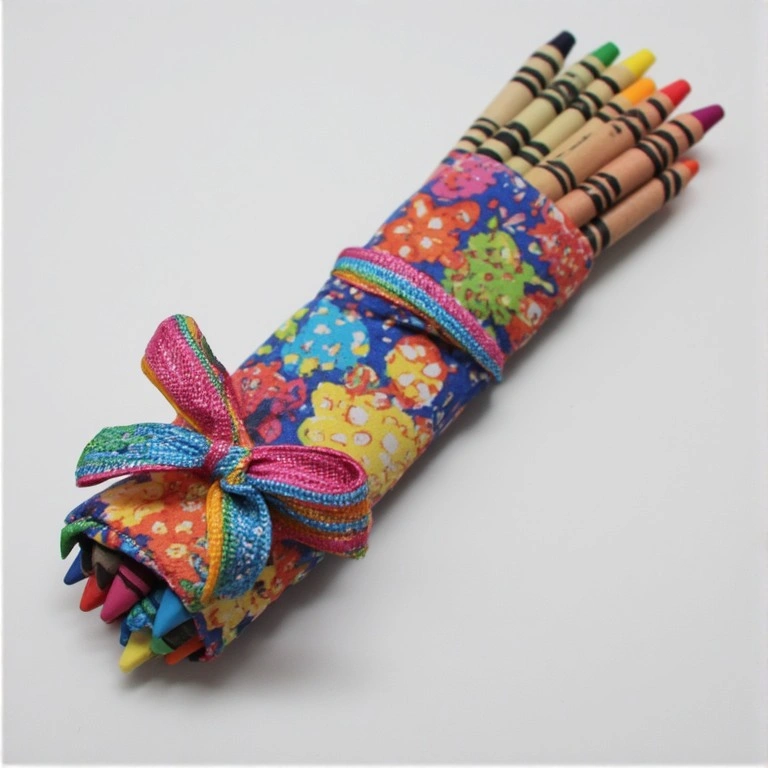
20 Back to School Crafts — Sewing Edition
A fabric roll that holds crayons or colored pencils neatly and ties closed with ribbon. Great for car rides, art class, and travel.
Materials:
- Two fabric pieces (12″×10″)
- Ribbon (18 inches)
- Sewing machine or fabric glue
- Scissors
- Iron
Steps:
- Layer two fabric pieces right sides out and press flat.
- Sew pockets every inch along the bottom third.
- Attach ribbon to one side edge at center.
- Fold up the pocket section and press.
- Roll from one end and tie with the ribbon.
Time: 30–45 minutes | Difficulty: Medium
13. Painted Rock Paperweights
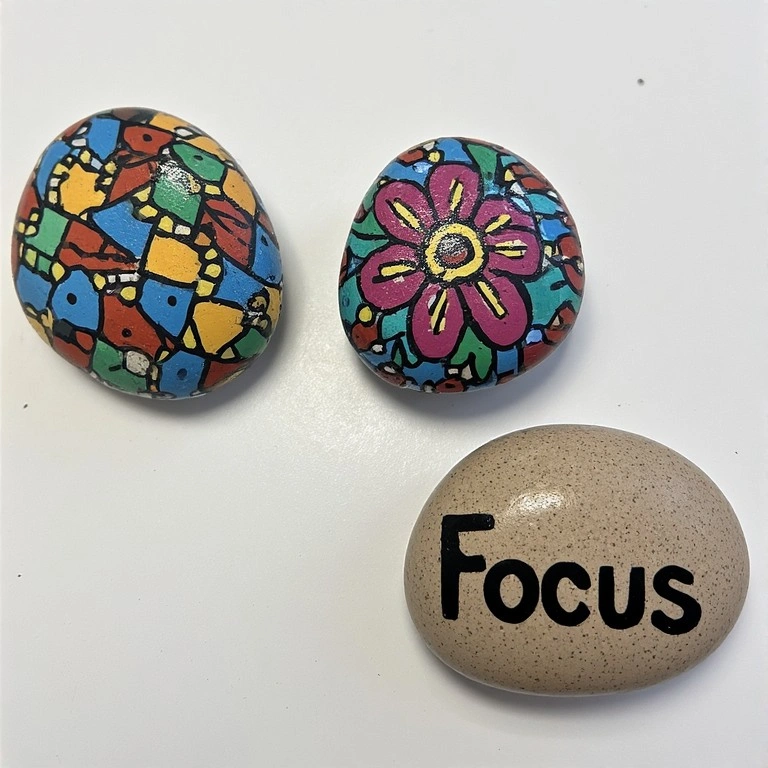
Smooth rocks painted with motivational words, patterns, or portraits — a sweet desk accent and a great mindfulness activity.
Materials:
- Smooth flat rocks
- Acrylic paint
- Fine-tip paint markers
- Clear sealant spray
- Paintbrushes
Steps:
- Wash and dry rocks completely.
- Apply a white base coat and let dry.
- Paint designs, words, or patterns on top.
- Add fine details with paint markers.
- Seal with clear spray sealant once fully dry.
Time: 20–30 minutes | Difficulty: Easy
Tip: Words like “Focus,” “Dream,” and “Be Kind” make great motivational paperweights.
14. Magnetic Locker Photo Frame
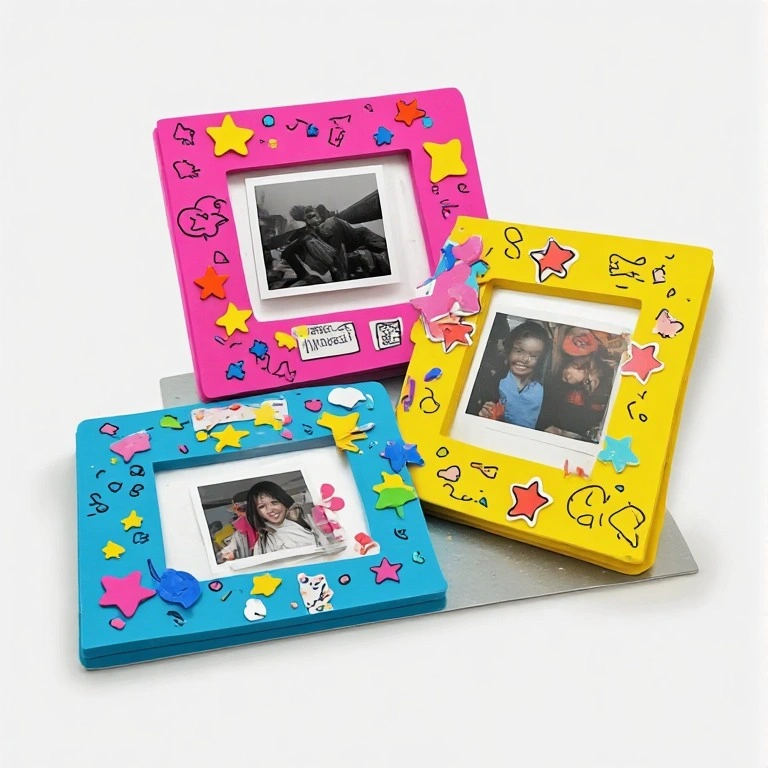
A magnetic frame made from craft foam and decorated with stickers or paint. Perfect for displaying photos inside a school locker.
Materials:
- Craft foam sheets
- Magnetic adhesive strips
- Scissors
- Stickers and markers
- Photo (wallet-size)
Steps:
- Cut foam into a frame shape.
- Decorate with stickers, markers, or glitter.
- Attach magnetic strips to the back.
- Slot your photo into the frame.
- Press onto locker door to display.
Time: 10–15 minutes | Difficulty: Easy
15. Paper Airplane Fleet
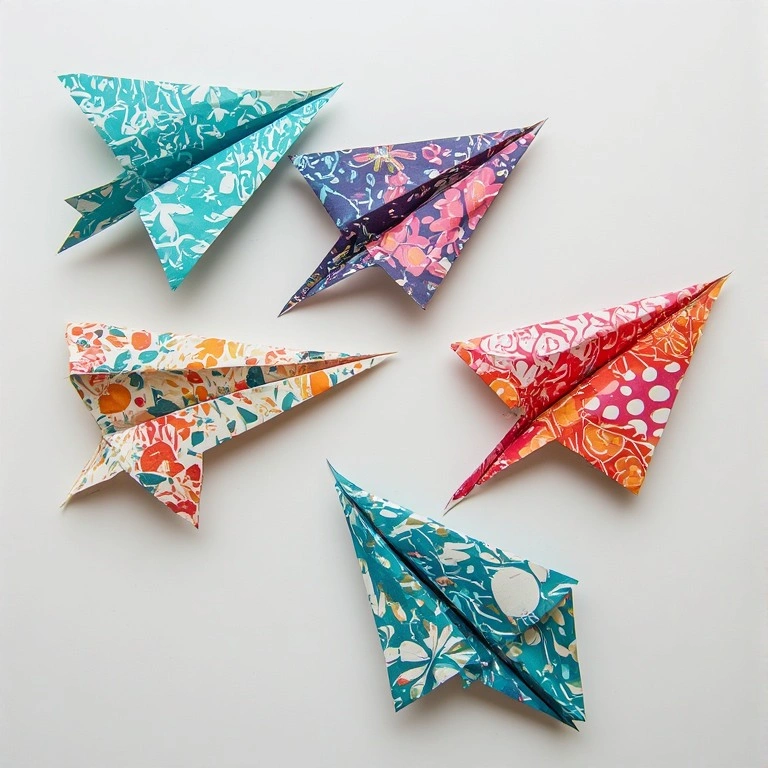
Make a decorated fleet of paper airplanes for a classroom display or just for fun. Each design flies differently — a great STEM tie-in!
Materials:
- Colored printer paper or origami paper
- Markers
- Ruler
- Stickers (optional)
Steps:
- Fold paper into your chosen airplane design.
- Decorate with stripes, names, or stars.
- Add sticker details to wings.
- Test the flight path and adjust folds if needed.
- Display on a shelf or string them as a mobile.
Time: 10–20 minutes | Difficulty: Easy
Tip: Heavier paper folds better and holds creases longer.
16. School Bus Craft from Paper Rolls
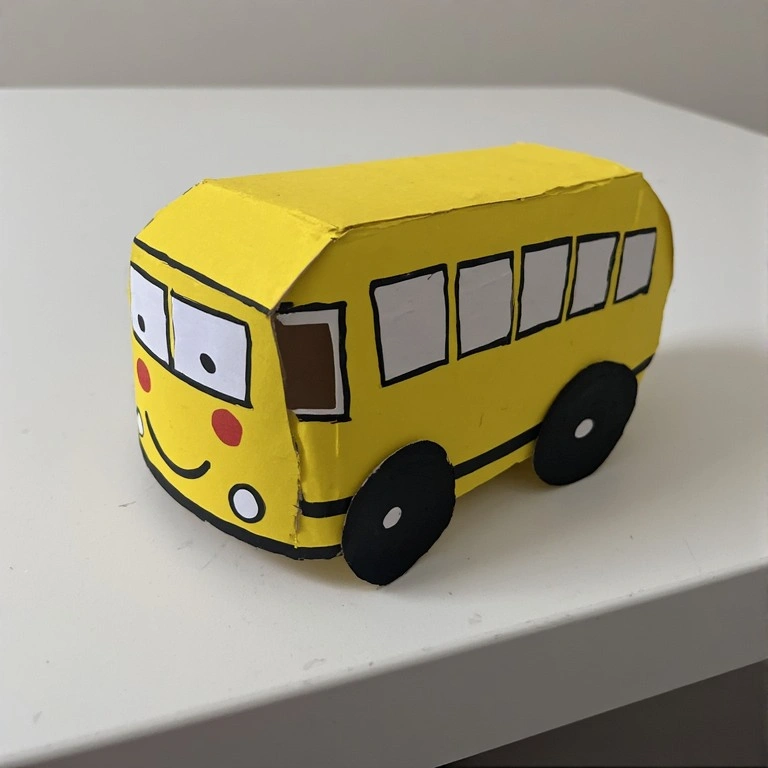
Transform toilet paper rolls into an adorable school bus — a classic early childhood project with endless decorating options.
Materials:
- Toilet paper roll
- Yellow paint
- Black cardstock
- White paper
- Markers and glue
Steps:
- Paint the toilet paper roll yellow and let dry.
- Cut black circles from cardstock for wheels.
- Draw windows on white paper and glue to the roll.
- Add a grill and headlights with marker.
- Glue wheels to the bottom.
Time: 15–20 minutes | Difficulty: Easy
17. Watercolor Supply Labels
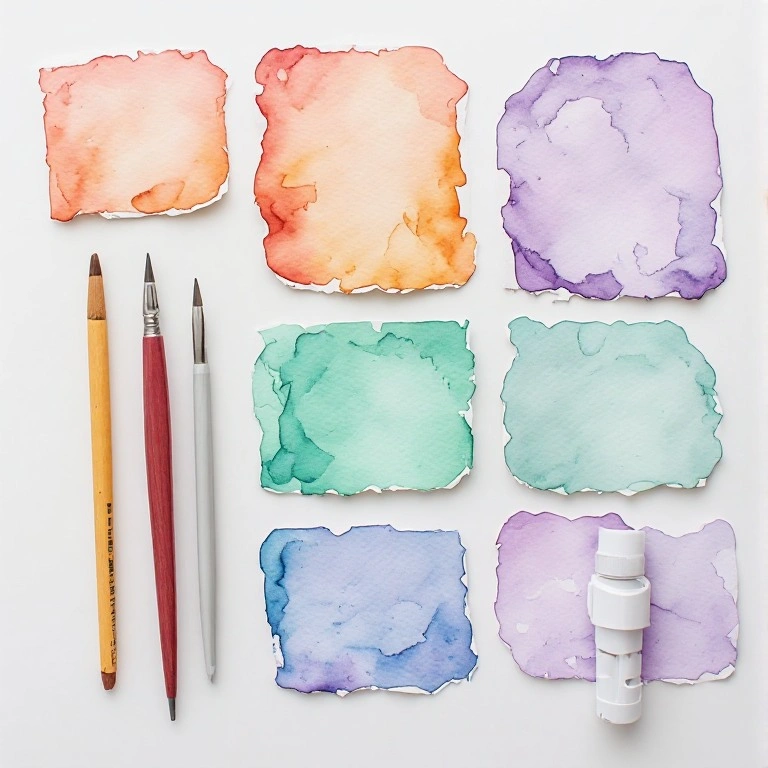
Beautiful hand-painted labels for organizing all school supplies at home or in the classroom. Quick to make and totally customizable.
Materials:
- White cardstock
- Watercolor paints
- Fine-tip black marker
- Scissors
- Laminator or clear tape
Steps:
- Cut cardstock into small rectangle or tag shapes.
- Paint a light watercolor wash background on each.
- Let dry, then write supply names with black marker.
- Add small doodles or borders.
- Laminate or cover with clear tape for durability.
Time: 15–25 minutes | Difficulty: Easy
Tip: Pastel watercolors give a soft, elegant look that photographs beautifully.
18. Felt Pencil Case
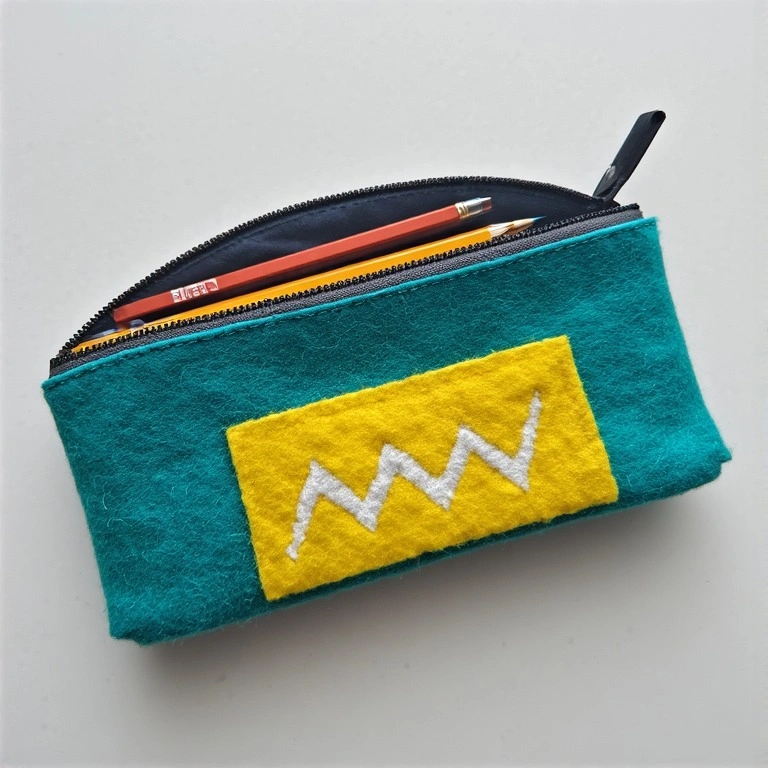
Unique Back to School Crafts with Felt
A soft, zippered (or snap-top) pencil case made from felt sheets — no special sewing skills needed.
Materials:
- Felt sheets (2–3 colors)
- Fabric glue or needle and thread
- Zipper or snaps
- Scissors
- Decorative patches or iron-ons
Steps:
- Cut two felt rectangles the same size.
- Glue or sew three sides together, leaving the top open.
- Attach a zipper or sew on snaps at the opening.
- Decorate the outside with iron-on patches or embroidery.
- Let dry fully before filling with supplies.
Time: 25–40 minutes | Difficulty: Medium
19. Personalized Pencil Toppers
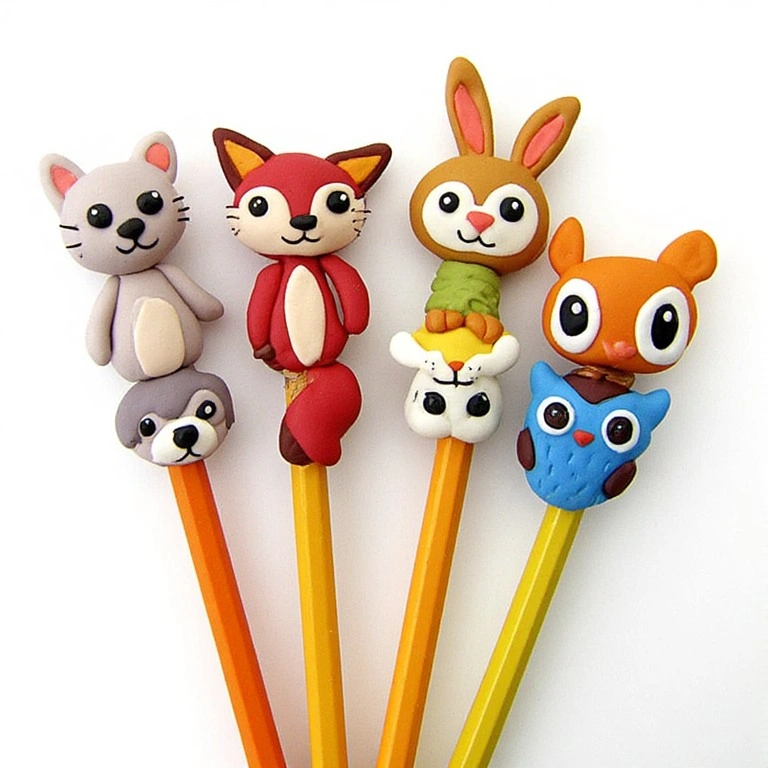
Tiny clay or foam characters that sit on top of a pencil eraser. Kids go wild for these — and they make great classroom gifts too.
Materials:
- Air-dry clay or foam sheets
- Toothpick or small dowel
- Acrylic paint
- Clear sealant
- Pencils
Steps:
- Mold small animal or character shapes from clay.
- Poke a pencil-sized hole through the base before drying.
- Let dry completely (overnight for clay).
- Paint with acrylic details.
- Seal and slide onto pencil tops.
Time: 20–30 minutes (plus drying) | Difficulty: Medium
Tip: Make matching toppers as a set for fun back-to-school gifting.
20. Kindness Rock Jar
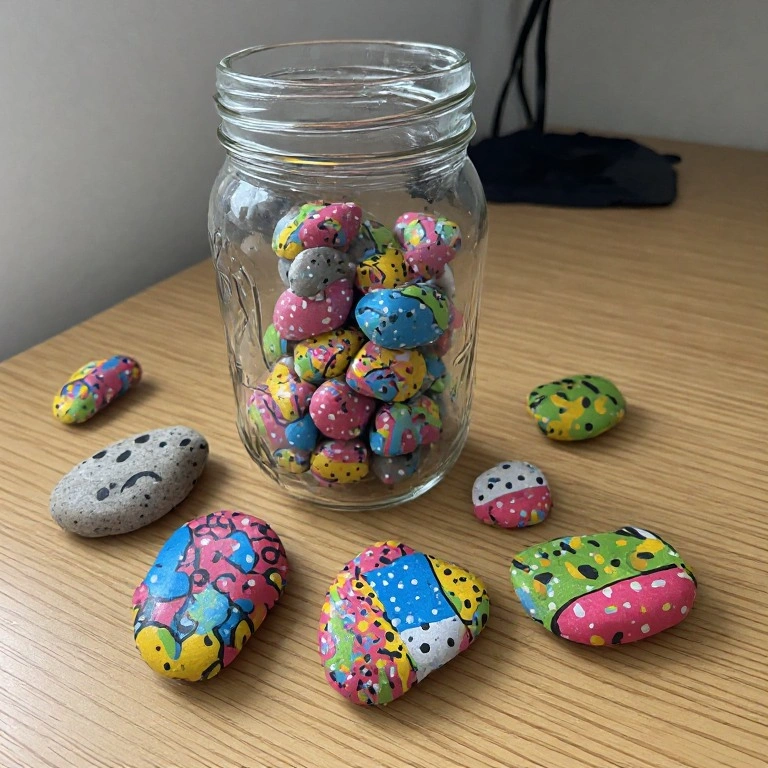
Fill a mason jar with painted rocks, each labeled with a kind deed or compliment. A wonderful first-week-of-school classroom activity.
Materials:
- Small smooth rocks
- White and colored acrylic paint
- Fine-tip marker
- Mason jar
- Clear sealant
Steps:
- Paint rocks with a white base and let dry.
- Add colorful backgrounds — stripes, dots, or gradients.
- Write kind messages once dry (e.g., “You’re amazing!”).
- Seal each rock with clear sealant.
- Fill a mason jar and place on the teacher’s desk.
Time: 30–45 minutes | Difficulty: Easy
Common Mistakes to Avoid
- Skipping the drying time — Rushing between steps (especially with paint or glue) leads to smudging and peeling. Always let each layer dry fully before moving on.
- Using too much glue — Over-applying glue causes warping in paper projects and messy edges on fabric ones. A thin, even coat is almost always better.
- Not sealing finished crafts — Unsealed paint or marker will fade or rub off with use. A coat of Mod Podge or clear sealant keeps projects looking fresh all school year.
Tips for Best Results
- Prep your workspace before starting — lay down newspaper or a silicone mat to protect surfaces.
- Read through all steps first so you know what’s coming and can prep materials in advance.
- Use quality paint — cheap acrylic paint often takes more coats and dries uneven.
- Let kids lead — the more ownership they feel over a project, the more they’ll use and love it.
- Batch similar projects — if making items for a whole class, assemble all at once for efficiency.
- Take photos as you go — great for sharing progress and creating a DIY tutorial for others.
FAQs
Q: What age are these crafts best for? Most projects are suitable for ages 5 and up with adult supervision. Crafts involving hot glue, carving tools, or scissors are better for ages 8+.
Q: Can these be done in a classroom setting? Absolutely. Projects like paper bookmarks, washi tape rulers, and painted rocks are perfect for group classroom activities with minimal cleanup.
Q: What supplies should I stock up on before starting? The most-used supplies across all 20 projects are: acrylic paint, Mod Podge, cardstock, washi tape, markers, and a hot glue gun. Having these on hand lets you tackle most ideas.
Q: How long do these crafts last? When sealed properly with Mod Podge or clear sealant, most crafts will last the entire school year. Felt and fabric projects are especially durable.
Q: Are these crafts budget-friendly? Yes! Most projects cost under $5 in materials, especially if you repurpose items like tin cans, toilet paper rolls, and old fabric scraps.
Q: Can I adapt these for holiday or seasonal themes? Definitely. Many projects like the mason jar organizer, notebook cover, and painted rocks can be easily themed for fall, winter holidays, or Valentine’s Day with small changes to colors and decorations.
Conclusion
There’s no better way to kick off a new school year than with something made by hand. These 20 back to school crafts cover every skill level, supply list, and age group — so there’s truly something for everyone.
Pick one project to start, gather your supplies, and let the creativity flow. Your kids (or students) will start the school year feeling excited, prepared, and proud of what they made. Happy crafting!