12 Fun Ice Cream Craft Ideas for Sweet Summer Activities
Summer or not, ice cream inspires smiles — and these 12 ice cream craft ideas prove that the fun doesn’t have to stop at the freezer. Whether you’re planning a birthday party, a rainy-day activity, or a creative afternoon with kids, there’s something here for every skill level.
From felt popsicles to melting paintings, these projects are colorful, beginner-friendly, and totally delightful.
1. Ice Cream Craft ideas : Felt Ice Cream Cone Plushie
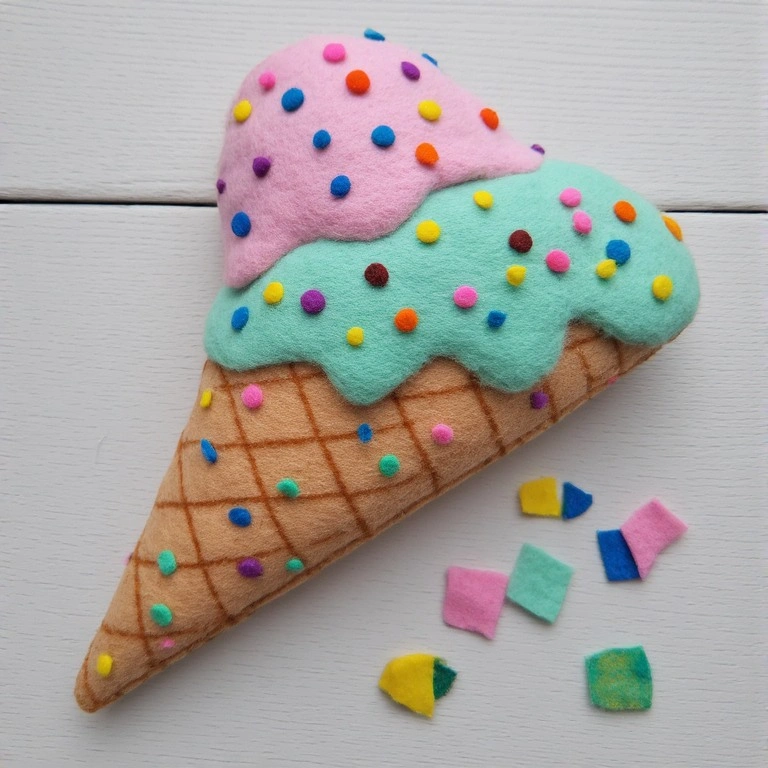
A huggable felt cone stuffed with soft filling — this plushie looks good enough to eat. It’s a perfect beginner sewing project and doubles as a cute room decoration or toy.
Materials:
- Tan and pastel felt sheets
- Polyfill stuffing
- Needle and thread or fabric glue
- Scissors
- Puffy paint (optional, for sprinkles)
Steps:
- Cut a cone shape from tan felt and a rounded scoop shape from pastel felt.
- Fold the cone into shape and stitch or glue the sides closed.
- Stuff the scoop with polyfill and attach it to the top of the cone.
- Add puffy paint dots to mimic sprinkles. Let dry completely.
- Time: 20–30 minutes
- Difficulty: Easy
💡 Tip: Use two different pastel colors for a double-scoop effect!
2. Paper Plate Ice Cream Craft for Toddlers
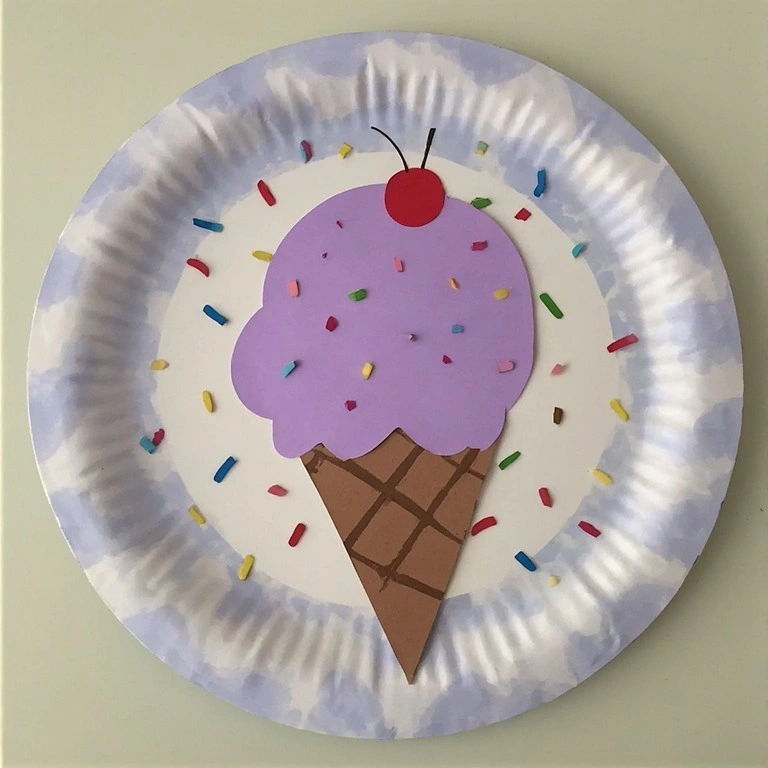
This is one of the easiest ice cream craft projects you can do with toddlers. It’s paint-friendly, mess-forgiving, and makes a great wall display.
Materials:
- Paper plates (1 full, 1 cut in half)
- Tempera paint in pastel colors
- Brown paint or crayon
- Glue stick
- Craft foam or construction paper
Steps:
- Paint the half paper plate in your chosen ice cream color. Let dry.
- Color or paint the full plate brown to make the cone shape — cut into a triangle if needed.
- Glue the scoop on top of the cone.
- Decorate with foam sprinkles or paper “cherries.”
- Time: 15–20 minutes
- Difficulty: Easy
💡 Tip: Let kids mix two colors on the scoop for a swirl effect.
3. Popsicle Stick Ice Cream Magnet
Cute, practical, and quick to make — these mini popsicle stick magnets are perfect for fridges, lockers, or as handmade gifts.
Materials:
- Jumbo popsicle sticks
- Acrylic paint
- Strong adhesive magnets
- Hot glue gun
- Glitter or foam stickers (optional)
Steps:
- Paint the top 2/3 of the popsicle stick in a pastel color to represent the ice cream.
- Paint the bottom third brown for the stick.
- Once dry, decorate with glitter, stickers, or painted sprinkles.
- Hot glue a magnet strip to the back.
- Time: 10–15 minutes
- Difficulty: Easy
💡 Tip: Make a whole set in different “flavors” for a gift pack.
4. Melting Ice Cream Watercolor Painting
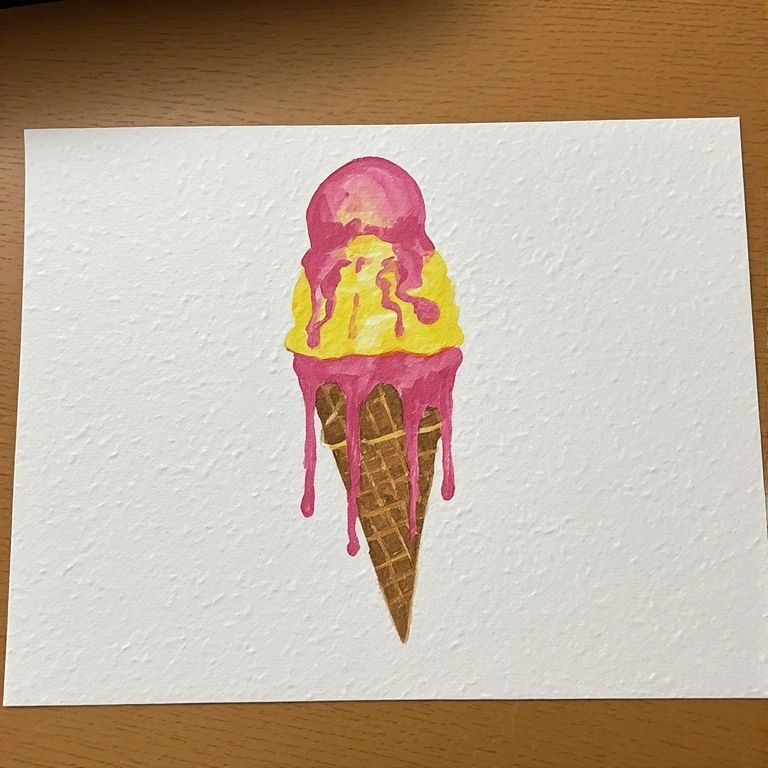
This art project teaches kids about color blending while creating a dramatic, dripping ice cream painting effect.
Materials:
- Watercolor paper
- Watercolor paints
- White crayon
- Paintbrushes
- Black marker (optional for outline)
Steps:
- Draw an ice cream cone shape lightly in pencil or white crayon on watercolor paper.
- Paint the scoop with wet, saturated watercolor — let colors bleed into each other.
- While still wet, tilt the paper slightly so the paint “drips” downward.
- Once dry, outline with black marker for a bold look.
- Time: 20–30 minutes
- Difficulty: Easy to Medium
💡 Tip: Use salt on the wet paint for a gorgeous texture effect.
5. Ice Cream Craft: 3D Cardboard Cone Decoration
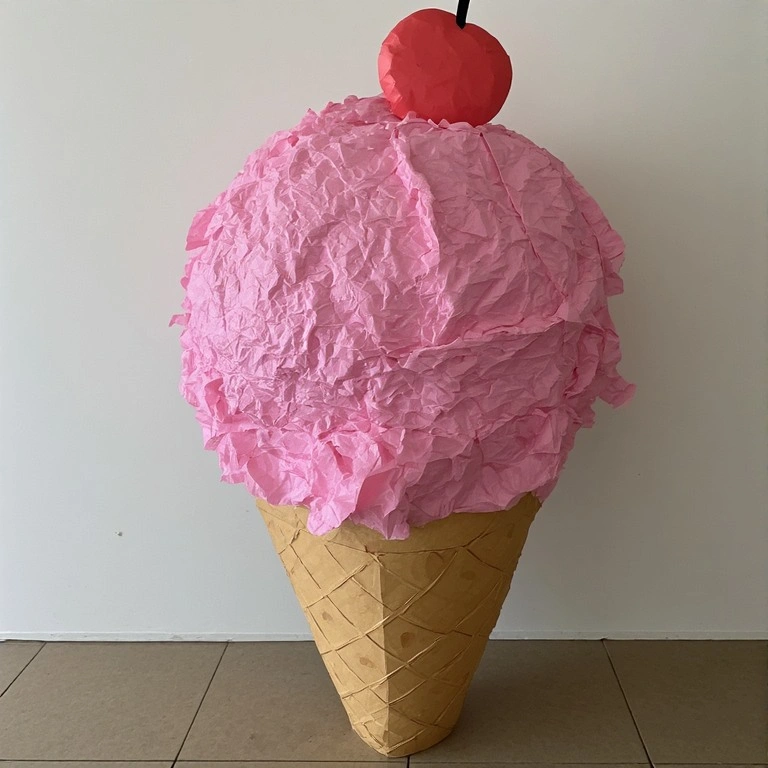
This oversized 3D ice cream decoration is ideal for party backdrops, classroom displays, or photo booth props.
Materials:
- Cardboard or poster board
- Tissue paper or crinkled paper in pastel shades
- Brown paint
- Hot glue gun
- Tape and scissors
Steps:
- Roll a large piece of cardboard into a cone shape and secure with tape.
- Paint the cone brown and draw a waffle pattern with a marker.
- Scrunch tissue paper into a large ball and hot glue it into the top of the cone.
- Add smaller tissue paper “drips” and a paper cherry on top.
- Time: 30–45 minutes
- Difficulty: Medium
💡 Tip: Use layers of different colored tissue paper for a rainbow effect.
6. Ice Cream Scoops Yarn Pom-Pom Mobile
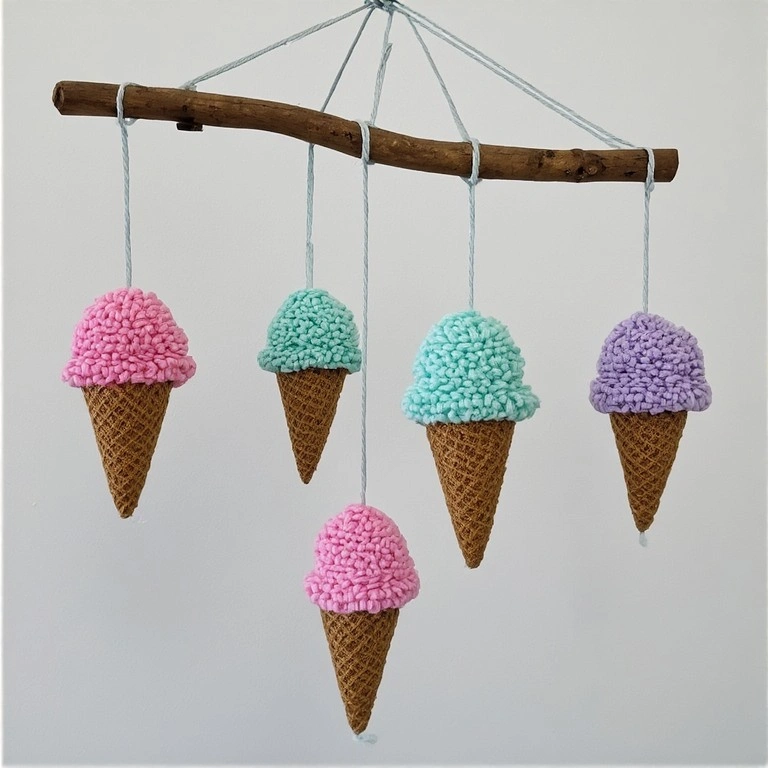
Fluffy yarn pom-poms shaped into ice cream scoops make the sweetest hanging mobile for a nursery or kid’s room.
Materials:
- Pastel yarn in 3–4 colors
- Wooden dowel or twig
- Brown craft foam or felt (for cones)
- String or twine
- Scissors
Steps:
- Make 6–8 yarn pom-poms in different pastel colors.
- Cut small cone shapes from brown felt or craft foam.
- Attach each pom-pom to a cone using hot glue.
- Hang each ice cream from the dowel with varying string lengths.
- Time: 45–60 minutes
- Difficulty: Medium
💡 Tip: Add tiny beads or sequins to the pom-poms to mimic sprinkles.
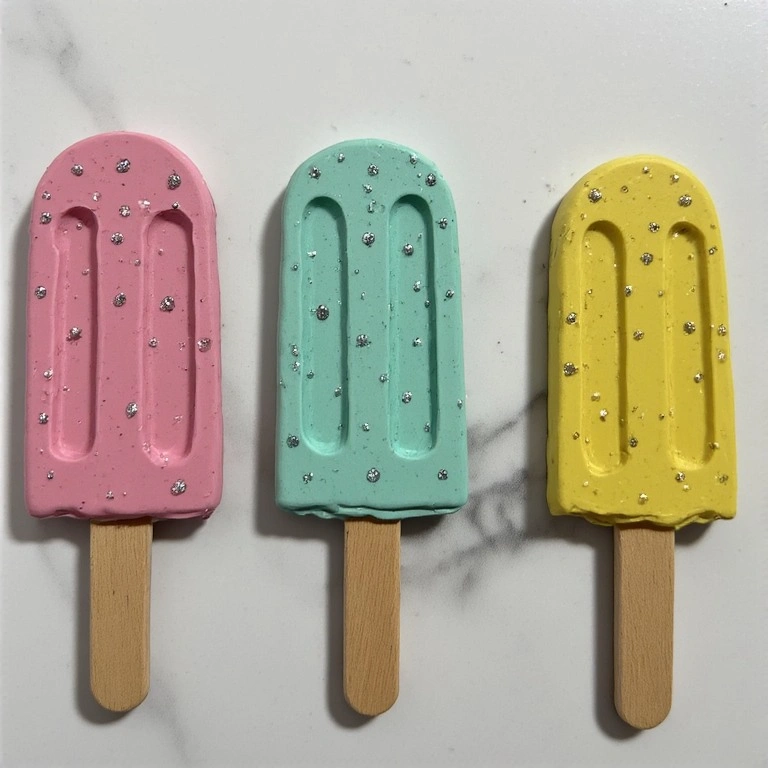
7. Ice Cream Craft: Painted Rock Popsicles
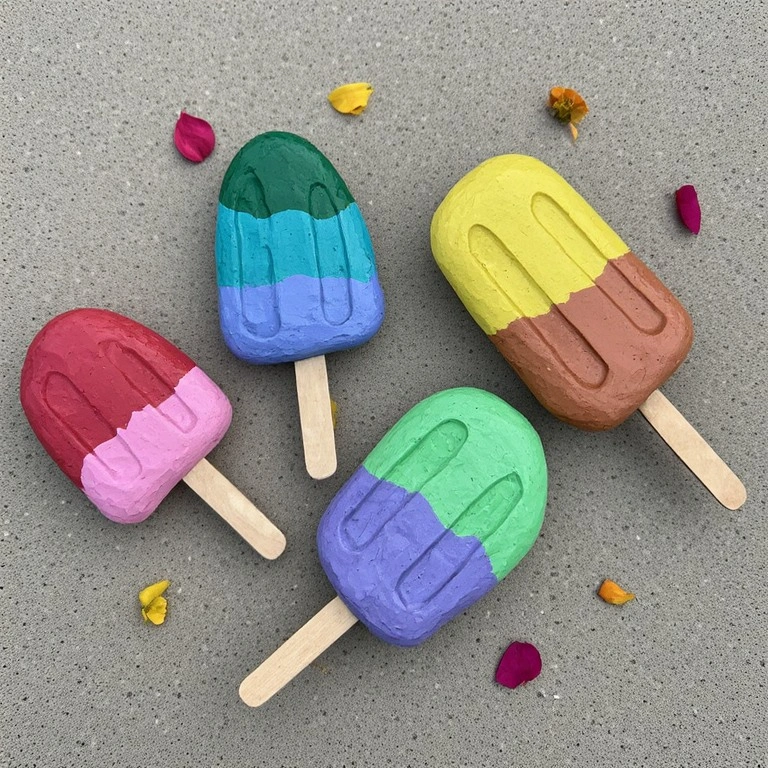
Smooth painted rocks transformed into adorable popsicle art — these make lovely garden decorations or desk accents.
Materials:
- Smooth flat rocks
- Acrylic paint in bright colors
- White paint pen or fine brush
- Popsicle sticks
- Mod Podge or clear sealant
Steps:
- Paint each rock in a base color (pink, orange, mint, etc.). Let dry.
- Add a second color for a bite mark or drip effect.
- Use a white paint pen to add dots, stripes, or “sprinkles.”
- Glue a popsicle stick to the bottom and seal with Mod Podge.
- Time: 20–30 minutes
- Difficulty: Easy
💡 Tip: Seal well so the painted rocks can sit outdoors without fading.
8. Clay Ice Cream Charm Keychain
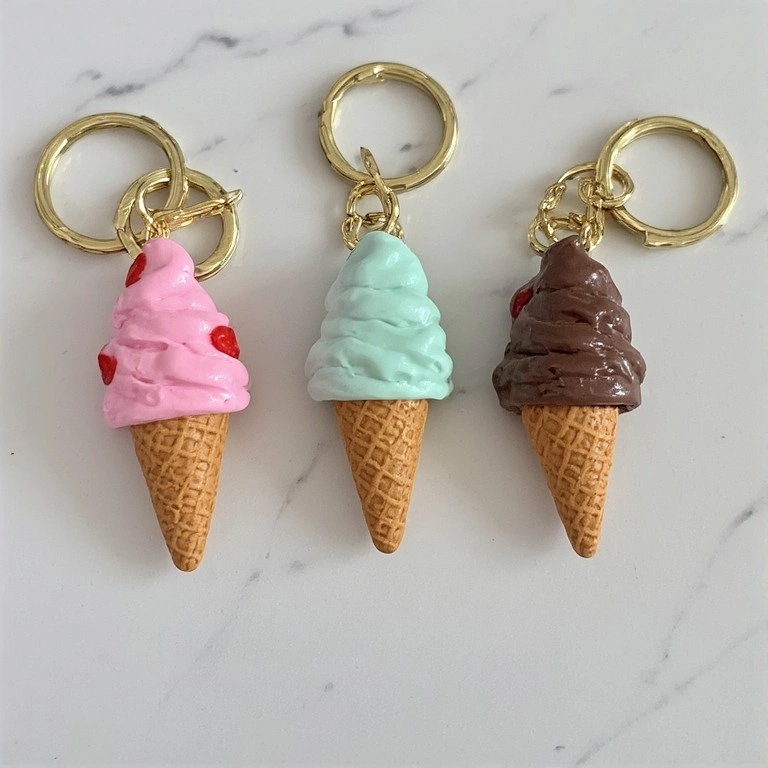
These mini clay ice cream charms look professional and make wonderful gifts or party favors.
Materials:
- Air-dry or polymer clay in pastel and brown shades
- Rolling pin
- Craft knife or clay tools
- Jump rings and keychain hardware
- Glaze or Mod Podge
Steps:
- Roll a small ball of pastel clay for the scoop.
- Shape a cone from brown clay and press gently together.
- Add tiny clay sprinkles or a mini cherry on top.
- Once dry/baked, attach a jump ring and keychain clip. Seal with glaze.
- Time: 30–40 minutes (plus drying time)
- Difficulty: Medium
💡 Tip: Use a toothpick to add texture to the waffle cone before baking.
9. Ice Cream Suncatcher With Tissue Paper
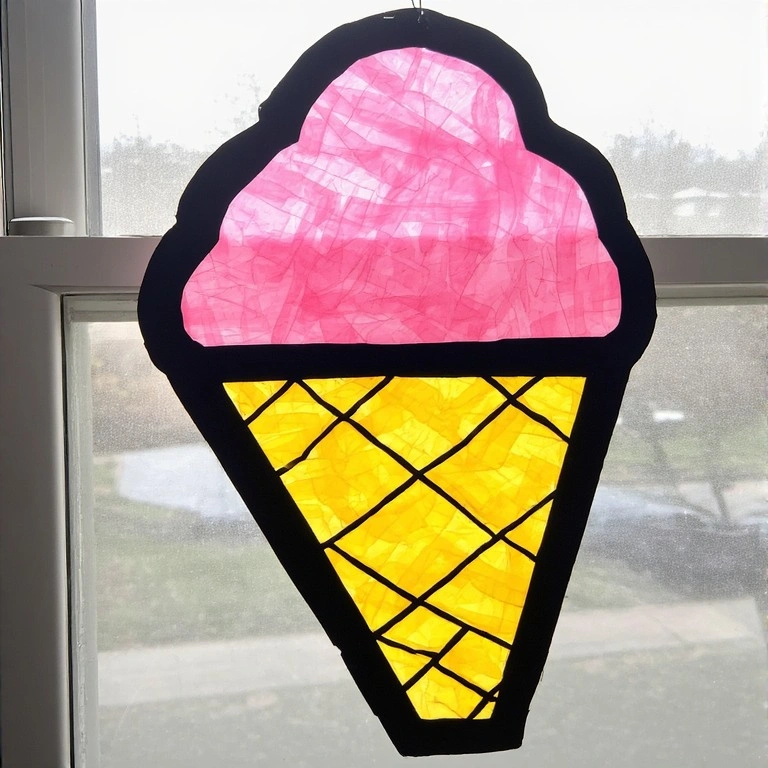
These translucent tissue paper suncatchers are stunning when hung in a sunny window — easy enough for kids but beautiful enough for any space.
Materials:
- Black construction paper
- Tissue paper in pastel colors
- Clear contact paper or glue
- Scissors
- Hole punch and ribbon
Steps:
- Cut an ice cream cone silhouette out of black construction paper (cut out the inside, keeping the border).
- Cut small squares of tissue paper in your chosen colors.
- Lay contact paper sticky side up and press tissue paper pieces inside the cone area.
- Attach the black frame on top. Punch a hole and hang with ribbon.
- Time: 20–25 minutes
- Difficulty: Easy
💡 Tip: Overlap tissue paper pieces for a beautiful stained-glass color effect.
10. Foam Sheet Ice Cream Bookmark
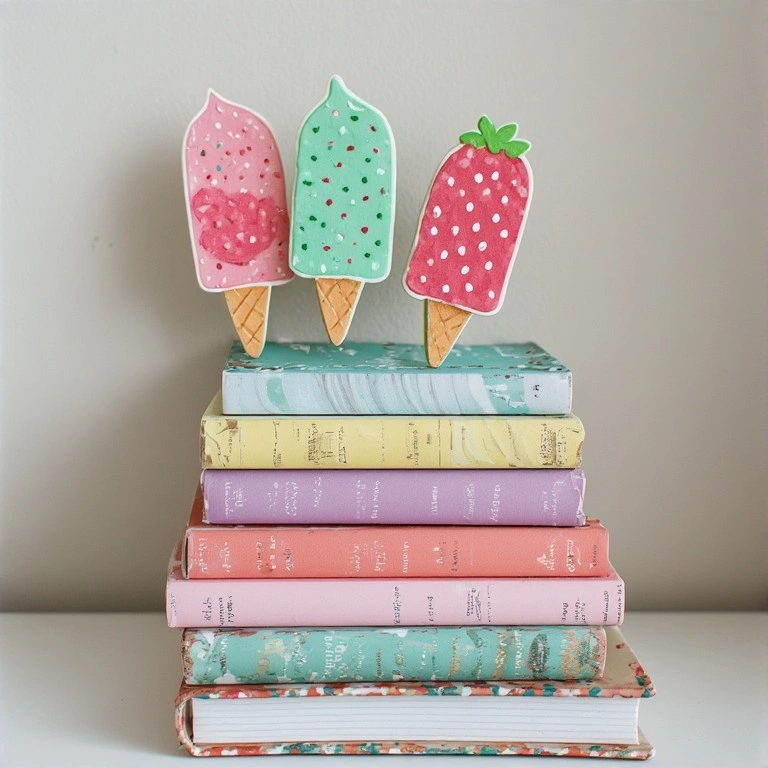
A fun and functional craft — these foam ice cream bookmarks are quick to make and perfect for book lovers.
Materials:
- Foam sheets in pastel and brown
- Scissors
- Glue or double-sided tape
- Fine-tip markers
- Laminator (optional)
Steps:
- Cut a long rectangle from brown foam for the cone/bookmark body.
- Cut a rounded scoop shape from a pastel foam sheet.
- Glue the scoop to the top of the bookmark.
- Decorate with marker dots, swirls, or a tiny cherry. Laminate if desired.
- Time: 10–15 minutes
- Difficulty: Easy
11. Washi Tape Ice Cream Wall Art
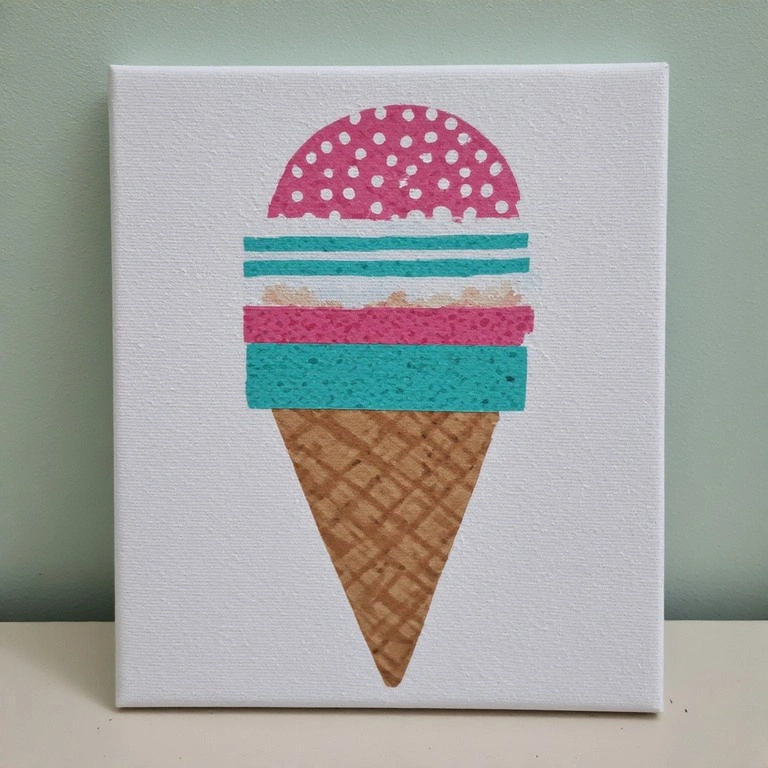
No paint needed! This zero-mess craft uses colorful washi tape to build ice cream art on canvas or paper.
Materials:
- Blank canvas or thick cardstock
- Washi tape in multiple colors and patterns
- Scissors
- Ruler and pencil (for guidelines)
Steps:
- Lightly sketch an ice cream cone shape in pencil on your canvas.
- Tear or cut washi tape into strips and fill the scoop sections with different tapes.
- Use a brown or patterned tape for the waffle cone section.
- Press down firmly and trim any edges that extend beyond the sketch.
- Time: 20–30 minutes
- Difficulty: Easy
💡 Tip: Use patterned washi tape (polka dots, stripes) for the scoop sections — it mimics texture beautifully.
12. Ice Cream Craft: Recycled Cup Snow Globe
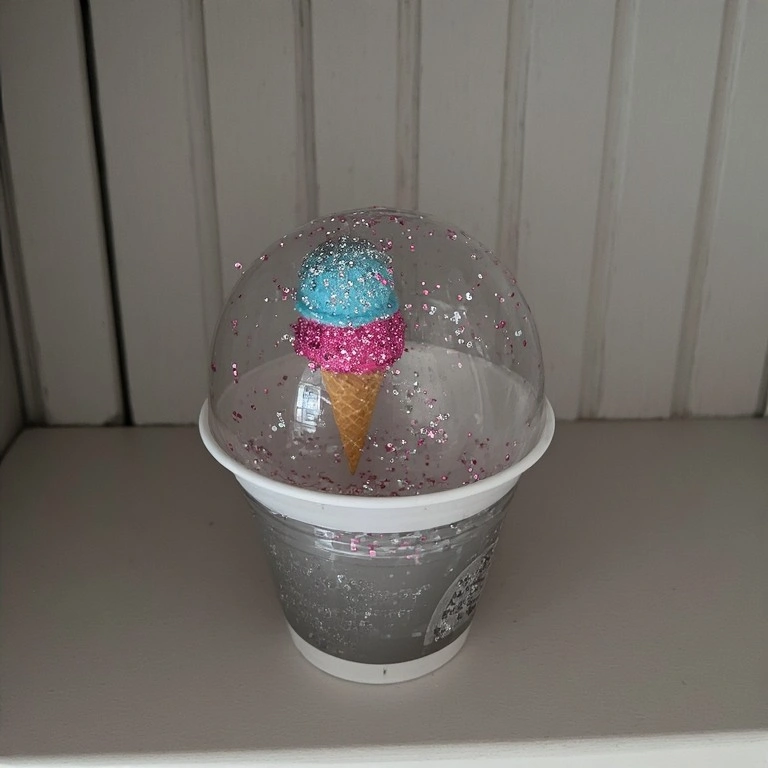
Turn an old plastic cup into a glittery ice cream snow globe — a magical desk decoration that’s also eco-friendly.
Materials:
- Clear plastic cup with lid
- Small plastic or foam ice cream toy (or homemade clay piece)
- Distilled water
- Glitter or iridescent sequins
- Waterproof glue
- Glycerin (optional, slows glitter)
Steps:
- Glue your mini ice cream figure to the inside of the cup lid. Let dry fully.
- Fill the cup with distilled water and a few drops of glycerin.
- Add a generous pinch of glitter or sequins.
- Apply waterproof glue to the lid rim, screw it on tightly, and flip upside down.
- Time: 20–30 minutes (plus drying time)
- Difficulty: Medium
💡 Tip: Use a watertight seal of hot glue on the lid rim to prevent any leaks.
Common Mistakes to Avoid
- Skipping the drying time — Rushing between steps (especially with glue or paint) leads to smeared colors and weak bonds. Always let each layer dry fully before moving on.
- Using the wrong glue for the material — Not all glues work on all surfaces. Use hot glue for foam and felt, fabric glue for textiles, and waterproof glue for anything near water or outdoor use.
- Overloading with decorations — It’s tempting to pile on the sprinkles and glitter, but too much makes projects look cluttered. Less is often more — let the main shape speak first.
Tips for Best Results
- Work on a protected surface — Cover your table with a silicone mat or newspaper to keep paints and glue from sticking.
- Use pastel colors for an authentic ice cream look — Soft pinks, mints, lavenders, and creams read more “ice cream” than bright primaries.
- Keep a damp cloth nearby — Wipe your hands between steps to keep colors clean and transfers minimal.
- Prep all materials before starting — Cutting shapes and laying out supplies in advance makes the process smoother, especially with kids.
- Take photos as you go — These make great process shots for sharing online or creating a tutorial of your own!
FAQs
Q: What age group are these ice cream crafts suitable for? Most of these projects are suitable for ages 4 and up with adult supervision. Ideas like the watercolor painting and clay charm are better for ages 7+ due to finer motor skills required.
Q: Can I use these crafts as party activities? Absolutely! Projects like the popsicle stick magnet, foam bookmark, and paper plate cone are fast, low-mess, and easy to prep in bulk — perfect for birthday party craft stations.
Q: What’s the best paint to use on felt or fabric? Fabric paint or puffy paint works best on felt and fabric surfaces. Acrylic paint can work but may crack over time if the material flexes.
Q: How do I make these crafts last longer? Seal painted projects with Mod Podge or a clear acrylic spray. For fabric crafts, avoid washing or getting them wet. Store in a dry place away from direct sunlight.
Q: Can I sell these crafts? Yes! Many of these make excellent handmade products for craft fairs or online shops — especially the clay charms, painted rock popsicles, and felt plushies.
Q: Where can I find affordable supplies? Dollar stores, craft chains, and online marketplaces all carry foam sheets, felt, popsicle sticks, and basic paints at low cost. Buying in multipacks saves money if you’re making several projects.
Conclusion
There’s something genuinely joyful about turning simple materials into something that looks good enough to eat. These 12 ice cream crafts are a reminder that creativity doesn’t need to be complicated — just colorful, fun, and a little sweet.
Pick one that matches your skill level, gather your supplies, and get making. Share what you create — because the best crafts are the ones that bring a smile to someone else’s face.