12 Around the World Crafts for Kids That Make Learning Fun
Exploring different cultures doesn’t require a passport. With the right supplies and a little creativity, kids can travel the globe from their own kitchen table.
These 12 around the world crafts for kids bring geography, history, and art together in one colorful activity. Each project is beginner-friendly, easy to set up, and designed to spark curiosity about the world.
1. Japanese Origami Crane
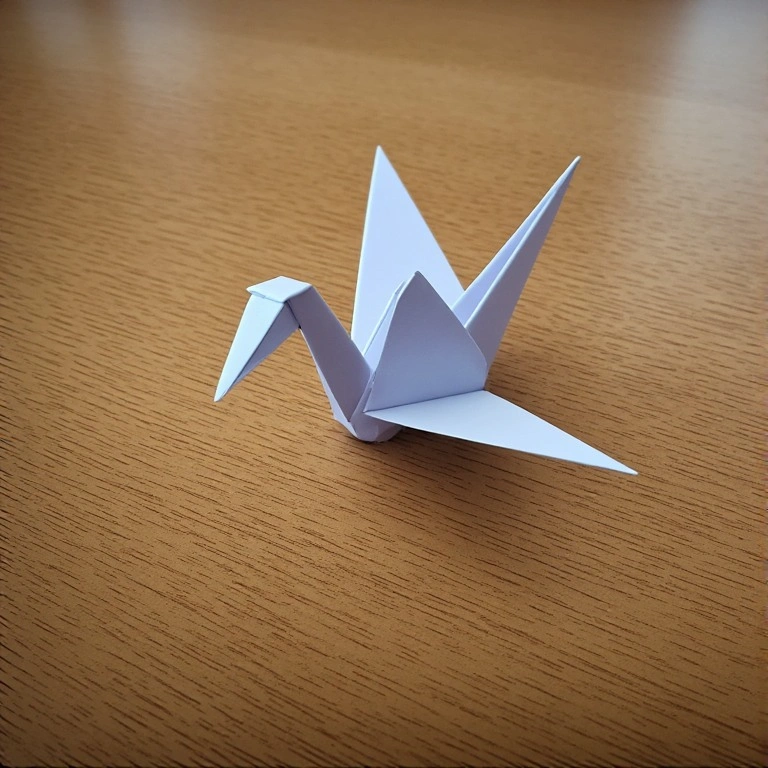
Origami is one of Japan’s most beloved art forms — and the crane is the perfect starting point for kids. It teaches patience, focus, and the beauty of working with simple materials.
Materials:
- Square origami paper (or cut a regular sheet into a square)
- Ruler (optional)
- Flat surface to work on
Steps:
- Fold the paper diagonally both ways, then unfold.
- Fold in half horizontally and vertically.
- Collapse into a square base.
- Fold the edges to the center crease on both sides to form a kite shape.
- Fold the top triangle down, then unfold all.
- Pull the bottom point up while pressing the sides inward (petal fold).
- Repeat on the back.
- Fold the lower flaps up to form wings and the neck/tail.
- Gently pull the wings apart to open the body.
- Time: 20–30 minutes
- Difficulty: Medium
Tip: Use double-sided origami paper for a more striking result.
2. Mexican Papel Picado Banner
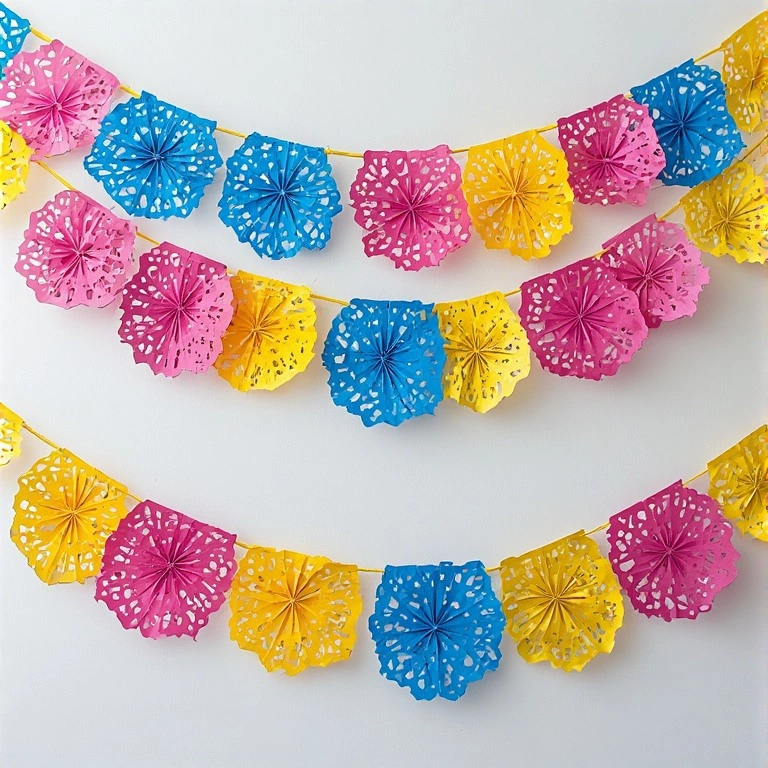
Papel Picado — meaning “punched paper” — is a traditional Mexican craft used during festivals. Kids will love cutting and hanging their own colorful banners.
Materials:
- Colored tissue paper or thin craft paper
- Scissors (small, sharp craft scissors work best)
- String or yarn
- Tape or glue
Steps:
- Fold a sheet of tissue paper in half lengthwise, then fold again.
- Cut small shapes along the folded edges (triangles, diamonds, half circles).
- Open the paper carefully to reveal the pattern.
- Fold the top edge over a length of string and tape or glue it down.
- Repeat with multiple sheets in different colors.
- Hang the finished banner across a window or wall.
- Time: 20–30 minutes
- Difficulty: Easy
Tip: The more folds you make before cutting, the more symmetrical the pattern.
3. Around the World Crafts for Kids — African Kente Cloth Weaving
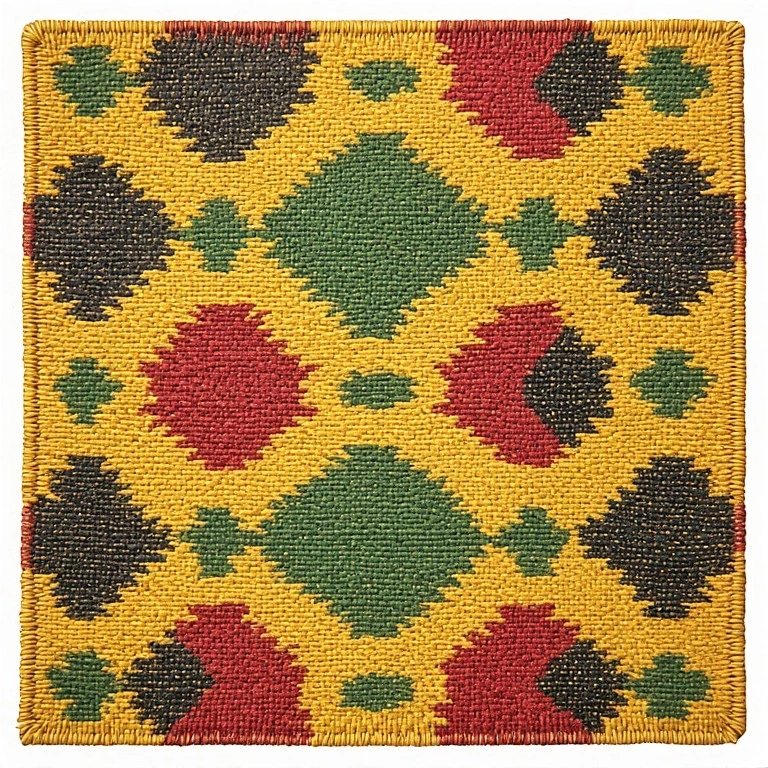
Kente cloth originates from Ghana and is woven with vibrant geometric patterns full of cultural meaning. This simplified paper version teaches kids the basics of weaving.
Materials:
- Yellow, red, green, and black construction paper
- Scissors
- Ruler
- Tape or glue
Steps:
- Cut one sheet of paper into strips about 1 inch wide.
- Take a second sheet and fold it in half lengthwise.
- Cut slits across the folded sheet, stopping about 1 inch from the edge.
- Unfold the sheet — this is your loom.
- Weave the paper strips over and under the slits, alternating rows.
- Trim the ends and tape or glue them down.
- Time: 25–40 minutes
- Difficulty: Medium
Tip: Use authentic Kente colors — yellow (gold), green, red, and black — each color carries symbolic meaning.
4. Indian Rangoli Art
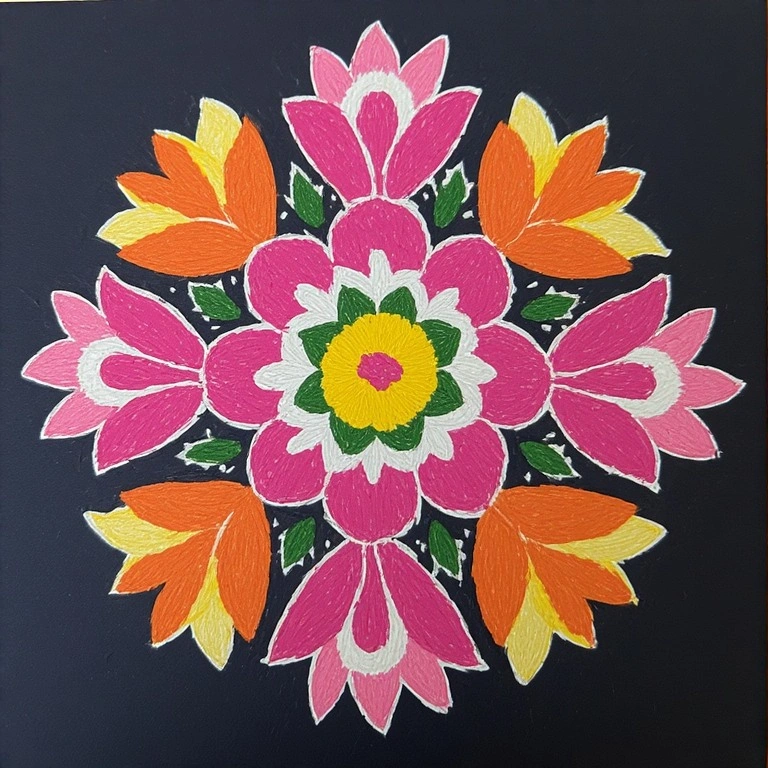
Rangoli is a traditional Indian art form made during festivals like Diwali. Kids can create their own version using chalk, sand, or colored rice without the mess of traditional powders.
Materials:
- Chalk pastels or colored sand
- Dark construction paper or cardboard
- Pencil for sketching
- Small bowls for colors
Steps:
- Lightly sketch a symmetrical design on dark paper (start with a circle divided into sections).
- Fill each section with a different color using chalk or colored sand.
- Blend colors at the edges with a fingertip.
- Add dots and floral shapes along the border.
- Spray with hairspray to seal (adult supervision required).
- Time: 30–45 minutes
- Difficulty: Medium
5. Greek Mosaic Tile Art
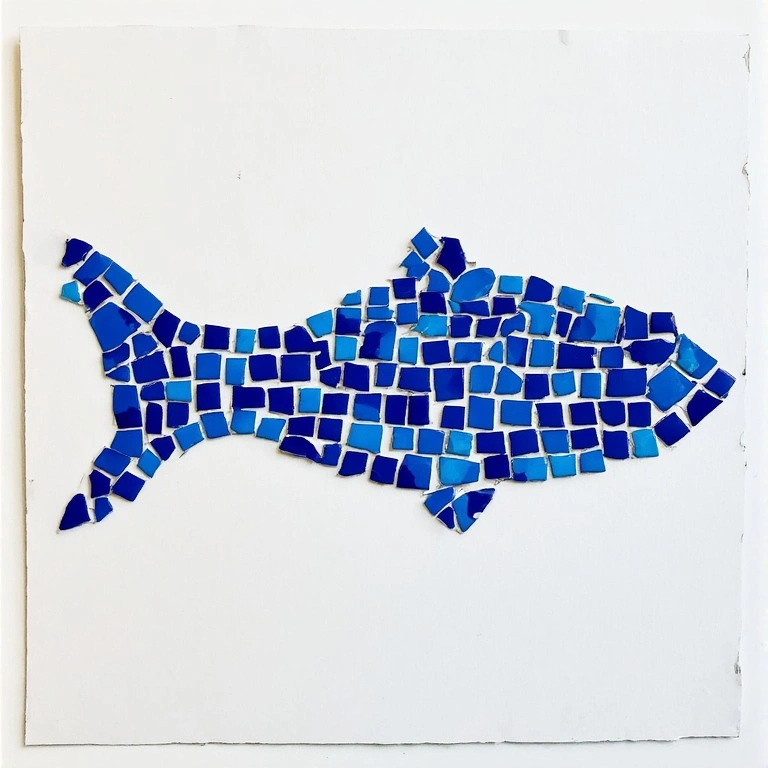
Ancient Greeks and Romans decorated their buildings with beautiful mosaics. Kids can recreate this ancient art using paper or foam tiles on cardboard.
Materials:
- Colored construction paper or foam sheets
- Cardboard base
- Scissors
- Glue stick
- Pencil
Steps:
- Draw a simple design on the cardboard (a fish, sun, or Greek vase works well).
- Cut paper or foam into small squares (about ½ inch each).
- Spread glue on one section of the design.
- Press colored squares onto the glue, leaving small gaps between tiles.
- Continue section by section until the design is filled.
- Let dry completely before displaying.
- Time: 30–45 minutes
- Difficulty: Easy
Tip: Use blue, white, and terracotta colors for an authentic Mediterranean feel.
6. 12 Around the World Crafts for Kids — Chinese Paper Lantern
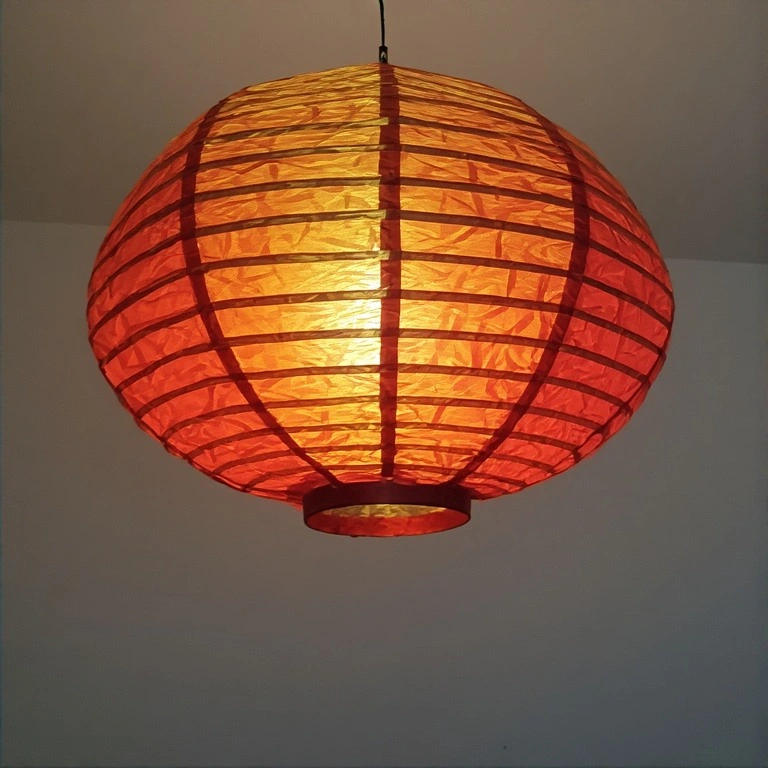
Chinese paper lanterns are made and displayed during the Lunar New Year. This classic craft is one of the most satisfying and eye-catching projects kids can make.
Materials:
- Red or gold construction paper
- Scissors
- Ruler
- Tape or stapler
- Strip of paper for the handle
Steps:
- Fold a sheet of paper in half lengthwise.
- Cut slits along the folded edge, stopping about 1 inch from the open edge.
- Unfold the paper.
- Curve the paper into a cylinder and tape or staple the short ends together.
- Attach a paper strip to the top as a handle.
- Gently push the top and bottom toward each other to puff the lantern open.
- Time: 10–15 minutes
- Difficulty: Easy
7. Australian Aboriginal Dot Art
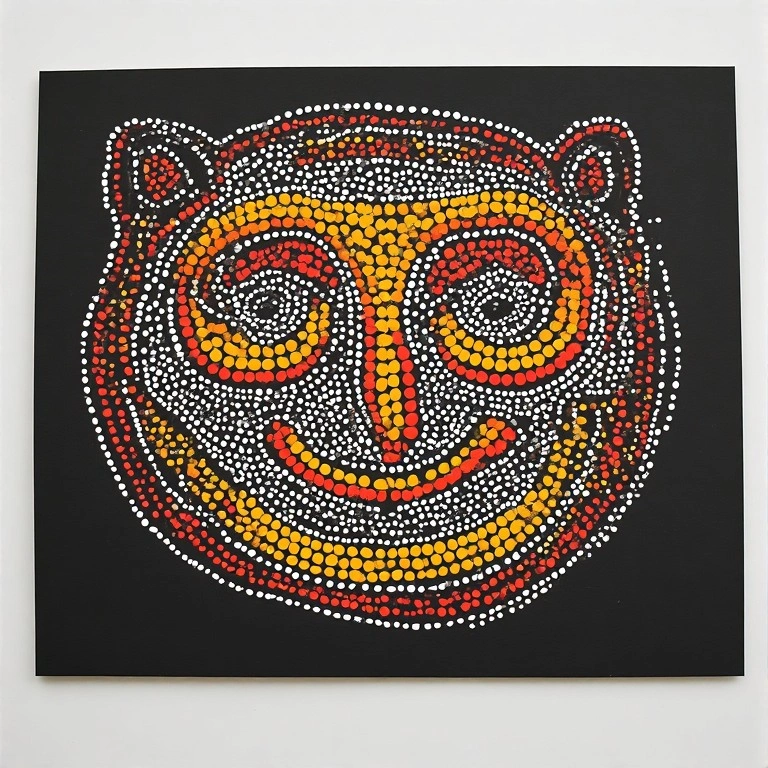
Dot painting is a sacred and expressive art form from Aboriginal Australian culture. Kids can create their own dot art designs using earthy tones and simple patterns.
Materials:
- Black or brown cardstock
- Acrylic or tempera paint
- Cotton swabs or the eraser end of a pencil
- Small paint palette or paper plates
Steps:
- Sketch a simple shape on dark cardstock (snake, turtle, sun, or concentric circles).
- Pour small amounts of paint onto a palette.
- Dip a cotton swab into paint and press dots along the outline.
- Fill in shapes and backgrounds with dot patterns.
- Let dry completely before adding additional layers.
- Time: 30–45 minutes
- Difficulty: Easy
Tip: Vary dot sizes by using different tools — pencil erasers make bigger dots than cotton swabs.
8. Brazilian Carnival Mask
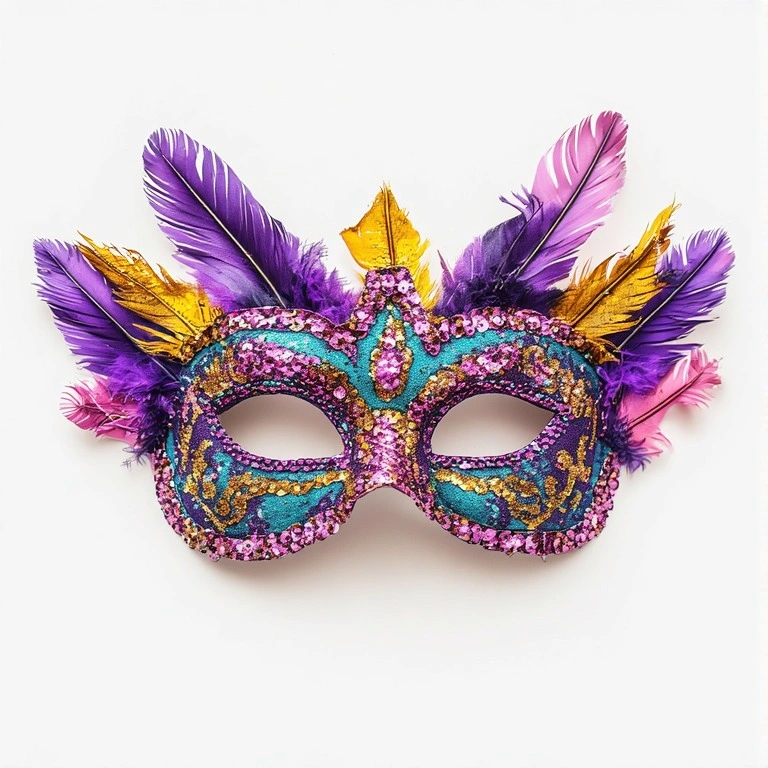
Brazil’s Carnival is famous for its bright costumes and masks. This feathered craft project brings all that color and festivity into a rainy afternoon.
Materials:
- Cardstock or a pre-cut mask template
- Craft feathers (assorted colors)
- Glitter, sequins, or gem stickers
- Craft paint and brushes
- Glue gun or strong craft glue
- A wooden dowel or craft stick for the handle
Steps:
- Cut a mask shape from cardstock, including eye holes.
- Paint the base in bright colors — purple, gold, or red work well.
- Once dry, decorate with glitter, sequins, and gems.
- Glue feathers along the top edge of the mask.
- Attach a craft stick to one side as a handle.
- Allow everything to dry fully before wearing.
- Time: 40–60 minutes
- Difficulty: Medium
9. Moroccan Geometric Tile Design
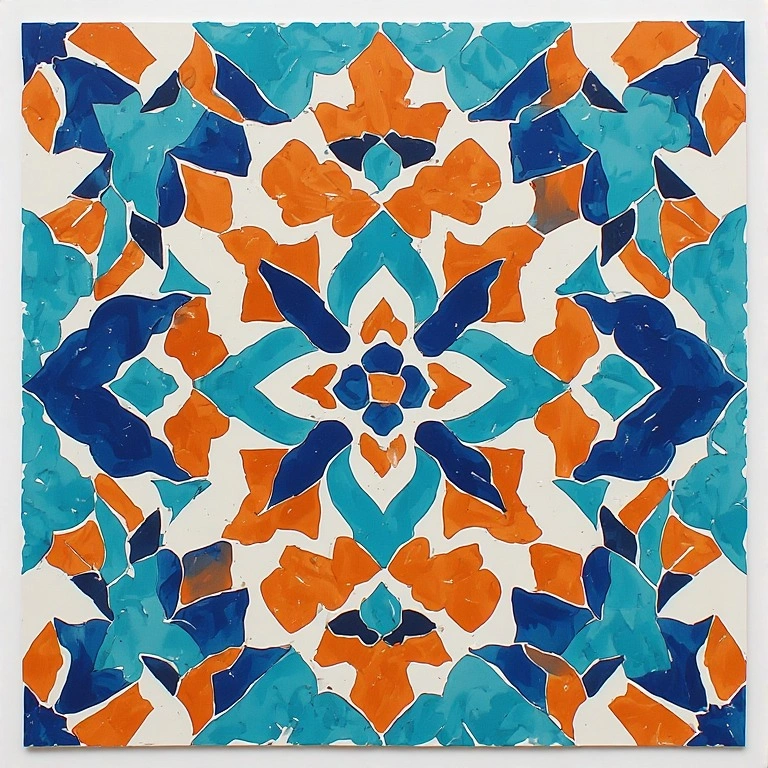
Moroccan zellige tilework features intricate geometric patterns and bold colors. Kids can recreate this look on paper using ruler, compass, and paint.
Materials:
- White cardstock
- Ruler and compass
- Pencil
- Watercolor or tempera paint
- Fine-tip black marker
Steps:
- Use a ruler and compass to draw an 8-pointed star in the center of the paper.
- Extend lines outward from the star’s points to form a repeating geometric pattern.
- Fill each section with paint in turquoise, cobalt, terracotta, and white.
- Let dry completely.
- Trace over all the lines with a fine-tip black marker to define the tile borders.
- Time: 45–60 minutes
- Difficulty: Medium
Tip: Look up photos of real Moroccan tile patterns for color and shape inspiration.
10. Around the World Crafts for Kids — Native American Dream Catcher
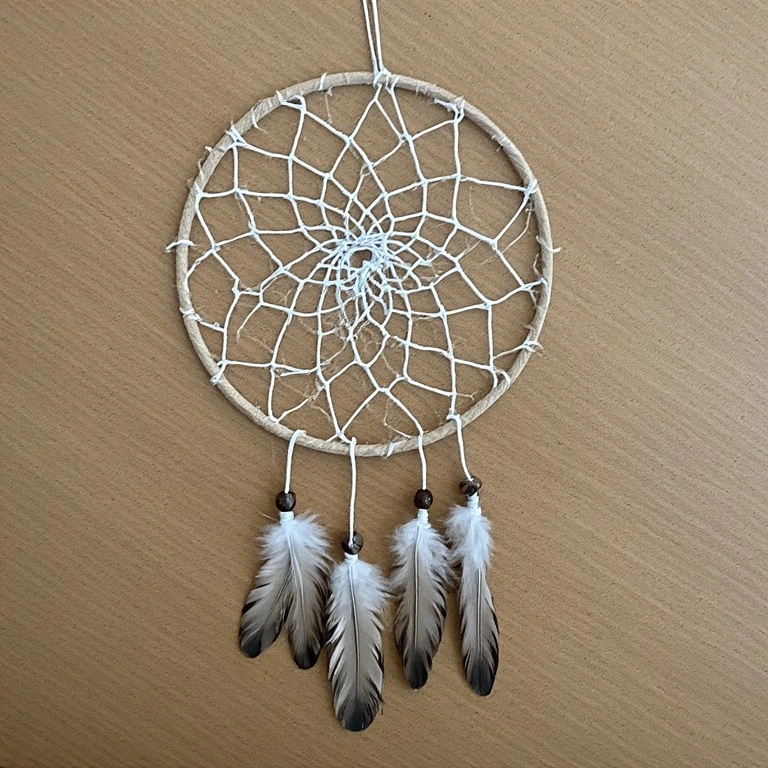
Dream catchers originate from the Ojibwe Nation and are traditionally crafted to protect sleepers from bad dreams. This simplified version introduces kids to this meaningful cultural tradition.
Materials:
- A small embroidery hoop or bent wire circle
- Yarn or string (white or natural)
- Feathers
- Wooden or plastic beads
- Scissors
Steps:
- Tie yarn to the top of the hoop and wrap it tightly around the frame until fully covered.
- Tie a new piece of yarn to the frame and loop it across to the opposite side.
- Continue weaving in a web pattern, looping and pulling the yarn tighter toward the center.
- Thread beads onto the yarn as you weave.
- Tie 2–3 lengths of yarn to the bottom of the hoop.
- Thread beads and attach feathers to the hanging strands.
- Time: 45–60 minutes
- Difficulty: Medium
11. Russian Matryoshka Doll Drawing
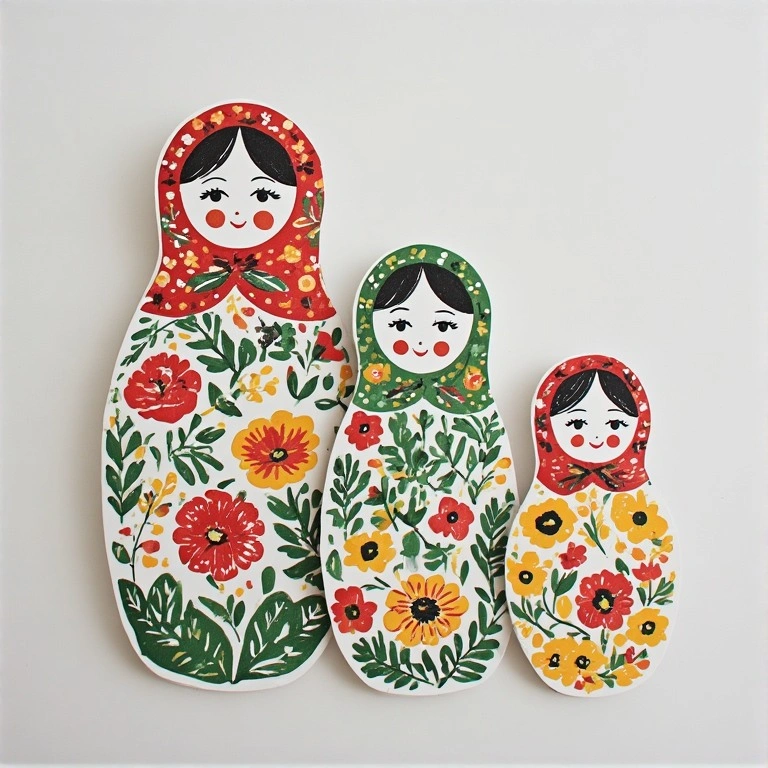
Russian nesting dolls — Matryoshka — are a beloved symbol of Russian folk art. Kids can design their own on paper, creating a series of dolls nested inside each other in size.
Materials:
- White cardstock
- Pencil
- Colored markers or crayons
- Black fine-tip marker
- Scissors
Steps:
- Draw a simple doll outline (rounded head, bell-shaped body) in three or four sizes.
- Sketch a face and headscarf on each doll.
- Fill in the body with floral patterns, dots, and bright colors.
- Outline all details with a black fine-tip marker.
- Cut the dolls out and arrange them by size.
- Optional: laminate them for a keepsake set.
- Time: 30–40 minutes
- Difficulty: Easy
Tip: Keep patterns simple and bold — traditional Matryoshka use large roses and tulips.
12. Egyptian Hieroglyphic Tablet
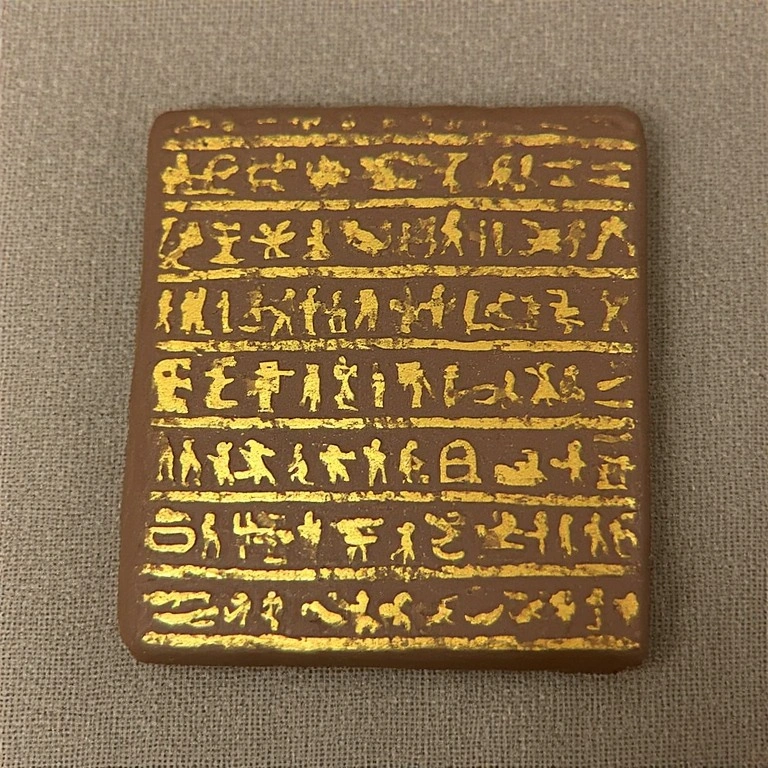
Ancient Egyptians carved hieroglyphs into stone tablets as a form of writing. Kids can recreate this with air-dry clay and simple carving tools.
Materials:
- Air-dry clay
- A wooden skewer or pencil for carving
- Brown and gold paint
- Paintbrush
- Rolling pin
Steps:
- Roll a piece of clay into a flat rectangle (about ¼ inch thick).
- Gently press the edges with your fingers to give it a rough, stone-like appearance.
- Use a skewer or pencil to carve simple hieroglyphs or your name in a cartouche (oval).
- Let the clay dry completely (24–48 hours or follow package instructions).
- Paint the tablet brown.
- Before it dries, lightly dry-brush gold paint over the surface to highlight the carvings.
- Time: 30 minutes active + drying time
- Difficulty: Medium
Common Mistakes to Avoid
- Skipping the drying time — Rushing through steps like gluing or painting leads to smudged or messy results. Build in wait time between layers.
- Using too much glue — Excess glue causes paper to warp and materials to slide. A thin, even layer is always better.
- Ignoring age-appropriateness — Some crafts involve scissors, hot glue, or small beads. Always check that materials and tools are suitable for your child’s age.
Tips for Best Results
- Prep your workspace first — Cover the table with newspaper or a craft mat before starting.
- Read all steps before beginning — Knowing the full process avoids mid-craft surprises.
- Use a reference image — A photo of the real-world inspiration (a real lantern, Kente cloth, etc.) helps kids understand the cultural context.
- Let kids lead — Offer guidance, but encourage creative choices in color and pattern.
- Label finished pieces — Write the country and craft name on the back. It turns art into a mini geography lesson.
- Make a passport book — Create a simple folded booklet where kids can “stamp” each country after completing its craft.
Frequently Asked Questions
What age group are these crafts best for? Most of these crafts are designed for kids aged 5–12. Easier projects like the Chinese lantern and Origami crane (with guidance) work for younger kids, while detailed projects like the Moroccan tile or dream catcher suit ages 8 and up.
Do I need to buy special supplies? No. Most of these crafts use basic materials like construction paper, scissors, glue, and paint. A few projects use air-dry clay or yarn, which are inexpensive and widely available.
Can these crafts be used in a classroom setting? Absolutely. Each project is self-contained, easy to prep in bulk, and naturally sparks discussion about world cultures. They work well as part of a geography unit or multicultural awareness week.
How do I teach cultural respect when doing these crafts? Before starting each project, share a little background about the culture it comes from — why the craft matters, where it’s used, and what it symbolizes. This turns a fun activity into a meaningful learning experience.
Can I combine these into a world cultures theme day? Yes! Pick 3–4 crafts from different continents and pair them with simple snacks or music from those regions. It’s an easy way to create an immersive cultural experience at home or in school.
What if my child finds a craft too difficult? Simplify it. For example, skip weaving and just color a Kente pattern on paper, or use a pre-cut mask instead of cutting one from scratch. The goal is exploration, not perfection.
Conclusion
The world is full of incredible art, traditions, and stories — and these crafts are just the beginning. Whether your child is decorating a Chinese lantern or carving an Egyptian tablet, they’re building a connection to cultures far beyond their own.
Pick one of Around the World Crafts for Kids project this weekend, gather your supplies, and let curiosity take the wheel. The best adventures start at the craft table.