20 4th of July Crafts Ideas to Celebrate in Style This Summer
Whether you’re hosting a backyard bash or a quiet family evening, making something with your hands adds a special touch to the holiday.
These 4th of July crafts are fun, festive, and easy enough for kids and adults alike.
From patriotic décor to wearable accessories, there’s something here for every skill level and budget.
1. Mason Jar Patriotic Luminaries
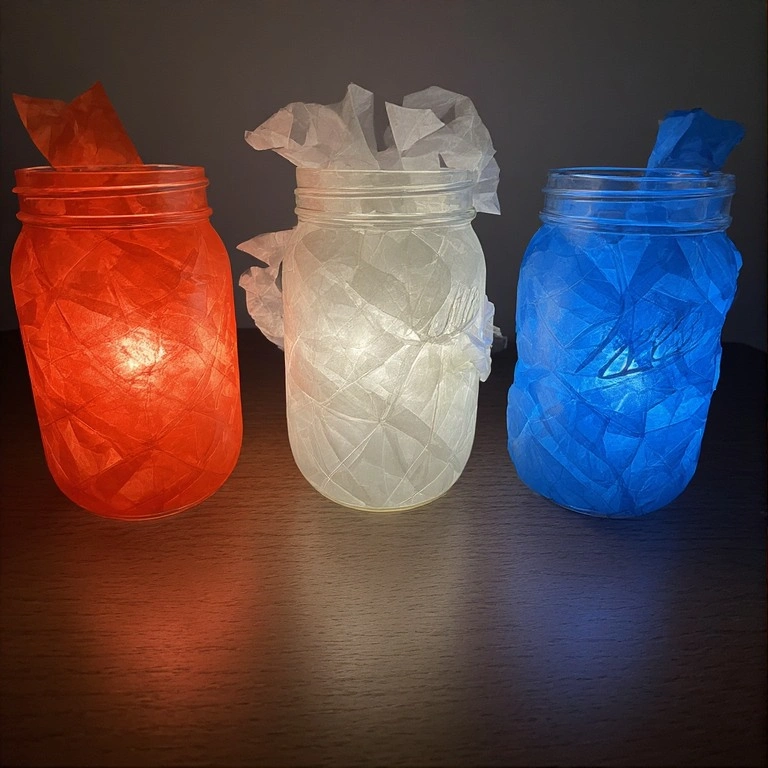
Transform ordinary mason jars into glowing red, white, and blue lanterns perfect for your porch or picnic table.
Materials:
- Mason jars (any size)
- Red, white, and blue tissue paper
- Mod Podge
- Tea light candles (real or battery-powered)
- Paintbrush
Steps:
- Cut tissue paper into small squares.
- Brush Mod Podge onto the outside of the jar.
- Press tissue paper squares onto the jar, overlapping slightly.
- Apply a final coat of Mod Podge over the top to seal.
- Let dry completely (about 1 hour), then place a tea light inside.
Time: 20–30 minutes | Difficulty: Easy
💡 Tip: Use battery-powered tea lights if kids will be handling the jars.
2. Patriotic Paper Plate Wreath
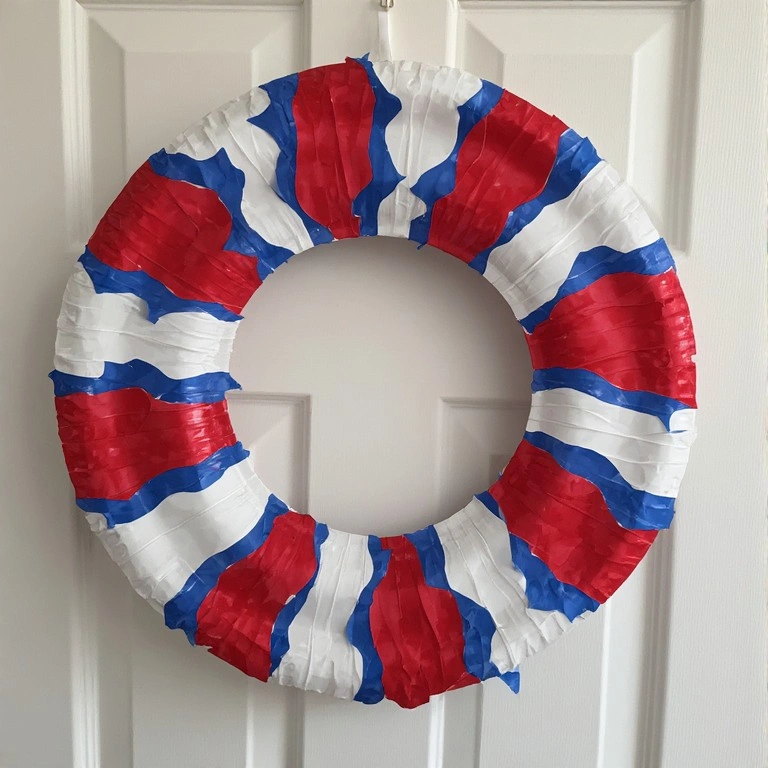
A bright, budget-friendly wreath made entirely from paper plates — great for kids to make on their own.
Materials:
- 2 large paper plates
- Red, white, and blue paint
- Scissors
- Glue or stapler
- Ribbon for hanging
Steps:
- Cut the center out of one paper plate to create a ring.
- Cut the second plate into petal shapes.
- Paint petals in red, white, and blue and let dry.
- Glue petals around the ring, alternating colors.
- Attach a ribbon loop to the back for hanging.
Time: 30–40 minutes | Difficulty: Easy
3. 4th of July Crafts: Star-Spangled Wind Spinner
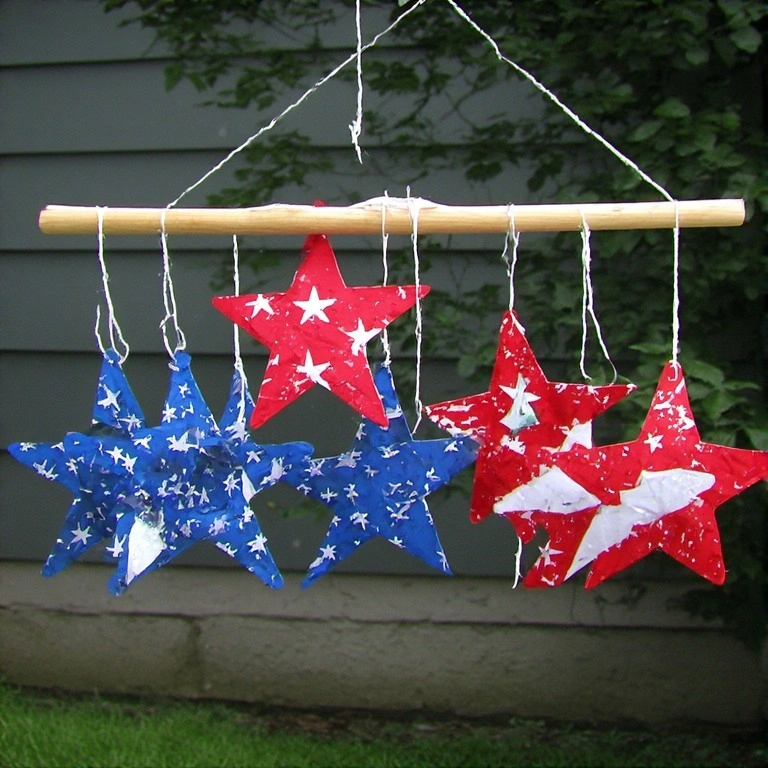
These spinning stars catch the breeze and add instant patriotic flair to any outdoor space.
Materials:
- Cardstock in red, white, and blue
- Scissors
- Hole punch
- String or fishing line
- Wooden dowel
Steps:
- Cut large star shapes from each color of cardstock.
- Fold each star accordion-style from tip to tip.
- Punch a hole at the top and bottom of each star.
- Link stars together using string, alternating colors.
- Tie the top to a wooden dowel and hang outdoors.
Time: 20–30 minutes | Difficulty: Easy
4. Fireworks Scratch Art Cards

Create spectacular fireworks effects using a simple scratch-art technique — magical results every time.
Materials:
- Black cardstock
- Metallic crayons or oil pastels (red, gold, silver)
- Toothpick or scratch tool
- White crayon
Steps:
- Cover the card with heavy layers of red, gold, and silver crayon.
- Paint over everything with black paint or cover with a black crayon.
- Let dry fully.
- Use a toothpick to scratch fireworks, stars, and spiral patterns into the black surface.
- The metallic colors beneath will shine through.
Time: 25–35 minutes | Difficulty: Easy
💡 Tip: Press firmly when scratching for crisp, clean lines.
5. Patriotic Ribbon Wand
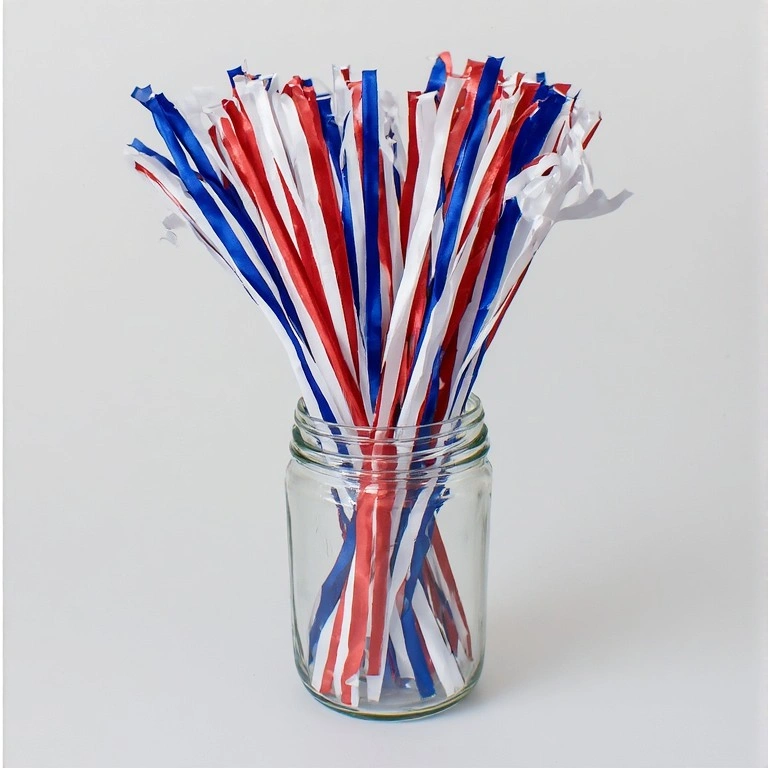
These ribbon wands are perfect for a parade, a backyard celebration, or just for kids to wave around with joy.
Materials:
- Wooden dowel (12 inches)
- Red, white, and blue ribbon (1 yard each)
- Hot glue gun
- Star stickers or paint (optional)
Steps:
- Cut ribbon into 1-yard lengths.
- Fold each ribbon in half and knot it at the fold.
- Hot glue the knots to the top of the wooden dowel.
- Alternate ribbon colors as you glue.
- Decorate the dowel with star stickers if desired.
Time: 10–15 minutes | Difficulty: Easy
6. American Flag Flower Pot
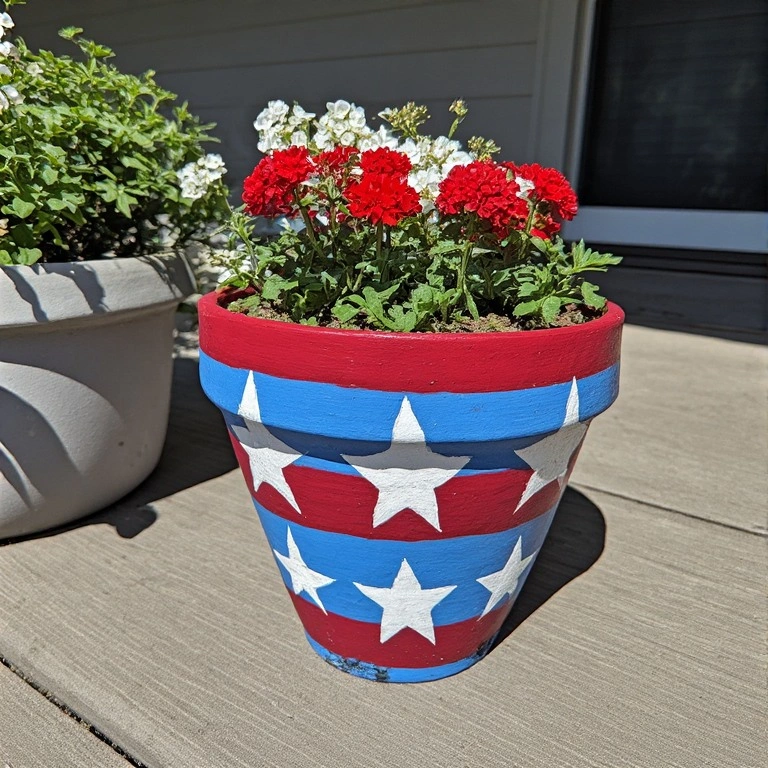
Turn a plain terracotta pot into a patriotic planter that looks stunning on any front step.
Materials:
- Terracotta pot
- Red, white, and blue acrylic paint
- Painter’s tape
- Small foam brush
- Sealer spray
Steps:
- Paint the entire pot white and let dry completely.
- Use painter’s tape to section off stripes.
- Paint red stripes and let dry.
- In the upper left section, paint blue and add white star dots using the end of a pencil.
- Remove tape, let dry, and seal with spray sealer.
Time: 45–60 minutes | Difficulty: Medium
💡 Tip: Apply two coats of each color for vibrant, even coverage.
7. 4th of July Crafts: Popsicle Stick Flag
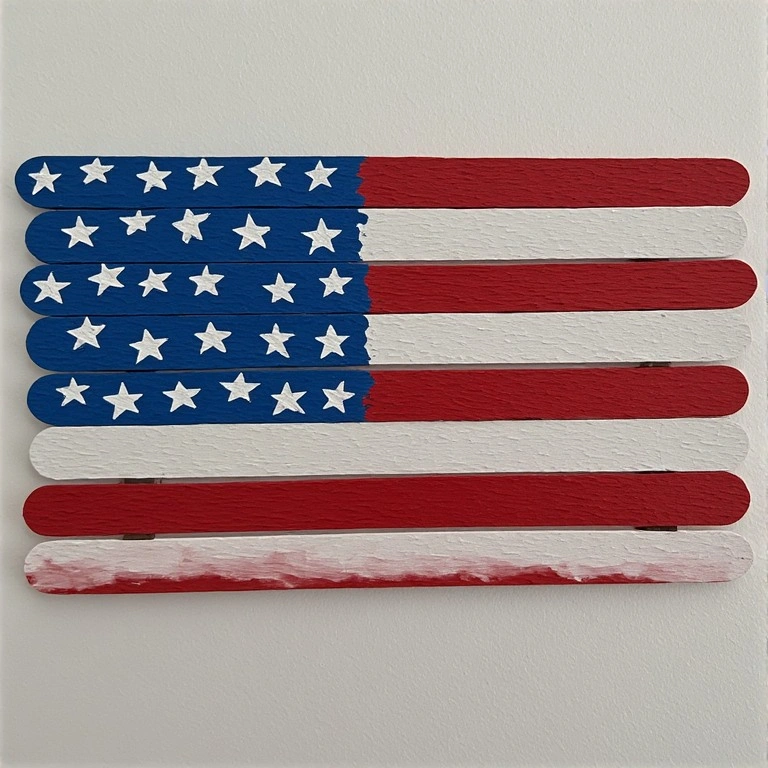
A classic kids’ craft that teaches flag design while creating adorable patriotic wall décor.
Materials:
- 15–20 popsicle sticks
- Red, white, and blue paint
- Small American flag printout (optional)
- Craft glue
- Twine for hanging
Steps:
- Lay 15 sticks side by side vertically and glue two horizontal sticks across the back to hold them together.
- Once dry, paint red and white horizontal stripes on the right 2/3.
- Paint the upper left section blue.
- Add white star dots using a cotton swab.
- Tie twine to the back for hanging.
Time: 30–40 minutes | Difficulty: Easy
8. Red, White & Blue Balloon Garland
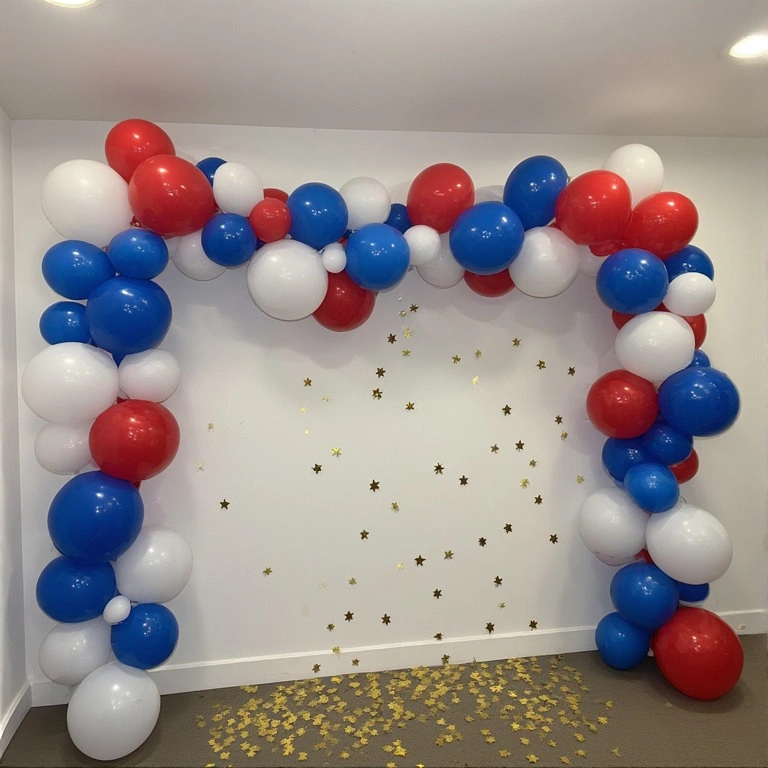
A stunning, show-stopping decoration that transforms any party space in under an hour.
Materials:
- Red, white, and blue balloons (variety of sizes)
- Balloon garland strip
- Balloon pump
- Command strips or tape
Steps:
- Inflate balloons in varying sizes.
- Push balloon knots into the holes of the garland strip.
- Alternate colors, clustering similar shades for a natural look.
- Fill gaps with small balloons.
- Hang using command strips or tape along a wall or mantle.
Time: 45–60 minutes | Difficulty: Medium
9. Tie-Dye Patriotic T-Shirt
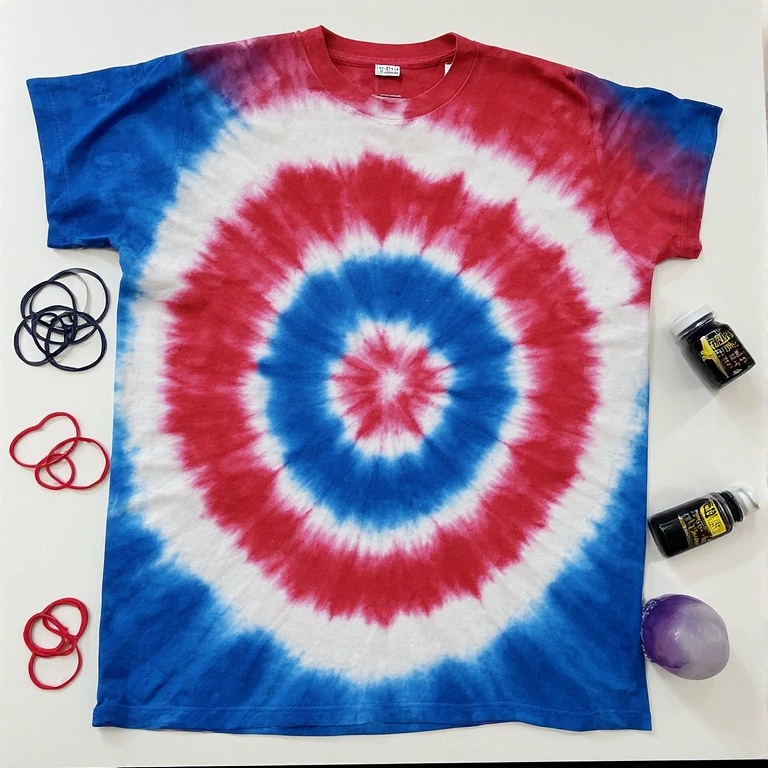
Create a wearable piece of festive art that’s as fun to make as it is to wear on the 4th.
Materials:
- White cotton t-shirt (pre-washed)
- Red and blue fabric dye
- Rubber bands
- Plastic gloves
- Plastic wrap
Steps:
- Dampen the shirt with water.
- Pinch the center and twist into a spiral, securing with rubber bands.
- Apply red dye to one section and blue dye to another, leaving some white.
- Wrap in plastic wrap and let sit 6–8 hours.
- Rinse, remove bands, and wash separately.
Time: 20 minutes active + 6–8 hours setting | Difficulty: Medium
💡 Tip: The more rubber bands you use, the more defined the pattern will be.
10. Patriotic Pinwheel Bouquet
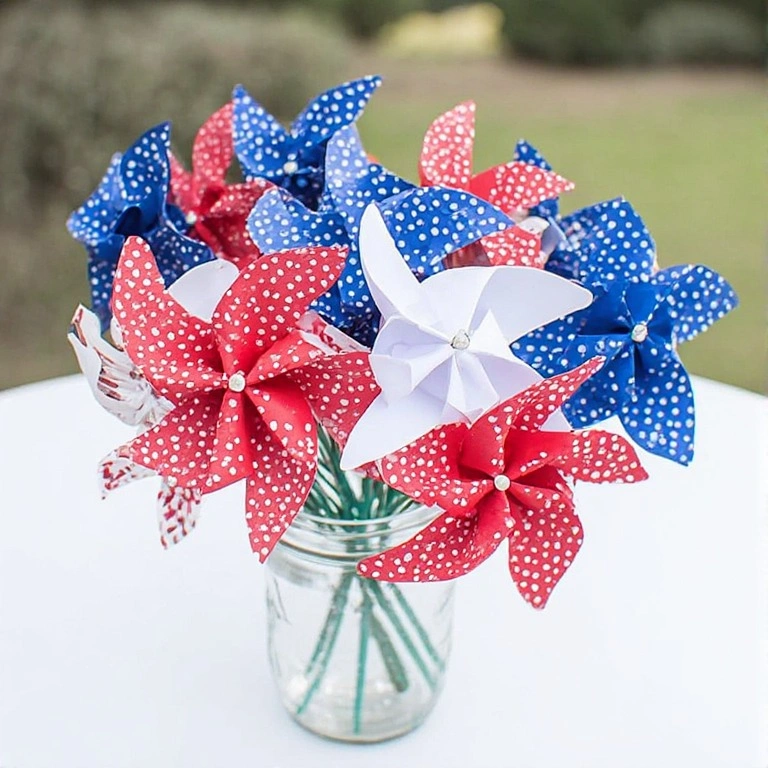
These cheerful pinwheels look like a bouquet of spinning flowers — perfect for table centerpieces.
Materials:
- Red, white, and blue scrapbook paper
- Scissors
- Straight pins
- Wooden skewers
- Pencil eraser
Steps:
- Cut paper into 6-inch squares.
- Cut diagonal lines from each corner toward the center, stopping 1 inch short.
- Fold every other point to the center, pressing lightly.
- Push a straight pin through all the folded points and the center.
- Push the pin into a pencil eraser, then secure the eraser end to a wooden skewer.
Time: 15–20 minutes per pinwheel | Difficulty: Easy
11. Fireworks Bubble Wrap Stamp Art
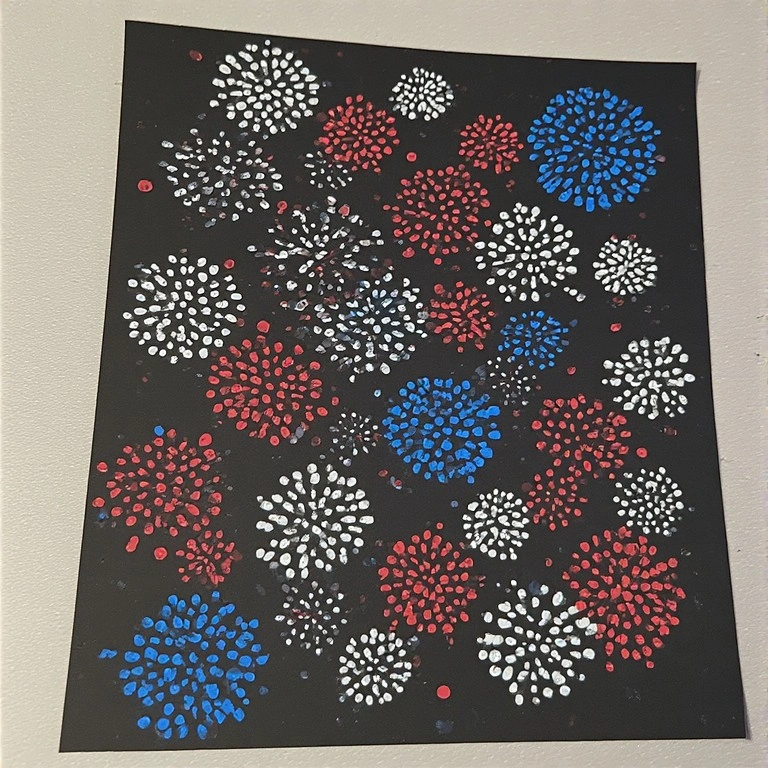
Use bubble wrap to print stunning fireworks explosions — a surprisingly satisfying technique.
Materials:
- Bubble wrap sheet
- Red, white, and blue paint
- Black construction paper
- Scissors
- Paintbrush
Steps:
- Cut bubble wrap into circular pieces of various sizes.
- Brush paint onto the bubble side of each piece.
- Press the painted side firmly onto black paper.
- Repeat with different colors, overlapping for a fireworks effect.
- Add glitter or metallic stars while paint is still wet.
Time: 15–25 minutes | Difficulty: Easy
12. 4th of July Crafts: Patriotic Wreath with Burlap Ribbon
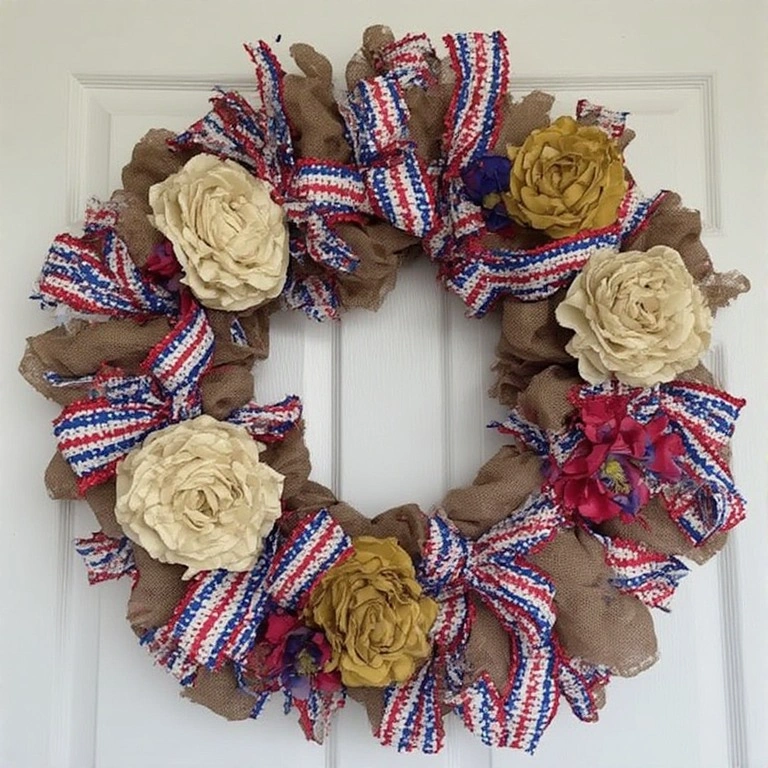
A full, beautiful wreath that combines rustic burlap with bold patriotic colors for a farmhouse-chic look.
Materials:
- Wire wreath frame
- Burlap ribbon
- Red and blue mesh ribbon
- White silk flowers or stars
- Hot glue gun
- Wire cutters
Steps:
- Thread burlap ribbon through the wreath frame in a puffed loop pattern.
- Add blue mesh ribbon loops in the same way, distributed evenly.
- Thread red ribbon loops to fill remaining gaps.
- Hot glue white flowers or star ornaments throughout the wreath.
- Attach a wire loop to the back for hanging.
Time: 60–75 minutes | Difficulty: Medium
💡 Tip: Vary ribbon lengths for a more dimensional, full look.
13. Star-Shaped Suncatcher
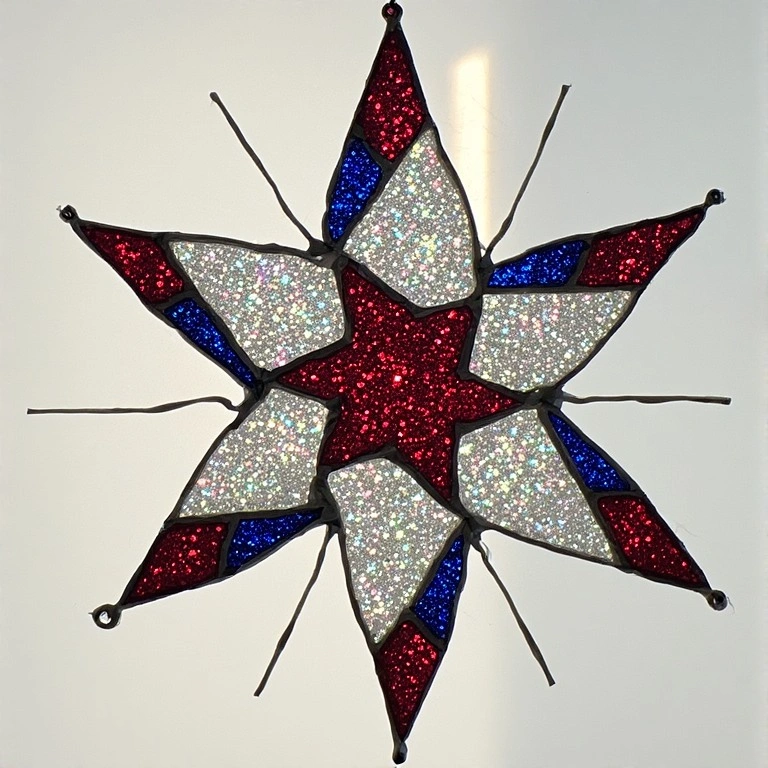
These glittery sun catchers hang in windows and cast colorful patriotic light throughout the room.
Materials:
- Star-shaped cookie cutter
- White school glue
- Red and blue glitter
- Wax paper
- String
Steps:
- Place the cookie cutter on wax paper.
- Fill the inside with a thick layer of white glue.
- Sprinkle red, white, and blue glitter over the glue.
- Press a loop of string into the top before it dries.
- Let dry 24–48 hours, then peel off the wax paper.
Time: 10 minutes active + 24–48 hours drying | Difficulty: Easy
14. Patriotic Clothespin Photo Clip Garland
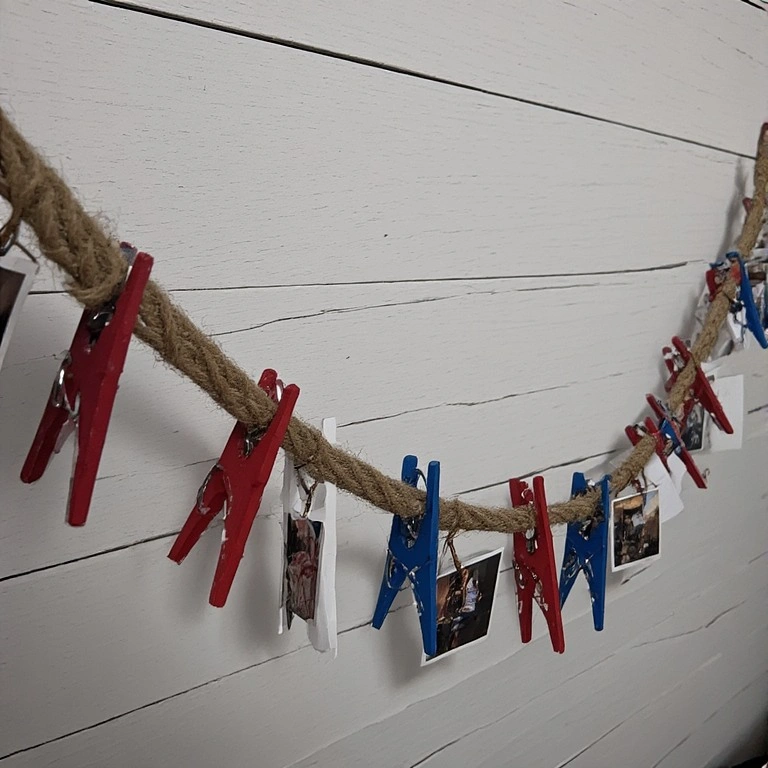
Display your favorite family photos in festive style with this charming patriotic garland.
Materials:
- Wooden clothespins
- Red, white, and blue paint
- Twine or jute string
- Small photos or cards
- Mini star stickers
Steps:
- Paint clothespins in red, white, and blue — roughly equal amounts of each.
- Add star stickers while paint is still slightly tacky.
- Let dry fully.
- String twine between two anchor points (wall hooks, curtain rods, etc.).
- Clip photos or festive cards onto the twine with the painted clothespins.
Time: 20–30 minutes | Difficulty: Easy
15. Foam Rocket Craft

These lightweight foam rockets are great for kids and can actually be launched with a drinking straw.
Materials:
- Red and blue craft foam sheets
- Scissors
- Hot glue or foam adhesive
- Drinking straw
- Star foam stickers
Steps:
- Cut a rectangle of red foam and roll it into a tube shape, gluing the edge.
- Cut a cone from blue foam and glue it to the top.
- Cut 3 small triangles from blue foam for fins and glue to the base.
- Decorate with star stickers.
- Slide the straw into the tube and blow to launch.
Time: 20–25 minutes | Difficulty: Easy
16. Painted Rock Firecracker
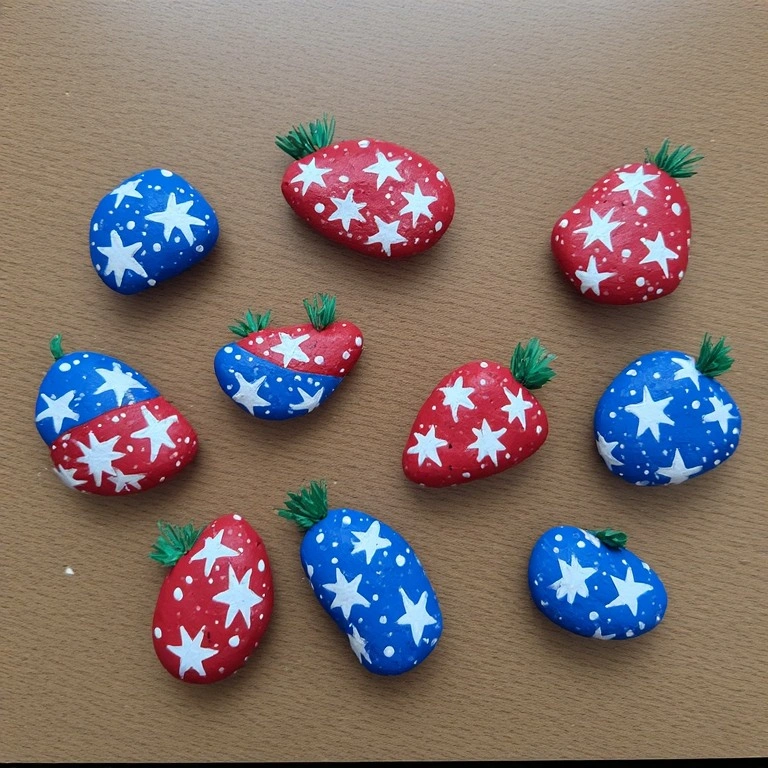
Turn smooth river rocks into adorable firecracker decorations for your garden or tabletop.
Materials:
- Smooth oval rocks
- Red and blue acrylic paint
- White paint pen
- Twine or black yarn
- Sealer spray
Steps:
- Paint rocks red or blue and let dry.
- Use a white paint pen to add stars, stripes, or polka dots.
- Once fully dry, poke a small hole in the top with a drill or awl.
- Thread a short piece of black twine through the hole to act as a “fuse.”
- Seal with outdoor spray sealer.
Time: 30–40 minutes | Difficulty: Easy
💡 Tip: Use rocks with a smooth, even surface for the cleanest paint finish.
17. Independence Day Bookmarks
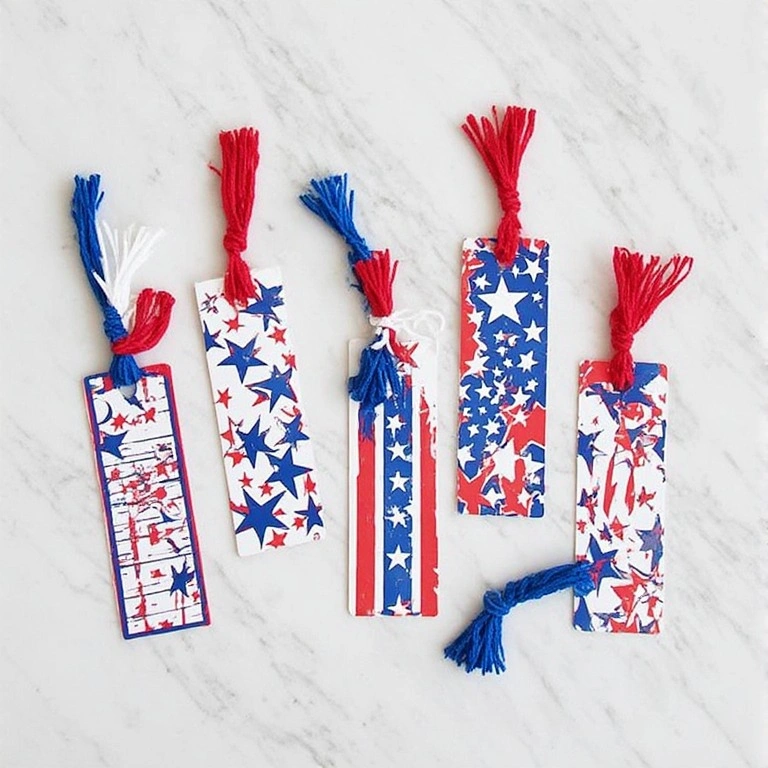
Festive, practical, and fun — these patriotic bookmarks make great party favors too.
Materials:
- Cardstock (red, white, blue)
- Scissors or paper cutter
- Markers or stamps
- Hole punch
- Red, white, and blue tassel (yarn)
Steps:
- Cut cardstock into 2″ x 7″ strips.
- Decorate with patriotic stamps, stars, or “Happy 4th” messages using markers.
- Punch a hole at the top.
- Cut 12 yarn strands (4 each of red, white, blue) about 5 inches long.
- Fold through the hole and knot to create a tassel.
Time: 10–15 minutes | Difficulty: Easy
18. Glitter Gel Candle Holders
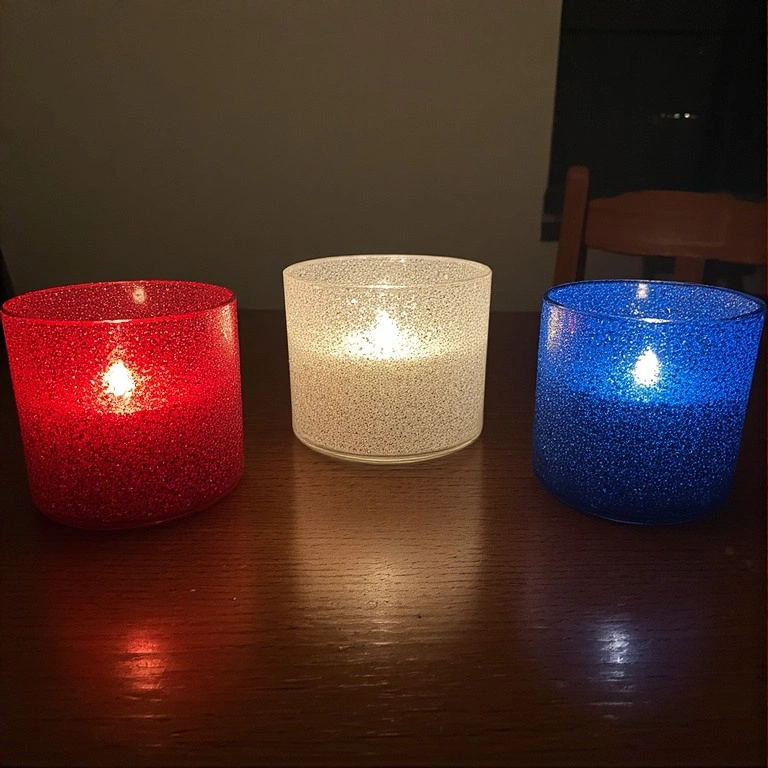
These stunning candle holders use gel glitter to create a sparkling patriotic effect.
Materials:
- Glass votive holders
- Mod Podge
- Red, white, and blue glitter
- Foam brush
- Tea light candles
Steps:
- Apply Mod Podge in sections to the outside of the glass.
- Sprinkle glitter over each section before it dries.
- Create a striped pattern: red section, white section, blue section.
- Let dry 30 minutes, then apply a second coat of Mod Podge to seal.
- Insert a tea light and display.
Time: 20–25 minutes + drying | Difficulty: Easy
19. Watercolor Flag Banner

A soft, artistic banner that adds a beautiful hand-painted touch to your holiday display.
Materials:
- Watercolor paper (cut into pennant shapes)
- Red and blue watercolor paints
- Thin paintbrush
- Twine
- Hole punch
Steps:
- Cut watercolor paper into 4″ x 6″ pennant triangles.
- Wet the paper slightly, then paint loose watercolor stripes or washes in red and blue.
- Add small stars with a fine brush while the paint is wet.
- Let dry completely.
- Punch holes at the top two corners and thread onto twine.
Time: 30–45 minutes | Difficulty: Medium
💡 Tip: Wet-on-wet watercolor creates beautiful organic bleeding effects — embrace the imperfection.
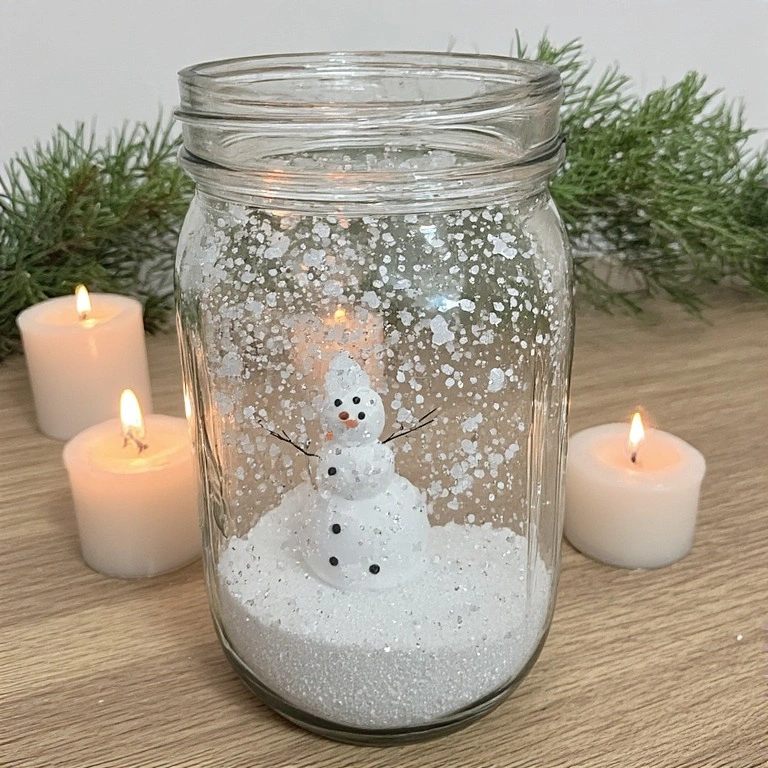
20. Patriotic Snow Globe Jar
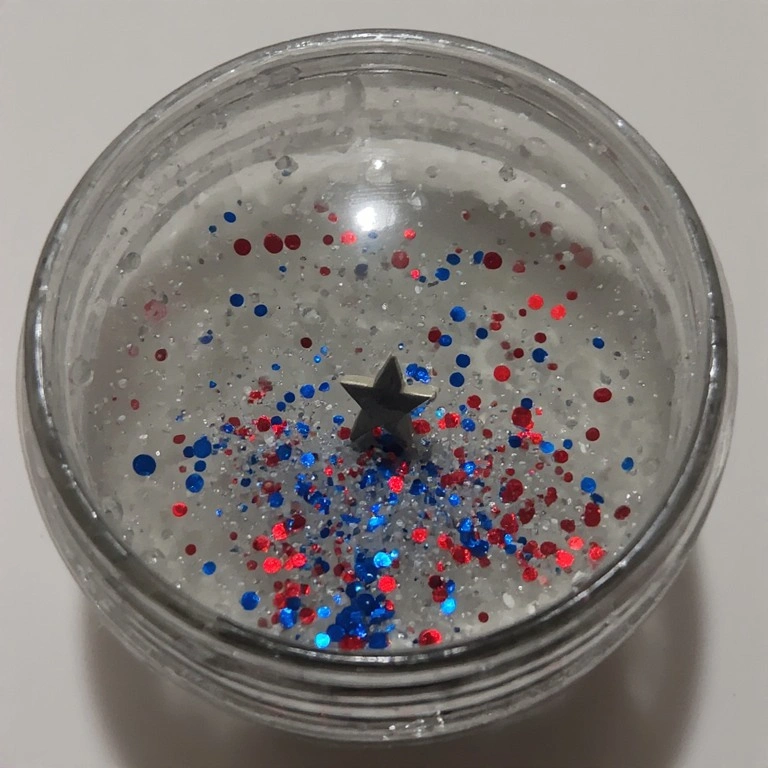
A shake-able mini snow globe filled with red, white, and blue glitter — enchanting and easy to make.
Materials:
- Glass jar with tight lid
- Distilled water
- White glitter glue
- Red, white, and blue glitter
- Small plastic star ornaments or figurines
- Waterproof glue (E6000)
Steps:
- Glue a small plastic star or figurine to the inside of the jar lid using E6000. Let cure 24 hours.
- Fill the jar almost to the top with distilled water.
- Add a squeeze of glitter glue and a generous pinch of red, white, and blue glitter.
- Screw the lid on very tightly — gluing the rim for a watertight seal if desired.
- Turn upside down and shake to see the glitter swirl.
Time: 15 minutes active + 24 hours curing | Difficulty: Easy
Common Mistakes to Avoid
- Skipping the drying time. Rushing through drying steps leads to smeared paint, peeling glitter, and crafts that fall apart. Always allow each layer to dry fully before moving on.
- Using too little paint or glue. Thin, patchy coverage makes crafts look unfinished. Apply generous, even coats and use quality materials for bold, vibrant results.
- Not prepping surfaces. For painted crafts on glass, plastic, or terracotta, always clean and prime your surface first. Grease or dust prevents paint from adhering properly.
Tips for Best Results
- Buy in bulk: Red, white, and blue supplies (ribbon, paint, glitter, balloons) are widely available and cheaper when bought together in patriotic packs.
- Start early: Don’t leave crafts for the morning of. Make your decorations 1–2 days ahead so everything has time to dry and cure properly.
- Involve the kids: Simpler crafts like popsicle stick flags, ribbon wands, and scratch art cards are perfect for little hands — and create lasting memories.
- Craft outdoors when possible: Glitter, paint, and glue can be messy. Set up on a folding table in the backyard with an easy-to-hose-down surface.
- Layer your décor: Mix DIY crafts with store-bought accents. A handmade wreath looks stunning paired with simple white fairy lights.
- Photograph your process: Document each step — your craft journey makes great social media content and helps you recreate favorites next year.
Frequently Asked Questions
Q: What age is best for these 4th of July crafts? Most of these crafts are suitable for ages 5 and up with adult supervision. Crafts like the ribbon wand, popsicle stick flag, and bookmarks work especially well for younger children. Projects involving hot glue guns or drills are best reserved for teens and adults.
Q: How long do these crafts take to complete? Most projects take between 15 and 60 minutes of active crafting. Some crafts — like the tie-dye shirt or snow globe jar — require additional drying or curing time, so plan accordingly.
Q: Are these crafts budget-friendly? Absolutely. Most of these projects use inexpensive materials available at dollar stores, craft stores, or Amazon. Many use items you likely already have at home, like mason jars, cardstock, and paint.
Q: Can I make these crafts in advance? Yes! In fact, it’s recommended. Décor crafts like the wreath, luminaries, and candle holders can be made 1–2 weeks in advance. Store them in a cool, dry place until the holiday.
Q: What if I don’t have all the exact materials listed? These crafts are very adaptable. Feel free to swap ribbon for twine, acrylic paint for tempera, or glass jars for plastic cups. The key is to keep to the red, white, and blue color palette.
Q: Where can I display these crafts? The possibilities are endless! Front porch, dining table, mantle, window sill, backyard fence, party buffet table — these crafts are designed to be versatile and look great indoors and outdoors.
Conclusion
The 4th of July is all about coming together, and crafting is one of the most joyful ways to celebrate. Whether you make one project or all twenty, the effort you put in makes your celebration feel truly personal.
Gather your supplies, pick your favorites, and let the creativity fly — just like the fireworks.
Happy Independence Day!