10 Easy Senior Crafts Ideas for Fun and Relaxing Activities
Crafting is one of the most rewarding ways to spend your time — no matter your age. Whether you’re looking to stay busy, relieve stress, or create something to be proud of, these senior crafts ideas are the perfect place to start.
Each idea below is simple, budget-friendly, and designed with comfort in mind. You don’t need prior experience — just a little time and the desire to make something with your hands.
1. Mason Jar Flower Vases
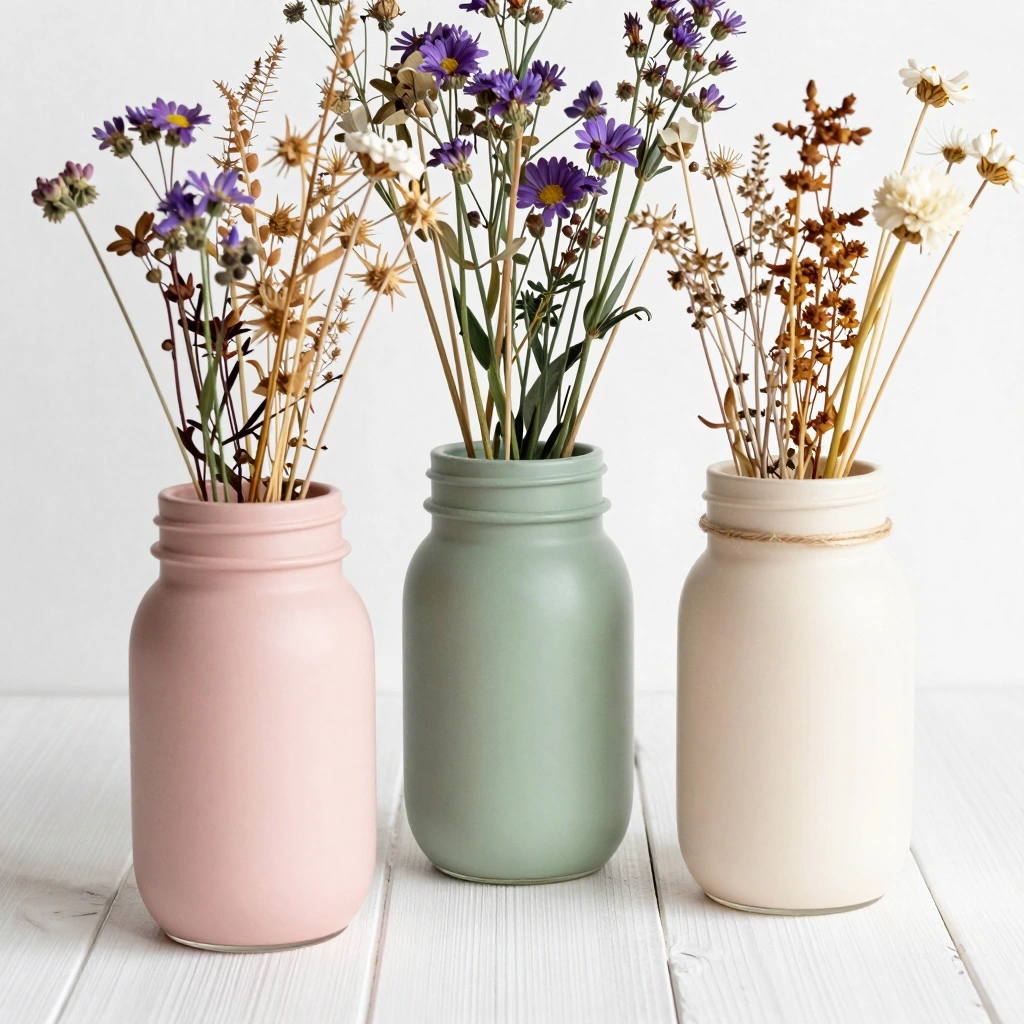
A timeless project that looks gorgeous on any windowsill or table. Old mason jars get a second life with a coat of paint and some twine wrapping. The result is a rustic, charming vase you can fill with fresh or dried flowers.
Materials:
- Mason jars (any size)
- Acrylic paint (pastel or earthy tones work great)
- Jute or twine
- Hot glue gun
- Foam paintbrush
Steps:
- Clean and dry your mason jar completely.
- Apply two coats of acrylic paint using the foam brush. Let each coat dry.
- Wrap twine around the neck of the jar and secure with a dot of hot glue.
- Add a ribbon or a dried flower for a finishing touch.
- Fill with flowers and display!
Time: 20–30 minutes Difficulty: Easy
Tip: Use chalk paint for a matte, farmhouse-style finish that doesn’t need a sealer.
2. Senior Crafts Favorite: Button Mosaic Art
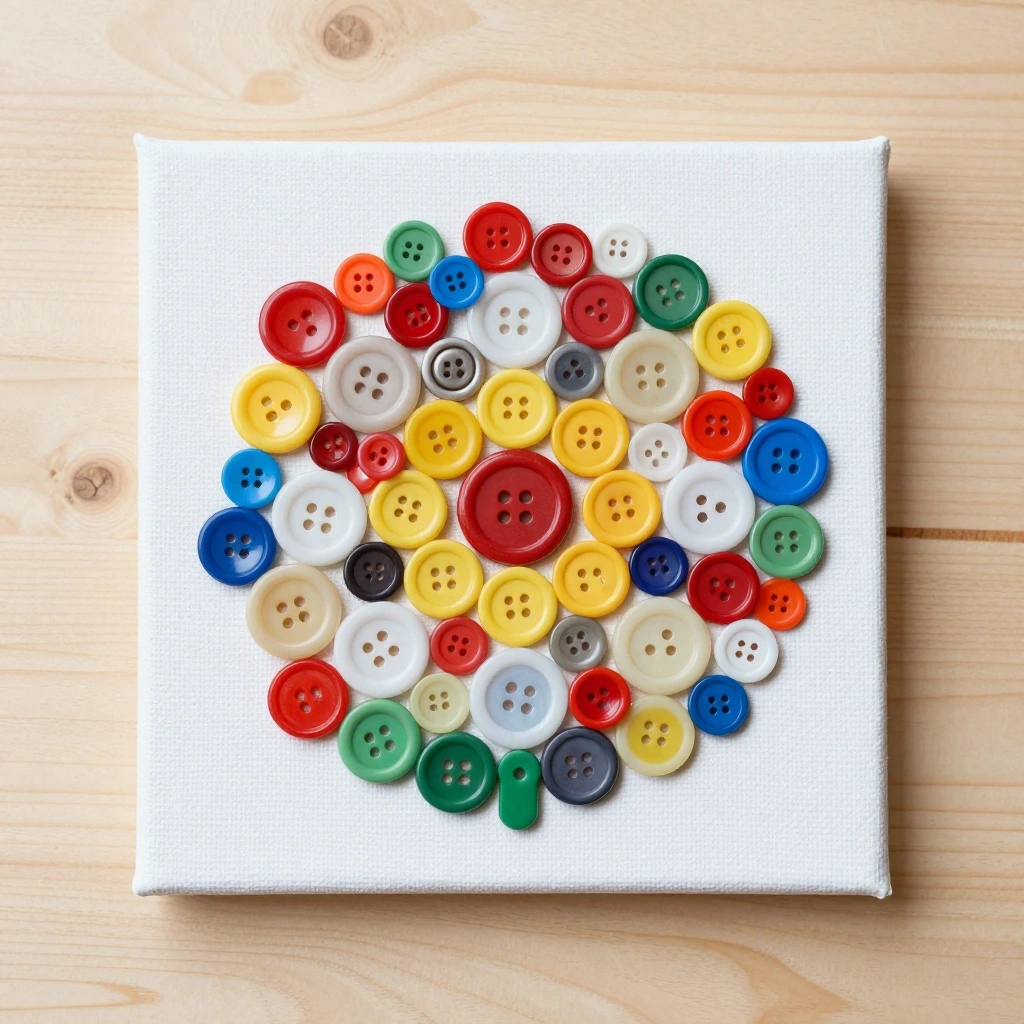
One of the most beloved senior crafts for a reason — it’s therapeutic, colorful, and the results look like real artwork. All you need is a bag of buttons and a canvas. You can create flowers, trees, hearts, or abstract patterns.
Materials:
- Pre-sketched canvas or thick cardboard
- Assorted buttons (various sizes and colors)
- Strong craft glue or Mod Podge
- Pencil (for sketching the design)
Steps:
- Lightly sketch your design on the canvas in pencil.
- Sort your buttons by color or size.
- Apply craft glue to one section at a time.
- Press buttons firmly into the glue, filling in your design.
- Let dry completely for at least 2 hours before hanging.
Time: 45–60 minutes Difficulty: Easy
Tip: Raid your old sewing box — mismatched vintage buttons add the most character.
3. Painted Rock Garden Markers
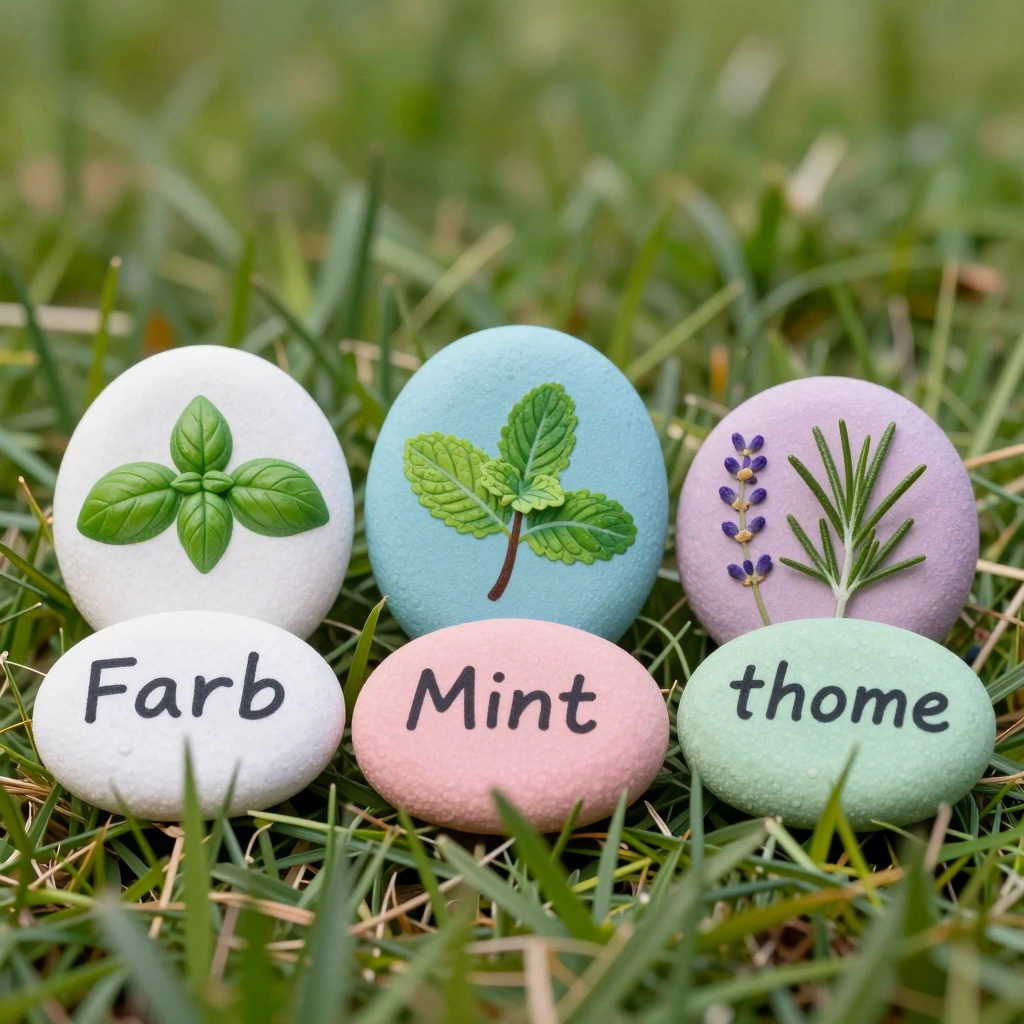
Perfect for gardeners! These hand-painted rocks are both practical and decorative. Label your herb garden, flower beds, or vegetable patch with charming painted stones. They’re weatherproof and totally unique.
Materials:
- Smooth, flat rocks (from the garden or craft store)
- Acrylic paint
- Fine-tip black paint marker or Sharpie
- Clear outdoor sealant spray
Steps:
- Wash and dry your rocks thoroughly.
- Paint the base of each rock in a bright color. Let dry.
- Use the fine-tip marker to write herb or plant names.
- Add small decorative details like dots, leaves, or flowers.
- Once fully dry, spray with clear sealant for weatherproofing.
Time: 30–40 minutes Difficulty: Easy
Tip: Place a small piece of white painter’s tape on the rock before writing — it creates a clean “label” area.
4. No-Sew Fleece Lap Blankets
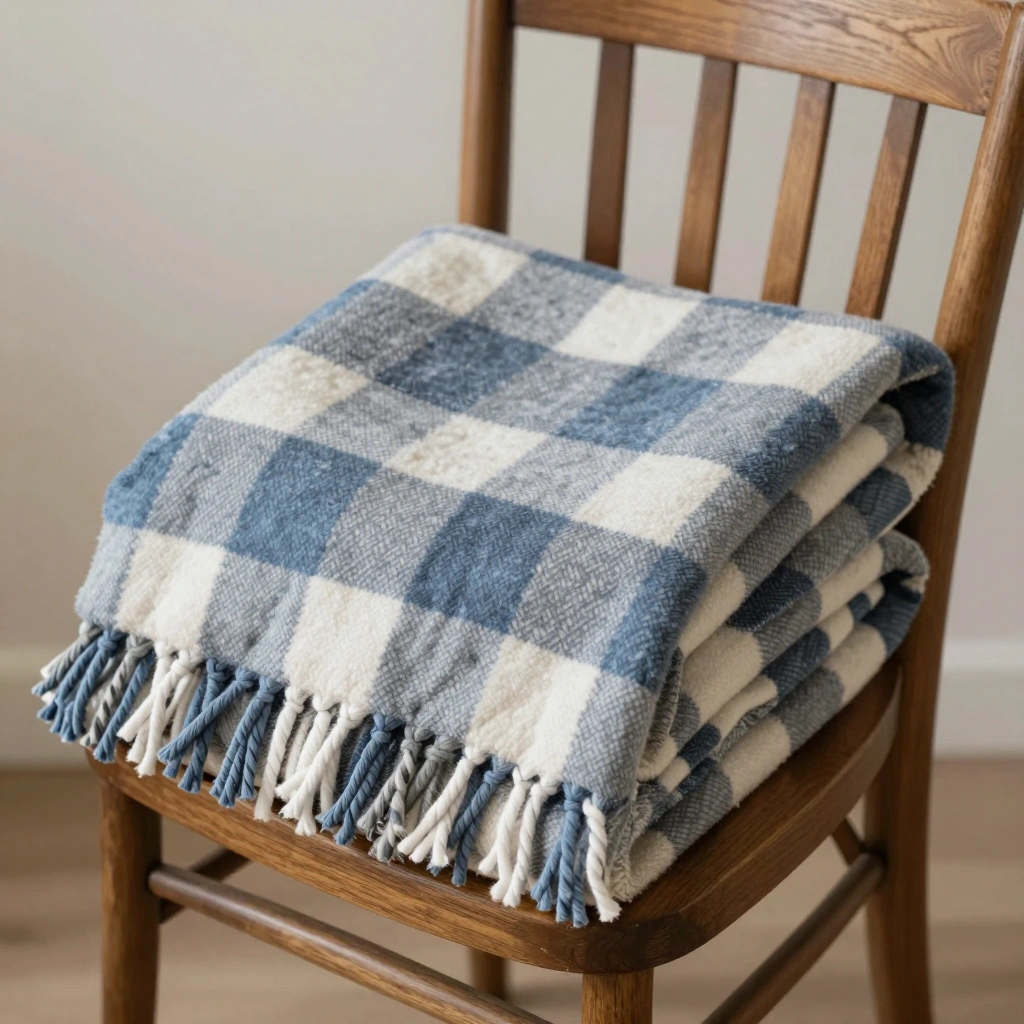
Warm, cozy, and completely beginner-friendly — no sewing machine required! Fleece lap blankets make wonderful gifts for grandchildren or fellow seniors. You can choose any pattern or color combination you love.
Materials:
- 2 pieces of fleece fabric (1.5 yards each)
- Sharp fabric scissors
- Ruler or cutting mat
- Fabric chalk or marker
Steps:
- Layer both pieces of fleece on a flat surface, wrong sides together.
- Cut a 4-inch square from each corner of both layers.
- Cut fringe strips about 1 inch wide and 4 inches deep around all edges.
- Tie each top fringe strip to the matching bottom one in a double knot.
- Continue all the way around until the blanket is fully tied.
Time: 45–60 minutes Difficulty: Easy
Tip: Use anti-pill fleece to keep your blanket looking fresh after many washes.
5. Decoupage Flower Pots
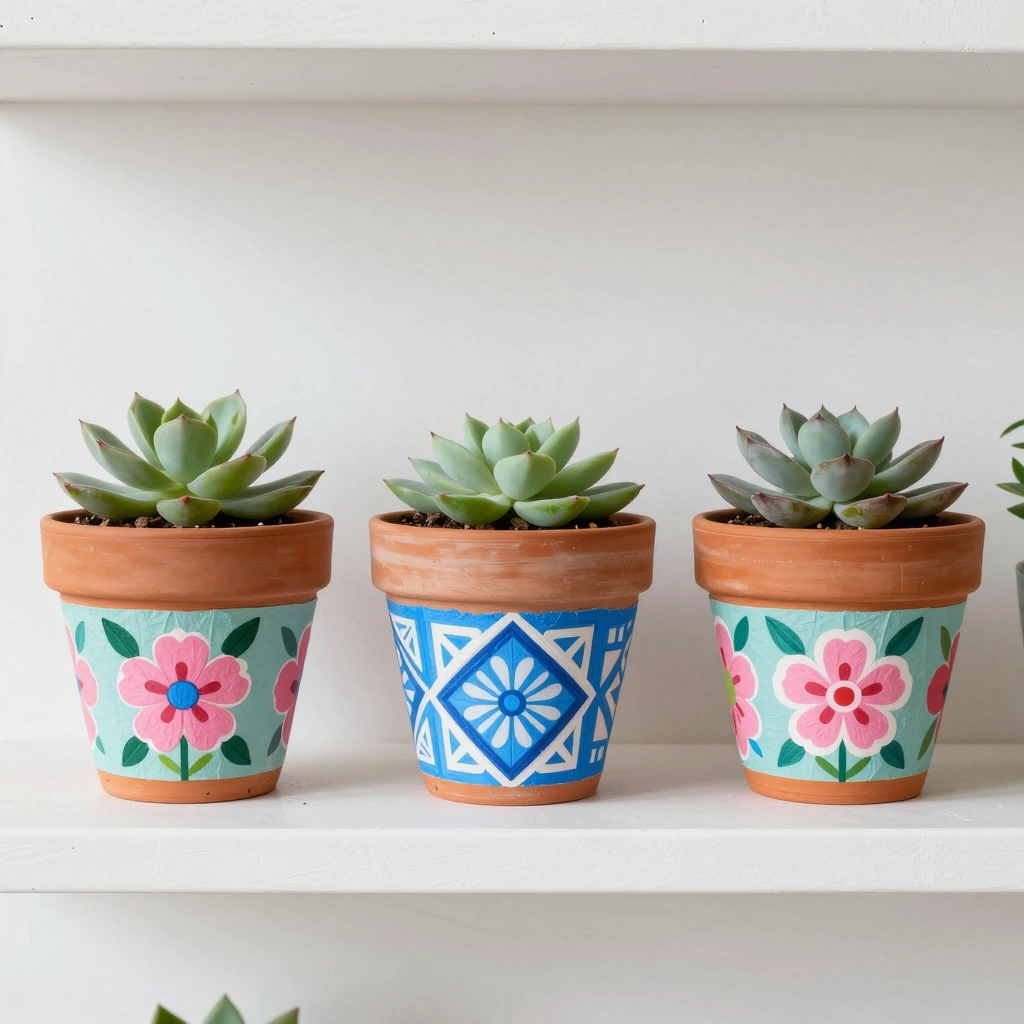
Decoupage is one of the most satisfying senior crafts techniques — you simply glue pretty paper onto a surface and seal it. Plain terracotta pots become stunning decorative pieces perfect for gifting or keeping.
Materials:
- Plain terracotta pots
- Tissue paper, napkins, or decorative paper
- Mod Podge (matte or gloss)
- Foam brush
- Scissors
Steps:
- Tear or cut your paper into irregular pieces or desired shapes.
- Brush a thin layer of Mod Podge onto a small section of the pot.
- Press paper pieces onto the wet Mod Podge, smoothing out wrinkles.
- Apply another layer of Mod Podge on top to seal.
- Repeat until the pot is fully covered. Let dry for 1 hour.
Time: 30–45 minutes Difficulty: Easy
Tip: Floral napkins from the dollar store make incredibly beautiful decoupage material.
6. Watercolor Greeting Cards
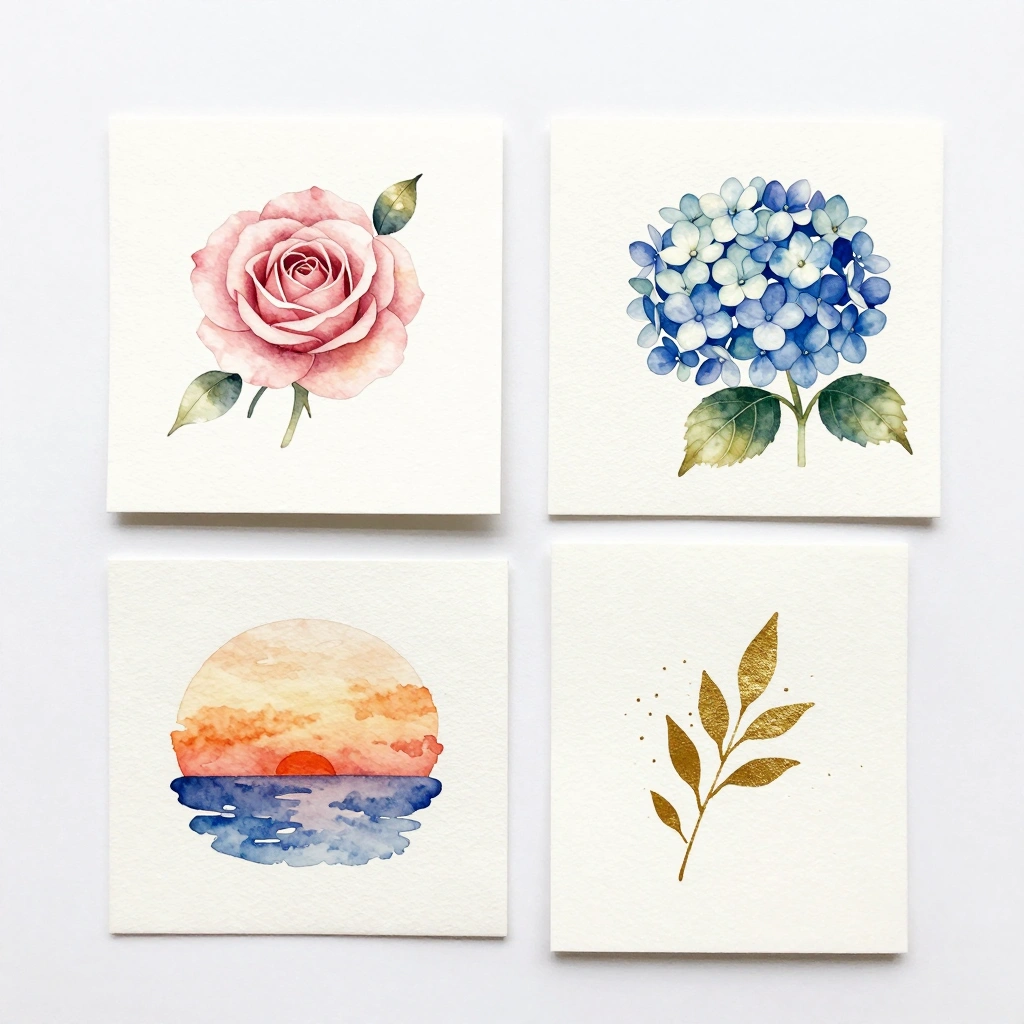
Handmade cards are always more meaningful than store-bought ones. Watercolor cards are simple to make and absolutely stunning to give. A little paint and a blank card is all you need to create something heartfelt.
Materials:
- Blank white card stock or pre-folded cards
- Watercolor paint set
- Small paintbrushes (round tip)
- Water cup and paper towel
- Fine-tip black pen (optional, for outlines)
Steps:
- Lightly sketch your design in pencil — a flower, heart, or simple landscape works great.
- Wet your brush and pick up a small amount of paint.
- Work from light to dark, letting each layer dry before adding detail.
- Add black pen outlines once fully dry for a clean look.
- Write your message inside and gift with love!
Time: 20–30 minutes per card Difficulty: Easy to Medium
Tip: Drop a second color into wet paint for a beautiful soft blending effect.
7. Yarn-Wrapped Letters
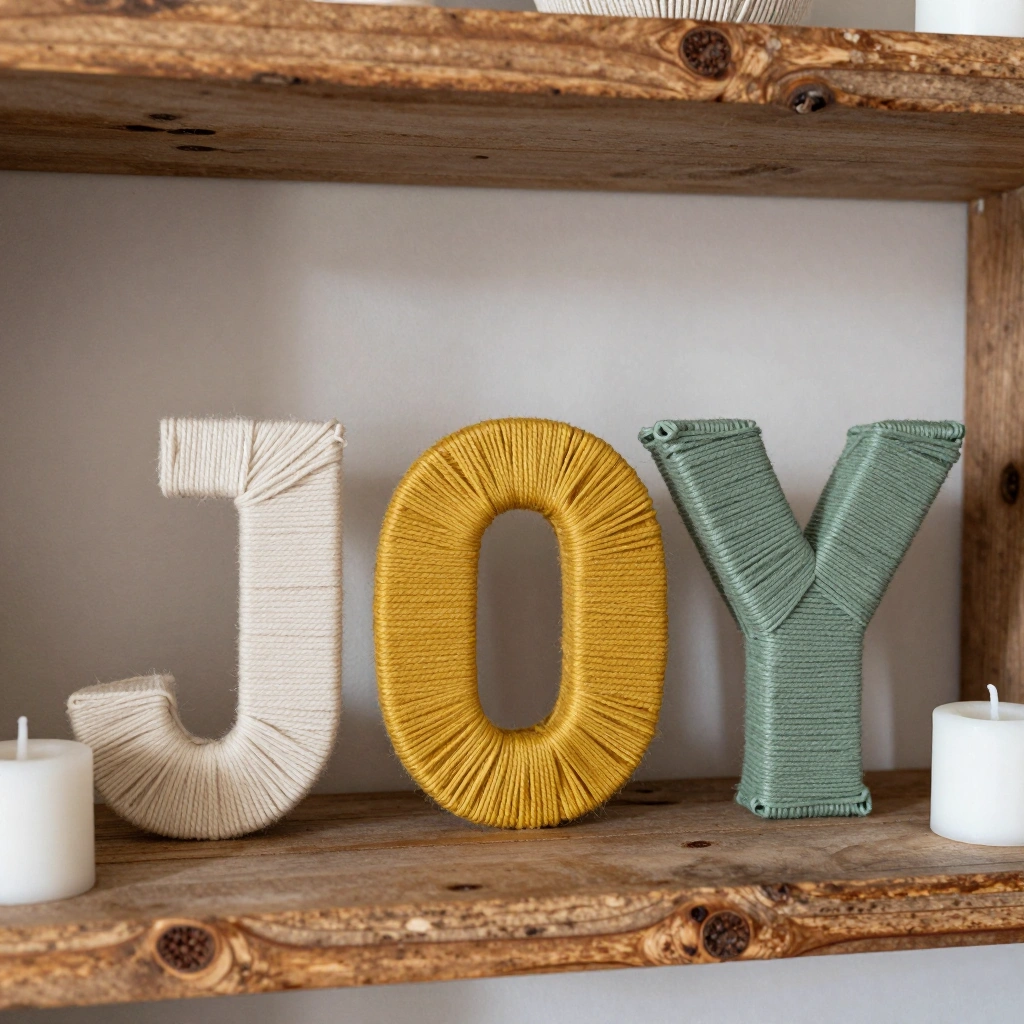
These bold, decorative letters make wonderful wall art or shelf decor. Wrap foam or wooden letters with colorful yarn to create stunning monograms or inspirational words. They look high-end but cost almost nothing to make.
Materials:
- Foam or wooden letters (craft store)
- Yarn in one or multiple colors
- Craft glue
- Scissors
Steps:
- Apply a small dab of glue to the starting point on the letter.
- Begin wrapping yarn tightly and evenly around the letter form.
- Overlap rows closely so no gaps show.
- Change colors whenever you like — just glue the end of one yarn and start the next.
- Secure the final end with a dab of glue and let dry.
Time: 30–60 minutes Difficulty: Easy
Tip: Use a chunky yarn for faster coverage and a cozy, textured look.
8. Pressed Flower Bookmarks
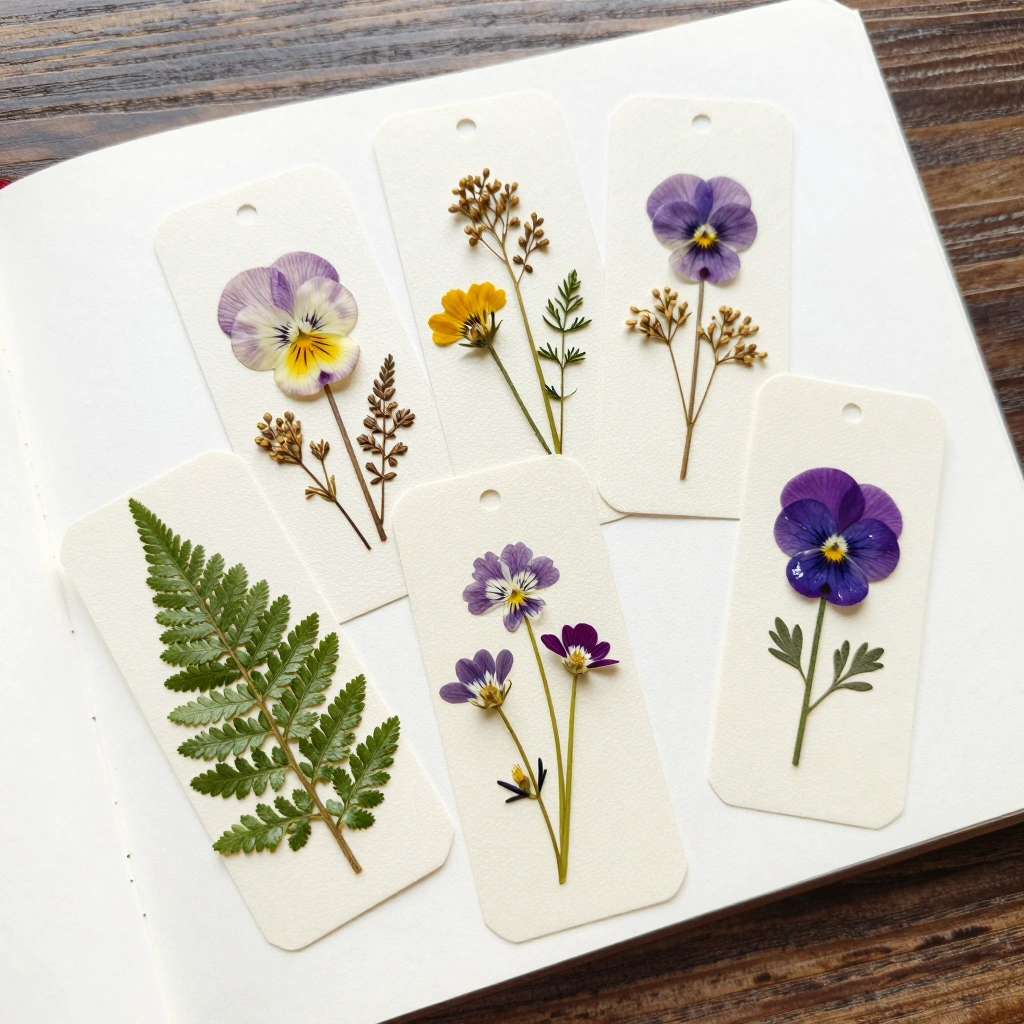
Nature lovers will adore this craft. Collect wildflowers or garden blooms, press them flat, and seal them into beautiful laminated bookmarks. These make wonderful gifts that preserve real flowers forever.
Materials:
- Fresh flowers and leaves
- Heavy books (for pressing)
- Cardstock cut into bookmark strips (2″ x 7″)
- Clear laminating sheets or wide clear tape
- Craft glue
Steps:
- Place flowers between two sheets of parchment inside a heavy book.
- Leave for 1–2 weeks until completely flat and dry.
- Arrange pressed flowers on your cardstock bookmark.
- Glue pieces down carefully and let dry.
- Seal with clear laminating sheet or packing tape on both sides.
Time: 20 minutes (plus 1–2 weeks pressing time) Difficulty: Easy
Tip: Violas, pansies, and small daisies press beautifully and keep their color.
9. Fabric Scrap Wreath
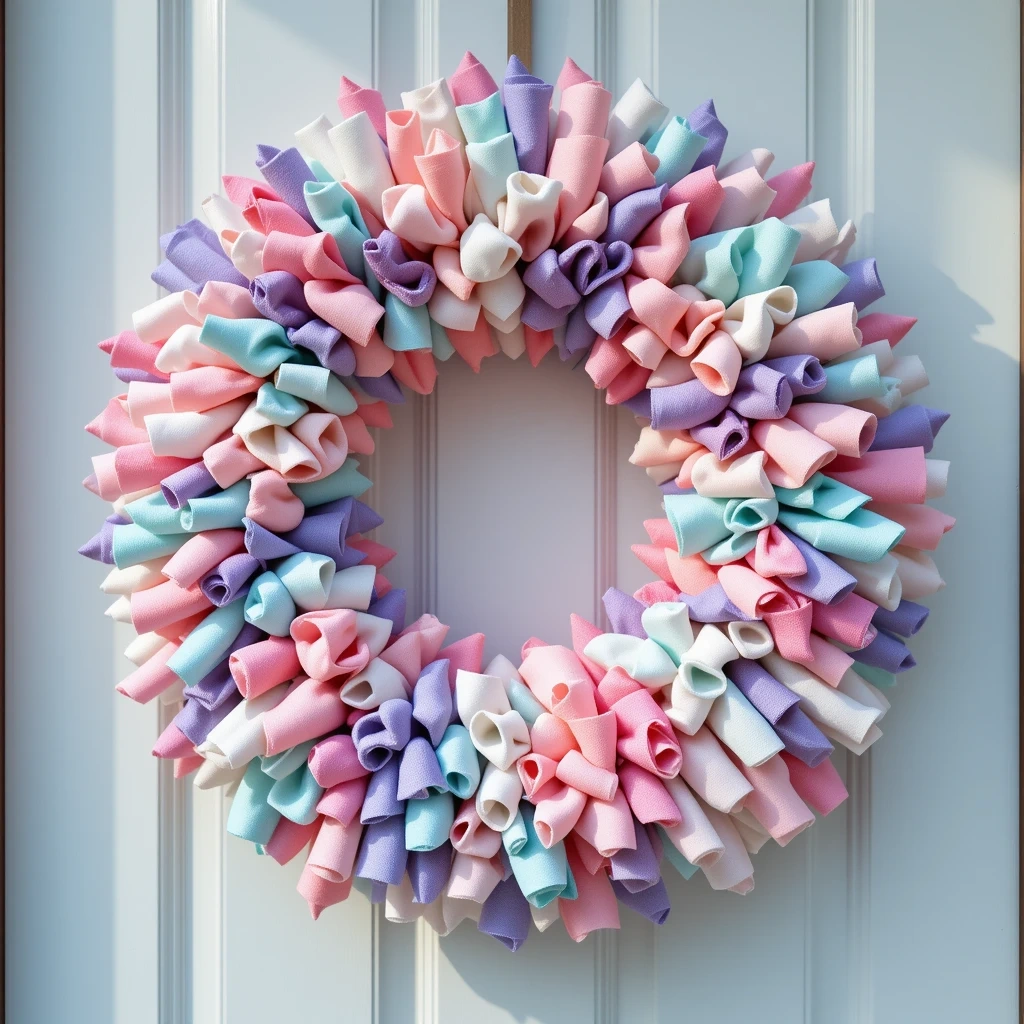
Don’t throw away those old fabric scraps! A fabric scrap wreath is one of the most creative and resourceful senior crafts projects out there. It’s colorful, textural, and completely customizable to any season or color scheme.
Materials:
- Wire or foam wreath form (12-inch)
- Assorted fabric scraps cut into 1″ x 6″ strips
- Scissors
Steps:
- Cut all fabric into uniform strips — about 1 inch wide and 6 inches long.
- Fold a strip in half and loop it through the wire form.
- Pull the ends through the loop and tighten — like a lark’s head knot.
- Repeat with each strip, pushing them close together as you go.
- Continue until the entire wreath form is covered. Fluff to finish.
Time: 60–90 minutes Difficulty: Easy to Medium
Tip: Mix textures — cotton, flannel, burlap — for a richly layered look.
10. Memory Shadow Box
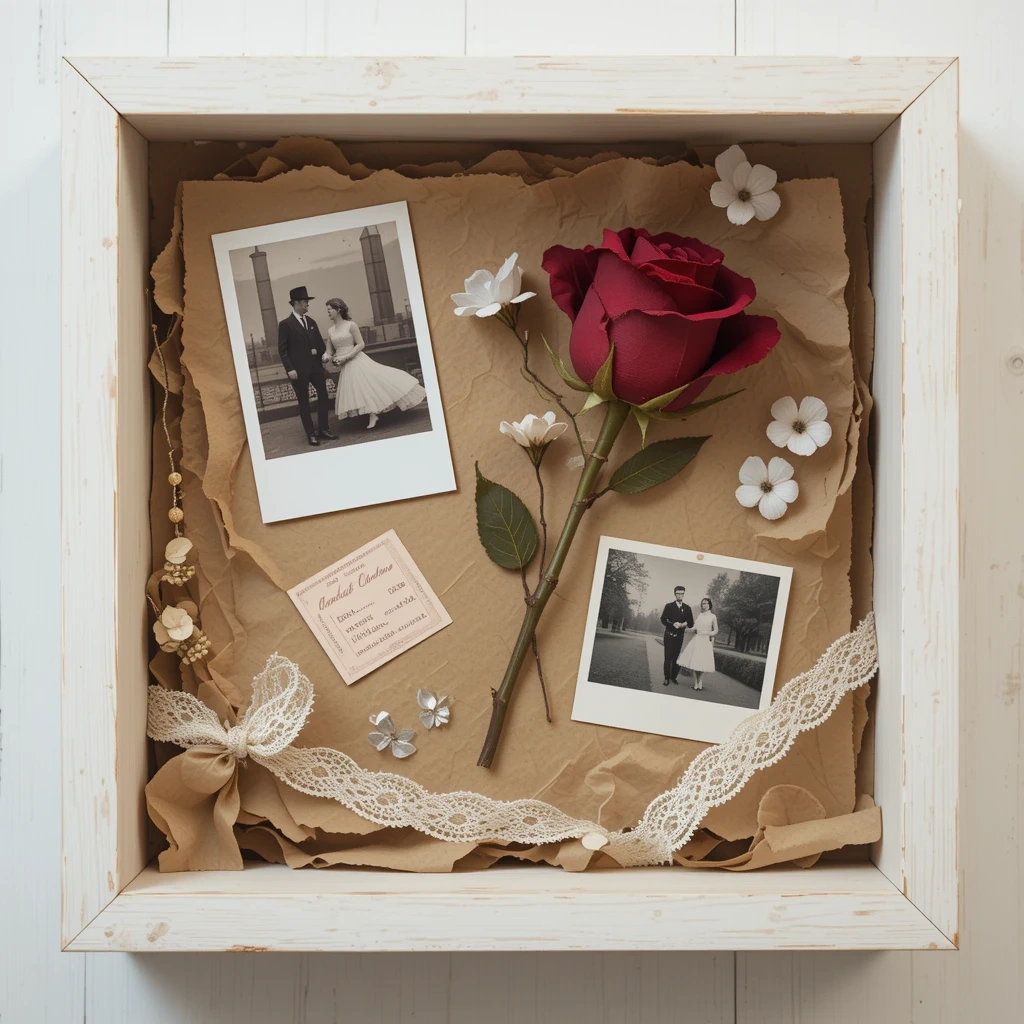
A meaningful keepsake project that celebrates life’s most treasured moments. Use a shadow box frame to display photos, small mementos, ticket stubs, or flowers from special occasions. Every finished box tells a beautiful story.
Materials:
- Deep shadow box frame (available at craft stores)
- Photos printed to size
- Mementos (postcards, dried flowers, ribbons, buttons)
- Scrapbook paper for background
- Double-sided tape or craft glue
Steps:
- Choose a theme — a trip, a grandchild’s birth, a wedding, a garden year.
- Cut scrapbook paper to fit inside the back of the frame.
- Lay out your items inside the box before gluing — experiment with placement.
- Attach heavier items with strong craft glue; lighter pieces with double-sided tape.
- Close the frame and hang or display on a shelf.
Time: 60–90 minutes Difficulty: Medium
Tip: Work in layers — background items first, then middle ground, then foreground for a 3D effect.
Common Mistakes to Avoid
1. Skipping the drying time Rushing between steps — especially with paint or glue — leads to smearing, peeling, or ruined work. Always let each layer dry completely before moving on.
2. Using too much glue at once Excess glue causes bubbling, warping, and messy finishes. Apply thin, even layers and build up if needed rather than overloading at the start.
3. Working in poor lighting Good lighting isn’t just comfortable — it’s essential for detail work like painting, tying knots, and aligning pieces. Always craft near a bright window or use a well-lit workspace.
Tips for Best Results
- Start with a clean, flat workspace — clutter leads to mistakes and lost materials.
- Gather all materials before you begin so you’re never mid-project and hunting for scissors.
- Work in short sessions if needed — most of these projects can be paused and resumed easily.
- Use a tray or mat under your work to protect surfaces and keep everything contained.
- Keep baby wipes nearby for quick paint or glue cleanups before they dry.
- Take a photo of your finished piece — share it, print it, or keep it as inspiration for next time.
Frequently Asked Questions
What crafts are best for seniors with limited hand mobility? Projects like fabric scrap wreaths, memory shadow boxes, and no-sew blankets involve gentle, large movements that are easier for those with arthritis or reduced grip strength. Opt for chunky materials and tools with padded handles.
Do I need prior crafting experience? Not at all! Every idea on this list is beginner-friendly. The steps are simple, the materials are affordable, and there’s no “wrong” way to make something beautiful.
Where can I find affordable craft supplies? Dollar stores, thrift shops, and craft store clearance sections are goldmines. Many projects — like rock painting and button mosaics — use items you already have at home.
Are these crafts good for senior groups or classes? Absolutely. Projects like watercolor cards, button mosaics, and painted rocks work wonderfully in group settings. They encourage conversation, creativity, and community.
How do I store unfinished craft projects? Use a large zip-lock bag or a shallow plastic bin to keep materials together between sessions. Label the bag with the project name so you can pick up right where you left off.
Can these crafts be sold or gifted? Yes! Many of these — especially the greeting cards, bookmarks, decoupage pots, and memory shadow boxes — make incredibly thoughtful handmade gifts for family and friends.
Conclusion
Crafting is so much more than a hobby — it’s a way to express yourself, stay mentally sharp, and create something lasting with your own hands. These 10 ideas prove that beautiful, meaningful projects don’t require fancy tools or years of practice.
Pick one that speaks to you and get started today. You might just discover your new favorite thing to do.