12 Creative Fall Bracelet Ideas Crafts for Cozy Autumn Style
Fall is the perfect time to update your accessories with warm tones, cozy textures, and nature-inspired details. Whether you are a beginner crafter or a seasoned jewelry maker, these 12 fall bracelet ideas Crafts will inspire your next creative project. From clay beads to macrame, every design captures the spirit of the season beautifully.
Grab your supplies and get ready to make something you will actually want to wear — or give as a thoughtful handmade gift.
12 Fall Bracelet Ideas Crafts: Start with Beaded Acorn Charms
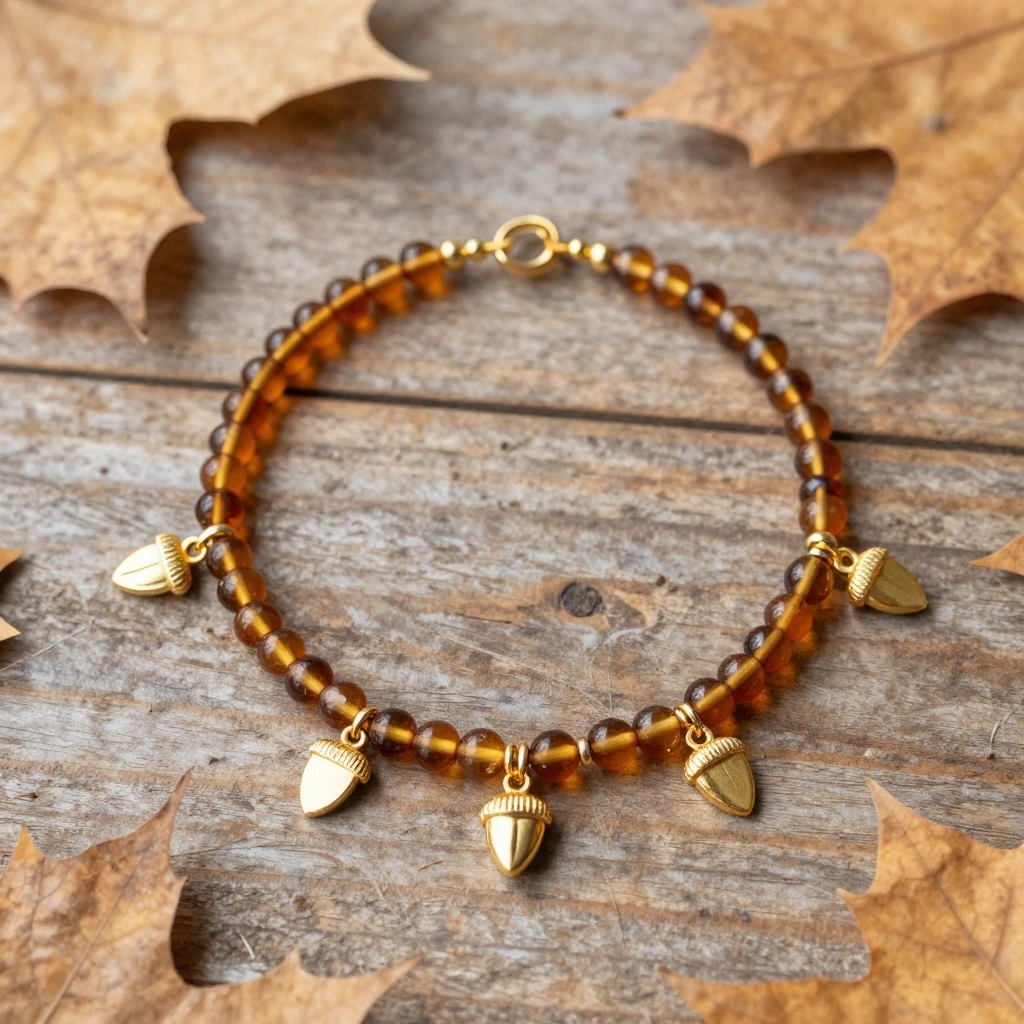
Tiny acorn charms add the most charming seasonal touch to any wrist stack. This bracelet pairs gold-tone acorn charms with warm amber and brown seed beads for a nature-inspired look that feels both cozy and elegant.
Materials:
- Gold-tone acorn charms (3–5 pieces)
- Amber and dark brown seed beads
- Elastic cord (0.8mm)
- Scissors and a beading mat
Steps:
- Cut elastic cord to your wrist size plus 3 inches.
- String seed beads in alternating amber and brown patterns.
- Add acorn charms evenly spaced throughout.
- Tie a secure double knot and trim the excess cord.
- Tuck the knot inside a nearby bead to hide it.
Time: 15–20 minutes Difficulty: Easy
Tip: Add a dab of clear nail polish to the knot for extra security.
Polymer Clay Leaf Bracelet
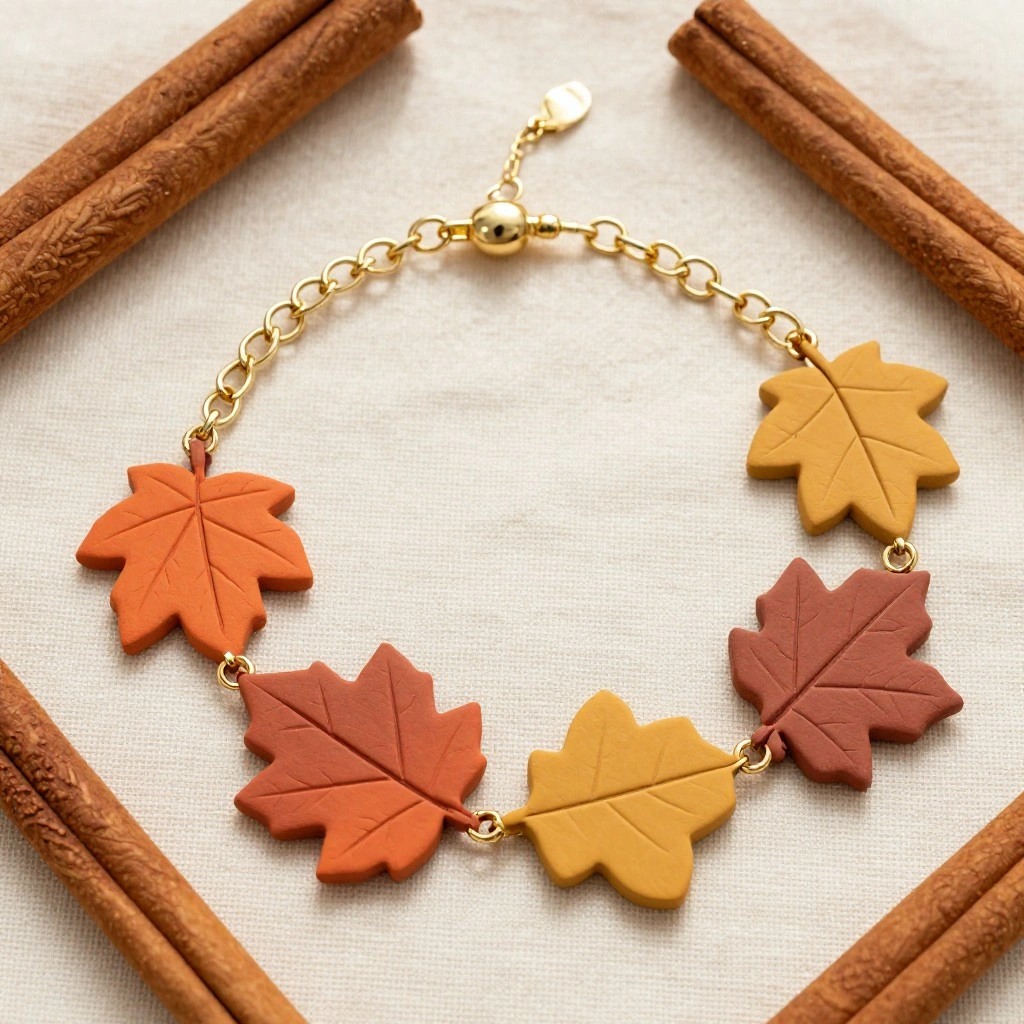
Handmade clay leaf charms are having a major moment in fall craft circles. This bracelet lets you shape your own miniature leaves using polymer clay in rust, mustard, and burnt orange tones — each one unique, just like real autumn leaves.
Materials:
- Polymer clay (rust, mustard, orange)
- Leaf-shaped cutter or carving tool
- Jump rings and lobster clasp
- Thin chain (gold or brass)
- Oven (for baking clay)
Steps:
- Roll out clay to 2mm thickness and cut leaf shapes.
- Carve vein details with a toothpick or clay tool.
- Pierce a small hole at the top of each leaf before baking.
- Bake at 275°F (135°C) for 15 minutes, then cool completely.
- Attach leaves to the chain using jump rings.
- Add the lobster clasp to one end.
Time: 45–60 minutes (including baking) Difficulty: Medium
Tip: Mix two clay colors together slightly for a more realistic leaf gradient effect.
Macrame Friendship Bracelet in Earth Tones
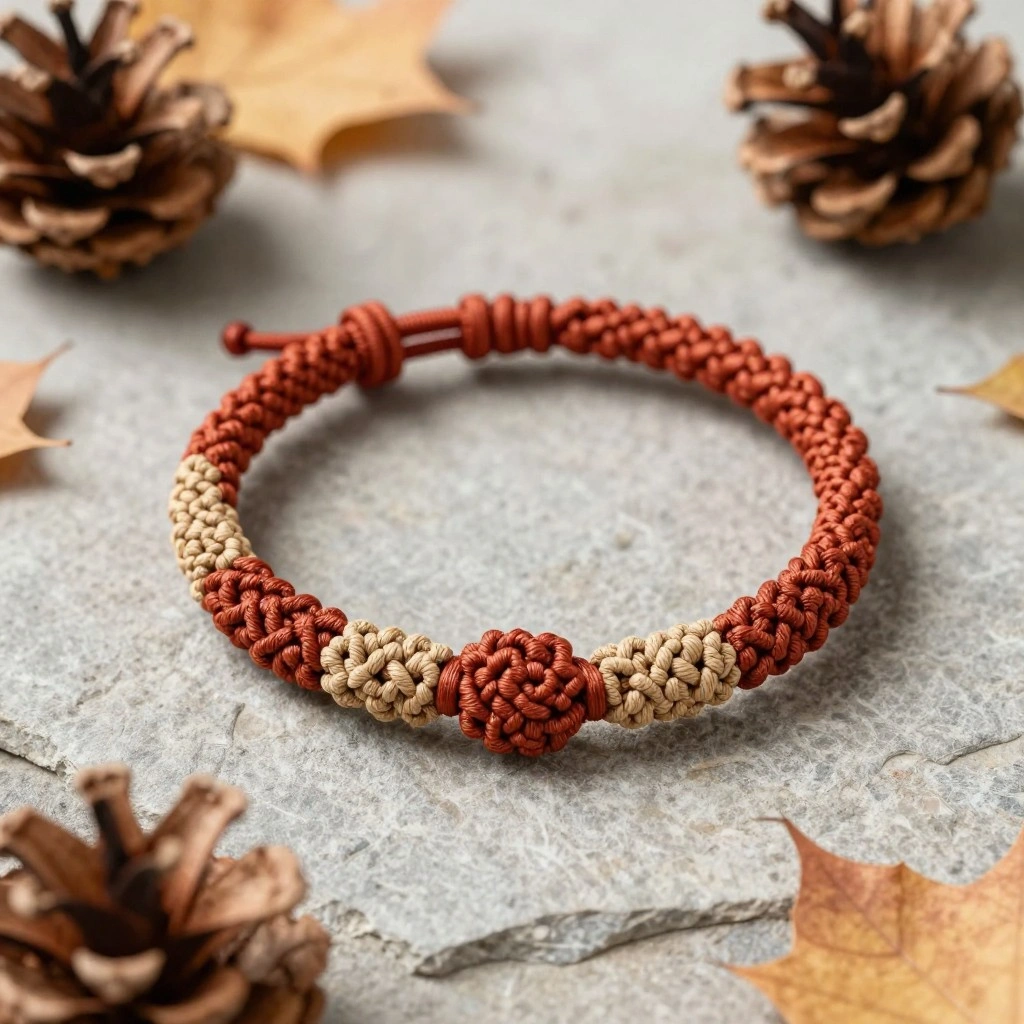
Macrame bracelets are timeless, and they look especially stunning in fall’s earthy palette. This knotted design uses simple square knots to create a textured band in terracotta, sand, and warm brown threads.
Materials:
- Macrame cotton cord (2mm) in terracotta, sand, and brown
- Tape or clipboard to anchor cords
- Scissors
Steps:
- Cut four cords, each about 24 inches long.
- Fold cords in half and anchor the fold at the top.
- Work square knots across the full width, alternating colors every few rows.
- Continue knotting until the bracelet fits your wrist.
- Braid or knot the end cords into a tie closure.
- Trim ends evenly.
Time: 20–30 minutes Difficulty: Easy
Tip: Pre-plan your color sequence before starting so the pattern stays consistent.
Wooden Disc and Twine Bracelet

Minimalist and rustic, this bracelet uses laser-cut or hand-painted wooden discs threaded onto natural twine. It is a wonderful project for beginners and looks beautiful as part of a layered wrist stack.
Materials:
- Small wooden disc beads
- Natural jute or hemp twine
- Acrylic paint (optional, for decorating discs)
- Small brush
- Scissors
Steps:
- Paint wooden discs with fall motifs or simple color blocks if desired. Let dry.
- Cut twine to wrist measurement plus 8 inches for tying.
- Thread discs onto the twine, spacing them evenly.
- Separate twine into two strands at each end.
- Tie the bracelet with a bow or square knot closure.
Time: 20–25 minutes Difficulty: Easy
Tip: Seal painted wooden discs with a light coat of Mod Podge to prevent chipping.
Hammered Copper Cuff Bracelet
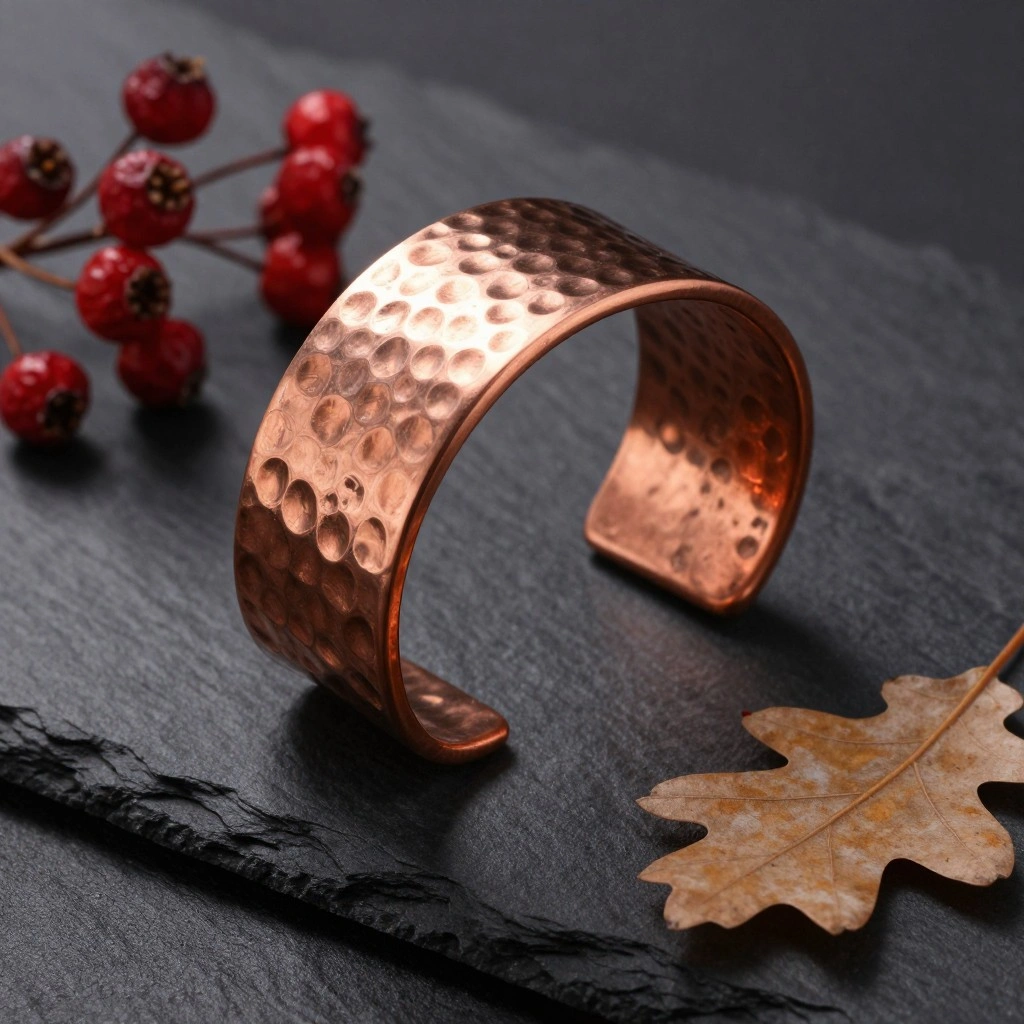
Copper is the ultimate fall metal — its warm reddish tone mirrors the season perfectly. This beginner-friendly cuff bracelet uses copper sheet metal and a hammer to create an organic, textured finish.
Materials:
- Copper sheet metal strip (6 x 1 inch, 24 gauge)
- Jeweler’s hammer and steel block
- Metal file or sandpaper
- Bracelet mandrel or thick dowel
Steps:
- File and smooth all edges of the copper strip.
- Place strip on the steel block and hammer texture across the surface.
- Slowly bend the strip around a mandrel into a cuff shape.
- Adjust the opening to fit your wrist comfortably.
- Polish with a soft cloth for a warm glow.
Time: 30–40 minutes Difficulty: Medium
Tip: Wear gloves when hammering. Patina the copper with a liver of sulfur solution for a darker, antique look.
12 Fall Bracelet Ideas: Resin Maple Leaf Bracelet
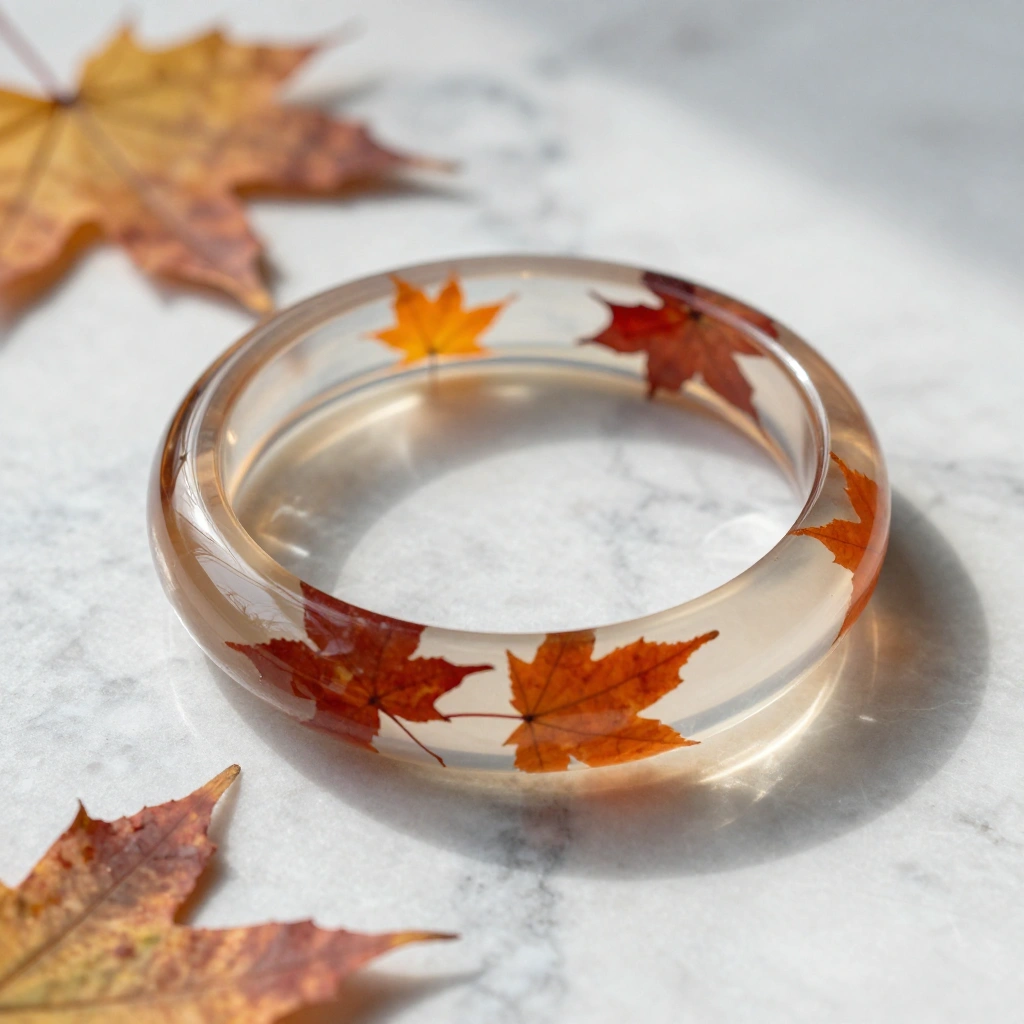
Preserve real autumn leaves forever inside a clear resin bangle. This bracelet is a bit more involved but produces a truly stunning result that looks like a wearable piece of fall art.
Materials:
- Real pressed and dried maple leaves
- Clear UV or two-part resin
- Silicone bangle mold
- Mixing cups and stir sticks
- UV lamp (if using UV resin)
Steps:
- Press and fully dry maple leaves for 48 hours.
- Mix resin according to package instructions.
- Pour a thin base layer into the mold and partially cure.
- Place pressed leaves carefully on top of the base layer.
- Pour remaining resin over leaves to fill the mold.
- Cure fully and demold gently.
Time: 1–2 hours active (plus curing time) Difficulty: Medium
Tip: Use leaves that are fully dry to avoid bubbles forming inside the resin.
Braided Leather Wrap Bracelet
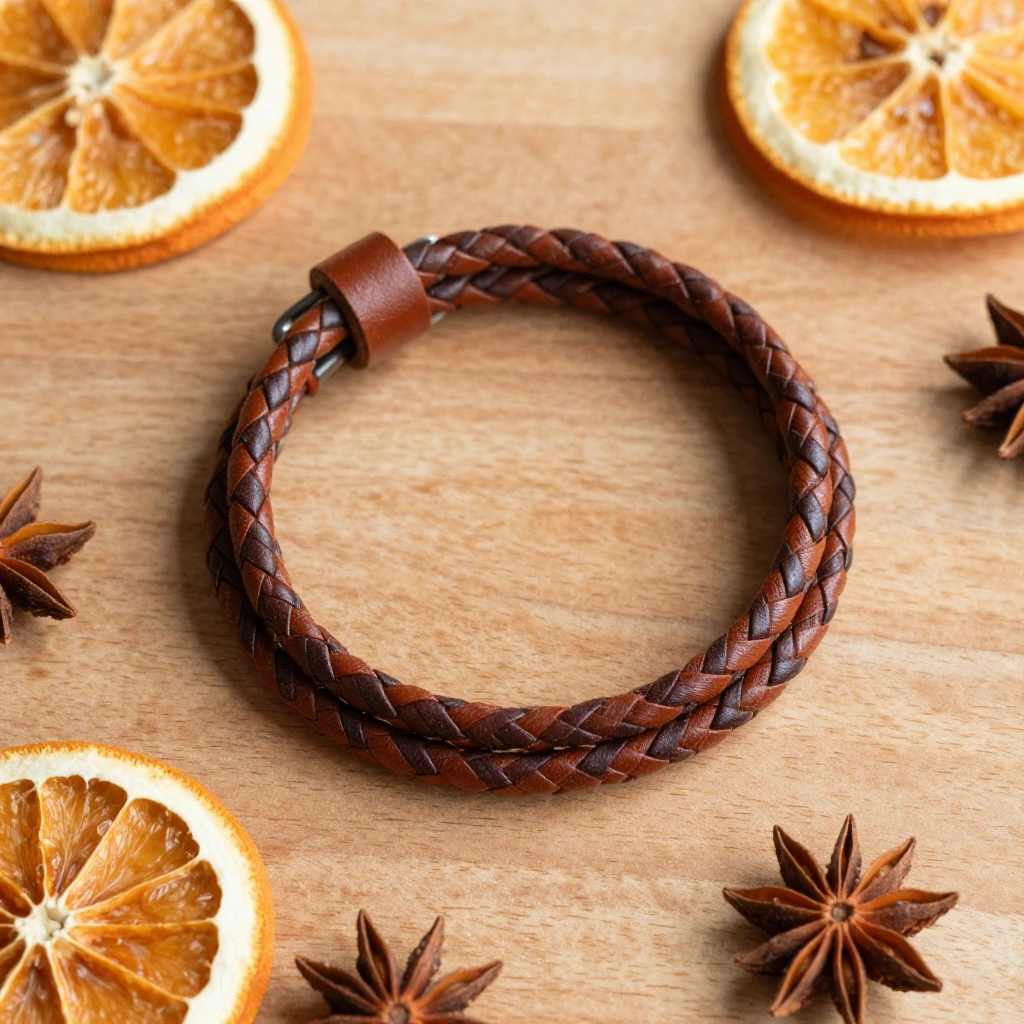
A braided leather wrap is effortlessly cool and pairs beautifully with fall wardrobes. Use genuine or faux leather strips in cognac, chestnut, or dark brown for that perfect seasonal palette.
Materials:
- Leather cord or strips (3mm wide) in 2–3 fall tones
- Lobster clasp and jump ring
- Crimp ends
- Pliers
Steps:
- Cut three leather cords, each about 18 inches long.
- Secure one end in a crimp end with pliers.
- Braid the three cords firmly to your desired length.
- Secure the other end in a second crimp end.
- Attach the lobster clasp to one crimp end and a jump ring to the other.
Time: 15–20 minutes Difficulty: Easy
Tip: Lightly condition leather cords with leather balm before braiding to keep them supple and prevent cracking.
Felt Pumpkin Charm Bracelet
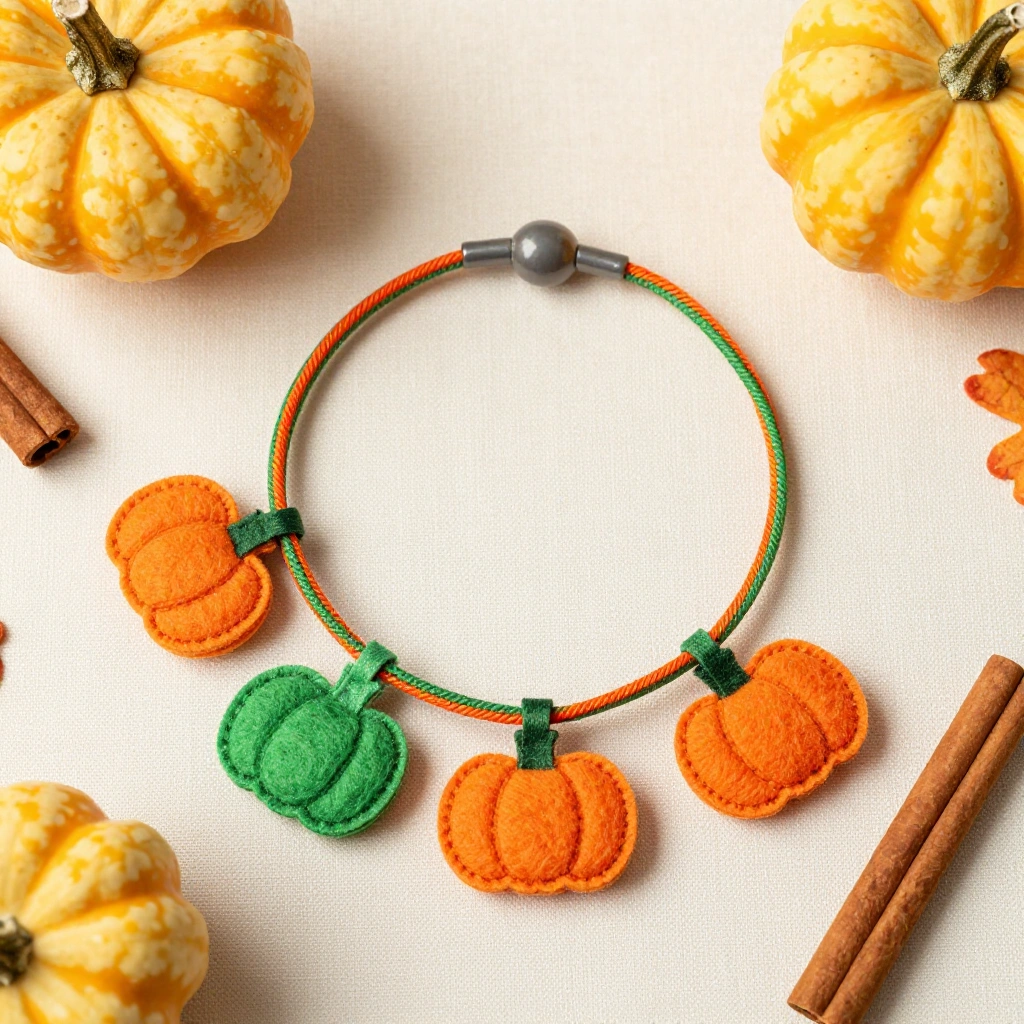
This fun and whimsical bracelet is wonderful to make with kids. Small felt pumpkin charms stitched and stuffed with a bit of filling are attached to an elastic band for an adorable fall accessory.
Materials:
- Orange and green felt squares
- Embroidery floss (orange, green, brown)
- Small amount of fiberfill stuffing
- Elastic cord
- Needle and scissors
Steps:
- Cut two small pumpkin shapes from orange felt per charm.
- Stitch the two pieces together using a blanket stitch, leaving a small gap.
- Stuff lightly with fiberfill and close the stitch.
- Add a small green felt stem with brown floss details.
- String finished charms onto elastic cord.
- Knot the cord and tuck the knot behind a charm.
Time: 30–45 minutes Difficulty: Easy
Tip: Make a variety of sizes for the most visually interesting bracelet arrangement.
Wire-Wrapped Stone Bracelet
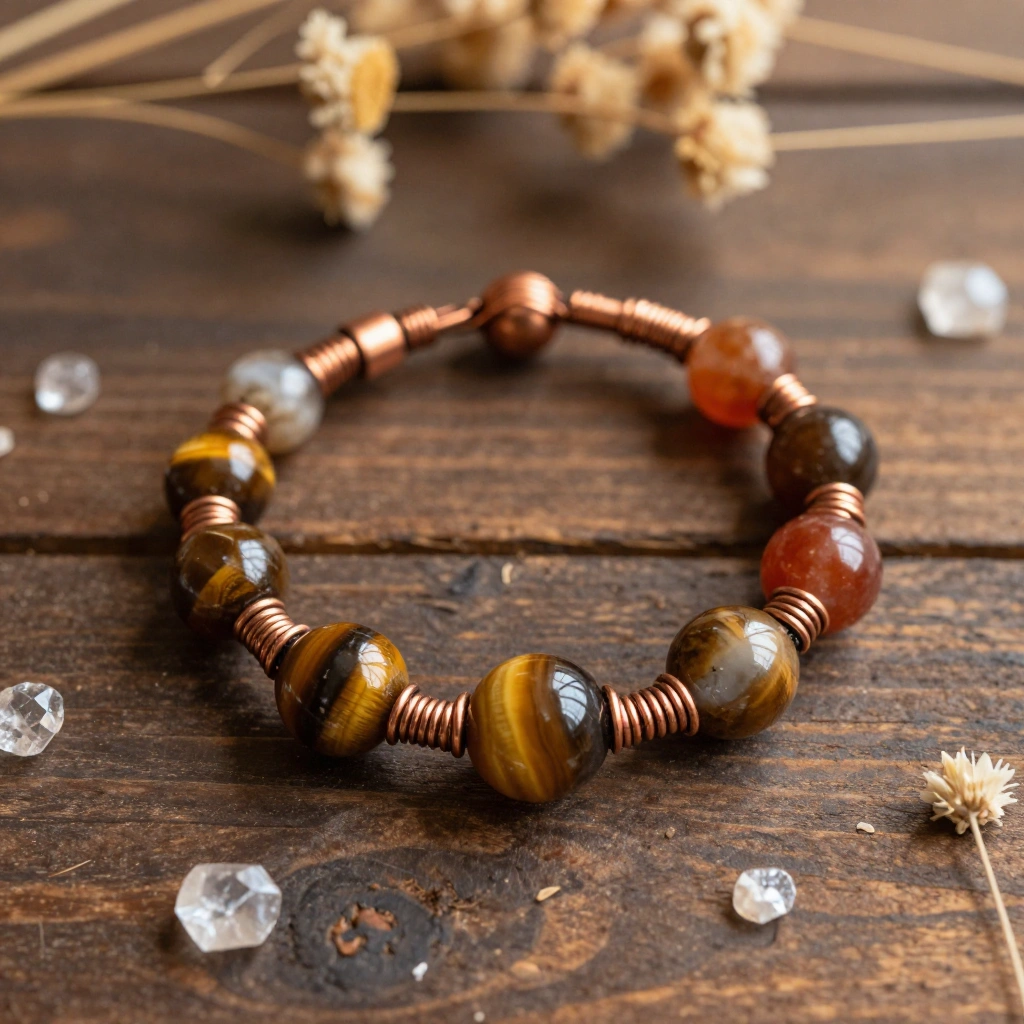
Gemstones in warm fall tones — tiger’s eye, carnelian, and smoky quartz — feel especially grounded and seasonal. This bracelet wraps individual stones in copper or gold wire for a handcrafted bohemian look.
Materials:
- Tiger’s eye, carnelian, or smoky quartz stones
- 24-gauge copper or gold wire
- Chain-nose pliers
- Jump rings and lobster clasp
- Thin chain base
Steps:
- Cut 6 inches of wire per stone.
- Wrap wire around each stone, crisscrossing over the front.
- Twist wire ends together at the top to form a loop.
- Attach each wrapped stone to the chain using a jump ring.
- Space stones evenly across the chain length.
- Add lobster clasp to close.
Time: 30–45 minutes Difficulty: Medium
Tip: Start with a looser wrap — it is easier to tighten than to undo a wrap that is too tight.
Dried Flower Resin Bead Bracelet
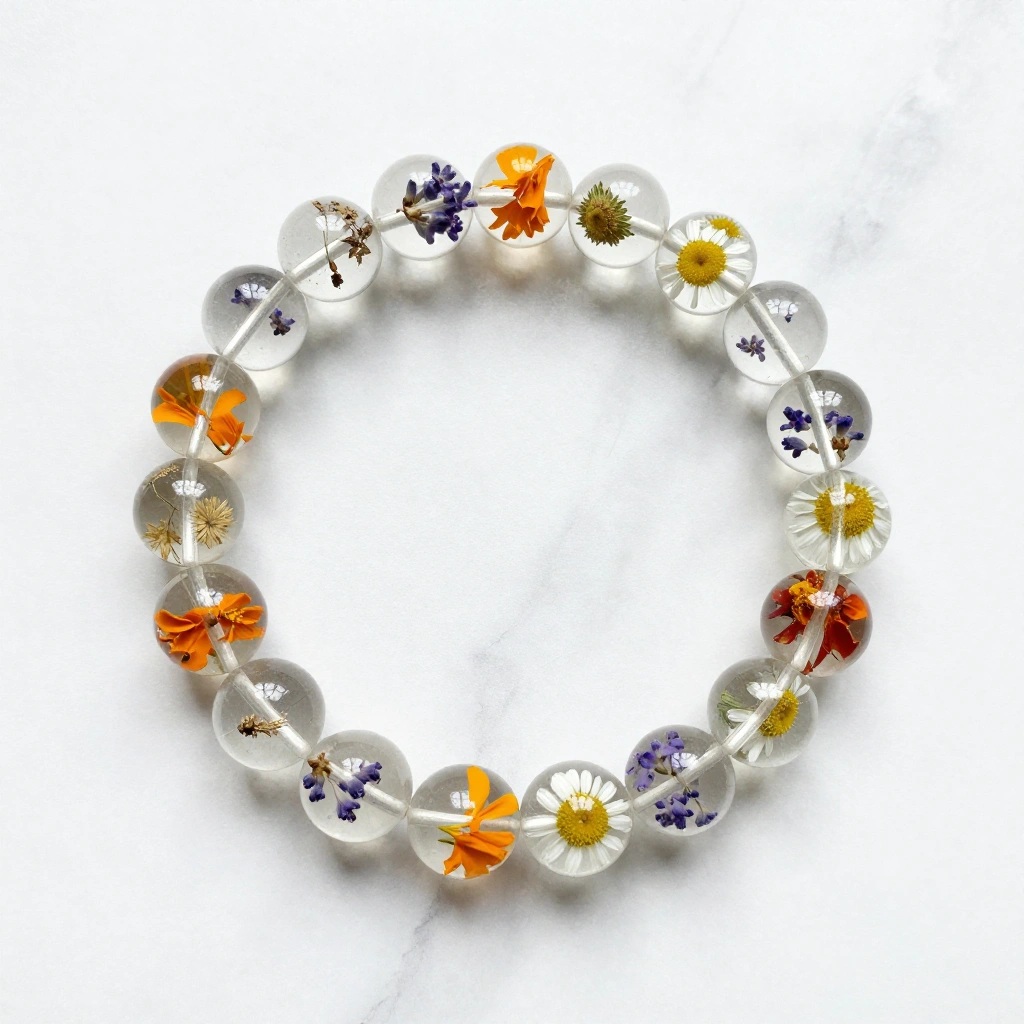
Tiny beads cast in resin with real dried flowers inside make for one of the most beautiful fall bracelets you can wear. Lavender, chamomile, and tiny orange marigold petals all work wonderfully.
Materials:
- Bead-shaped silicone molds
- Clear casting resin
- Dried small flowers (lavender, chamomile, marigold)
- Eye pins
- Elastic cord or thin chain
Steps:
- Mix resin per instructions and pour halfway into bead molds.
- Place dried flower pieces into the resin layer.
- Fill molds to the top with remaining resin.
- Cure fully (UV or air depending on resin type).
- Demold beads and insert eye pins through each.
- String on elastic cord and knot to finish.
Time: 1 hour active (plus curing time) Difficulty: Medium
Tip: Press flowers completely flat before using in resin to ensure they sit properly inside the bead shape.
12 Fall Bracelet Ideas: Stamped Metal Tag Bracelet
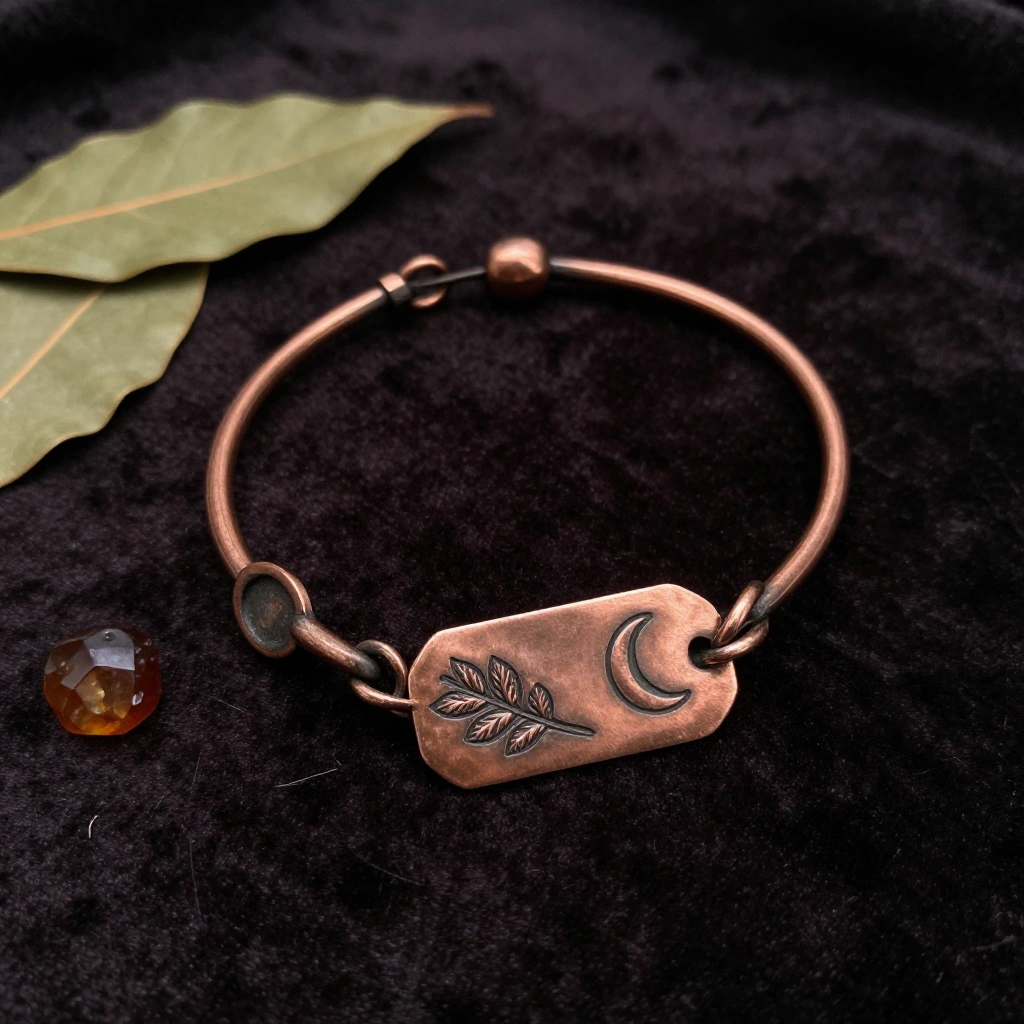
Metal stamping is a satisfying craft that produces professional-looking personalized jewelry. Stamp fall words or symbols onto a copper or aluminum tag for a meaningful wearable keepsake.
Materials:
- Copper or aluminum metal blanks (rectangle or round)
- Metal letter and symbol stamps
- Hammer and steel bench block
- Hole punch
- Jump rings and lobster clasp
- Thin chain
Steps:
- Place metal blank on the steel block.
- Position a stamp on the blank and strike firmly once with the hammer.
- Repeat to spell a word or add symbols (leaves, moons, snowflakes).
- Punch a hole at the top of the stamped tag.
- Attach to a chain with a jump ring.
- Add lobster clasp to finish.
Time: 20–30 minutes Difficulty: Easy to Medium
Tip: Color the stamped impressions with a permanent marker, then wipe the surface clean — the ink stays in the recessed areas for more visible detail.
Autumn Berry and Bead Stretch Bracelet
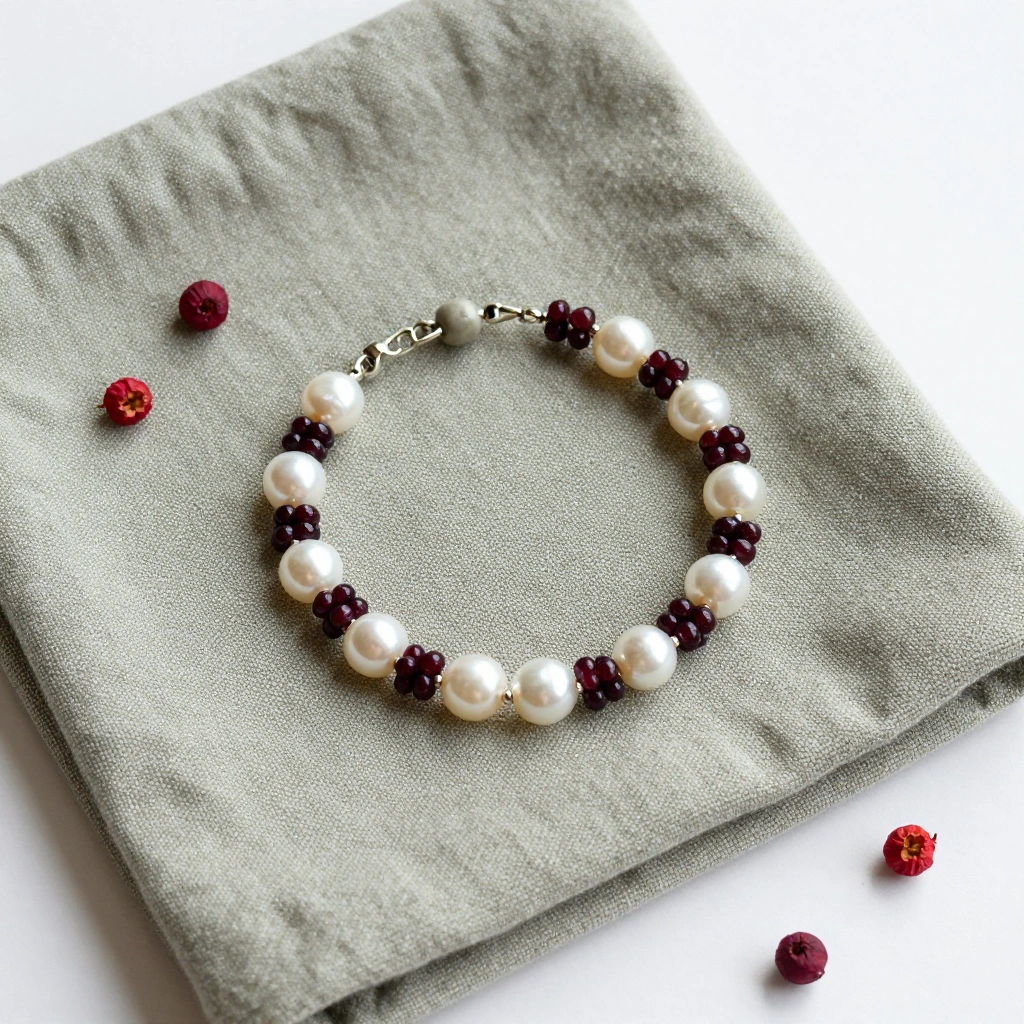
This simple stretch bracelet combines glass pearl beads in creamy ivory with small dark burgundy seed beads to mimic the look of autumn berry clusters. It is elegant enough to wear every day.
Materials:
- Ivory glass pearl beads (6mm)
- Burgundy seed beads (size 8/0)
- Stretch magic cord (0.7mm)
- Scissors and super glue
Steps:
- Cut stretch cord to 10 inches.
- String in a pattern: one pearl, three seed beads, repeat.
- Continue until the strand reaches your wrist size.
- Tie a surgeon’s knot tightly at the ends.
- Add a drop of super glue to the knot before trimming the tails.
Time: 10–15 minutes Difficulty: Easy
Tip: String the bracelet on a bead board or inside a shallow bowl so beads do not roll away as you work.
Common Mistakes to Avoid
1. Using cord that is too thin for heavier beads. Thin elastic cord can break under the weight of large beads like resin, stone, or clay. Always match your cord gauge to the weight of the materials.
2. Skipping the knot reinforcement step. A plain knot in elastic cord often slips loose over time. Always use a surgeon’s knot or double knot and seal it with a drop of super glue or clear nail polish.
3. Not pre-planning bead placement. Laying out your design flat before stringing saves a lot of frustration. Especially for patterned or charm-heavy bracelets, planning ahead keeps your spacing even and your design balanced.
Tips for Best Results
- Work in good lighting. Tiny beads and wire wrapping require clear visibility — natural daylight or a craft lamp makes a big difference.
- Measure twice. Measure your wrist before cutting cord or chain. Add 0.5–1 inch for a comfortable fit.
- Use a bead mat. A simple piece of velvet or a dedicated bead mat prevents beads from rolling and keeps your workspace organized.
- Invest in good pliers. A basic set of chain-nose and round-nose pliers makes wire and jump ring work much easier.
- Store finished bracelets flat. To prevent stretching and tangling, store elastic bracelets flat in a small jewelry box or pouch.
- Take your time with resin. Rushing the curing process leads to sticky or cloudy results. Follow cure times exactly.
FAQs
What is the easiest fall bracelet to make for beginners? The autumn berry stretch bracelet and the wooden disc and twine bracelet are the most beginner-friendly. Both require no special tools and can be completed in under 20 minutes.
What fall colors work best for handmade bracelets? The most popular fall tones are rust, burnt orange, mustard yellow, deep burgundy, terracotta, warm brown, and forest green. Gold and copper metals complement all of these beautifully.
Can kids make these fall bracelets? Yes — the felt pumpkin charm bracelet, stretch bead bracelet, and beaded acorn charm bracelet are all family-friendly projects. Avoid resin and metalsmithing projects with young children.
Where can I find supplies for fall bracelets? Craft stores like Michaels and Joann carry most supplies. Online marketplaces like Etsy and Amazon are great for finding specialty items like gemstone beads, copper sheet metal, and silicone molds.
How do I make a bracelet last longer? Use high-quality elastic cord or metal closures, seal all knots, and avoid wearing bracelets in water. Store them properly when not in use.
Can I sell these handmade fall bracelets? Absolutely. Handmade bracelets sell well on Etsy, at craft fairs, and through local markets — especially during the fall and holiday season. Use clean packaging and good photography to showcase your work.
Conclusion
From simple stretch bracelets to stunning resin designs, these 12 fall bracelet ideas cover every skill level and style. The best part of making your own jewelry is that each piece carries a little bit of your creativity and care into the world.
Pick one idea today, gather your supplies, and start crafting — your wrists will thank you for it.