10 Best Apple Craft Ideas for Preschool and Toddlers
Fall is the best time to get creative — and apples are the perfect inspiration. Whether you’re a teacher looking for classroom activities, a parent planning a weekend project, or just someone who loves seasonal crafts, these 10 apple craft ideas have something for everyone.
From simple stamping techniques to adorable decorations, each idea is beginner-friendly and uses easy-to-find materials. Grab your supplies and let’s get started!
1. Apple Stamp Art
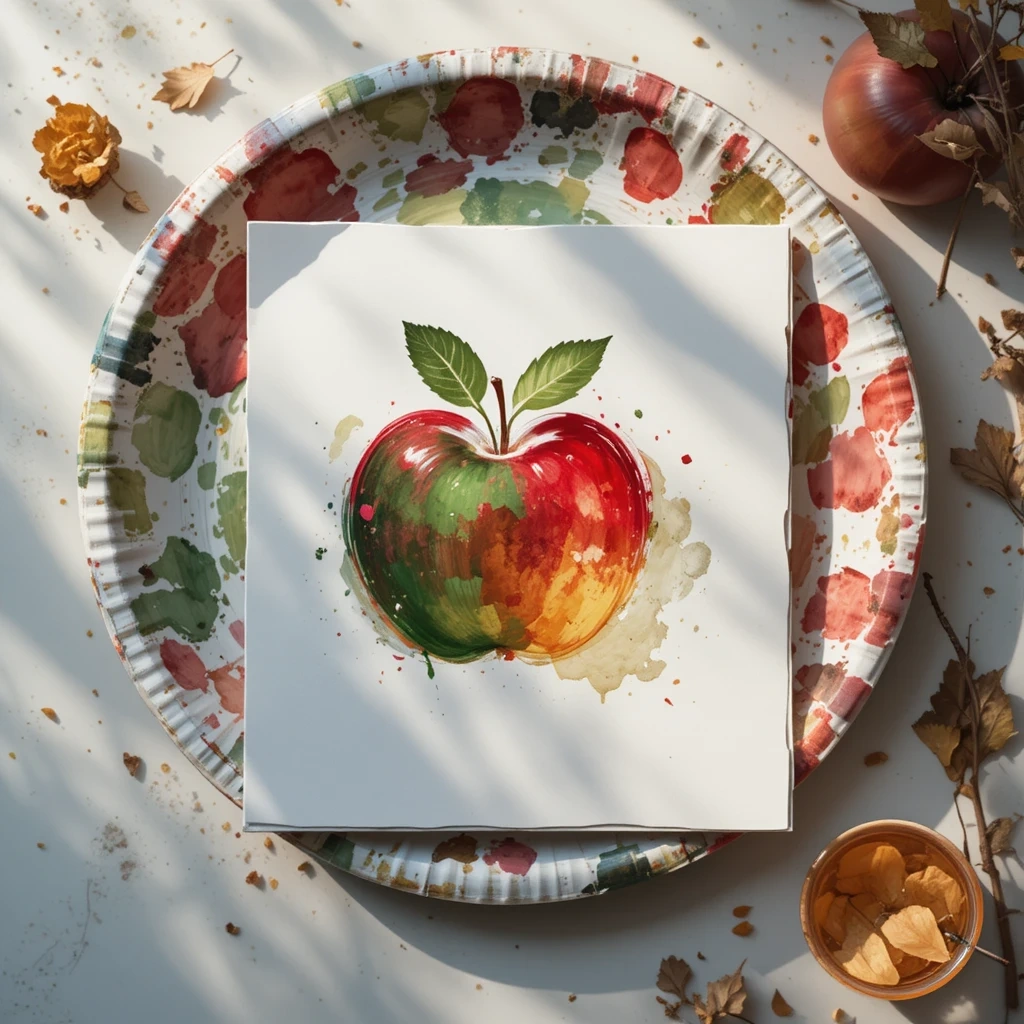
Apple stamping is one of the most satisfying and mess-friendly crafts you can do. Simply cut an apple in half, dip it in paint, and press it onto paper to reveal a beautiful natural pattern with a built-in star shape in the center.
It’s perfect for toddlers and younger kids, and the prints make gorgeous wrapping paper, greeting cards, or wall art.
Materials:
- 1 fresh apple (cut in half crosswise)
- Acrylic or washable paint (red, green, yellow)
- White cardstock or canvas
- Paper plate (for paint)
- Paper towels
Steps:
- Cut the apple in half crosswise to expose the star pattern inside.
- Pat the cut side dry with a paper towel.
- Pour paint onto a paper plate and spread evenly.
- Press the apple cut-side down into the paint, then stamp firmly onto paper.
- Lift carefully and repeat, reloading paint as needed.
- Let dry completely before framing or using.
- Time: 15–20 minutes
- Difficulty: Easy
Tip: Use multiple colors on the same stamp for a rainbow effect — kids absolutely love it!
2. Apple Craft Wreath
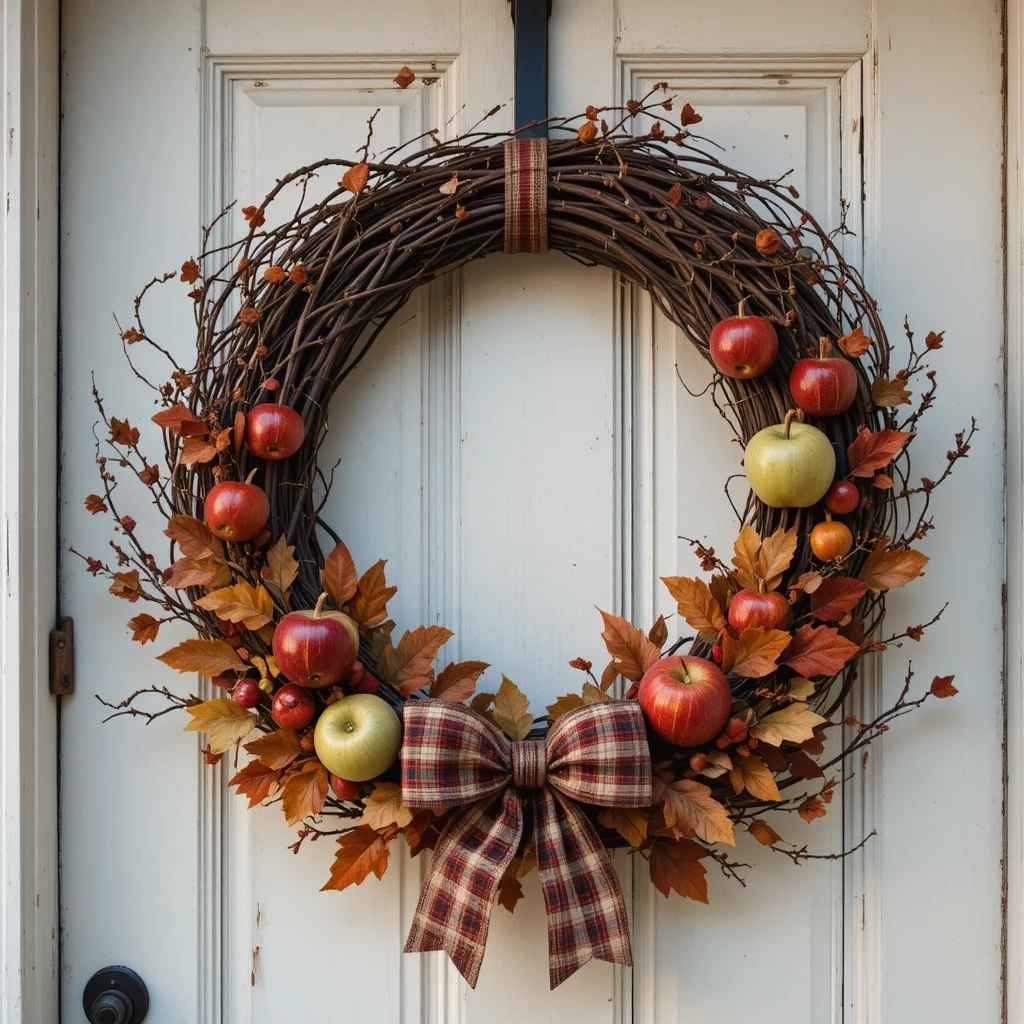
One of the Top 10 Apple Craft Ideas for Fall Décor
This charming wreath combines faux apple picks, dried leaves, and a simple grapevine base to create a festive front-door decoration. It looks store-bought but costs a fraction of the price.
Materials:
- Grapevine wreath (12–14 inch)
- Faux apple picks or foam apples (6–8 pieces)
- Hot glue gun and glue sticks
- Dried or faux autumn leaves
- Burlap or plaid ribbon (1.5 inch wide, 1 yard)
- Wire for hanging
Steps:
- Lay the grapevine wreath flat on your work surface.
- Arrange the apple picks around the wreath before gluing to plan the layout.
- Hot glue apples evenly around the top and sides of the wreath.
- Fill gaps with dried leaves or faux foliage, gluing in place.
- Tie a ribbon bow and glue it to the top center.
- Attach a wire loop to the back for hanging.
- Time: 30–45 minutes
- Difficulty: Easy
Tip: Mix red and green apples for a more realistic, textured look.
3. Paper Bag Apple Puppet
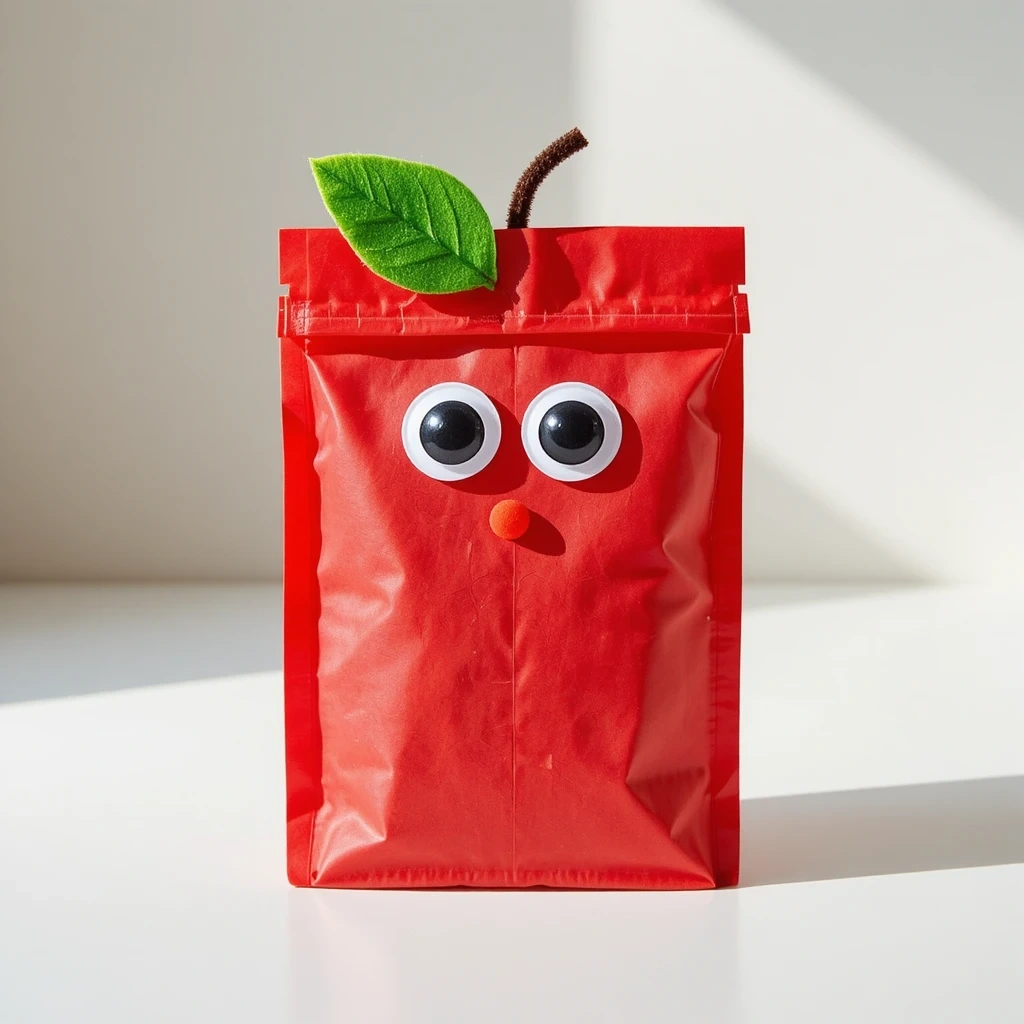
Paper bag puppets are a classic kids’ craft — and an apple version is especially adorable for fall storytelling or school projects. Kids can bring their apple character to life with googly eyes, felt leaves, and a pipe cleaner stem.
Materials:
- Small brown paper lunch bag
- Red, green, or yellow craft paint or construction paper
- Googly eyes (2)
- Green felt or construction paper (for leaf)
- Brown pipe cleaner (for stem)
- Glue stick or craft glue
- Black marker
Steps:
- Paint or cover the paper bag in your chosen apple color. Let dry.
- Cut a leaf shape from green felt or paper and glue to the bottom of the bag’s flap.
- Twist a brown pipe cleaner and glue it above the leaf as a stem.
- Glue two googly eyes onto the front of the bag.
- Draw a smile and cheeks with a black marker.
- Slide your hand inside the flap to animate the puppet.
- Time: 20–30 minutes
- Difficulty: Easy
Tip: Make a whole bushel of puppets for a classroom puppet show!
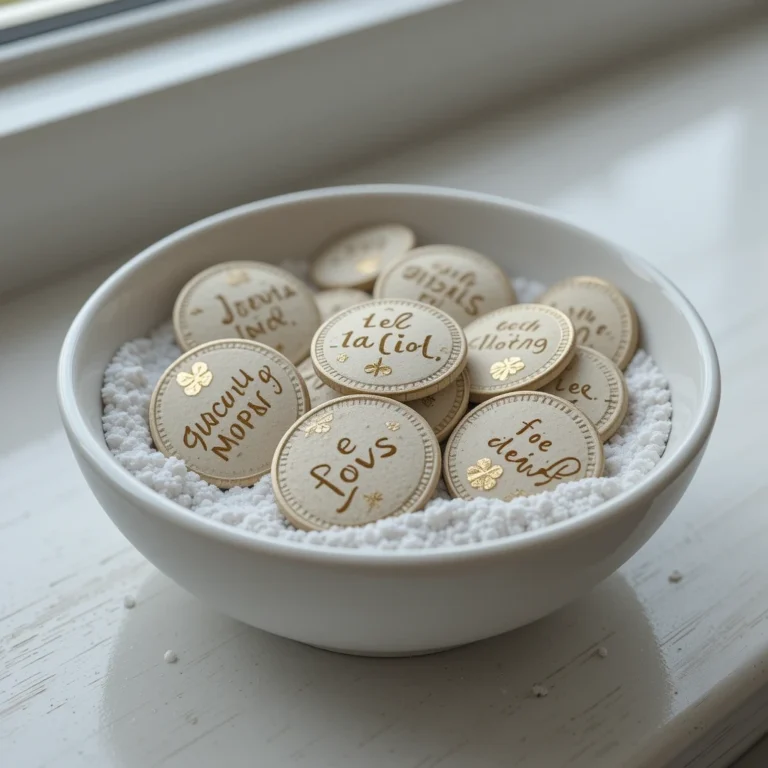
4. Salt Dough Apple Ornaments
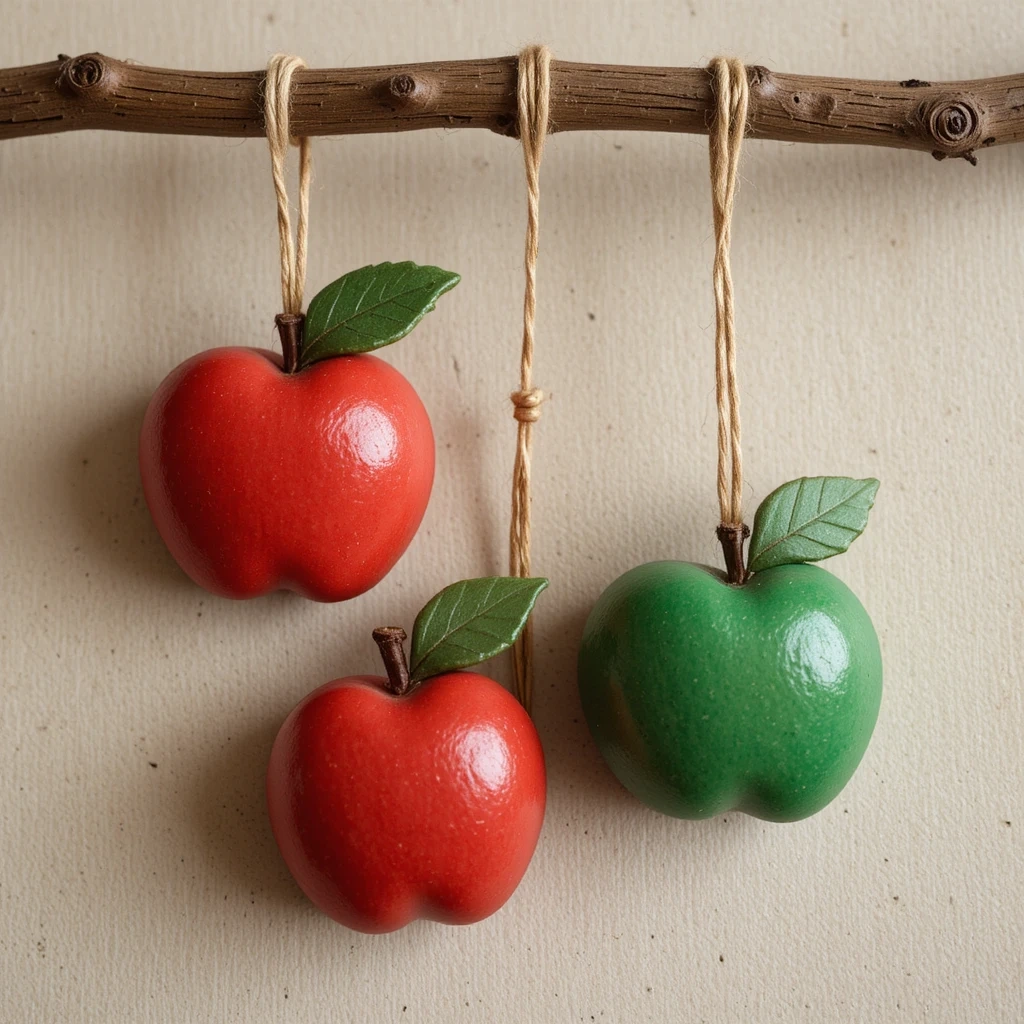
Salt dough is a magical, inexpensive medium that turns into hard, paintable shapes when baked. Apple ornaments made from salt dough are perfect for Christmas trees, garland, or gift tags.
Materials:
- 1 cup all-purpose flour
- ½ cup salt
- ½ cup water
- Rolling pin
- Apple-shaped cookie cutter
- Red, green, and brown acrylic paint
- Clear sealant spray or Mod Podge
- Twine for hanging
Steps:
- Mix flour, salt, and water until a smooth dough forms.
- Roll out to ¼ inch thickness on a floured surface.
- Cut apple shapes using a cookie cutter and poke a small hole at the top with a toothpick.
- Bake at 200°F (93°C) for 2–3 hours until completely hard.
- Let cool, then paint red or green with brown stems.
- Seal with Mod Podge and thread twine through the hole.
- Time: 3–4 hours (including bake time)
- Difficulty: Easy–Medium
Tip: Add a name or date with a fine-tip paint pen before sealing to make a personalized keepsake.
5. Apple Craft Candle Holders

A Simple Apple Craft That Doubles as a Centerpiece
Hollow out real apples and place tea light candles inside for a stunning, all-natural table decoration. These look gorgeous on a Thanksgiving or fall dinner table and take under 10 minutes to make.
Materials:
- 3–4 large apples (Honeycrisp or Fuji work best)
- Tea light candles
- Apple corer or melon baller
- Lemon juice (to prevent browning)
- Autumn leaves or moss for display
Steps:
- Use an apple corer or melon baller to scoop out the center of each apple.
- Make the hole just deep enough to hold a tea light securely.
- Brush the inside with a little lemon juice to slow browning.
- Drop a tea light candle into the cavity.
- Arrange on a tray or platter surrounded by leaves and moss.
- Light the candles just before your guests arrive.
- Time: 10–15 minutes
- Difficulty: Easy
Tip: Refrigerate the apples beforehand so they stay fresh and firm throughout your event.
6. Apple Bookmark

This quick and cute craft is perfect for back-to-school season or as a gift for book lovers. Using red cardstock and a few simple cuts, you can create an apple-shaped bookmark in minutes.
Materials:
- Red, green, and brown cardstock
- Scissors
- Black marker or gel pen
- Glue stick
- Optional: laminator for durability
Steps:
- Cut a large apple shape (about 3 x 4 inches) from red cardstock.
- Cut a small leaf from green cardstock and a thin stem from brown.
- Glue the leaf and stem to the top of the apple shape.
- Draw a small worm peeking out of a hole for a fun touch.
- Write a favorite quote or “Happy Reading!” on the back.
- Laminate if desired for long-lasting use.
- Time: 10–15 minutes
- Difficulty: Easy
Tip: These make wonderful teacher appreciation gifts — make a small batch and tie them with twine.
7. Apple Sensory Bin
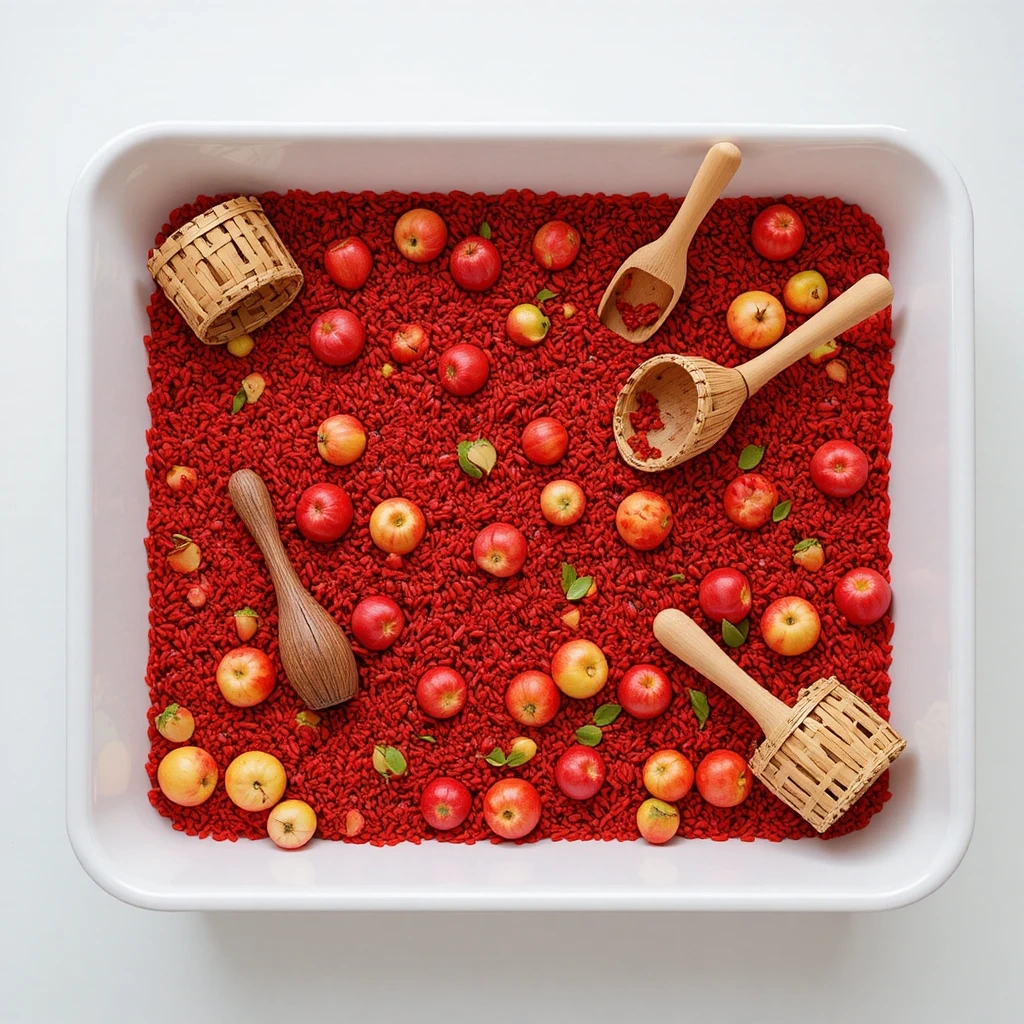
Sensory bins are beloved by toddlers and early childhood educators alike. An apple-themed sensory bin filled with dried oats, plastic apples, and scooping tools gives little ones a rich tactile experience while supporting fine motor development.
Materials:
- Large plastic storage bin
- Dried oats, kinetic sand, or rice (dyed red)
- Small plastic or foam apples
- Scoops, cups, and spoons
- Mini apple baskets (from dollar store)
- Optional: cinnamon sticks for scent
Steps:
- Fill the bin with your base material (oats, sand, or colored rice).
- Bury plastic apples partially throughout the bin.
- Add scooping tools, small baskets, and cups.
- Drop in cinnamon sticks for a sensory scent boost.
- Let children explore freely — scooping, sorting, and filling.
- Store with a lid when not in use.
- Time: 10 minutes to set up
- Difficulty: Easy
Tip: Color rice red by shaking it in a ziplock bag with red food coloring and a splash of vinegar — dry overnight before use.
8. Foam Apple Back-to-School Pencil Holder
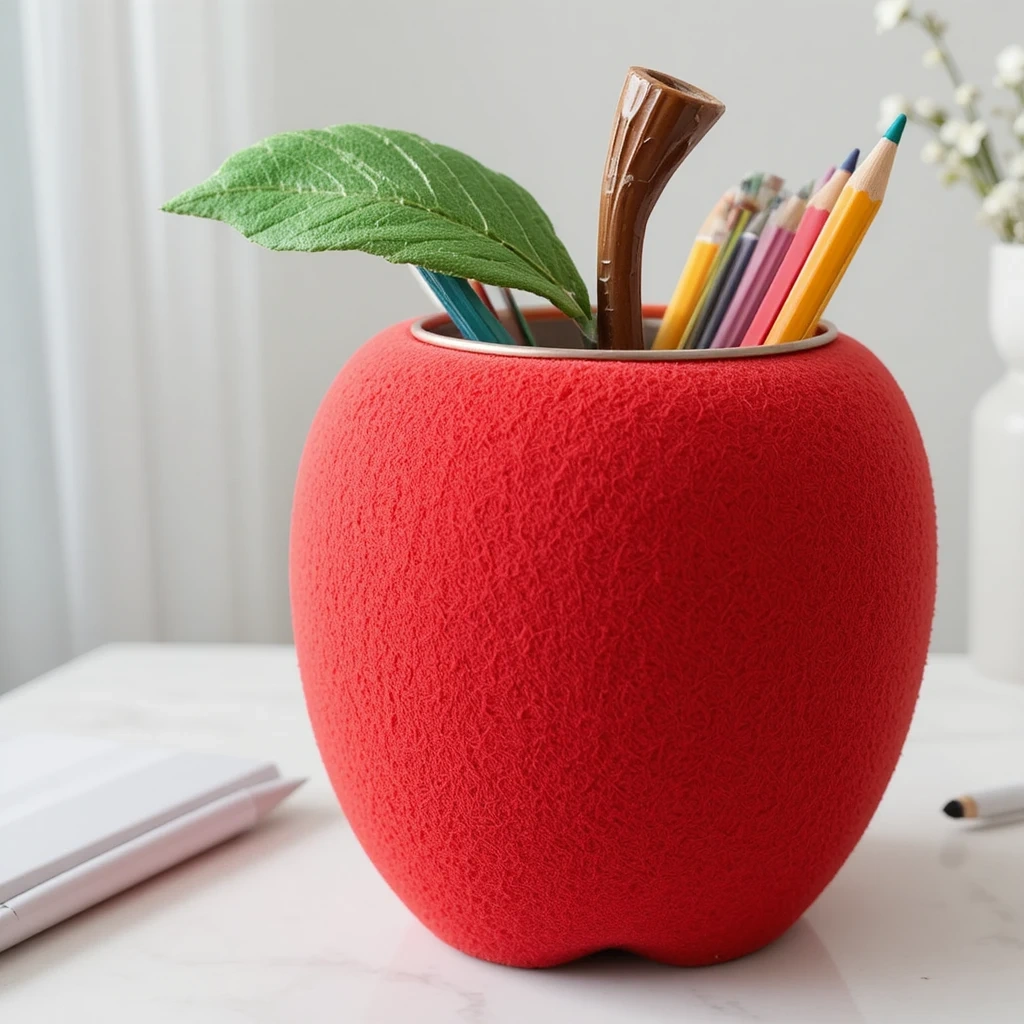
This Apple Craft Is a Fun Back-to-School DIY
Turn a plain tin can into an adorable apple pencil holder using foam sheets. It’s a great classroom craft for kids and looks fantastic on any desk.
Materials:
- Clean tin can (soup can size)
- Red foam sheet
- Green and brown foam scraps
- Hot glue or craft glue
- Googly eyes (optional)
- Scissors and pencil for tracing
Steps:
- Measure the height and circumference of the tin can and cut red foam to fit.
- Wrap and glue the red foam around the outside of the can.
- Cut a green leaf and brown stem from foam scraps.
- Glue the leaf and stem to the top edge of the can.
- Add optional googly eyes for a character look.
- Fill with pencils, pens, or markers.
- Time: 20–30 minutes
- Difficulty: Easy
Tip: Let kids personalize their pencil holders with their name written in a gold or silver marker.
9. Apple Suncatcher
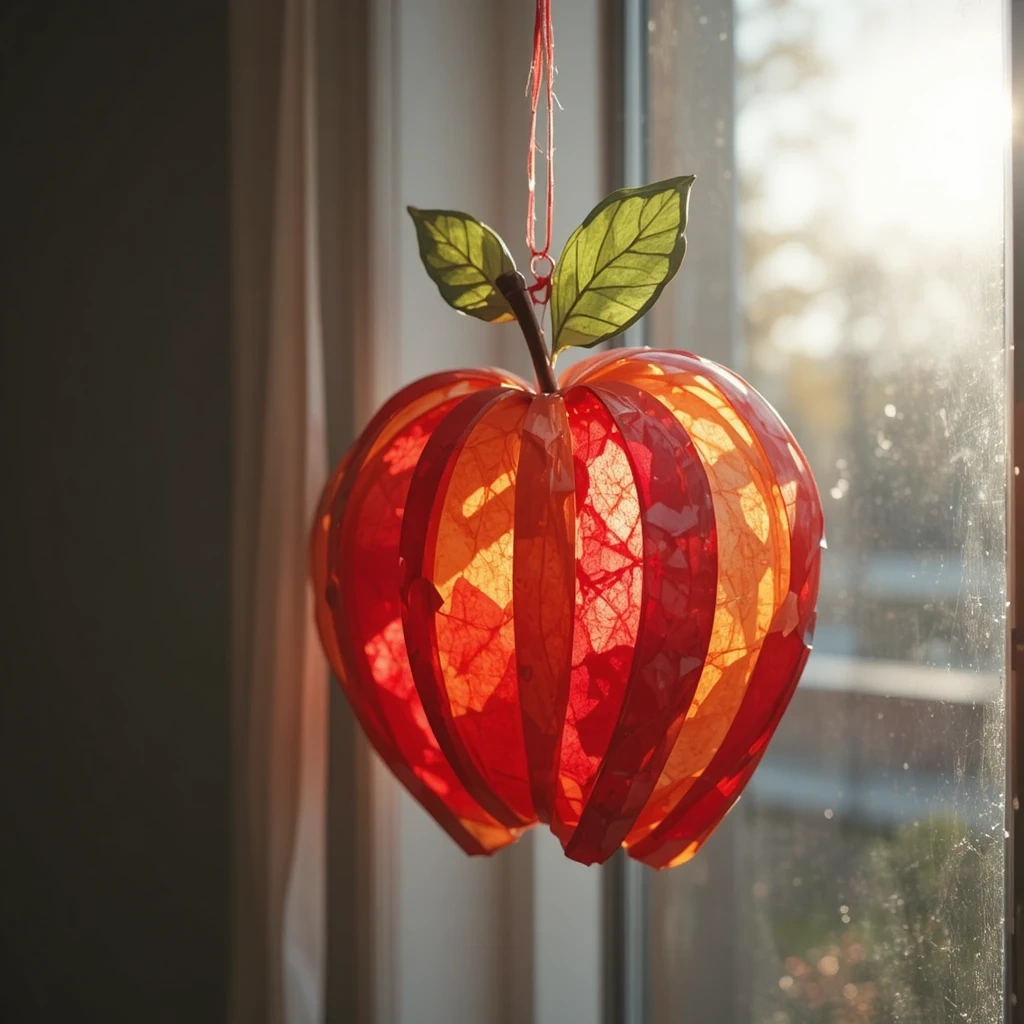
Suncatchers are magical — they fill a room with color and light. This apple version uses tissue paper and contact paper for a gorgeous stained-glass effect without any complicated tools.
Materials:
- Clear contact paper (two 6-inch square pieces)
- Red, yellow, and green tissue paper (torn into small pieces)
- Black cardstock (for apple frame)
- Scissors
- Hole punch and string
Steps:
- Cut an apple outline from black cardstock, leaving a hollow center.
- Lay one piece of contact paper sticky-side up on your work surface.
- Tear tissue paper into small pieces and press onto the sticky surface inside the apple frame area.
- Layer colors for a stained-glass effect.
- Place the second contact paper sheet over the top, sticky sides together.
- Trim edges, punch a hole at the top, and hang in a sunny window.
- Time: 20–25 minutes
- Difficulty: Easy
Tip: Press the tissue paper in slightly overlapping layers for richer, more saturated color.
10. Apple Craft Cork Board
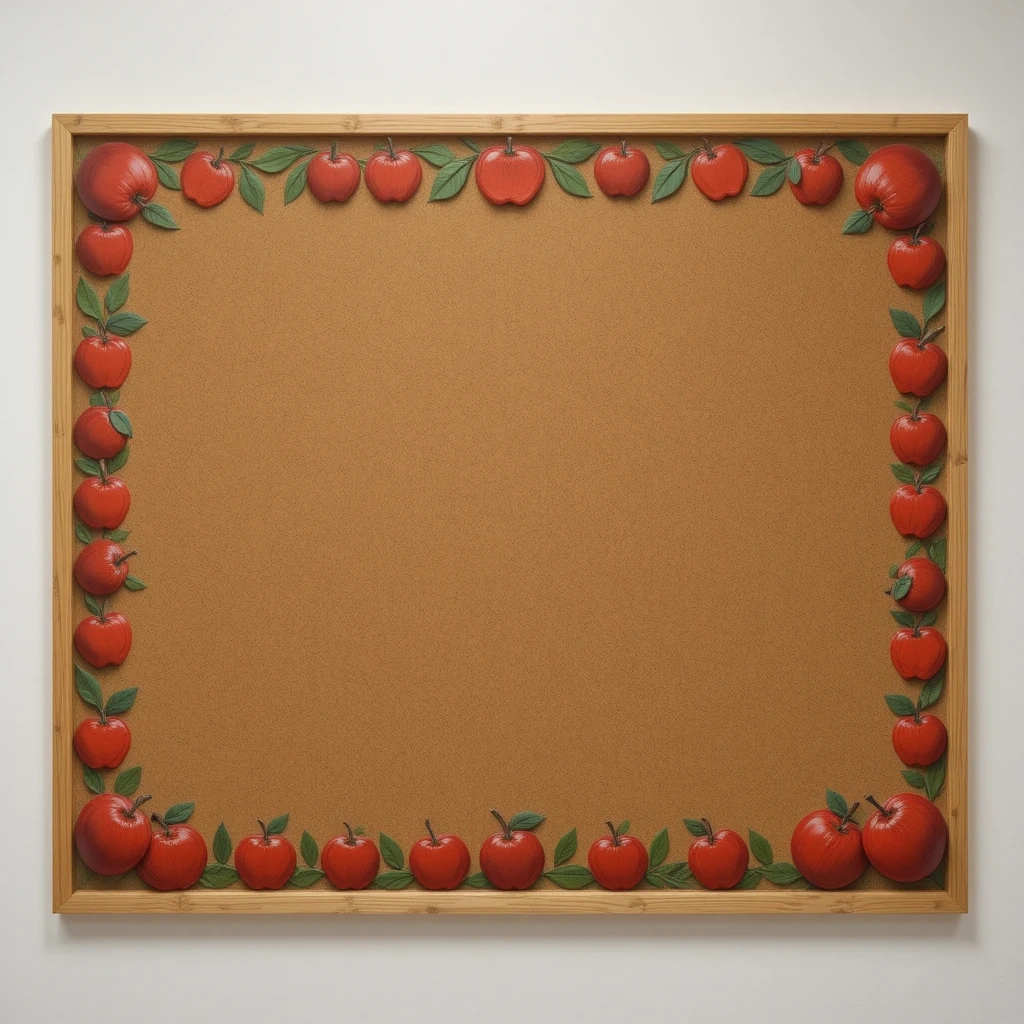
Turn a corkboard into a fall classroom or home office decoration by creating an apple border using red paint and foam apple stamps. It’s functional, festive, and incredibly simple to make.
Materials:
- Plain corkboard (any size)
- Red, green, and brown acrylic paint
- Apple-shaped foam stamp (or cut your own from foam)
- Paper plate for paint
- Optional: chalkboard label for center
Steps:
- Pour red paint onto a paper plate and spread evenly.
- Press the apple foam stamp into the paint and test on scrap paper first.
- Stamp apples along the border of the corkboard, spacing evenly.
- Use a fine brush to add green leaves and brown stems to each apple.
- Let dry completely before using.
- Add a chalkboard label or welcome message to the center if desired.
- Time: 30–40 minutes
- Difficulty: Easy–Medium
Tip: Seal the painted border with a thin coat of Mod Podge to protect the design from fading.
Common Mistakes to Avoid
- Using wet apple surfaces for stamping. Always pat the cut side of the apple dry before dipping in paint — excess moisture makes prints blurry and faded.
- Skipping the sealing step on salt dough or cardstock crafts. Without a sealant, painted surfaces scratch easily and lose their finish quickly, especially with kids’ crafts.
- Overloading the stamp with paint. A thick layer of paint causes smearing and hides the beautiful star pattern inside the apple. Use a thin, even coat for crisp results.
Tips for Best Results
- Work on a covered surface. Lay down newspaper or a silicone mat before any painting project to keep cleanup easy.
- Let each layer dry fully. Rushing between paint coats causes muddy colors and smearing — patience makes a big difference.
- Use washable paint for kids. For crafts involving young children, always opt for non-toxic, washable acrylic or tempera paints.
- Prep materials in advance. Pre-cut shapes, pre-fill sensory bins, and pre-measure dough ingredients before sitting down with kids — it keeps the flow smooth.
- Store leftovers properly. Salt dough can be wrapped in plastic wrap and refrigerated for up to 2 days if you want to work in stages.
- Add a personal touch. Names, dates, or little messages on finished crafts turn them into keepsakes worth keeping for years.
Frequently Asked Questions
Q: What age group are these apple crafts best for? Most of these crafts are suitable for ages 3 and up with adult supervision. Apple stamping, sensory bins, and paper bag puppets are ideal for toddlers. Salt dough ornaments and suncatchers work well for ages 5 and up.
Q: Do I need to use real apples for apple craft projects? Not at all! Many of these crafts use foam apples, cardstock cutouts, or apple-shaped stamps. Real apples are only needed for stamping and candle holders.
Q: How long do apple candle holder centerpieces last? Apple candle holders typically last 3–5 days before browning. Brushing the inside with lemon juice and refrigerating when not in use can extend their life slightly.
Q: Can I do these crafts in a classroom setting? Absolutely. Apple stamping, bookmarks, pencil holders, suncatchers, and paper bag puppets are all great classroom crafts that are low-mess and budget-friendly with easy-to-source materials.
Q: What paint works best for apple crafts? For most surfaces, regular acrylic craft paint works perfectly. For crafts involving young children, use washable tempera or finger paint. For fabric or cork surfaces, use fabric or chalk paint for better adhesion.
Q: Where can I find foam apples and apple-shaped stamps? Dollar stores, craft stores like Michaels or Hobby Lobby, and online retailers like Amazon carry seasonal foam apple picks and foam stamps, especially in late summer and fall.
Conclusion
Apple crafts are one of those rare activities that are just as enjoyable for adults as they are for kids. Whether you’re decorating your home for fall, prepping a classroom lesson, or making a handmade gift, there’s an idea on this list for every skill level and occasion.
Pick one, gather your materials, and start crafting today — your apple masterpiece is only a few supplies away!